 Adobe Community
- Home
- Camera Raw
- Discussions
- Re: ACR Bridge Transformation Tool auto crop disab...
- Re: ACR Bridge Transformation Tool auto crop disab...
ACR Bridge Transformation Tool auto crop disable

Copy link to clipboard
Copied
When I use the transformation tool in Adobe Camera Raw's Bridge function it sometimes auto crops the result. When the crop is large, it allows me to determine the crop. I would like to force it to always allow me to determine the copy. No auto crop. Is there a way to do this?


 6
Replies
6
6
Replies
6

Copy link to clipboard
Copied
Moving to Adobe Camera Raw from Photoshop

Copy link to clipboard
Copied
Hi John,
Couple of things, some of nomenclature: Bridge does not have any cropping capability, all that comes from Adobe Camera Raw which is a plugin to both Bridge and Photoshop. In fact, you can have ACR open in PS if you start it from Bridge or you can have it open via Bridge if you start it from Bridge. There's a preference for that.
The good news, that I'm sure you've discovered, is that any cropping from ACR is never permanent. You can always revert back to the original size image at any time. See the screenshot below:
Now one of the issues with ACR when cropping is that after selecting Crop, or pressing the "c" key, you can then marquee out whatever size crop you want. If you want to maintain the image's aspect ratio, you can marquee the entire image and then by holding the Shift key, you can drag from one corner and the crop will resize with that aspect ratio. Once you've cropped it to a size you want, you can move the image around so that the image is placed within that crop the way you want it.
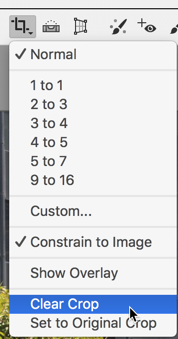
One possibility is that a crop was done earlier in the image and when you opened the image up you are presented with the previous crop. If so, then simply clear that crop and start from the beginning.
Please let us know if this is what you are/were looking for.
Copy link to clipboard
Copied
Clarification to my question. I am using Adobe Camera Raw launched from Bridge. I am editing Nikon RAW images. The function I am using is the Transform Tool. I am using it to correct perspective. ACTION 1, If I make a small adjustment it will automatically apply a crop. ACTION 2 When I make a large adjustment, it will retain the entire image and show transparency in areas where the canvas is not covered by the image. I want the option to always determine the crop as in ACTION 2. Is there a way to turn off the auto crop that occurs in ACTION 1?

Copy link to clipboard
Copied
I played around with it, think I see what you're saying. In those cases where it appeared to crop, I zoomed out and I believe recovered the entire image, i.e. it's still there but hidden by the borders.
Richard Southworth
Added by edit - Or maybe not. It would seem that any distortion has to produce a non-rectangular image, and therefore there should always be canvas showing.
Copy link to clipboard
Copied
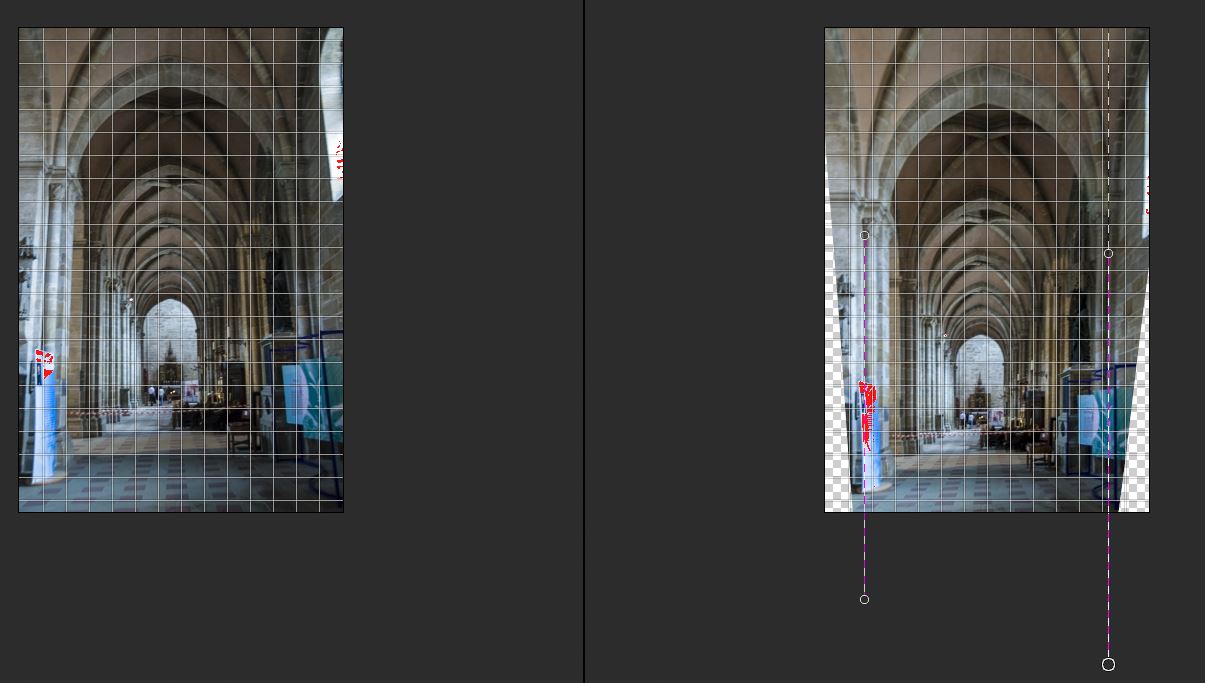
Thanks to everyone for their input. The screen capture below shows the issue. On the left is the original image. On the right is after I did a small vertical correction. You will see how the window on the left (outlined in red) is about 70% gone after the correction.

Below is showing a large correction. Note the blank canvas at the bottom. However, there is still a crop of the window. In the past I did this type of correction in PS and expanded the canvas so I had no crop. Then I could crop, fill, etc. as I desired. I was looking for an easier way to do this and keep the image as a RAW file.
Again thanks to everyone for their suggestions. Maybe someone from Adobe knows a work around.
Copy link to clipboard
Copied
Hi Jon,
I'm not from Adobe but now that I know what the issue is I think I can give you some direction.
When you click on the Transform Tool, it's not all that uncommon to want to deal with this like one does within Photoshop. ACR provides a different direction to get the job done.
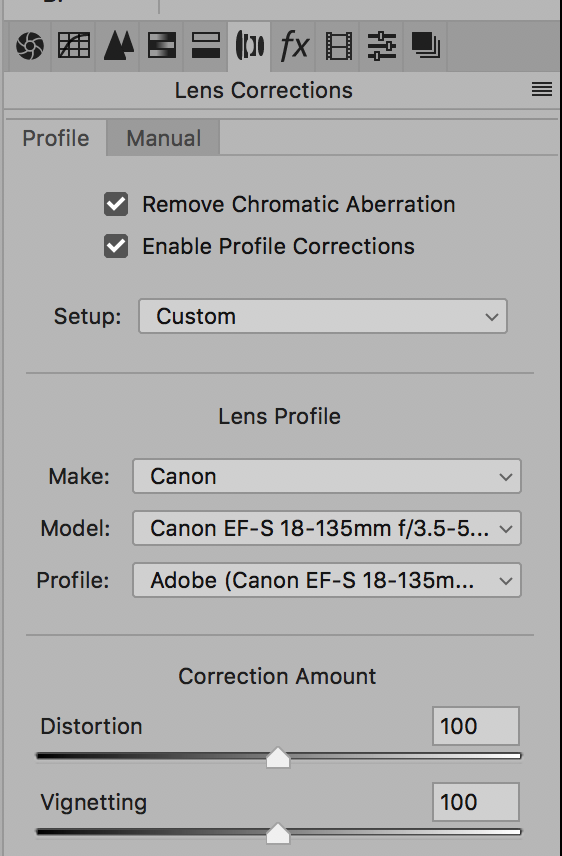
First, be sure to correct any lens correction. You do this by clicking on the Lens Correction tab and set the options for your camera. Typically once you set that you're using a Nikon, the rest will follow automatically. If you lens is not listed, chose something "close."
Next, click on the Transform icon in the Tools but DO NOT TRY DRAWING ANY LINES ON THE IMAGE YET.
If you look over at the right side of the screen you'll see the Upright Controls. In order of L to R,
- the negate will negate anything you've already done.
- The "A" will apply an automatic adjustment using some light controls. Most of the time this is fine for me.
- The horizontal line will emphasize flat horizontal surfaces like horizon lines.
- The Vertical lines will straighten vertical things, your image will be satisfied by either the "A" or this.
- The grid will make everything vertical and horizontal that it can.
- The last one is what you were doing: you were placing lines. This is handy if nothing else satisfies you and is last-ditch effort.
Finally there are the manual controls, similar to what Photoshop has had for years.
In the image below, I selected this image particularly because the original image didn't have much on the bottom to compress, ergo the vast region of transparent pixels. To fix this, you can either take a significantly wider image using a wide angle lens so that you have stuff to crop or be very creative with the Content Aware Tool and/or the Rubber Stamp. There is nothing else that can be done.
Please let us know if this explains the use of this tool now.


 AdChoices