- Home
- Adobe Discussions
- Discussions
- Tutorial: Introduction to Adobe Fill & Sign
- Tutorial: Introduction to Adobe Fill & Sign
Tutorial: Introduction to Adobe Fill & Sign
Copy link to clipboard
Copied
Adobe Fill & Sign enables you to easily fill out and sign forms online. Simply use the text tool to add text or the "annotation" tools to add a checkmark, X, or dot to choice fields and check boxes, and to circle or strike out text. Use the signature tool to sign or initial your form.
Download your filled form as a PDF to Print or email
*The Adobe Fill & Sign team is updating and adding new features constantly so this tutorial will be "out of date" immediately after writing it but gives a general overview and will be updated periodically.
Upload your PDF form (Office and image based forms are also supported):
From the "Fill & Sign" tab by first clicking the "Fill & Sign" tab and then the "Select any Form to Fill Out" button:
This brings up the file selection dialog where you can choose to upload from your computer or from the Document Cloud, in this example I will upload from My Computer
Adding Text fields:
After the form has been created from your PDF (or other) click on any field where you'd like the text to begin and start typing.
Note on "Auto" placement and sizing:
There is some automatic placement and font size logic when you click to type. If the field is not placed where you thought it should, or the font is too large/small you can try to delete and click again or move the field (see "Moving and re-sizing fields" below).
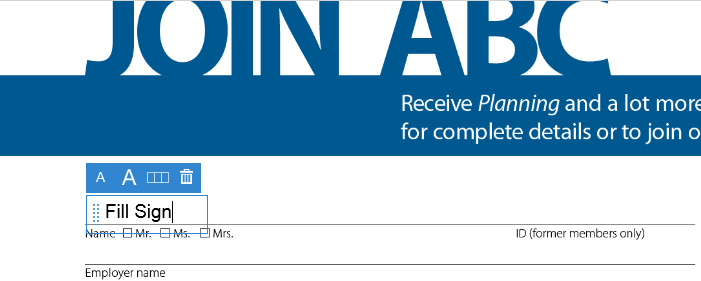
To create another text field remove focus from the current field by:
- Clicking anywhere to remove focus
- Esc, or Tab on the keyboard will also remove the focus)
Now click on the next field:
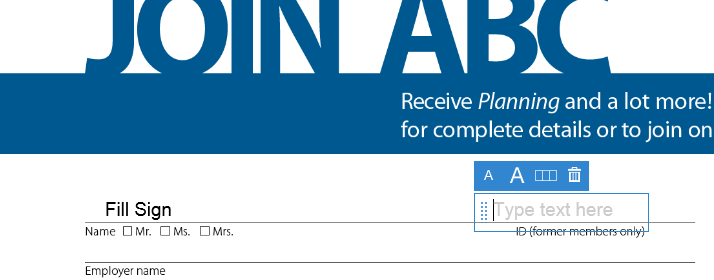
Personal Data in Right hand panel:
On the right side of the form is a panel with your personal information, some of this is populated for you based on your AdobeID which you can edit:
You can also can fill out the rest of the information there so it is easier to add to your form:
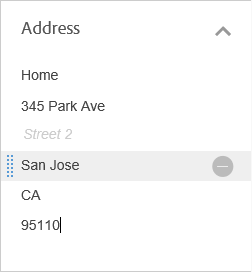
Labels from the panel on the right can be dragged and dropped onto the form, mousing over the label exposes the drag handle on the left of the label:
Click and hold to drag the item out into the form:

Let go of mouse button to drop it over the field you want to fill:

*See below under "Properties" for how to re-size fields
Adding Annotations:
Along the toolbar above the form there are tools for "Type Text", "Crossmark", "Checkmark", "Circle", "Line" and "Filled dot". You can use the various annotation tools to fill in check boxes and radio buttons, as well as using the Circle to circle text or the line to strike out text:
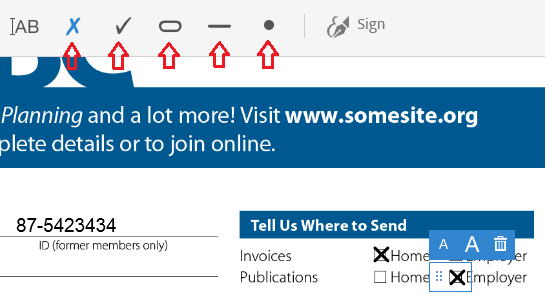
When the "Crossmark", "Checkmark", "Circle", "Line" or "Filled dot" tools are selected each click on the form will add an annotation to make it easy to fill out forms with a lot of radio buttons and/or check boxes.
Re-size the first annotation you place to fit the check box or radio button. Subsequent annotations you add will be this new size and will fit the rest of the box/circle fields.
Comb fields:
Comb fields are the little boxes where a character goes into each box as shown below. The auto-placement when you click to type in the first box of a comb field should detect the boxes and create a field that looks like this:
The button in the "properties" bar (above the field) that has little boxes turns the comb field on/off (switches between comb and normal text field). If you add a text field to a comb field box and it does not become the comb type field you can click the "comb" button in the Properties bar, after you have typed if the characters do not fit in each box you can adjust the spacing with the grab handle where the "re-size here" points in the image above.
After you type into a comb field it should look like this:
Auto-save:
The work you do is automatically saved as you work. You do not have to save your work. You will see a message near the top of the form next to "Fill & Sign" showing when changes are saved:
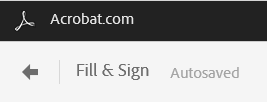
You can close your form at anytime and come back later to complete it.
Properties:
- Fields can be resized using the font up/down buttons in the toolbar - this applies to the text fields as well as annotations (X, check mark, circle etc) and Signatures.
- Deleted using the trash can
- Text fields can be converted to "comb" fields (the little boxes where each letter is in a box, like in a DMV form) if the auto-placement did not detect it for you, or the "comb" setting can be turned off if it is detected incorrectly

Sign and Initial forms:
Click on the "Sign" button in the toolbar to add your signature or initials to a form:
The Signature panel starts off in "Type" mode, where you can use your keyboard to sign using custom signature fonts. You can also use your mouse, touch pad, or touch screen to sign in "Draw" mode. If you have an existing image of your Signature you can Import the image using "Image". The buttons at the top switch between Type, Draw and Image:
In "Type" mode simply use your keyboard to initial or sign and choose your preferred font from the "Change Style" menu:
In Draw mode using a good touch device you can sign with your own signature, note there is a "Clear" button in case you need to try a few times:
Click the "Accept" button to apply the signature.
Now click on the page where you want to place it:
In Image mode you can upload a supported image (or PDF) of your signature.
Moving and re-sizing fields:
There is auto-placement logic for the field placement (up/down) and for the size, it should locate the closest field in the form and place the text just above the baseline as shown above.
If the field was not placed where you want the text you can move the field by:
- Use the keyboard arrow keys to "nudge" the fields to change the placement in relation to the baseline /field. Using the arrow keys has different affect depending on the type of field:
- Text fields as long as they are a single line of text can be moved up or down using the arrow keys
- Multiple line text fields have to be moved using the second method below, arrow up/down will navigate through the rows of text
- The following tools/annotations can be moved 4 ways using the arrow keys to nudge: "X", Check mark, oval/circle, line/strikeout tool, dot and Signature
- Click/drag on the move handle on the left edge of the field
Page Navigation and Zoom controls:
Along the bottom of the form is a "HUD" that includes page and zoom controls, use these controls to zoom the page in or out so you can read it more easily, and to navigate through the pages or go directly to a page:
Finding your filled forms:
The most recent four forms you have filled out will appear on the "Fill & Sign" tab under "Recent Forms" and all of your filled forms are available on the "Files" tab. There are also "filters" in the Files tab to filter and show only files added by "Fill & Sign":
Download to Print or send:
Your filled out form can be downloaded as a PDF from which you can Print from using the Free Adobe Reader, or send by Email:
- The "Fill & Sign" tab by mousing over a forms thumbnail and clicking the "Download" icon
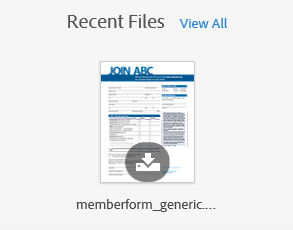
- The "Files" tab by checking the box next to a form or forms and then clicking "Download" along the top
- Viewing the form in "Fill & Sign" using the "Download as PDF" button in the upper right:
The form can also be saved to the "Document Cloud" using the "Save to Document Cloud" option from the "Download as PDF" button. This will place the filled out PDF in Document Cloud Files where you can store it, download it, or use the PDF in another application in Document Cloud such as "Send & Track" to send it to another person:
*Note that if a form was created from a file/PDF in Creative Cloud then saving a PDF will have the option to download to computer or Save to Creative Cloud as opposed to Document Cloud.
Copy link to clipboard
Copied
I understand how to fill and sign a form. However, I'm looking to make a form I currently have as a MS Word document a PDF that has fields that can be typed into. Will fillable forms allow this? If not, what should I be using? I'm a teacher trying to create a contact form that I can email for ease of use (to save some trees). Thanks for your help! PLEASE, PLEASE, PLEASE HELP ME!
Copy link to clipboard
Copied
Hi;
No, our service would not enable what you've described. Here are a few options:
You could send the contact form as a Word document to the users with instructions to use Adobe Fill & Sign, they would upload to Fill & Sign and then fill out and download a PDF which they would email back to you.
Alternatively you could use Adobe Acrobat which is available as a full purchase or via subscription (so you could pay for a month to get your form converted/created and then cancel): Adobe Acrobat XI Pro + 5 Additional Acrobat Services | Adobe Acrobat Pro
Thanks,
Josh
Find more inspiration, events, and resources on the new Adobe Community
Explore Now