 Adobe Community
Auto Trace Keeps Crashing
Copy link to clipboard
Copied
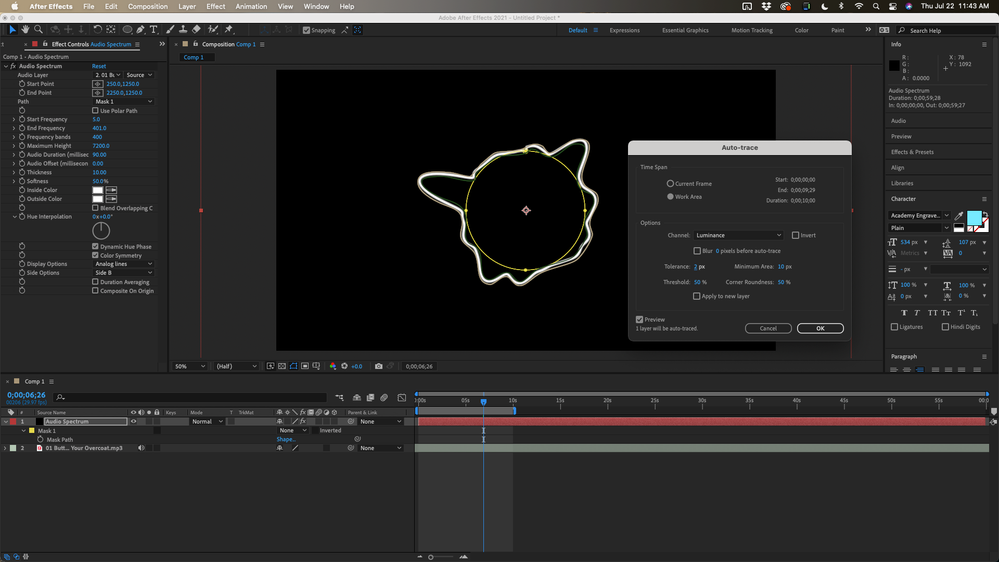
I am having a really annoying issue where in which I tried to autotrace a solid layer with the audio spectrum effect placed on it named "Audio Spectrum" (the purple circle in the project screenshot), and each time I click the autotrace it begins buffering before crashing and I have to shut down my computer every time because it won't allow me to quit out of After Effects. I have cleared all of my media cache and freed up space on my laptop yet the problem persists.
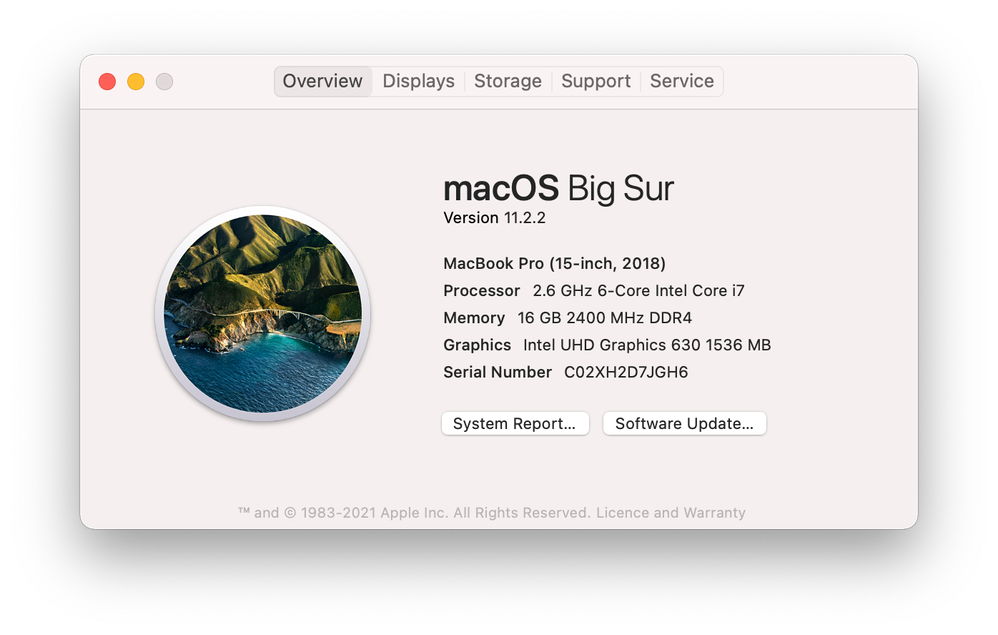
I'll leave a screenshots of my MacBook specs and a screenshots of the project below.
Copy link to clipboard
Copied
I'd recommend pre-rendering the audio spectrum on its own layer with alpha and then try running it on that new layer.
Out of curiousity, why are you autotracing it? There might be a better route to your end goal.
Copy link to clipboard
Copied
Are you trying to create an animated mask. Autotrace is going to generate hundreds of points and a keyframe on every frame.
If you need transparency, redo the audio spectrum effect settings to generate a black and white layer, then use that as a track matte.
If you need to actually animate a vector path there are other ways. It would really help us help you if we knew what you were trying to do and how you plan to use the paths you are trying to create.
Copy link to clipboard
Copied
My goal is to use the autotrace on the audio spectrum layer and then apply the Saber effect from video co-pilot onto the mask that has been created on the auto traced layer. The reason I can't apply the Saber plug-in straight to the audio spectrum layer is because it it doesn't animate with the spectrum it just stays within the confined circle of the mask on that layer, whereas when I apply it to the autotraced layer it follows the animated shape of the spectrum as it has been traced into a mask self.
I hope that made sense I tried to explain it as clear as possible.
Copy link to clipboard
Copied
Also Rick, kindly check your inbox please as I have sent you a message on there regarding a separate query.
Copy link to clipboard
Copied
This workflow will keep you from running out of resources. I use the split up the task idea to help with Rotobrush, Camera Tracking, and a dozen other automated and tracking tasks. If you save between steps you'll always be protected and never have to rebuild from scratch.
To simplify and make Auto Trace more effective I would recommend that you change the Audio spectrum to white for both colors, remove the feathering, make the line about 10 or 20 pixels wide, then set the work area to about 5 seconds, maybe 10. Run AutoTrace with these settings:
If Autotrace takes longer than about 15 seconds shorten the work area. You will get something like this
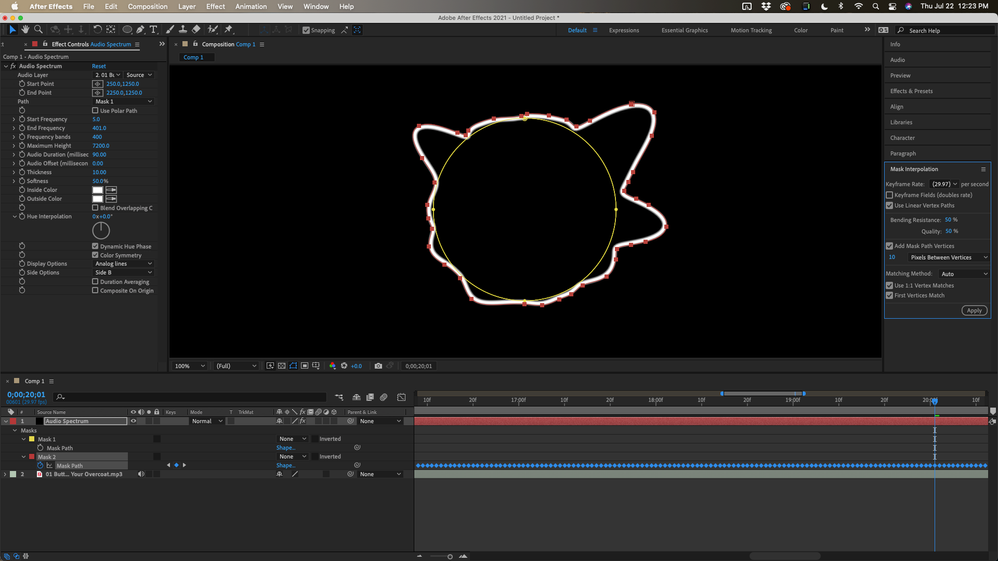
Then reveal the keyframes(u), move the CTI past the last keyframe, and use the 'j' key to set the CTI to the last keyframe. You should now have Mask 1, your original ellipse used by Audio Spectrum, and Mask 2, the auto-traced outside mask. Mask 3, the inside mask on the shape layer and your audio track. Nothing else should be there. Delete Mask 3, the bottom inside Mask, and you can turn off opacity keyframes.
It is time to readjust the work area in point. Move the CTI past the last keyframe (keyframes for Mask 2 must be showing), press 'k' to move to the last keyframe, then press Ctrl/Cmnd + right arrow to move one more frame past the last keyframe, then reset the work area by pressing B. This should move the work area down the timeline and give you a clean frame to start on. If the work area does not reset, set a new work area out point. If your system handled 10-seconds just fine, try 20 next time. Repeat the procedure.
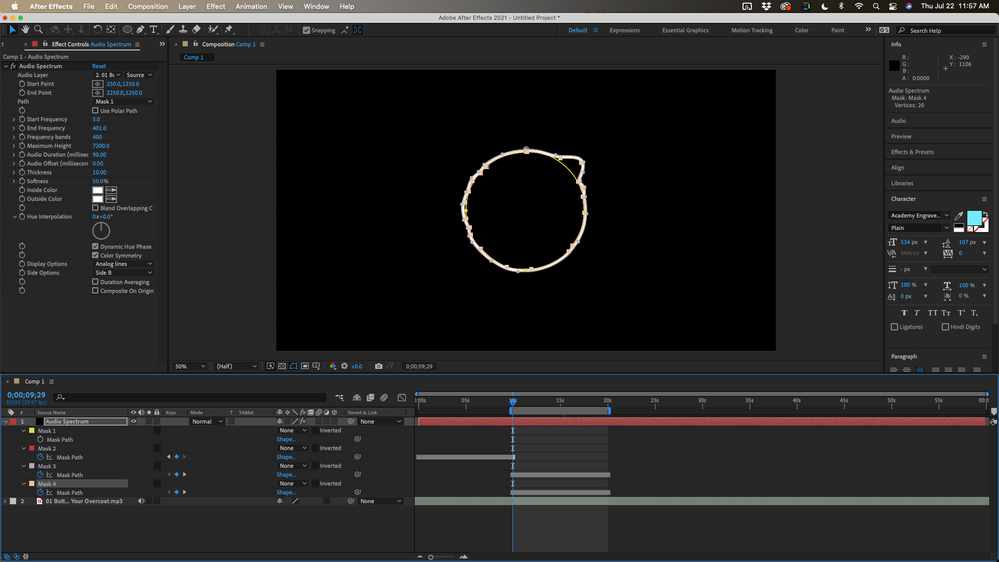
Now you will have Masks 1, 2, 3, and 4 in your timeline. Your timeline should look like this:
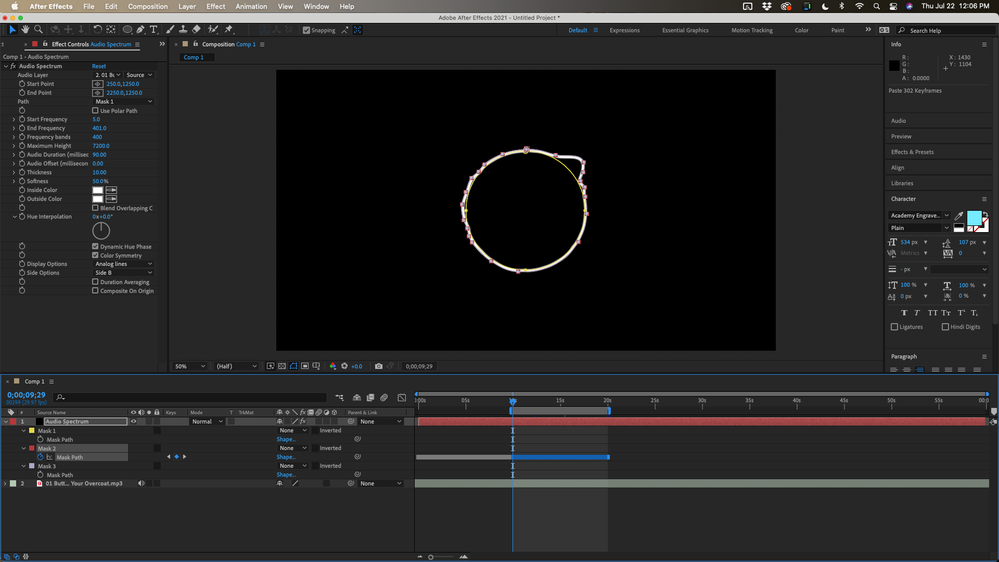
Delete Mask 4 (the inside Mask). Press the "u" key until the keyframes are showing, select Mask 3/Mask Path in the timeline to select all Mask 3/Mask Path keyframes and highlight them then Cut (Ctrl/Cmnd + x), move to Mask 2/Mask Path, make sure the CTI is at the start of the work area, and Paste (Ctrl/Cmnd + v). All of the keyframes should be on Mask 2 and the timeline should look like this:
Delete the empty Mask 3. Repeat the workflow again until your timeline is complete. When the timeline is complete select Mask 2/Mask Path so all keyframes are highlighted and open Window/Mask Interpolation and set it up so the bending resistance and quality are set to 50% and Add Mask Path Vertices is checked and set to about 10 or 20 pixels. Set the Matching Method to Auto, 1:1 Vertex Matches, and First Vertex Match is on.
Before you apply make sure all Mask keyframes are selected, use the keyboard shortcut or the Animation Menu to toggle Hold Keyframes off so they are all now diamonds, then apply Mask Interpolation. This will fix any first vertex and number of points problems with the animated mask.
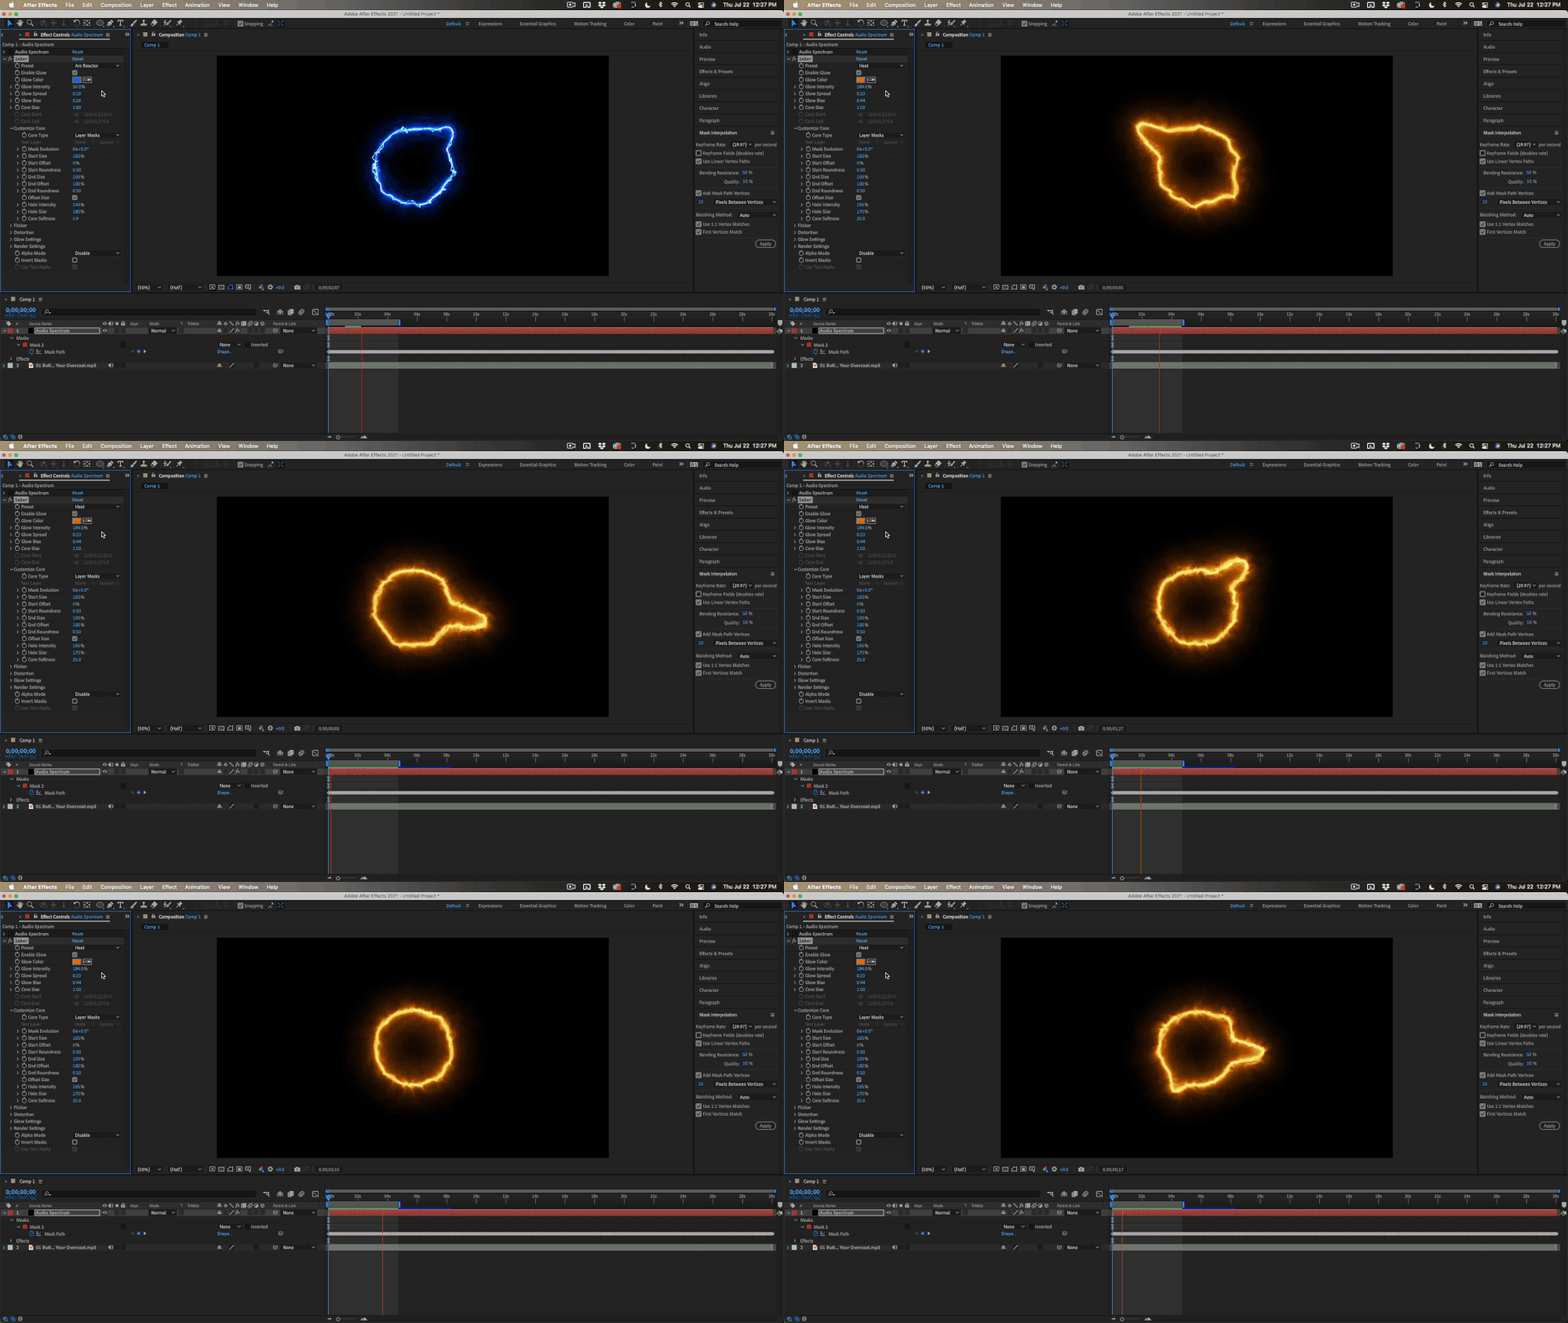
The next step is to turn off Audio Spectrum or delete it. Delete Mask 1, then add Saber to the Layer and set Saber to use the mask path. Make your adjustments and you'll get something like this:
I think I have given you all the steps necessary. Let us know if you are still having problems.
By the way, your screenshot shows a work area of about 10 minutes in a very long timeline. I would trim the timeline to the length of the longest shot in your comp. There is no reason at all to have all that wasted time in the comp and it could lead to problems later.
Copy link to clipboard
Copied
Thank you so much for your detailed response I will give these steps a try anmd let you know how it goes. Also have you seen my message regarding the seperate query in your inbox?


