 Adobe Community
- Home
- After Effects
- Discussions
- Re: Can I link the mask path to the size of a rect...
- Re: Can I link the mask path to the size of a rect...

Copy link to clipboard
Copied
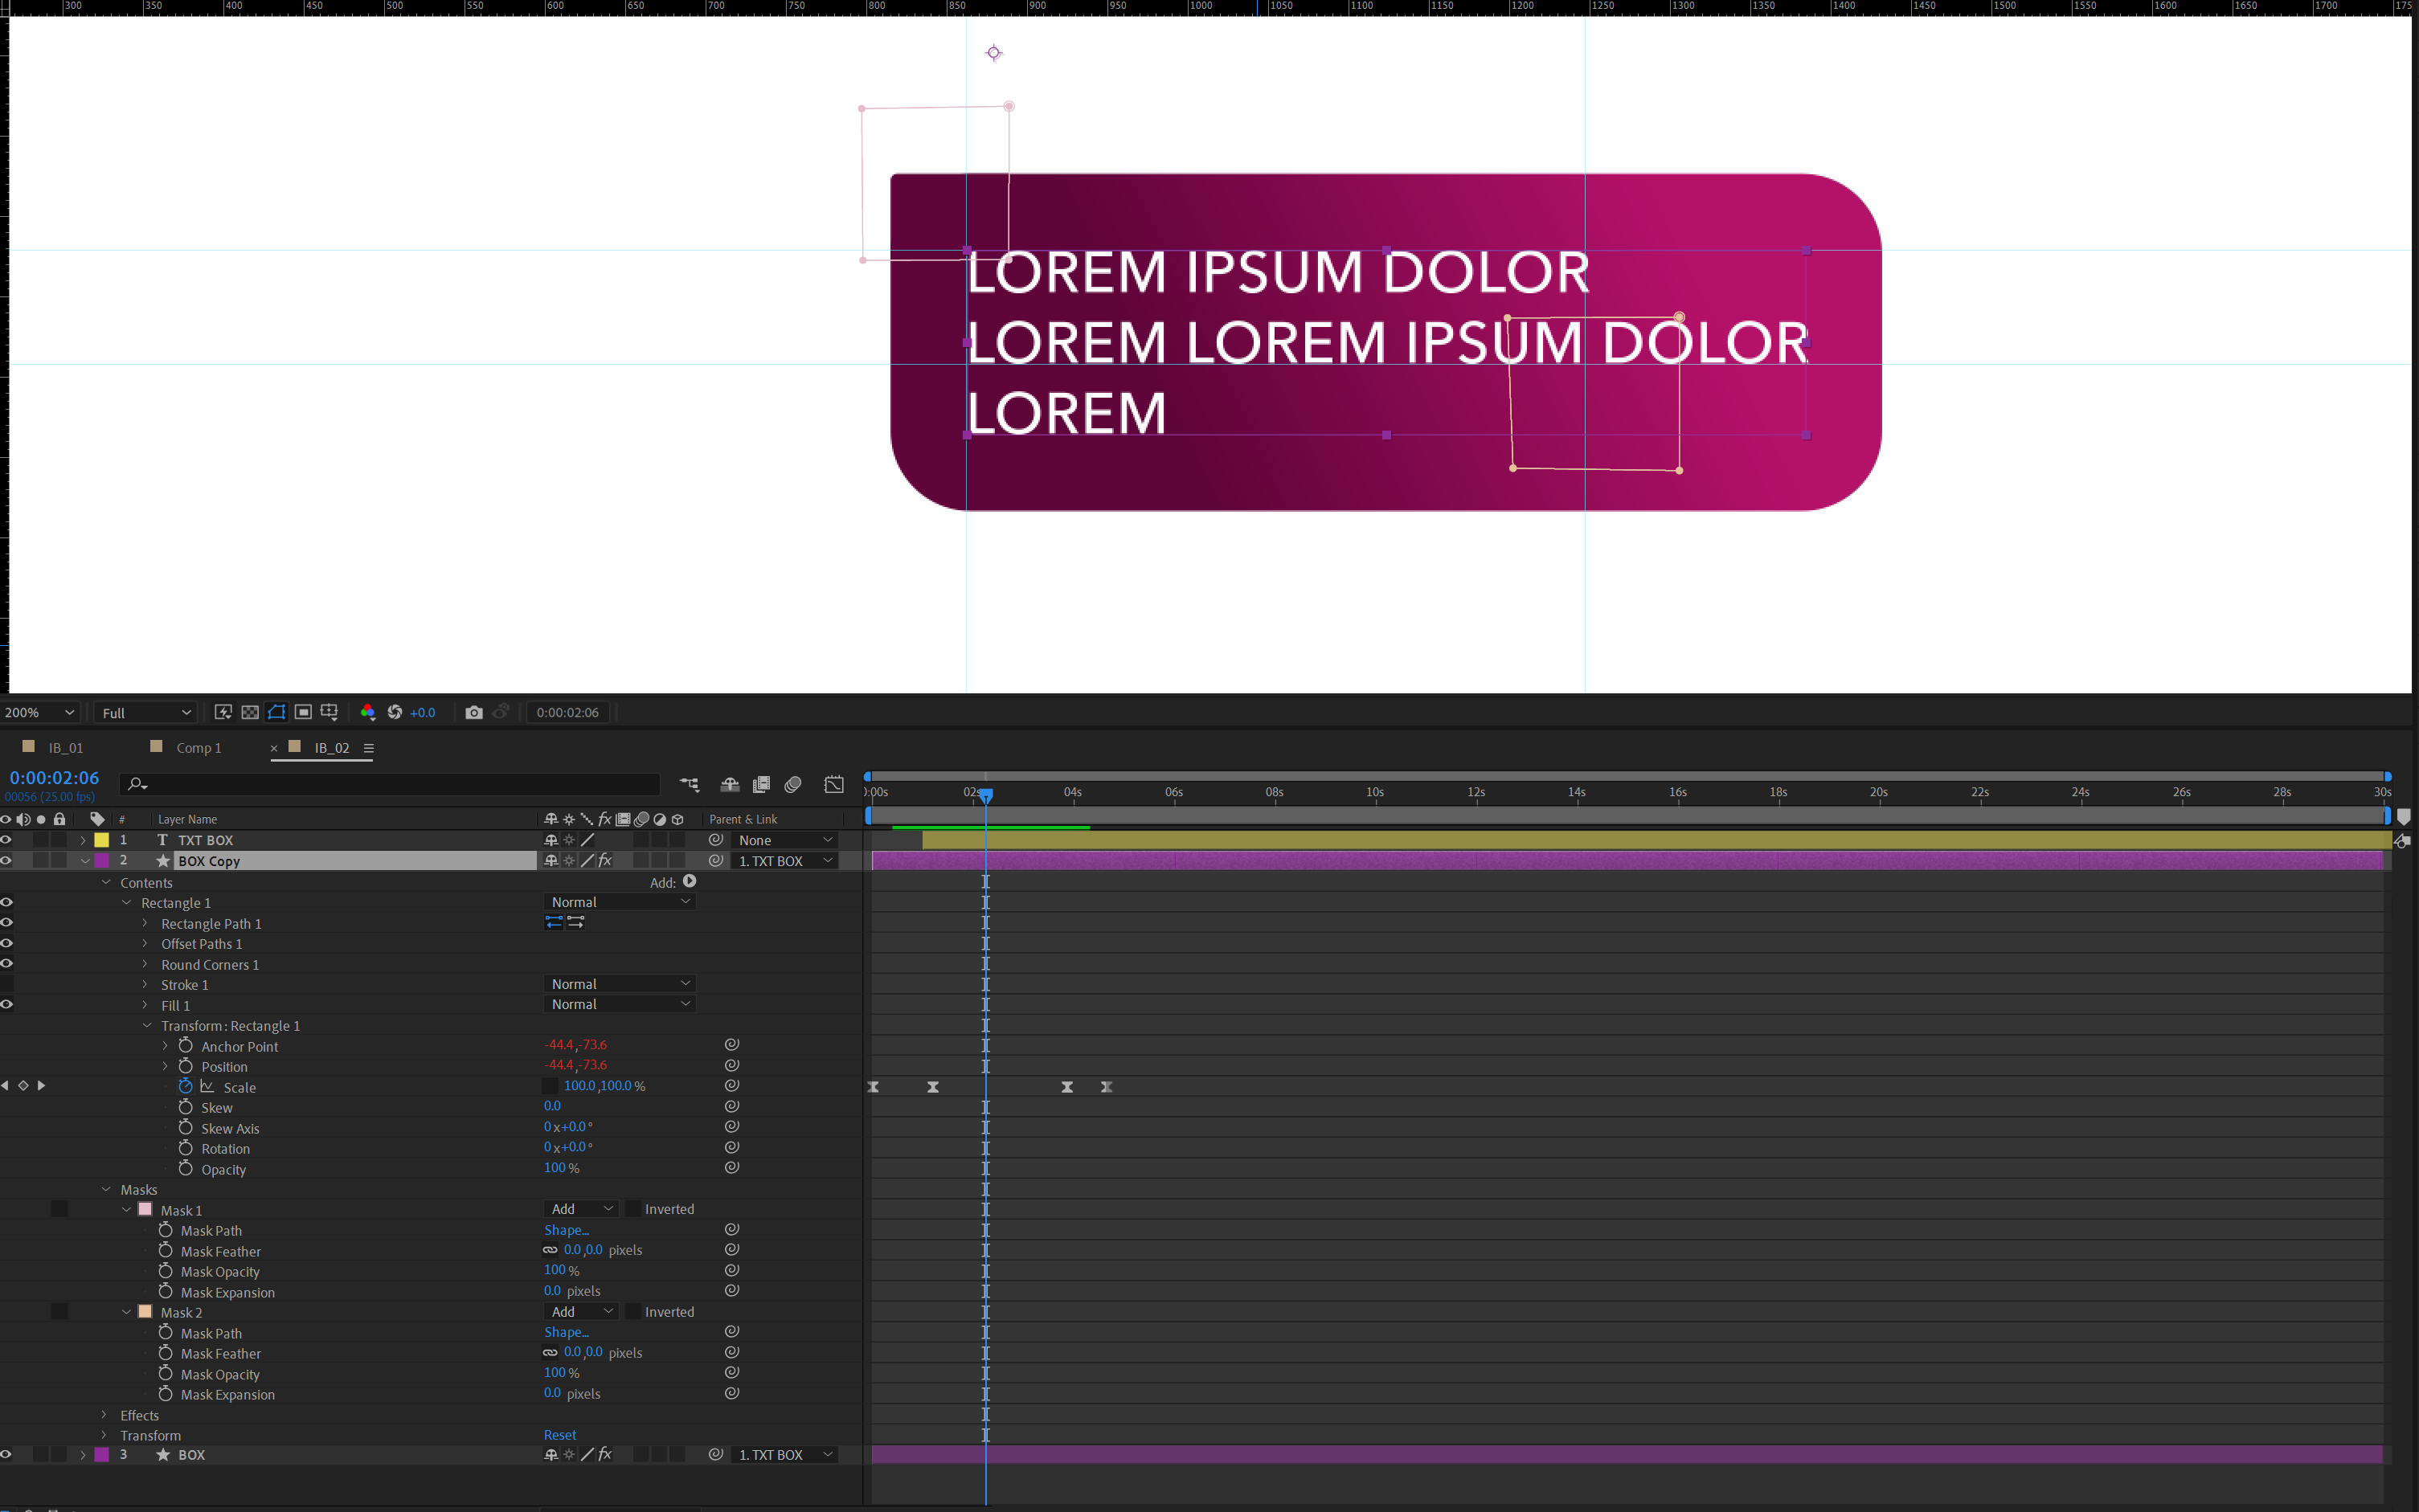
I have this rectangle shape that I want to use a motion template. The size of the rectangle is influenced by how much text I need to add inside.
Everything would be easy, but I need to keep the corners of my rectangle a certain radius.(I will add a screenshot of how the rectangle corners look like)
The only solution I found, is to duplicate that rectangle and mask its corners.
That raised another problem, when the size of the rectangle changes, the mask is not following the corner of the rectangle.
Is there a solution to this?
Can I fix the path of the masks to scale along with my rectangle and keep its position in relation to the corner?
Or is there another, more elegant solution to what I'm trying to achieve?


 1 Correct answer

The first thing you do is tie the shape layer position to the text layer position with a simple expression:
thisComp.layer(index - 1).transform.positionUsing the layer index instead of the layer name makes it easy to save the setup as an animation preset.
Then you add an ellipse and an expression control slider for the radius of the ellipse. You'll also retrieve the size of the text layer and the top and left values to position the ellipse in one of the corners. If you put ellipse 1 in the bott
... 6
Replies
6
6
Replies
6

Copy link to clipboard
Copied
Why don't you build your shapes in a clean fashion from circles and normal shape layer rectangles? Takes 5 minutes and gives you access to all position and size properties you need...

Mylenium
Copy link to clipboard
Copied
Copy link to clipboard
Copied
Copy link to clipboard
Copied
I really appreciate your help Mylenium, I wasn't hoping for a rig already made yet you provided one. Unfortunately I don't even know how to do what you told me. I feel bad to ask you, maybe you can give some noob friendly idications? What values from my text I need to substitute and how?
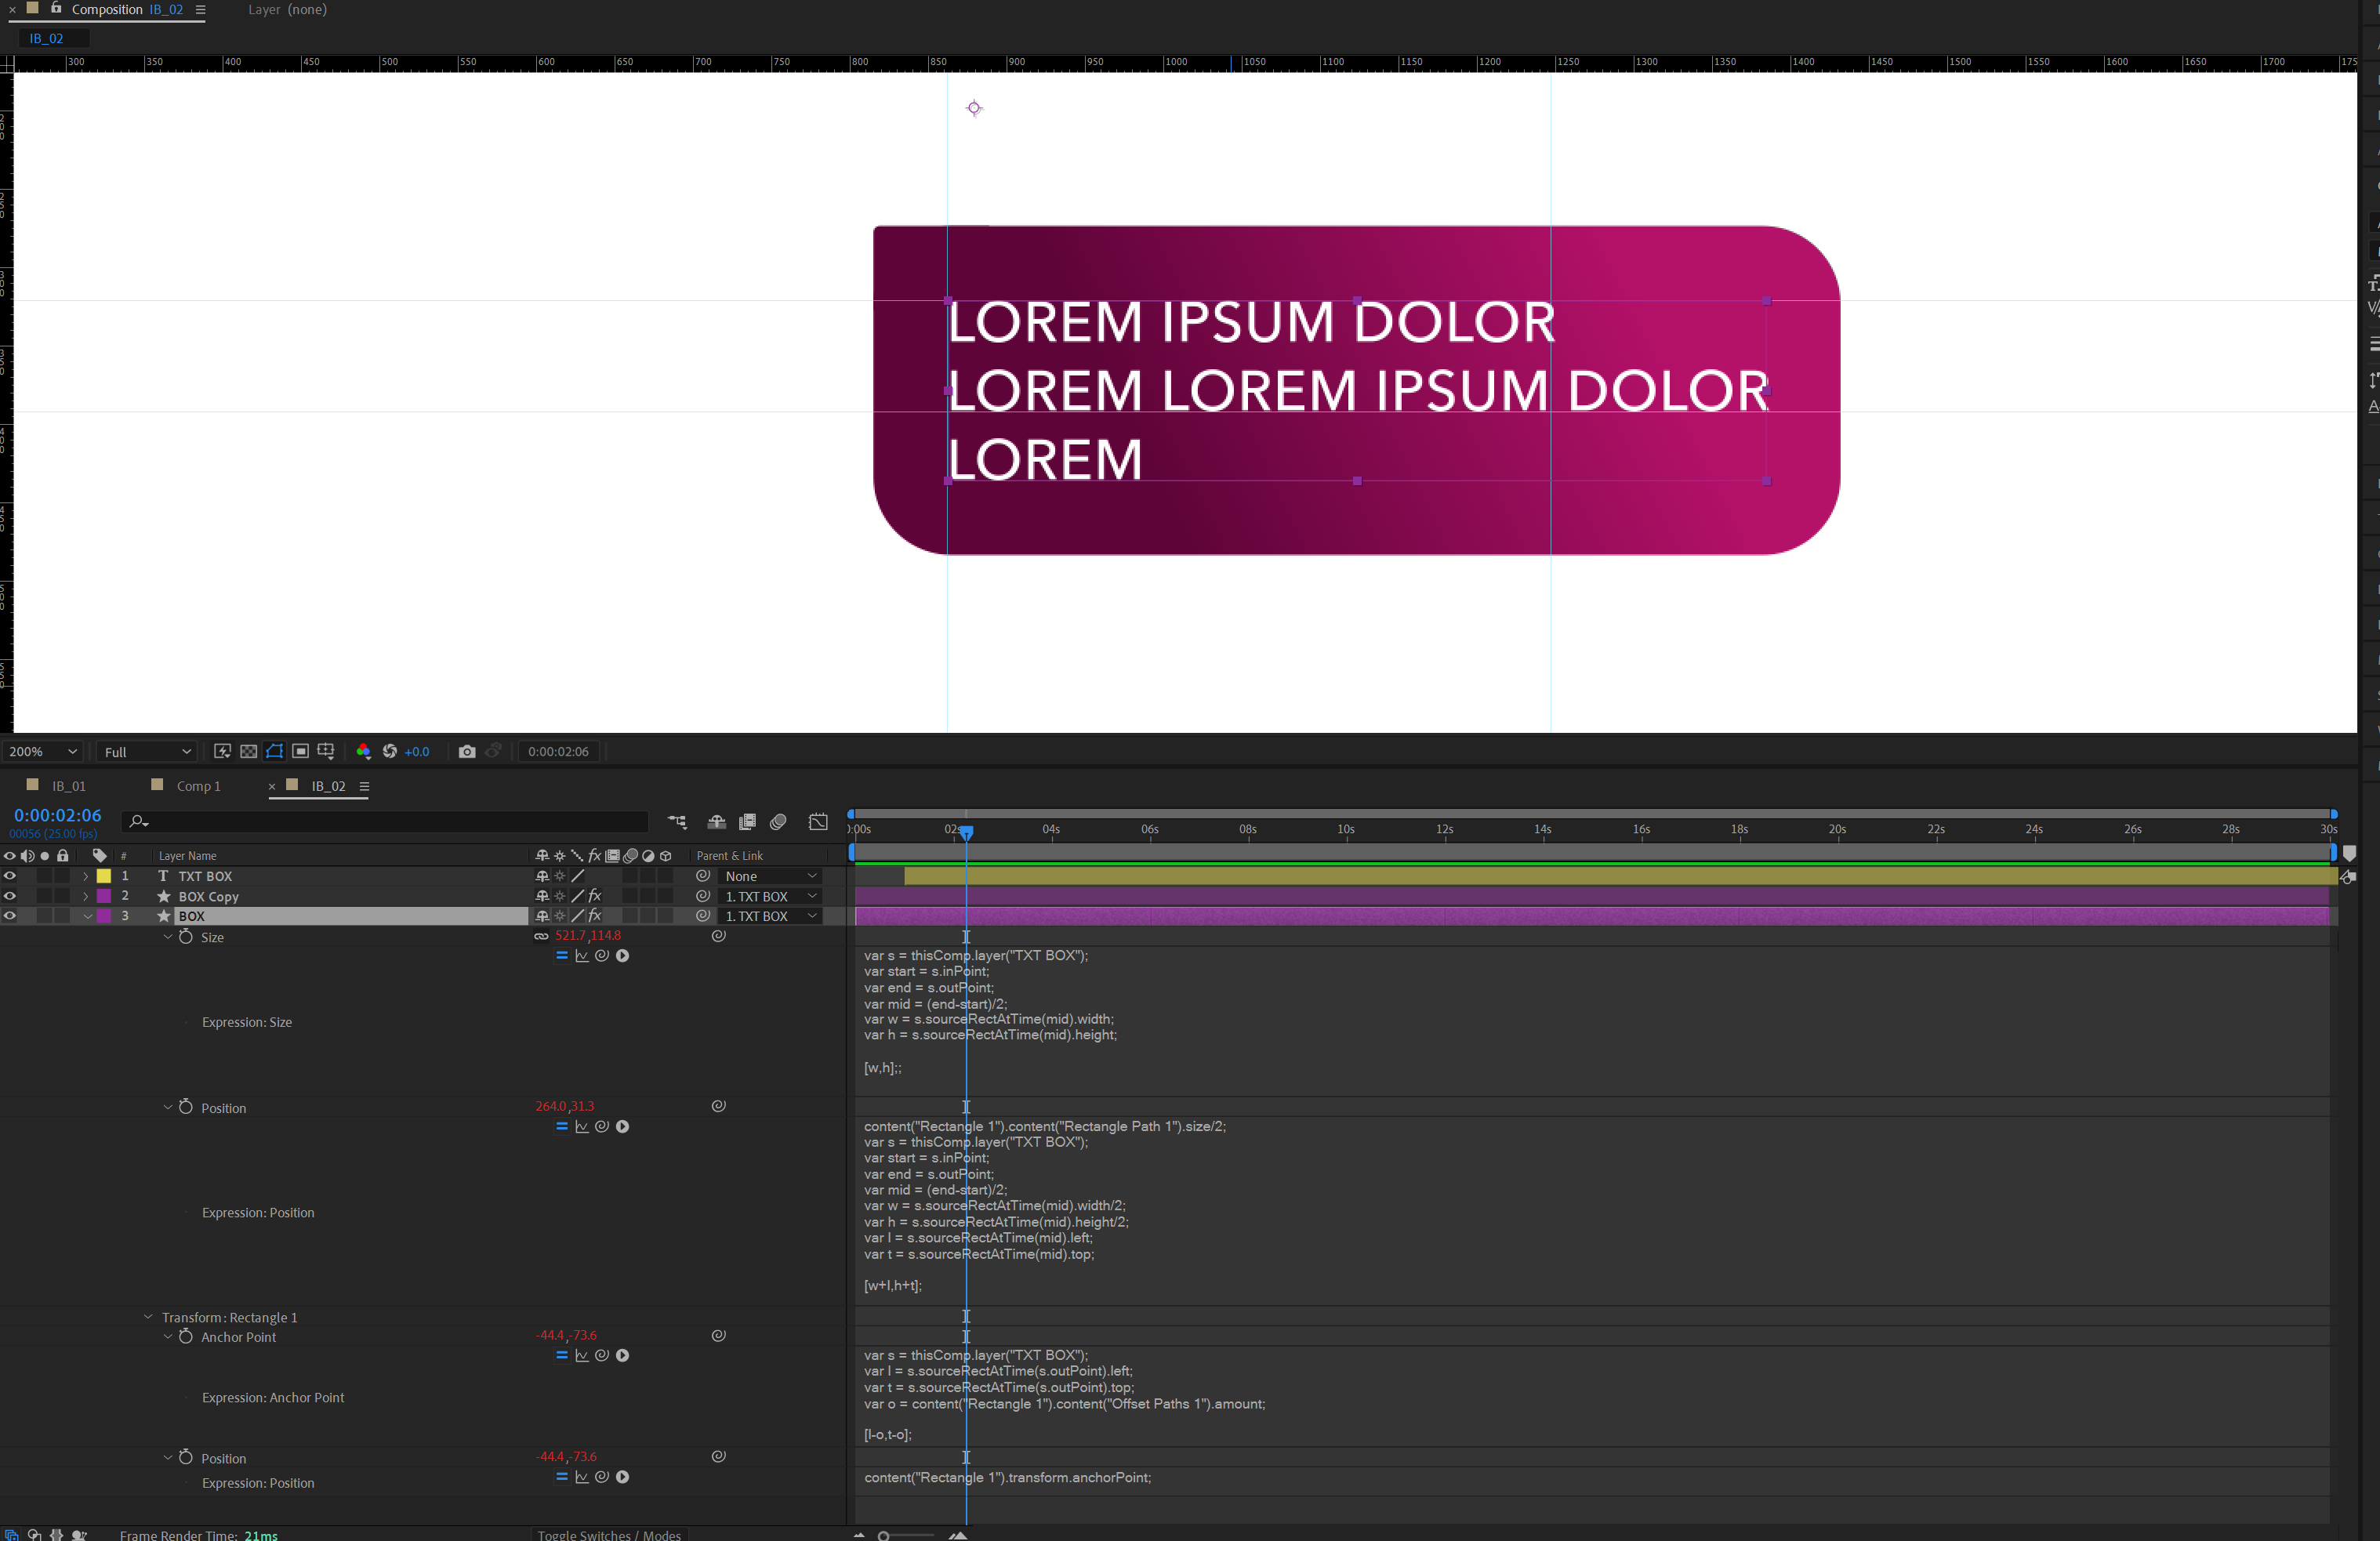
From my undestandment of the rig I made, that rectangle knew how big it needs to be through sourceRectAatTime() expression which linked the size of my text to the size of the rectangle
Copy link to clipboard
Copied
The first thing you do is tie the shape layer position to the text layer position with a simple expression:
thisComp.layer(index - 1).transform.positionUsing the layer index instead of the layer name makes it easy to save the setup as an animation preset.
Then you add an ellipse and an expression control slider for the radius of the ellipse. You'll also retrieve the size of the text layer and the top and left values to position the ellipse in one of the corners. If you put ellipse 1 in the bottom left corner the expressions look like this:
// Ellipse 1 size
r = effect("radius")("Slider")/2;
[r, r]
// Ellipse 1 Position
t = thisComp.layer(index-1);
ts = t.sourceRectAtTime();
x = ts.width / 2 + ts.left;
y = ts.height / 2 + ts.top;
[x - ts.width/2, y + ts.height/2 ]
Next, add a second ellipse and add these expressions:
// Ellipse 2 Size
content("Ellipse 1").content("Ellipse Path 1").size
// Ellipse 2 Position
t = thisComp.layer(index-1);
ts = t.sourceRectAtTime();
x = ts.width / 2 + ts.left;
y = ts.height / 2 + ts.top;
[x + ts.width/2, y - ts.height/2 ]
This will put the second ellipse at the top right corner of the text area.
Now you add Rectangle 1 and pull the size plus the radius of the ellipses and offset the rectangle appropriately.
// Rectangle 1 Size
t = thisComp.layer(index-1);
ts = t.sourceRectAtTime();
r = content("Ellipse 1").content("Ellipse Path 1").size[0]/2;
[ts.width + r, ts.height + r]

// Rectangle 1 Position
t = thisComp.layer(index-1);
ts = t.sourceRectAtTime();
x = ts.width / 2 + ts.left;
y = ts.height / 2 + ts.top;
r = content("Ellipse 1").content("Ellipse Path 1").size[0]/4;
[x + r, y + r]
Follow that up with Rectangle 2 but this time offset the position to the other side.
// Rectangle 2 position
t = thisComp.layer(index-1);
ts = t.sourceRectAtTime();
x = ts.width / 2 + ts.left;
y = ts.height / 2 + ts.top;
r = content("Ellipse 1").content("Ellipse Path 1").size[0]/4;
[x - r, y -r]
You keep the same expression for Rectangle 2 Size or you can just point rectangle 2 size to Rectangle 1.
The last step is to add Merge Paths and a Gradient fill. If you tie the ending position of the gradient fill to the. width of the text area the gradient will expand or contract with the size of the text.
If you want more padding, you'll have to adjust the expressions by adding a padding slider and value. You should be able to figure that out.
I've attached a project file and embedded (by dragging in the reply field) a screenshot.

Here's an animation preset that does the whole thing. Just add it using the animation menu and drag the new shape layer below any text layer.
Copy link to clipboard
Copied
Ooh wow! Thank you very much for the effort you went through for this! You made my day!

 AdChoices