 Adobe Community
- Home
- After Effects
- Discussions
- Re: Make copies of repeater appear instantly
- Re: Make copies of repeater appear instantly
Make copies of repeater appear instantly
Copy link to clipboard
Copied
Hello! I need to animate a spline pattern to make each line appear individually. When I set the keyframes on copies value, they occur gradually as if opacity was turning on although I need them to appear instantly. What would you suggest in this case?
Copy link to clipboard
Copied
Also, I'd like to know how to make those lines of different colors and make them appear one by one.
Copy link to clipboard
Copied
You animated the Repeater's Copies property. It uses a decimal value which makes the lines appear as a fade–in effect.
Add this expression to the Copies property:
Math.round(value)
It will force the repeater to use the nearest whole number, makign the lines just appear instead of fade–in.
If you want the Lines to appear one at a time instaed of the default build–up (where you wnd up with multiple lines on screen at the end) you would set Copies to 1 and animate the Offset property instead.
To have the lines of different color:
I just ended up putting a layer in my comp with horizontal stripes of color and using the zigzag shape layer as a track matte,
Copy link to clipboard
Copied
solved 50% hehe, do you have any idea how to get around this "wiggle" that is caused when I animate the position along with the text layer?
Copy link to clipboard
Copied
If you need different colors, you'll have to offset copies of the shapes in the Shape Layer.
You can then manually animate the opacity of each layer or use an expression to switch the opacity of each Shape /Transform Shape Opacity from zero to 100. You could even use a slider to control the timing and the distance between copies and another slider to set the delay.
I have an animation preset that does something similar. When I get to my computer, I'll share the expressions.
Copy link to clipboard
Copied
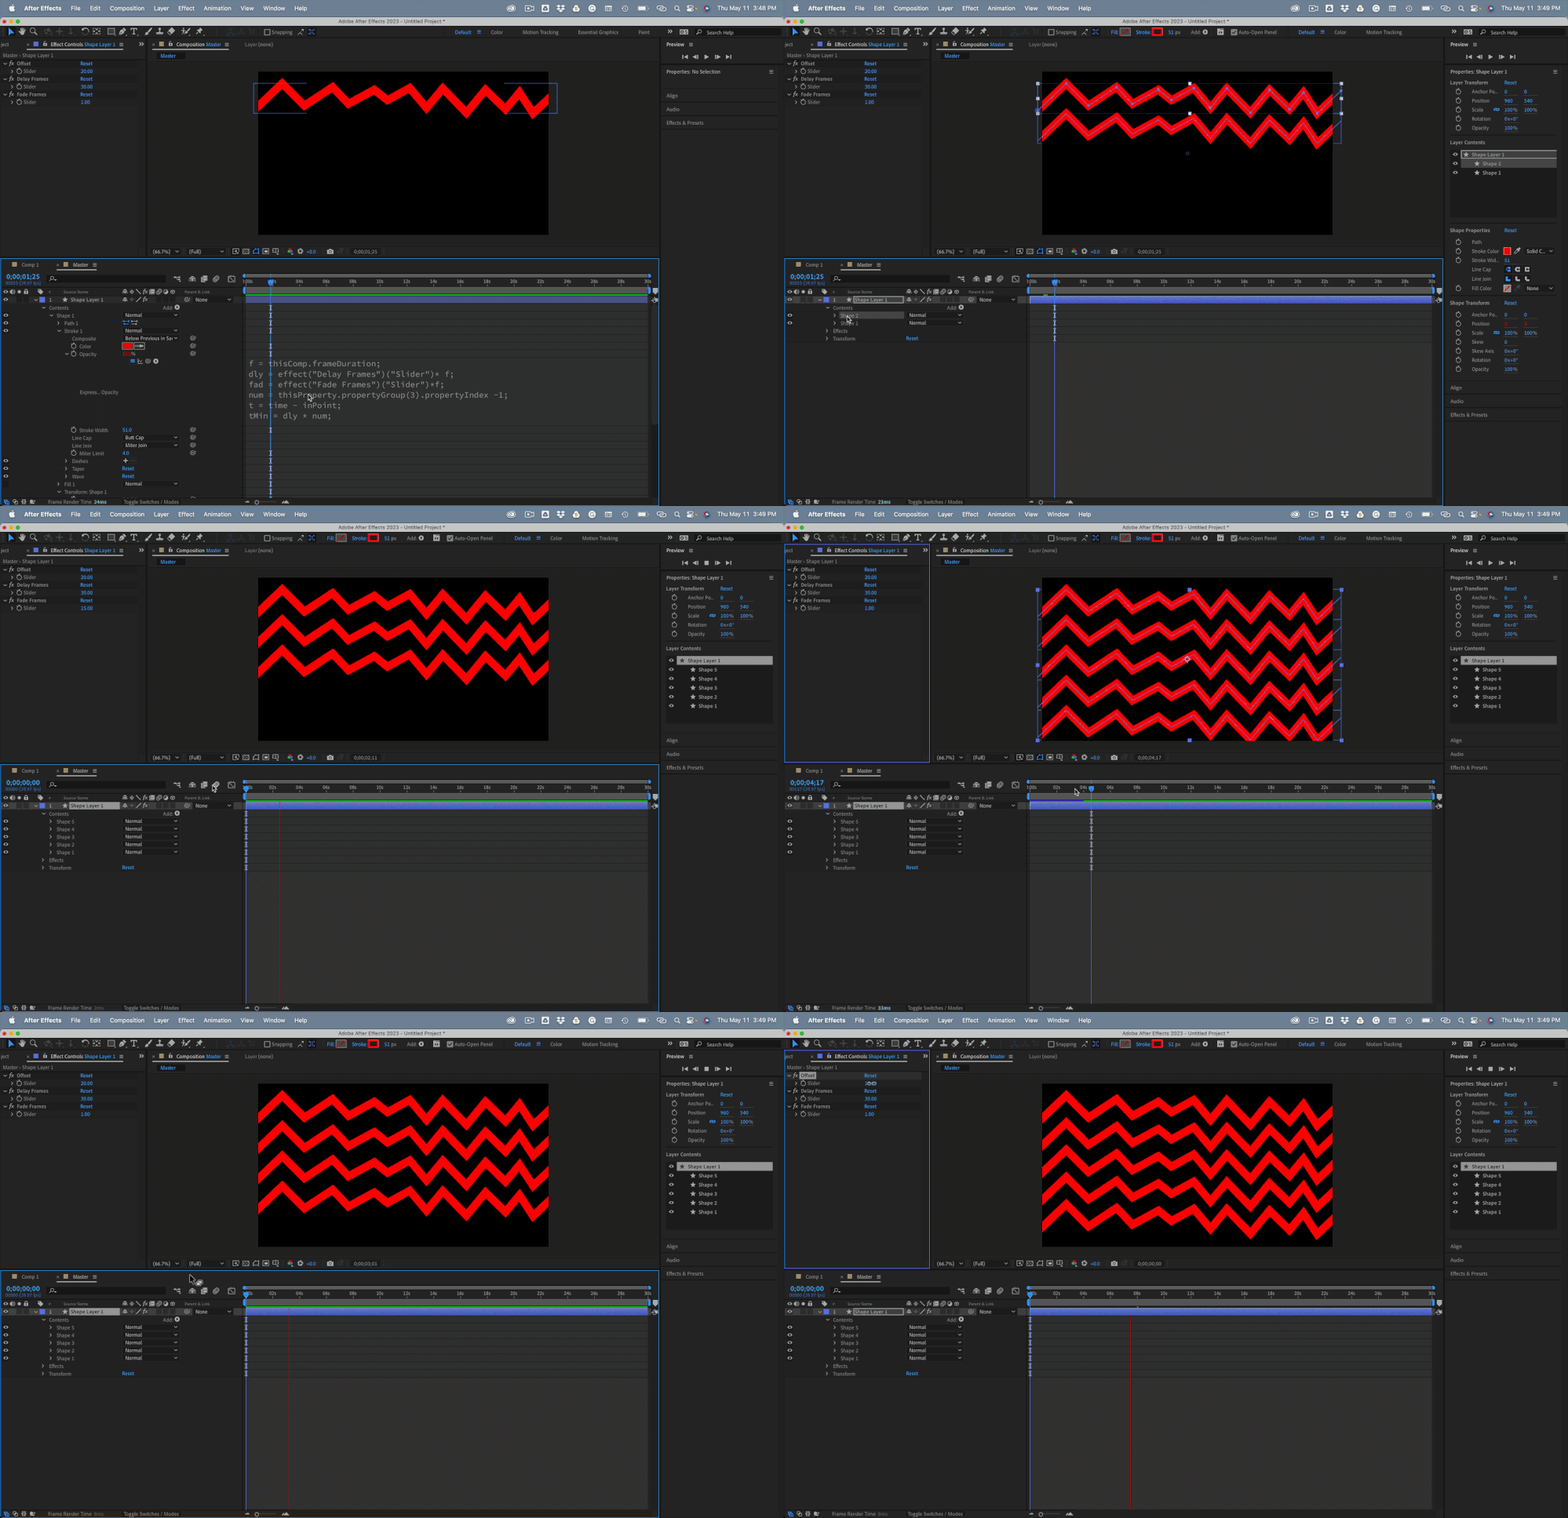
Here is the setup that I would use to create what you describe.
- Create a new path on a shape layer with a stroke.
- Add three expression control sliders named Offset, Delay Frames, Fade Frames
- Add the expressions shown below to Stroke 1/Opacity and Transform Shape 1/Position
- Duplicate Shape 1 as many times as you like
- Set Offset to 20 to move each copy down 20 pixels
- Set Delay Frames to 30 to make each layer appear 30 frames after the previous copy
- Set Fade Frames to 1 for an instant transition or 15 for a 15 frame reveal
- Change the Stroke Color for each copy of the path
Here are the expressions. This one is for Contents/Shape 1/Transform Shape 1/Position
num = thisProperty.propertyGroup(2).propertyIndex - 1;
ofst = effect("Offset")("Slider") * 10;
y = ofst * num;
[value[0], y]
This one is for Contents/Shape 1/Stroke 1/Opacity
f = thisComp.frameDuration;
dly = effect("Delay Frames")("Slider")* f;
fad = effect("Fade Frames")("Slider")*f;
num = thisProperty.propertyGroup(3).propertyIndex -1;
t = time - inPoint;
tMin = dly * num;
tMax = tMin + fad;
linear(t, tMin, tMax, 0, 100)
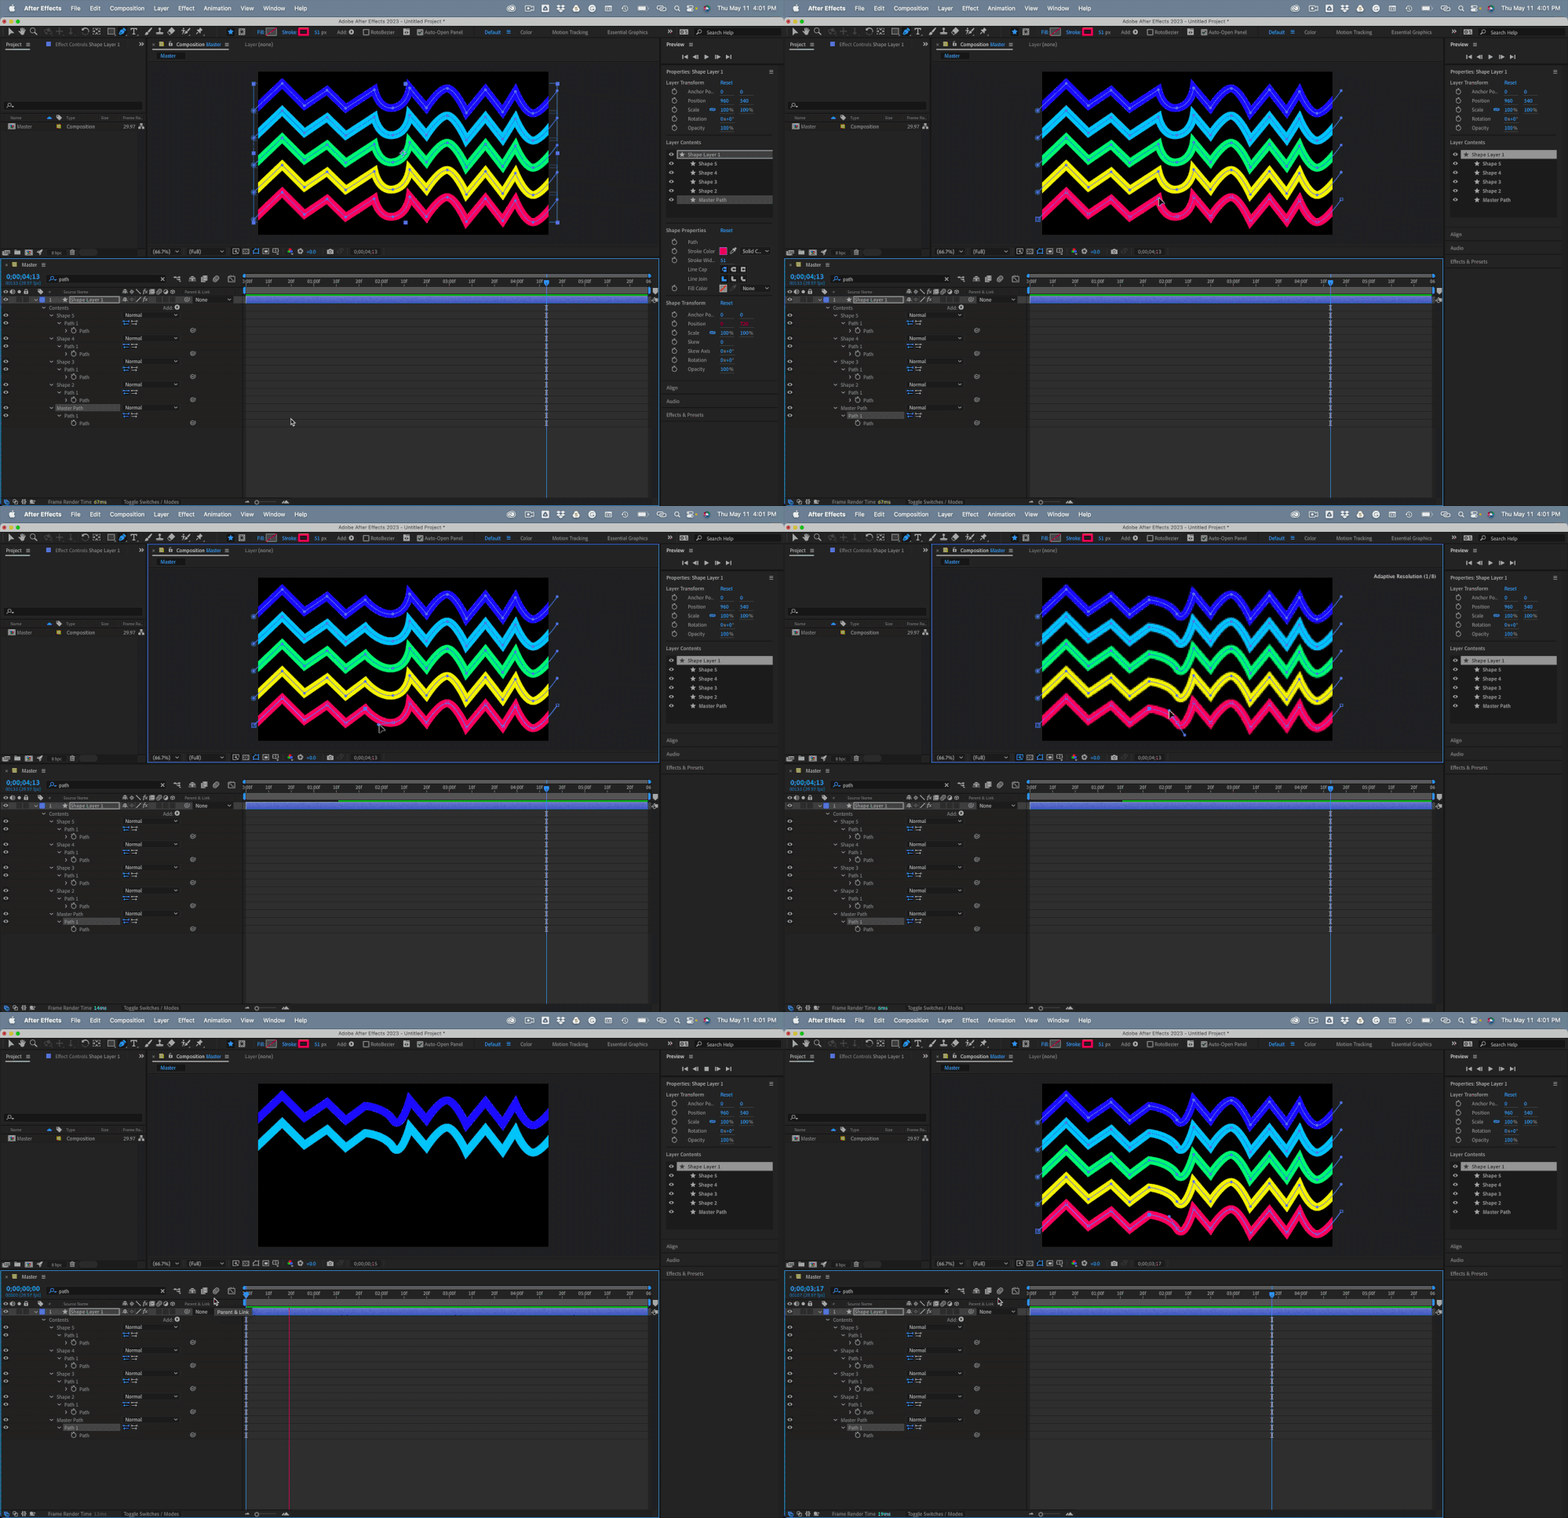
You will end up with something like this:
I included a project file. I even linked all of the duplicate paths to the first one with a pickwhip expression so you can edit the path, and all the others will follow.
If you don't need multiple colors or the ability to fade and adjust timing easily just apply Math.Round()
Here is a link to the Animation Preset. Draw any path on a shape layer, apply the preset, and start duplicating the shape layer and adjusting the sliders. You will have to tie the paths together yourself if you want to do that.
Copy link to clipboard
Copied
Wow! This is amazing! This is exactly what I needed, didn't think it would be not easy, though! I'd also be happy to know how to loop this animation out. Sorry, I'm new to it. What is the way to combine several expressions in one property?
Copy link to clipboard
Copied
Looping an animation can be as easy as trimming the layer to the end of the animation, pre-composing the layer (or layers) and moving all attributes to the new comp and trimming to the layer length, then applying Time Remapping to the now nested pre-comp.
After applying Time Remapping, all you have to do is add a loopOut() expression, and the layer will loop forever.
You can only apply one expression to a property, but the expression can do many things. It all depends on what you are trying to accomplish. I have a lot of expression-driven animation presets that perform complete in-and-out transitions based on layer length. They are based on time - inPoint and time-outPoint. Some will fly an image in from the left side of the screen, have it bounce to a stop, wait for the layer out-point to get close, then drop the image off the bottom of the screen. All you have to do to set those up is to put the layer where you want it to be on screen, set an in and out point, and the layer animates.
Some expressions will bounce a layer forever or decay the bounce as a layer falls, then comes to rest. You just have to go to the first frame where you want the bounce to start, set a position keyframe, then go to where you want the floor to be and set another keyframe and apply the expression.
Let us know what you want to accomplish, and we can help you figure it out.


