 Adobe Community
- Home
- After Effects
- Discussions
- Re: what is this white square in center of my fram...
- Re: what is this white square in center of my fram...
Copy link to clipboard
Copied
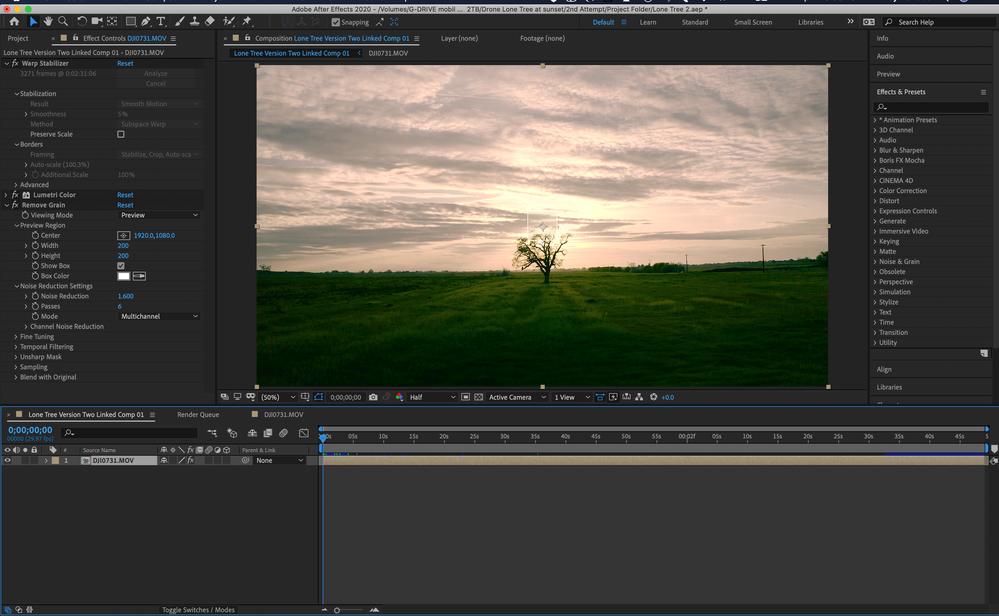
Can anyone tell me what this square is on my footage that burns in when i export and render out? Im not sure if this is something that was put on in adobe premier or affter effects as I am using adobe dymic link so its on my footage in both platforms.
 2 Correct answers
My guess would be that you used Remove Grain or a similar effect and forgot to change the settings from preview area to actual full frame. if that's not it, you have to provide more info on what you are actually doing in your project. Just throwing a cropped screenshot of the UI at people is never particularly helpful without explaining what's going on.
Mylenium
You have shown the Effects Control Panel, but if you select the layer and press the U key twice you'll see everything that you changed. All the Lumetry changes will show up as well as changes to Remove Grain. If Remove Grain does not show up in the timeline you didn't make any changes so pressing "e" will show you all effects added to your layer.
Here's a workflow hint for you. If you are going to use Warp Stabilizer on some footage it is usually more efficient to run it then pre-compose the
...Copy link to clipboard
Copied
My guess would be that you used Remove Grain or a similar effect and forgot to change the settings from preview area to actual full frame. if that's not it, you have to provide more info on what you are actually doing in your project. Just throwing a cropped screenshot of the UI at people is never particularly helpful without explaining what's going on.
Mylenium
Copy link to clipboard
Copied
Thanks Mylenium and I apologize in advance for any silly questions as Im very new to using AE. I thnk your onto something however, both you and Rick said the same thing. I did apply the remove grain effect to this one clip and just need to figure out how to get rid of that box so that it doesnt show up when I export the final comp. I tried scrolling through the differnet options of how 
Copy link to clipboard
Copied
Making someone feel bad for asking a question the way you like isn't particularly helpful either. Somehow @Rick Gerard managed to provide the right answer.
Copy link to clipboard
Copied
That screenshot tells us absolutely nothing about your composition. We need to see the layers. The small rectangle looks like it might be the Preview Ares that is the default when adding grain to a shot, but we cannot be sure until we see the modified properties of the layers or the effects applied. You can find it yourself by deselecting all layers, pressing the 3 key to reveal all effects applied to all layers, then start soloing layers or turning things off or soloing layers until you isolate the problem. If that fails to find anything press the "u" key twice to show all modified properties in the comp.
I added an adjustment layer to this comp I am working on and added Add Grain with no modified properties. There's the white square.
If you can't find the problem post screenshots showing us all modified properties of the layers giving you problems and describe your workflow and what you expect to see in detail.
Copy link to clipboard
Copied
Thank you Rick this is exactly what happend. I did try to removes sone grain. You will have to excuse me, I am very new to Affter Effects. Just a camera guy with a lot of time on his hands these days attempting to edit material that I would normally hand off to a more qualified editor. I have attached a screen shot of my layers and its properites I think. Im happy with the way it looks I just want to get rid of that square. Not sure how to?
Copy link to clipboard
Copied
You have shown the Effects Control Panel, but if you select the layer and press the U key twice you'll see everything that you changed. All the Lumetry changes will show up as well as changes to Remove Grain. If Remove Grain does not show up in the timeline you didn't make any changes so pressing "e" will show you all effects added to your layer.
Here's a workflow hint for you. If you are going to use Warp Stabilizer on some footage it is usually more efficient to run it then pre-compose the layer and add your effects to the pre-comp. This eliminates the chance of having WS run again while it is rendering. An even better workflow, especially if you are doing some compositing that involves adding things to a scene using tracking tools, is to insert the objects into the scene, finalize the comp, then pre-compose the entire thing and run Warp Stabilizer on the whole comp. This will put the same distortions on the added objects that are on the original shot and make the composite better. Motion tracking will also work better on the original footage and if you run AE's camera tracker it will always work better on the original footage.
One more suggestion. If the shot you need to Warp Stabilize in AE is longer than a few seconds and/or you are adding a lot of effects, it is always a very good idea to render the comp to a suitable production format. Warp Stabilizer bloats the AEP file size, can cause rendering problems because it eats up a lot of system resources, and when you get back to Premiere Pro and replace the original shot with the rendered FX shot, you won't have any problems with the previews. In my production pipeline I use Dynamic Link all the time to start the AE comp, then Undo It in PPro immediately, render the FX shot, and put the FX shot in the Sequence just above the original shot. I only use Dynamic Link as it was designed for shots that are extremely simple and that will render at about 4 or 5 frames per second.
Copy link to clipboard
Copied
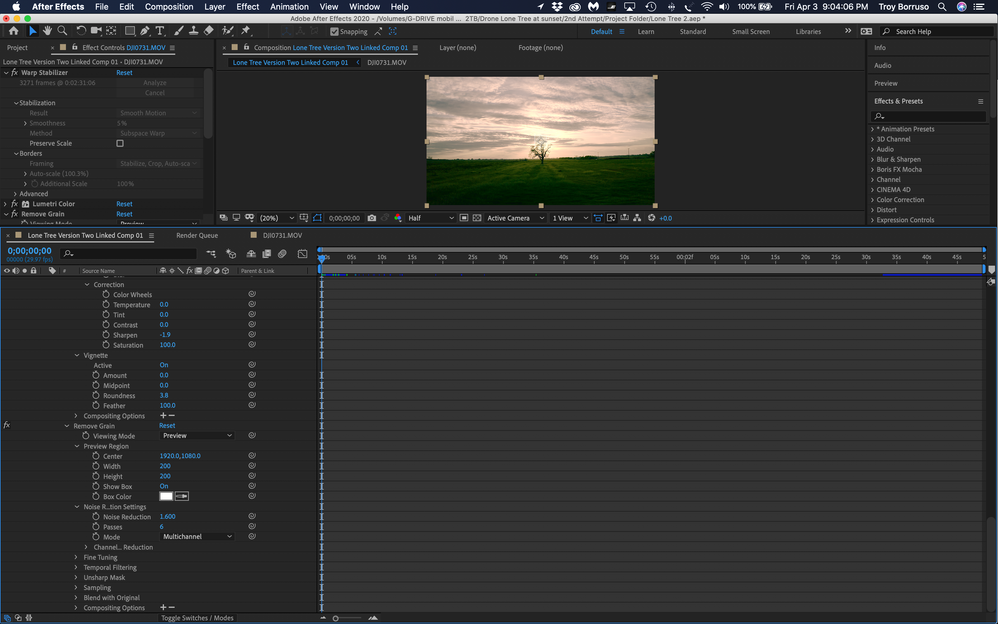
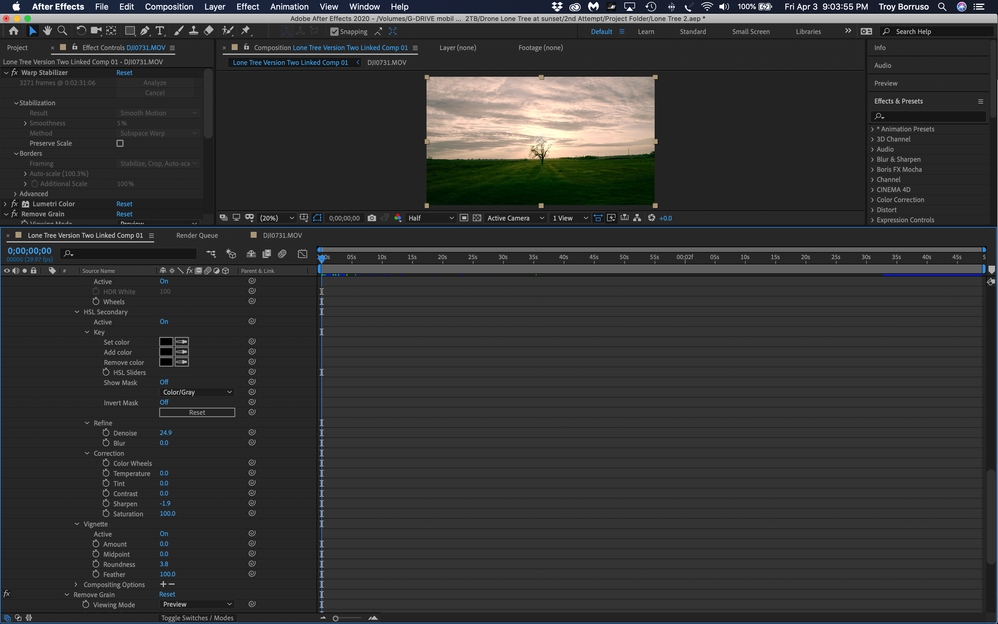
Thank you for all the workflow reccomendations, that will be very helpful moving forward. As for this square thats in the middle of my clip that seems to burn in when I render this comp, how do I hide that or turn that off so it goes away? I haave attached a series of screen shots so that you can see everything Ive changed with the effects. 
Copy link to clipboard
Copied
I think I may of figured it out, I set my remove grain viewing mode to final output and that seemed to do the trick. Thanks again Rick for all your support and reccomendations to leading me in the right direction. I would of been sooo lost without you!
Copy link to clipboard
Copied
That was painful to read. It was a very fair question, and harshly answered by mr. Grumpy Pants. And long windedly. For those chasing the answer after all that - go to your layer, expand it to find Effects then Viewing mode then there is a box to change from "preview" to "final output". That makes the square go away.
Copy link to clipboard
Copied
thank you for this!! i am having the same issue, after scrolling this whole page you saved me lol
Copy link to clipboard
Copied
Exactly what I was thinking. Very fair question (have had the same issue my self), and harsh answers (too long) when the solution was so easy 🙂


