• Global community
    • Language:
      • Deutsch
      • English
      • Español
      • Français
      • Português
  • 日本語コミュニティ
    Dedicated community for Japanese speakers
  • 한국 커뮤니티
    Dedicated community for Korean speakers
Exit
0

Anchor point for a 3D object

Community Beginner ,
Nov 03, 2018 Nov 03, 2018

Copy link to clipboard

Copied

I'm finishing up a project that involves a 3D cube, but I can't get the anchor point EXACTLY in the center of the cube. Is there an easier method for positioning an anchor point to the center of a 3D object?

Views

7.4K

Translate

Translate

Report

Report
Community guidelines
Be kind and respectful, give credit to the original source of content, and search for duplicates before posting. Learn more
community guidelines

correct answers 1 Correct answer

Community Expert , Nov 03, 2018 Nov 03, 2018

I generally approach it mathematically, but that only works easily if the scale of all cube walls are 100%.  If your wall layers are scaled otherwise the maths becomes far more tricky.

Here's an example where the cube walls are 300 x 300 pixels at 100% scale.  The anchor of each wall is centred at 150,150 - the default of a solid layer.  My comp is 1920x1080 pixels, so the null controller is centred in the comp, at 960,540,150.

Look at the relative positions of each wall layer.  They are all displ

...

Votes

Translate

Translate
Community Expert ,
Nov 03, 2018 Nov 03, 2018

Copy link to clipboard

Copied

You have to options for set the anchor Point in the center:

- Hold Control/Command Key and double click in the Pan Behind Tool.

- Go to Layer > Transform > Center Anchor Point in Layer Content.

If those two methods don't work for you, you have the option of checking the distance between two opposite layers (ie, front and back) looking in the position of this layers and set the Anchor Point exactly in the middle.

Votes

Translate

Translate

Report

Report
Community guidelines
Be kind and respectful, give credit to the original source of content, and search for duplicates before posting. Learn more
community guidelines
Community Expert ,
Nov 03, 2018 Nov 03, 2018

Copy link to clipboard

Copied

I generally approach it mathematically, but that only works easily if the scale of all cube walls are 100%.  If your wall layers are scaled otherwise the maths becomes far more tricky.

Here's an example where the cube walls are 300 x 300 pixels at 100% scale.  The anchor of each wall is centred at 150,150 - the default of a solid layer.  My comp is 1920x1080 pixels, so the null controller is centred in the comp, at 960,540,150.

Look at the relative positions of each wall layer.  They are all displaced in one or two axes by 150 pixels (half of 300).

Screen Shot 2018-11-04 at 12.39.39 pm.png

Once it's set up you can, of course, scale and move to your heart's content using the Null.

I've posted the project file on Dropbox if it helps you dissect it by looking at the project itself:

Dropbox - rotating cube.aep

Votes

Translate

Translate

Report

Report
Community guidelines
Be kind and respectful, give credit to the original source of content, and search for duplicates before posting. Learn more
community guidelines
Community Expert ,
Nov 04, 2018 Nov 04, 2018

Copy link to clipboard

Copied

LATEST

When I make a cube I offset the anchor point for all of the faces of the cube by half the width like this:

Screenshot_2018-11-04 14.27.43_WHAFxD.png

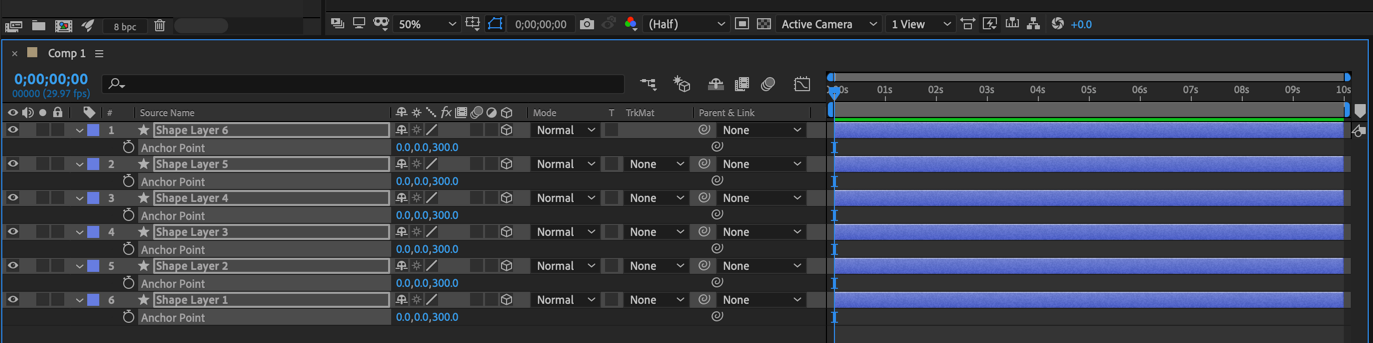
You can do it all at once if you just press A then drag a selection around all of the anchor points. These rectangles are all 600 X 600.

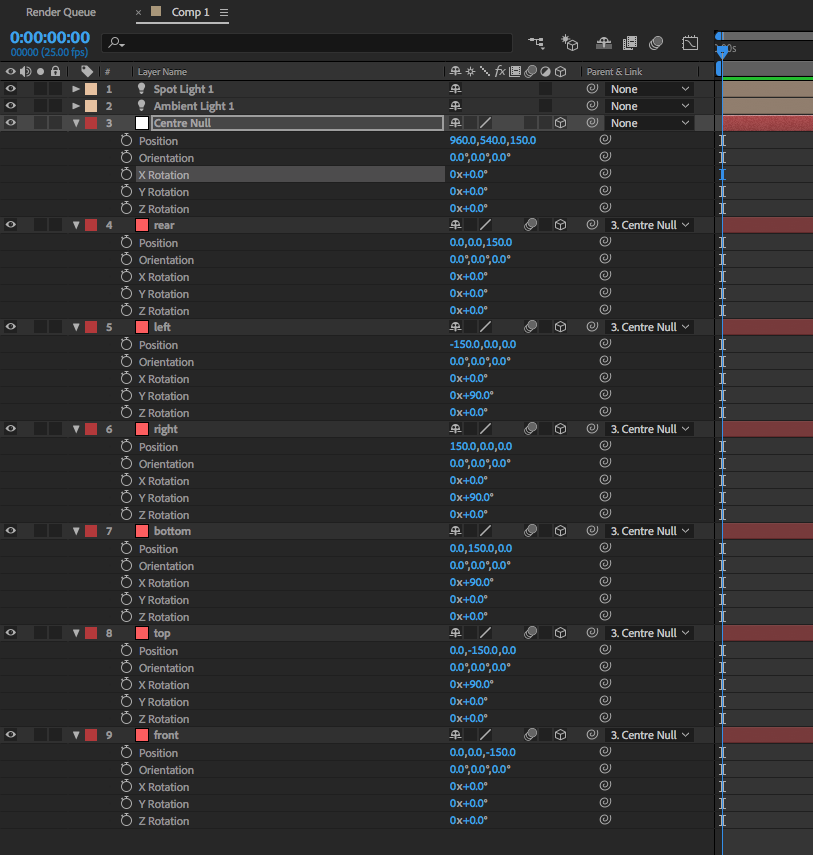
The next step is to Parent all layers to Layer 1.

The last step is to start at the front face (Shape Layer 1) and move up editing the y rotation first then for the last two layers, the x rotation. The values are 0, 90, 180, and 270 for y, then 90 and 270 for x. If you choose custom view you can watch the cube being built.

Screenshot_2018-11-04 14.34.15_eruRf6.png

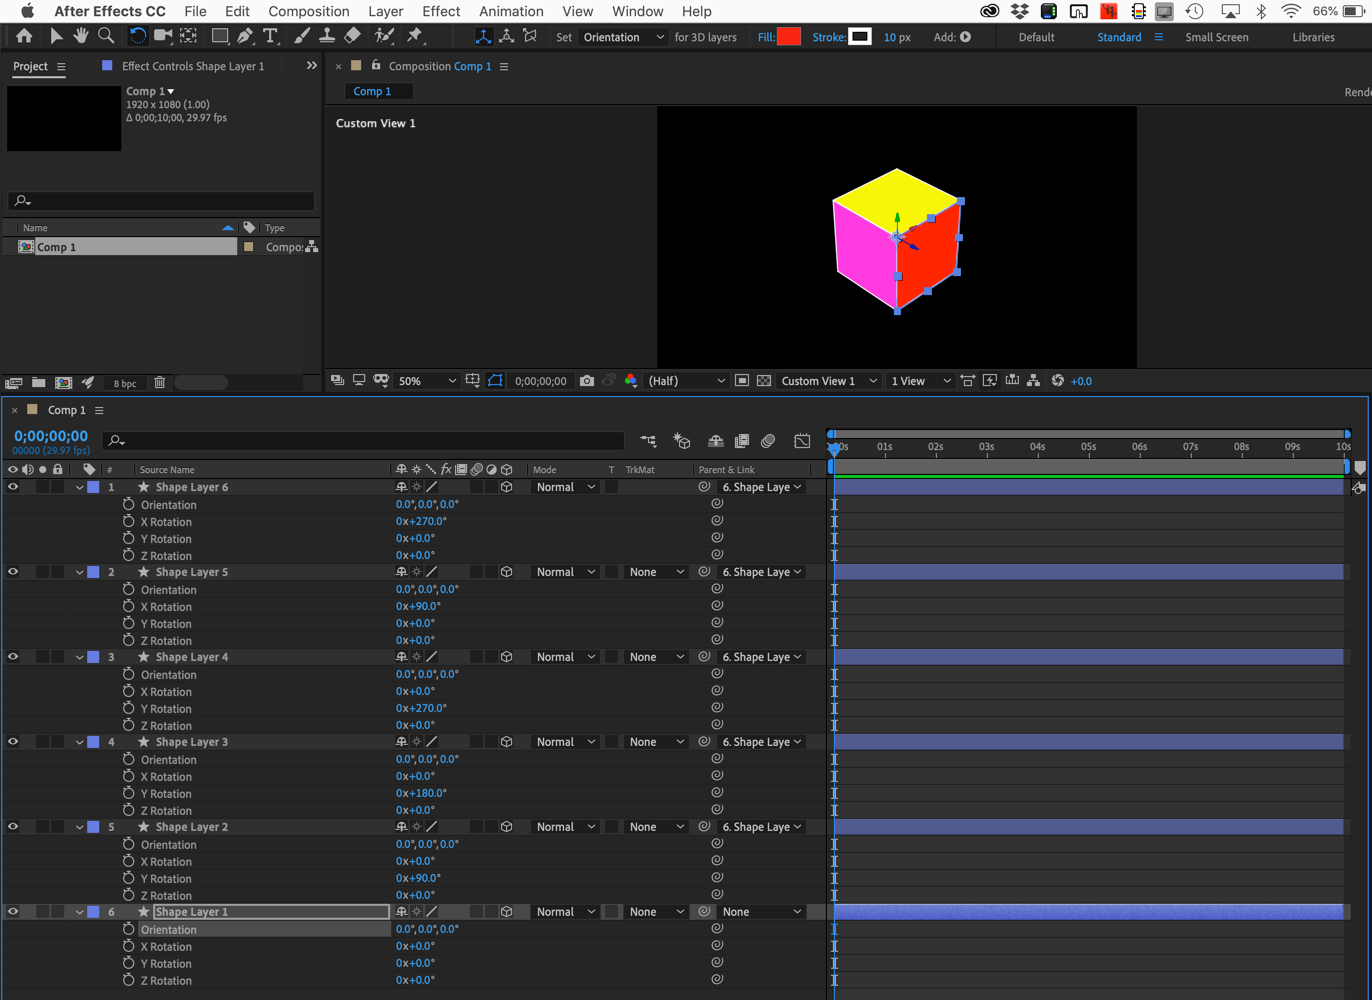
The last step is to lock the five layers with a parent, shy them if you want a really clean timeline. You now have a cube at the center of AE's 3D space. You can edit the position scale and rotation of the front face and the rest of the cube will follow. The Anchor point is at the exact center of the cube and everything should work well. The whole process takes about 90 seconds.

One more note, you'll probably get better edge seams if you change the blend mode for all layers to Alpha Add.

cube.gif

If you really want to go crazy add a camera and some lights, export to C4D (File>Export>), then do some animating in C4d Lite. This took about 5 minutes:

cube+.gif

Votes

Translate

Translate

Report

Report
Community guidelines
Be kind and respectful, give credit to the original source of content, and search for duplicates before posting. Learn more
community guidelines