 Adobe Community
- Home
- After Effects
- Discussions
- How to animate In Text Along a Path
- How to animate In Text Along a Path
How to animate In Text Along a Path
Copy link to clipboard
Copied
Hey! Could someone please point me to a tutorial, or help me find which effect inside after effects might help me to create this text animation? I'm specifically looking at the text that appears to animate in by wrapping itself around the upside down arch path. Is this in trim paths? Or text animation in after effects?
Or even better, is there an expression that might help me achieve this?
Thank youuu
Copy link to clipboard
Copied
Check the text animators. As far as I can see, the text-y position is animated letterwise and the text is on this shild-path.
The other - not visibile - element is a mask with the same path, so the text can appear/disappear.
*Martin
Copy link to clipboard
Copied
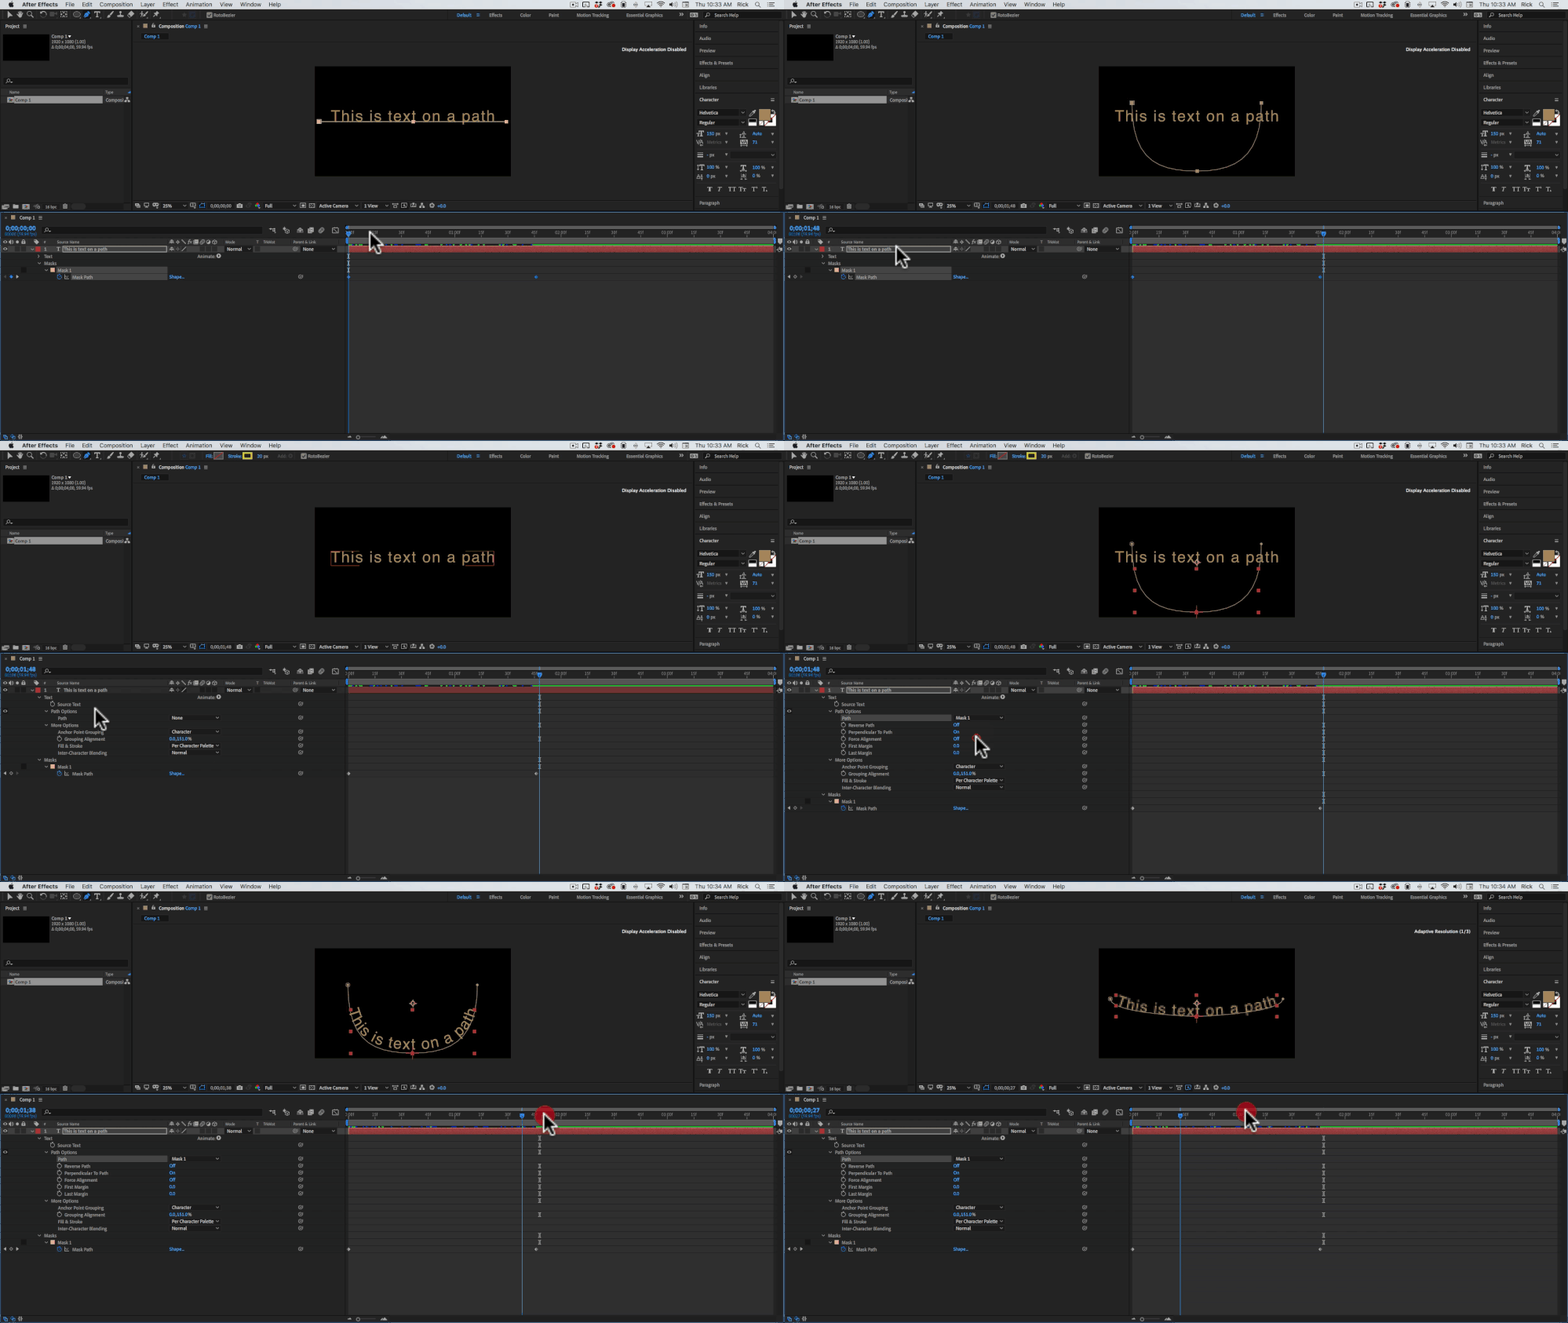
To make text follow a path you need an animated mask path on the text layer, then you need to throw one switch.
The sample has two text layers. The hardest part is learning how to animate the path so it looks good. It is easiest if you have another layer as a guide for the curve.
To manipulate the path and edit it make sure that the path is selected in the timeline. this will change the selection tool from a solid black pointer to a white one and you can drag selections around points and Bezier handles. With the Path selected it is also easier to use the Pen tool to modify curves and add points using the Alt/Option and Ctrl/Cmnd modifier keys.
Another way to animate vector paths is to use the UI script Create Nulls From Paths found at the bottom of the Window menu. Select the path, choose points to follow nulls, then you can animate the position of the nulls to change the shape of the path.
Trying to write an expression that would move individual characters into a curve using text animators for the position, rotation and tracking would quickly become a nightmare for most users and it's a lot more work than is necessary.
Copy link to clipboard
Copied
actually, you don't need an expression.
I would suggest the follow workflow:
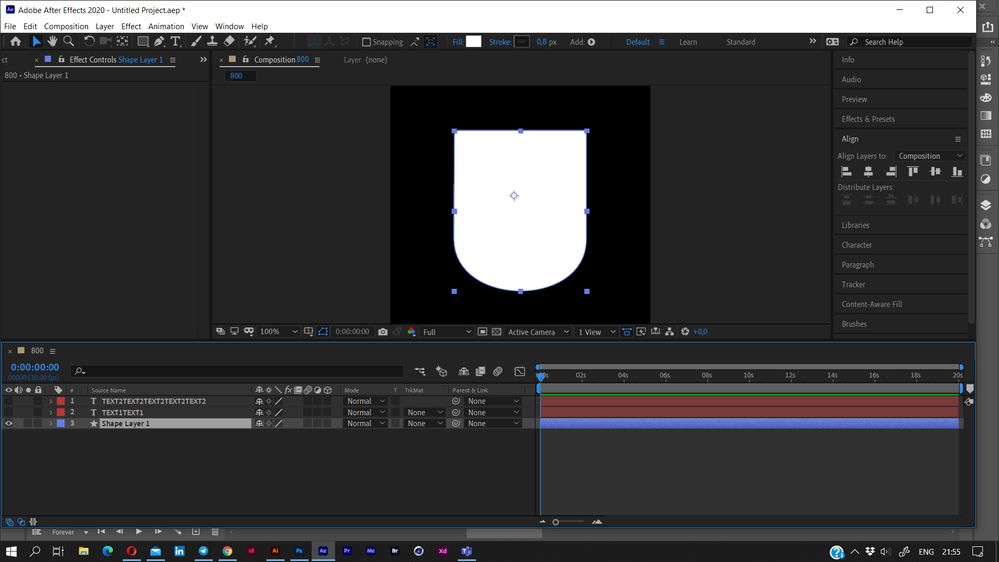
1. Create a shield shape, it then become a mask
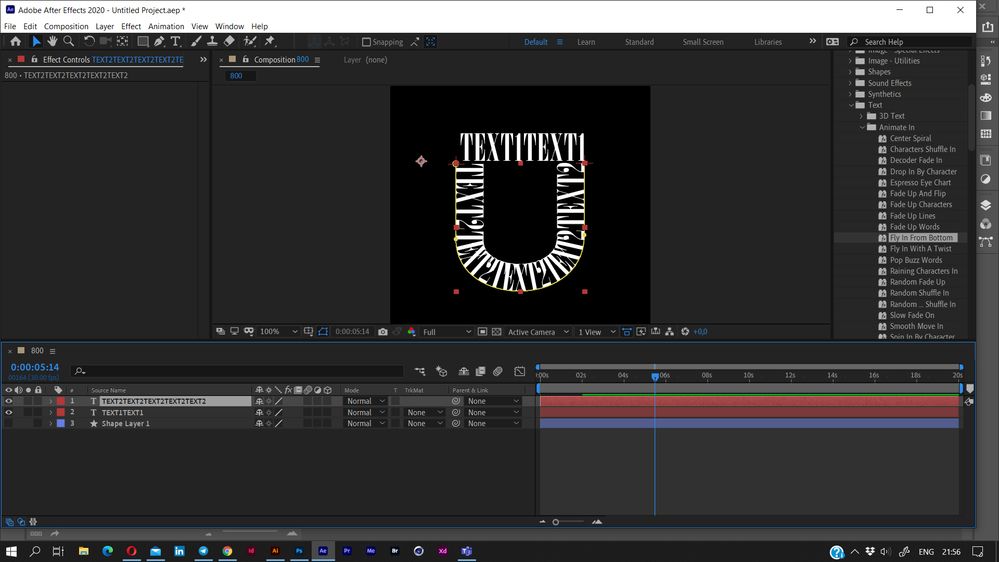
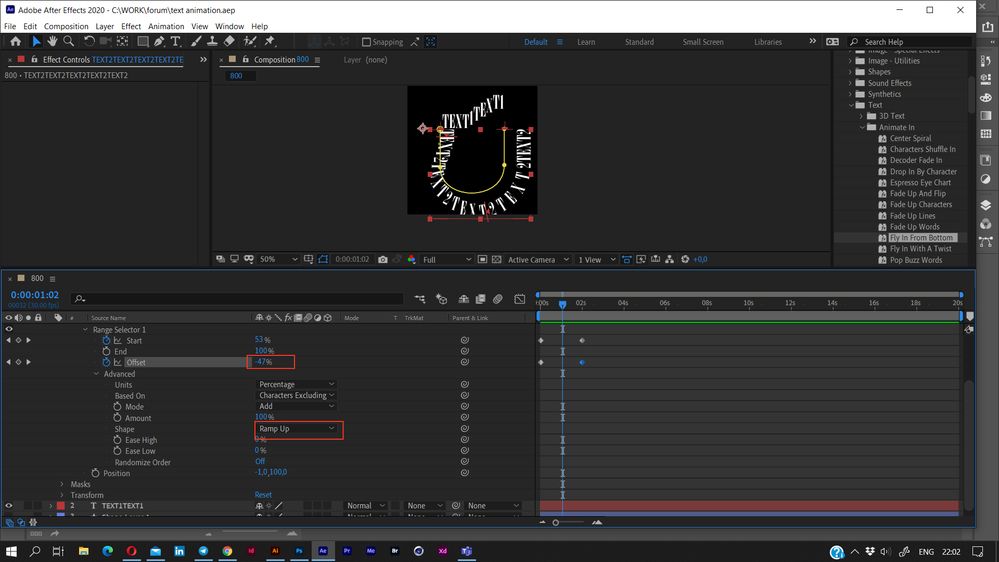
2. Then create text layers: standard line for a top one and curved one for bottom one. To set the text to path, draw the open path following to the shield shape (see the yellow line on the next screen). It will get the name Mask1. In the Text layer properties open Path Options > Path and choose Mask1 in the list. The text will follow the path. You can also use Force Alignment to stretch the text fully from start to end the path.
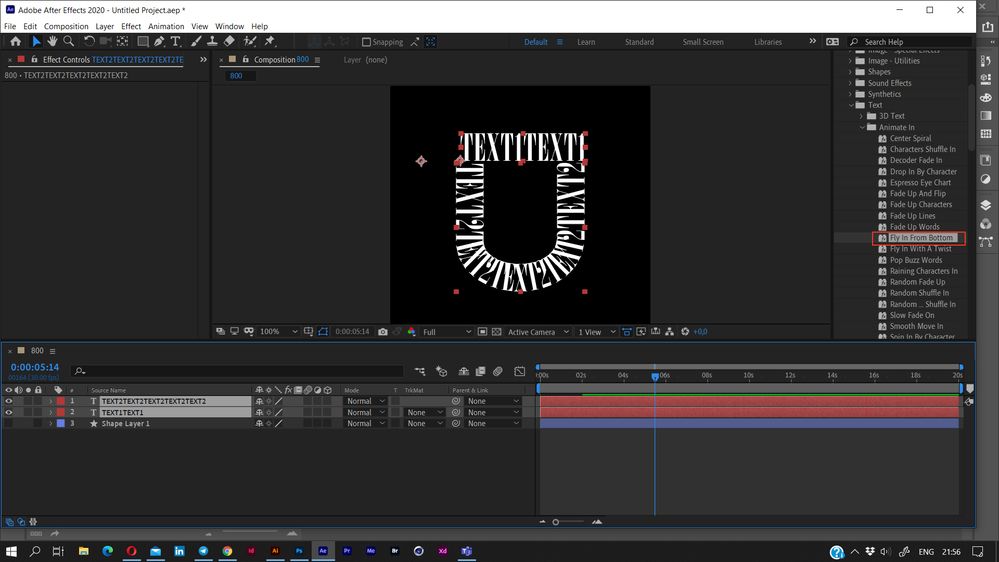
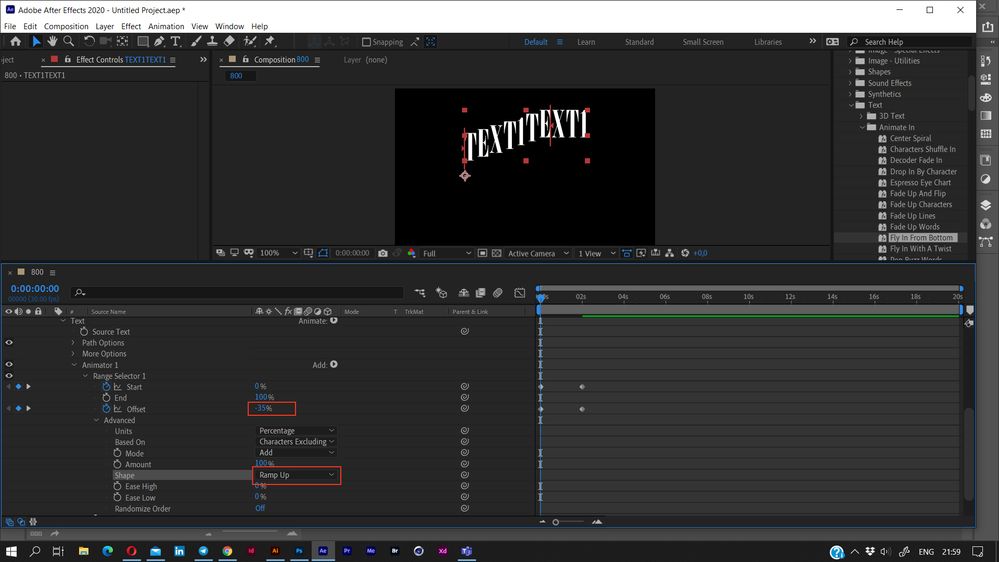
3. Apply the animation preset (you can create it by yourself, but using the preset is some faster). For your project Fly In from Bottom is the best (Bottom here is just a starting position, you can change it any moment).
4. Adjust animations.
- Open Animator1 section
- Change position to place the text out of shield
- To make the animation smooth, in Advanced section choose Ramp Up in Shape list. In the main Range Selector section add Offset animation. It should be some "minus" (e.g. -70) at the starting keyframe and 0 (zero) at finishing one.
Adjust the second text the similar way, changing values for Position and starting Offset.
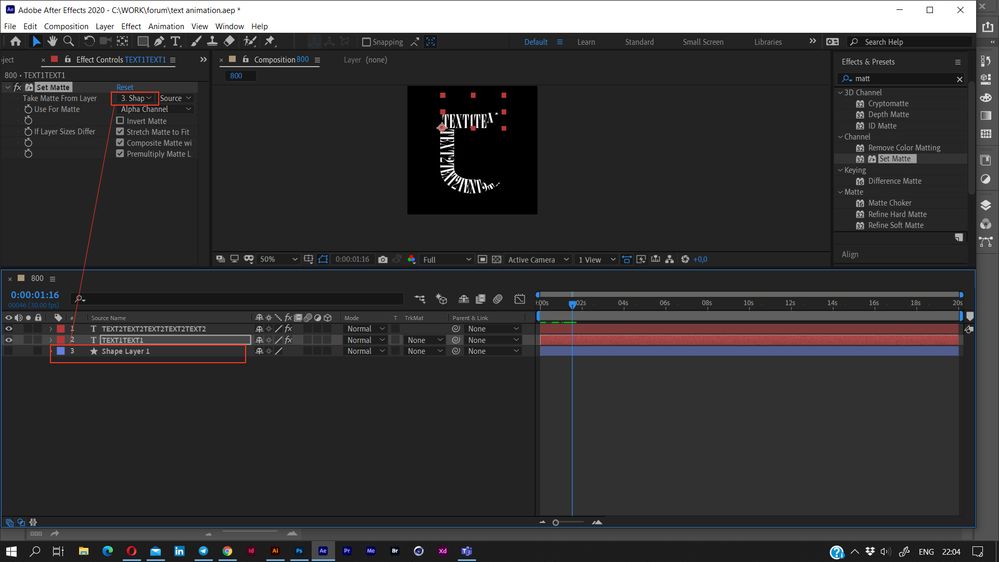
5. Apply Set Matte effect to the text layers.
In effect settings choose the Shield shape layer as a matte source.
For looping the animation copy the keyframes and use Right-click >Keyframe Assistant > Time-Reverse Keyframes.
All internal texts use just Position animation and matte. The easiest and most clear/editable way is to create a smaller shield layer and use it as a matte source for these texts.

