 Adobe Community
- Home
- After Effects
- Discussions
- Linking an adjustment layer and solid layer to a n...
- Linking an adjustment layer and solid layer to a n...
Linking an adjustment layer and solid layer to a null object
Copy link to clipboard
Copied
Hallo,
I am trying to achieve a maginfying effect not only enlarging but also revealing a different background.
For this
I have one adjustment layer with the magnifying effect (w/ a mask)
I have another solid layer masking a background (that is revealed by the magnifying glass)
I connected these two layers to a null object. Unfortunatley the position of the two masks (that are having the same starting point and size) doesn't stay congruent.
What can I do? I would be happy about some support.
Copy link to clipboard
Copied
yes, it's strange but the shapes slide a bit even if we connect the properties directly.
Here is what I tryed to co-ordinate them:
1. Created 3 layers —
- Adjustment layer with Magnify effect (my settings are Center 960,540: Radius 450, Magnification by taste)
- Image layer
- Shape layer (Circle) for a mask with the same radius as the Magnify area (in my case Size = 900,900).
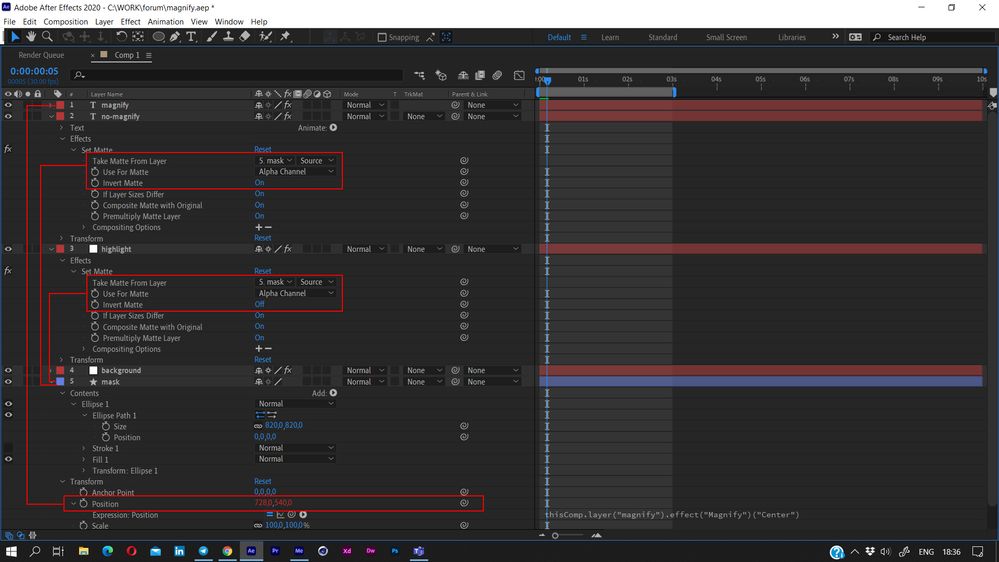
2. Applied Set Mask effect to the Image layer with Shape layer selected as a mask source (cause Shape layer is more controllable by expressions then the Mask path).
3. Linked the shape position directly to Magnify effect center.
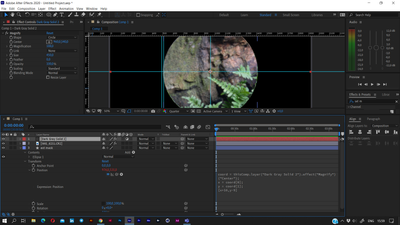
After linking the shapes the slided a bit, so I edited the expression to correct it (see a screenshot)
PS. Null works the same way, the only difference is that you link both (Magnify center and Shape position)to Null and adjust 2 expressions.
Copy link to clipboard
Copied
Thanks a lot! I am quite new to AE and heard of Expressions...but have no experience so far. It worked out for me after I set the [x+ and y– ] to zero.
Copy link to clipboard
Copied
There is no need for an adjustment layer. Put the Magnify effect on the bottom footage layer, Make sure the anchor point of the shape layer that you are using as a track matte is in the center of the circle. Press Shift + F4 to reveal the Link/Parent column. Select the footage layer and reveal the Magnify effect Center in the timeline. Reveal the Position Property of the shape layer used as a track matte. Drag the pickwhip from the Magnify/Center property to the Shape layer/Transform/Position property. You can't use parenting because Magnify/Center property is based on Comp Space, not layer space. Moving an adjustment layer will not move the center property.
If you want to get really fancy you can tie the Magnify/Size property to the ellipse size property with an expression. Ellipse Size is diameter, Magnify size is radius so you'll have to either divide by 2 or multiply by 2 to get the numbers to work out. If you want to use the Ellipse as the adjuster the expression wold look like this:
thisComp.layer("Shape Layer 1").content("Ellipse 1").content("Ellipse Path 1").size[0]/2
Copy link to clipboard
Copied
This also worked out. Thanks for your support! Actually I applied the magnifying Effect to typography. In the the magnified circle there is still visible the original sized typography next to the enlarged one. Is there a possibilty to make it dissappear?
Copy link to clipboard
Copied
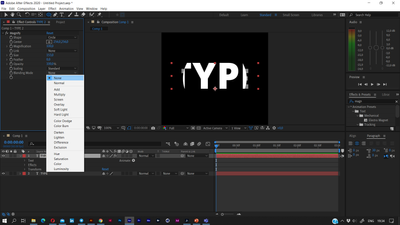
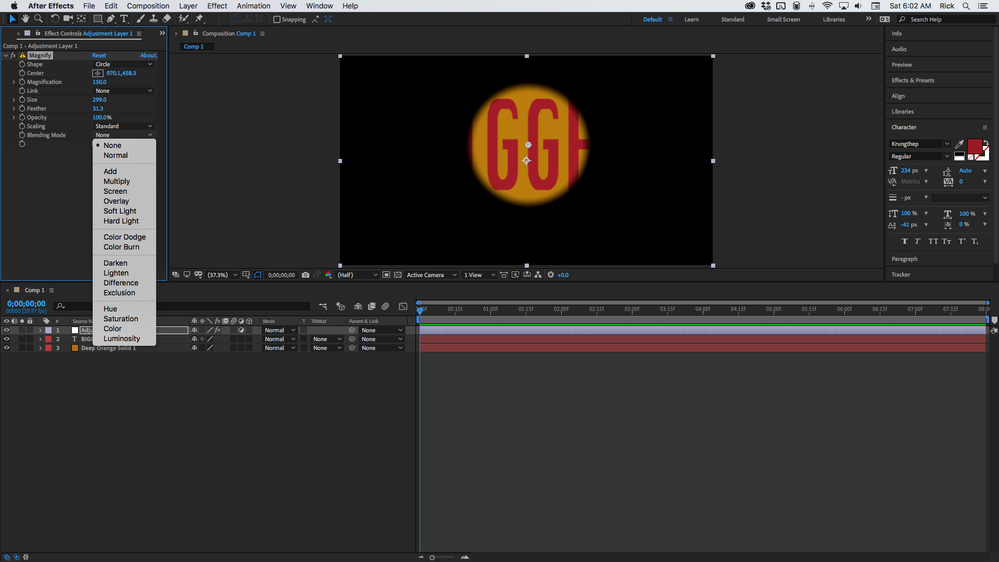
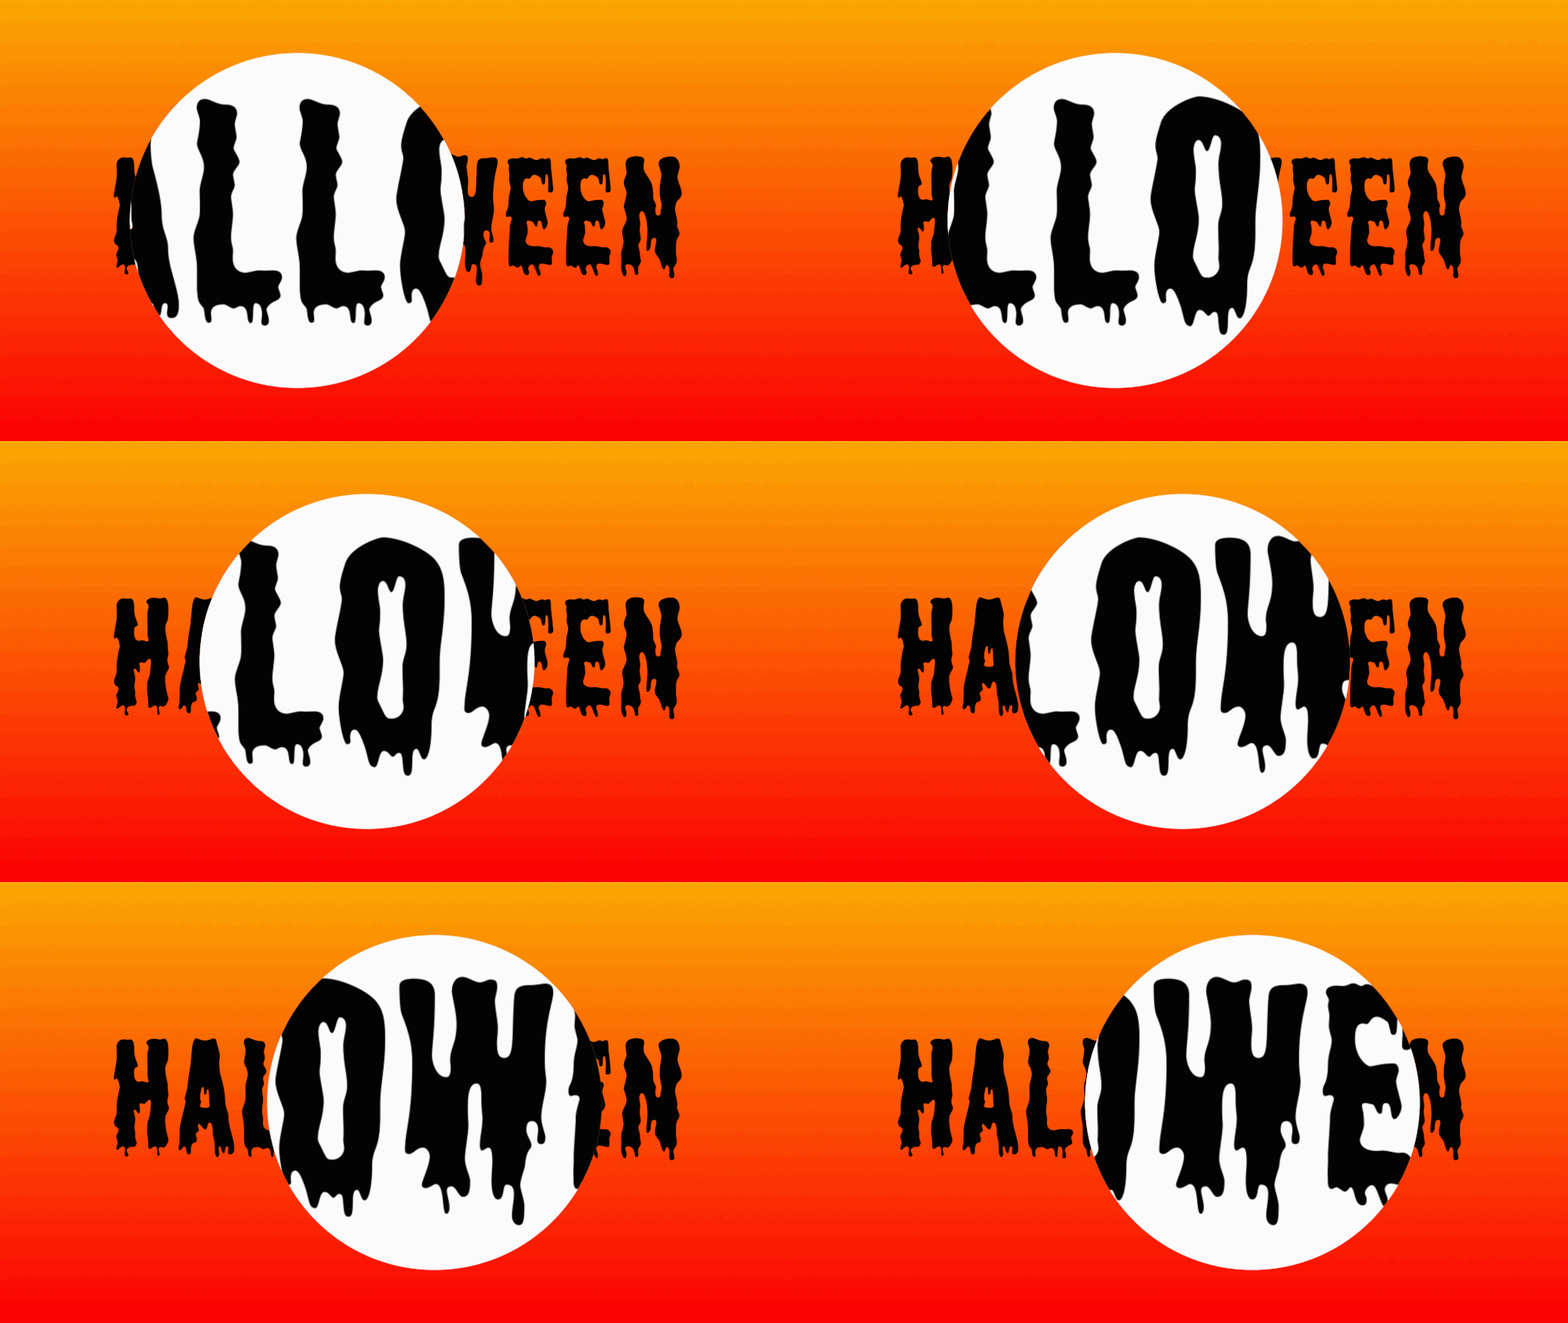
change the Magnify's Blending mode to None
(the second layer is added just for clarity, it's masked to show the outer part comparing the magnied one)
Copy link to clipboard
Copied
I'm not sure what you are trying to do with the design but if you put Magnify on an adjustment layer it will affect all of the layers below. Setting the Blend mode to None will poke a hole in everything.
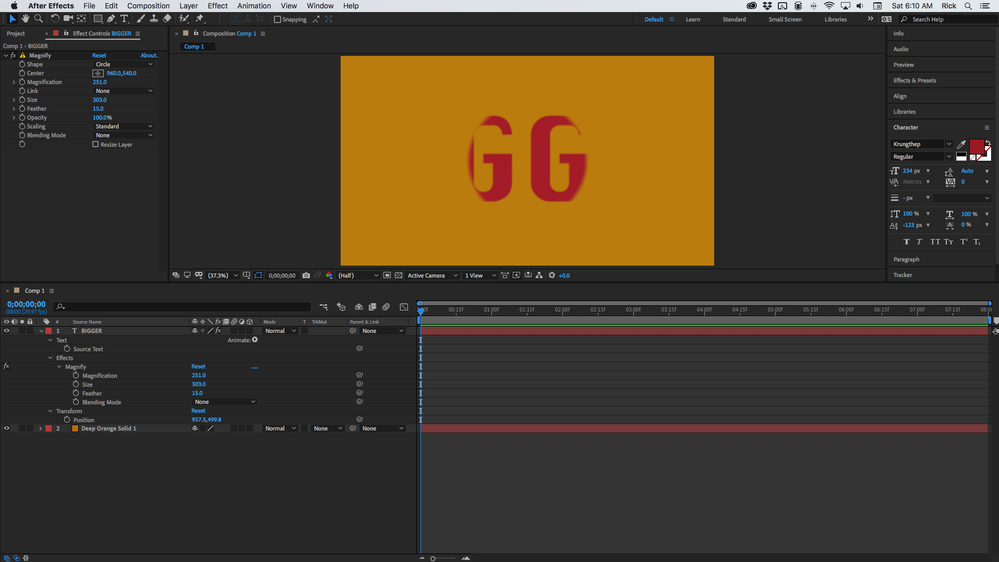
Applying the effect to the layer you want to magnify is probably what you want to do. It's important to dig into all of the controls when you are trying to figure out how an effect works:
Copy link to clipboard
Copied
Hi, thanks for your answers and sorry for my late reply.
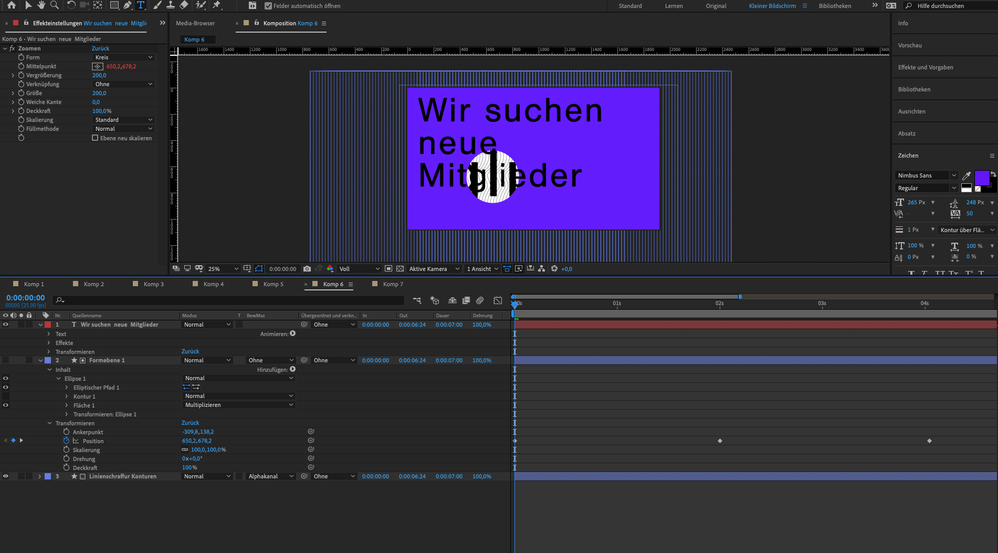
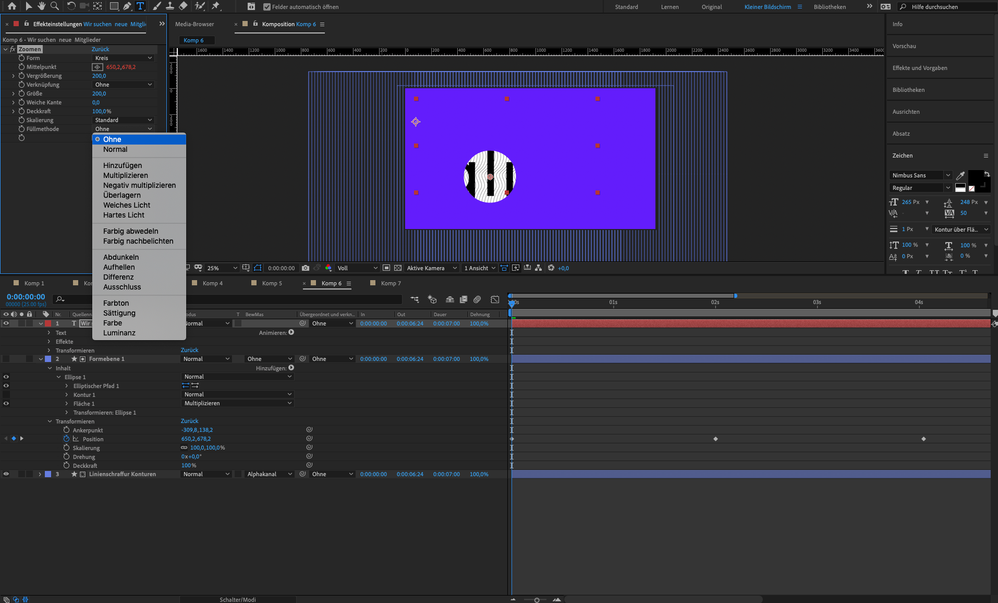
The changing the blending mode to none (ohne) also makes disappearing the typography around the maginifiying effect (that I don't want to). Here are two screenshots of how it looks now, and the other one shows it when I apply none. Shouldn't the normal blend mode work?
Copy link to clipboard
Copied
If I add a solid background layer the doubled typography problem is solved (I tried in in an extra document), but somehow may combination withe trackmatte circle isn't recognised as a background.
Copy link to clipboard
Copied
do I understand well that you want to have
1) colored background;
2) non-magnified static text;
3) white (or other colored) circle inder magnified text with the same size as a magnifying area;
4) magnified text?
Copy link to clipboard
Copied
I would suggest to double the text layer and use "Set Matte" effect for non-magnified text (inverted alpha) and highlight (alpha) with the same source layer (mask shape). This case you can control just 1 additional layer (mask), connecting it to Magnify effect center like Rick told before.
Copy link to clipboard
Copied
Thanks, Anna Landa! A bit late but finally it worked out. And I learned a lot.
Copy link to clipboard
Copied
I'm having trouble with this too. If you parent the Magnify center to object position with animated keyframes if works fine, but if you parent it to an object that is already parented to another object then it just doesn't work. In my case the magnifying glass is parented to the hand. And all I want is to have that magnifying effect follow the Magnifying glass. I tried to parent it to the character's hand that is rigged and it goes absolutely wrong way. Can't change anchor points, can't animate position... Any ideas?

