 Adobe Community

Copy link to clipboard
Copied
I am working on a write-on animation using mask paths on a solid layer with animated stroke. The solid is above a stylized text layer and I am using it as an inverted luma matte to reveal the original text. The problem is that one letter (o) keeps creating a fill instead of a stroke and I cannot figure out how to stop it from happening. There is no option available to turn off fill or stroke so it seems that it should only be using the stroke effect I assign to the mask path. I have never encountered this before and I'm going crazy.


 1 Correct answer
Because a mask path on a solid layer shouldn't be generating a fill like this.
why not? a closed mask path set to add will show the layer in the masked area.
I have posted this in other places and nobody can give an answer as to why all of the other letters work okay but the closed ones don't.
I gave you an answer: the reason is that a closed path is a mask that will mask the layer. show inside the closed path.
...
Additionally, I even tried NOT closing the path on those two letters and it got worse
 17
Replies
17
17
Replies
17

Copy link to clipboard
Copied
I can't visualize what you are talking about without a screenshot. I don't understand your workflow at all or what you mean by the letter O creating a fill instead of a stroke. Show us the modified properties of the layers giving you problems by pressing the U key twice, Printscreen and paste so we can see what's going on.
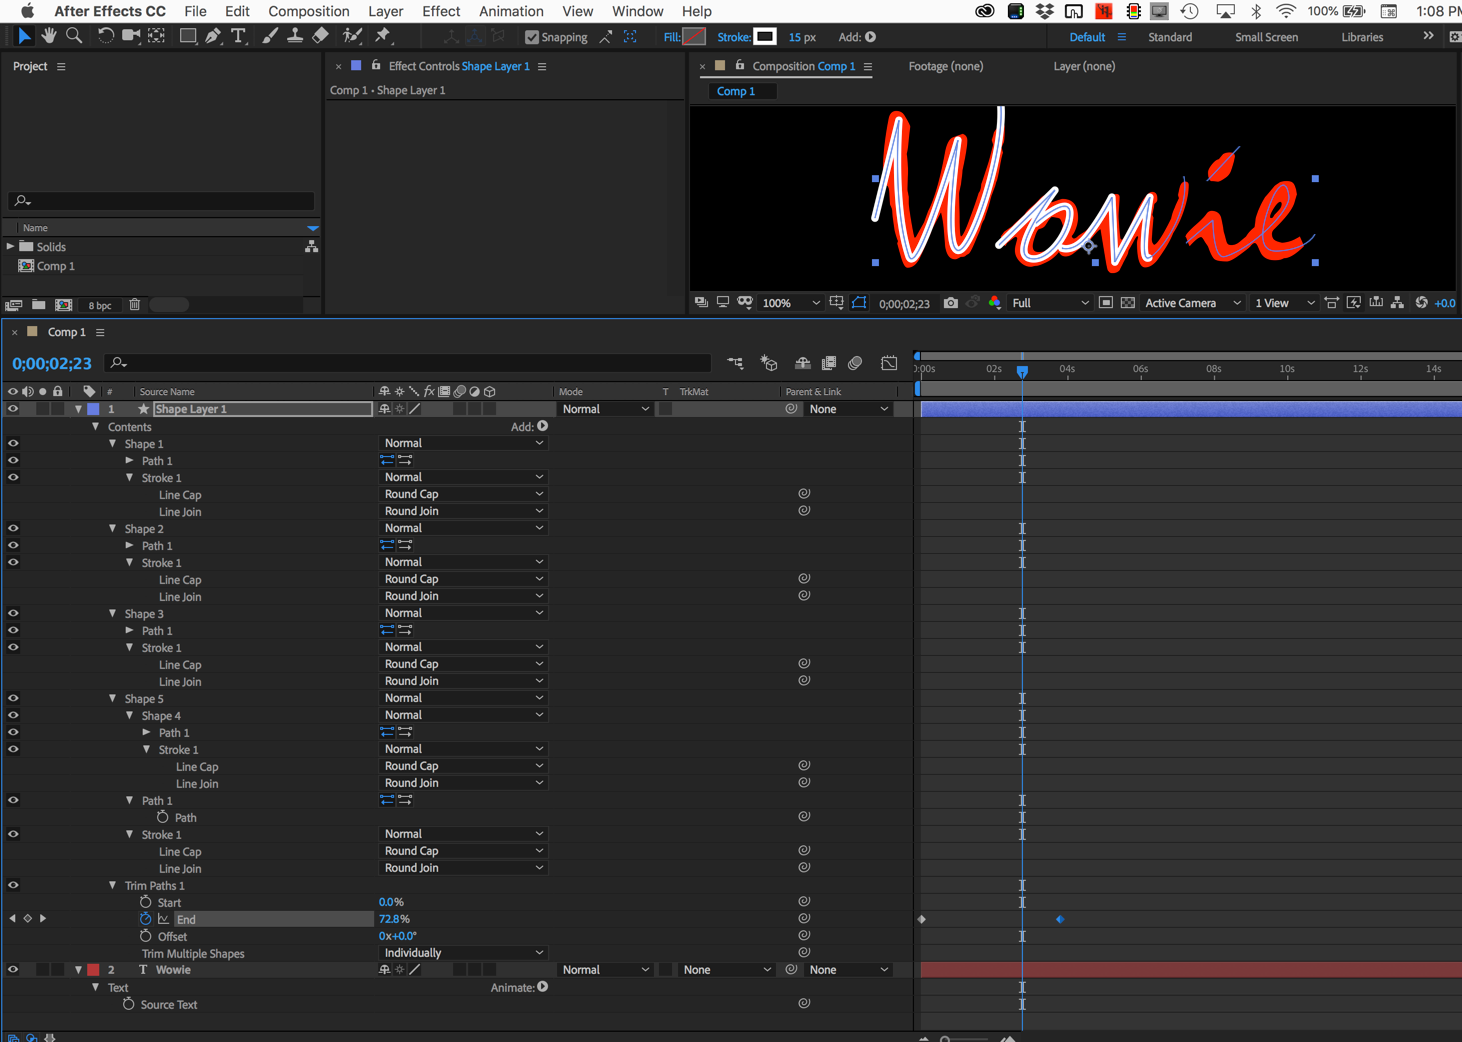
Here's how I set that kind of project up. The stroke is modified to round cap and round join. I start with a stroke width that is a little narrower than the text so I can easily and accurately set the position of the path. Then I add Trim Paths and select Trim Multiple shapes Individually and change the shape layer to an alpha matte and I'm done. It's a lot easier to animate the timing this way. All that is left to do here is increase the stroke width and set the track matte. The timeline is about 60% through the animation.
Using a mask layer and Stroke, you can use Alpha Matte if you have the Paint style set to On Transparent.
Copy link to clipboard
Copied
Thank you for responding. Alpha Matte does not work properly either. Changing up mattes or the three options (over transparent, original, reveal) does not yield proper results either. The stroke effect with the luma inverted or alpha matte is one single thickness and does not display the underlying text in its nuances of thickness: ![On transparent, not properly revealing text styleCropperCapture[1].png](/legacyfs/online/1535610_On transparent, not properly revealing text styleCropperCapture[1].png)
Here is what it is supposed to look like:
![Actual text layerCropperCapture[1].png](/legacyfs/online/1535615_Actual text layerCropperCapture[1].png)
Here are different views of the layer layouts:
![Both layersCropperCapture[1].png](/legacyfs/online/1535618_Both layersCropperCapture[1].png)
Here are the masks visible:
![All masks and stroke effectCropperCapture[1].png](/legacyfs/online/1535619_All masks and stroke effectCropperCapture[1].png)
This is what it looks like with stroke end at 0 pct where the fill is appearing:![Stroke end at 0 percentCropperCapture[1].png](/legacyfs/online/1535627_Stroke end at 0 percentCropperCapture[1].png)
This is with the stroke end at 100 percent:
![Stroke end at 100 percentCropperCapture[1].png](/legacyfs/online/1535629_Stroke end at 100 percentCropperCapture[1].png)
Copy link to clipboard
Copied
this is your problem:
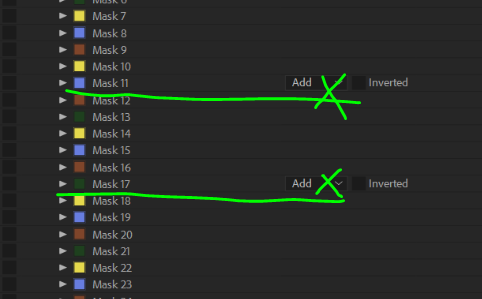
your paths should set to none. on the "O" they are the only ones who are closed path and are masking your solid (which is white) this is why you are getting white circles. change them to none.
BTW, for this type of path reveal I would not use "stroke", I would use "Write-on" which gives to the ability to set variable stroke through time.
Copy link to clipboard
Copied
Yes, I had tried that too, still the same result with one width stroke. Also tried switching matte modes with none selected as well as the three options for paint style.
Copy link to clipboard
Copied
tried what exactly? what are the steps? Write-on is the way to go if you wish to create variable width stroke which can also be used as a matte. The resource help files can tell you about the effect, how to convert a path to write-on position and so on, and many tutorials are available.
Copy link to clipboard
Copied
Sorry, I meant that I had tried the blend mode as well.
As for the write-on effect, I have used this before but given the amount of letters (more that what I shared) and the style of the font I am using, this would take way too much time. The stroke effect is not working as it should, unless I am still missing something that has not already been discussed.
Copy link to clipboard
Copied
It's the mask mode that's causing the white circles, not the blend mode. With the stroke effect there's no option other than one width stroke. show a full screenshot of your issue now.
Copy link to clipboard
Copied
Yes, that is what I was referring to. Here it is: ![CropperCapture[307].png](/legacyfs/online/1535659_CropperCapture[307].png)
Copy link to clipboard
Copied
Here is the stripped down part of my project, just this comp: https://www.dropbox.com/s/ecnjs4x9cwmj1uc/Text%20animation%20problem.aep?dl=0
Copy link to clipboard
Copied
This is the font: https://www.dropbox.com/s/6u3a1v7xcjz1hxo/CoronetLTStd-Regular.otf?dl=0
Copy link to clipboard
Copied
I see there is no fill on the "O"'s 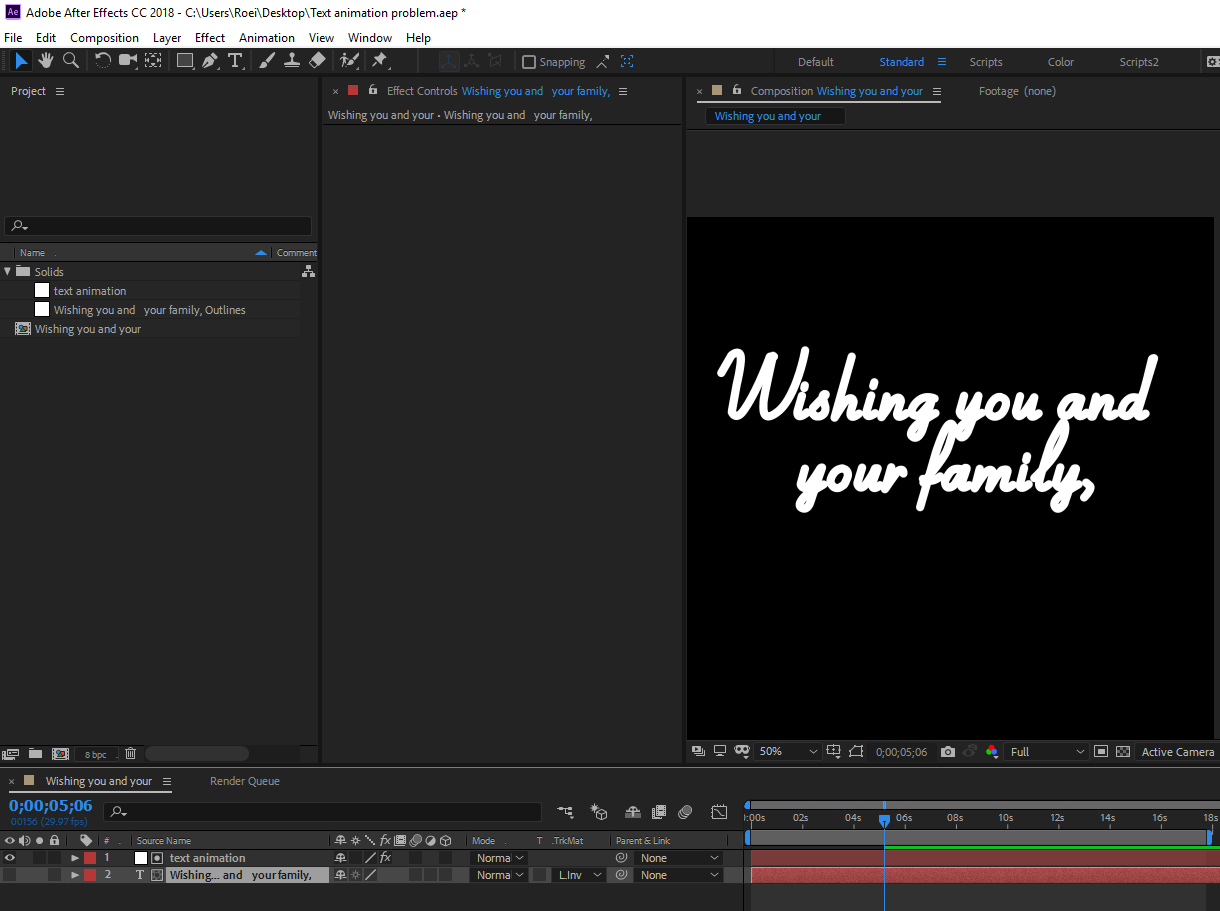
Copy link to clipboard
Copied
Yes, but it is NOT revealing the proper style of the font I am using. This is crucial. If you play around with the settings, you will see the fill appear with different approaches, but I cannot get the underlying text/font to display. With that said, if I cannot find a solution, I will be forced to take the more time consuming write on approach but the fact will still remain that the stroke effect is not acting as it should in this context. If nobody can present a solution, this is possibly a bug.
I should also mention that I tried converting the text to shapes and using the matte setting along with the solid/masks/stroke layer and this did not work either.
Copy link to clipboard
Copied
This is crucial. If you play around with the settings, you will see the fill appear with different approaches, but I cannot get the underlying text/font to display.
when you say "Fill", you do mean "Stroke", correct?
it seems you reported several issues in this thread so I will try to answer them all in hopes this will make everything clear:
1. the filled "O"'s were a result of the mask on the O being closed set to add
2. if you can't get the underlying letters to appear at all - you simply need to set the bottom layer to "Alpha matte" so it will use the layer above as a matte. you could have also set the masks on the text layer itself and used "reveal original image"
3. you want variable stroke so it will be more accurate - explained below:
here's what you get when you do this with stroke:
you get a constant width of a stroke revealing a variable width stroke and this is the result - far from perfect. if you shrink it too much, you eat away pixels that are needed. if you expand it, you reveal more than you want to. that's the problem you are facing with the effect you picked for the task. here's the matte in red to better illustrate the problem. you can only eat away from your shapes or reveal too much when you try to use a constant width stroke to reveal a variable width stroke.

this is why you should try to use write-on - because you a revealing a variable width shapes so you should use a variable width effect. it will take more time, but that's the price. but if time is a problem, and result is not that important - stroke is a fair option.
Copy link to clipboard
Copied
Because a mask path on a solid layer shouldn't be generating a fill like this. I have posted this in other places and nobody can give an answer as to why all of the other letters work okay but the closed ones don't. Additionally, I even tried NOT closing the path on those two letters and it got worse because the whole solid layer became one big white fill, no matter what the stroke end percentage was.
Copy link to clipboard
Copied
Because a mask path on a solid layer shouldn't be generating a fill like this.
why not? a closed mask path set to add will show the layer in the masked area.
I have posted this in other places and nobody can give an answer as to why all of the other letters work okay but the closed ones don't.
I gave you an answer: the reason is that a closed path is a mask that will mask the layer. show inside the closed path.
Additionally, I even tried NOT closing the path on those two letters and it got worse because the whole solid layer became one big white fill, no matter what the stroke end percentage was.
you don't have to do that. simply changing it to "none" will disable the mask functionality. I am not sure why you say it doesn't work. I have seen your project file - you did not setup the alpha matte correctly. as you can see in the GIF's I posted, your stroke works fine, the masks are disabled, and it works as well as a stroke should work. what is the problem now? here is your fixed project file, examine it and see if you have any further issues:
Text animation problem-fixed.aep - Google Drive
Copy link to clipboard
Copied
There it is! THANK YOU ROEL I was hoping it was something stupid and simple like this and not indeed a bug. I use mattes frequently so I don't know why I didn't notice I set the layers' visibility backwards. I think I should take a few weeks of vacation...
Copy link to clipboard
Copied
we did it!

 AdChoices