 Adobe Community
- Home
- After Effects
- Discussions
- Repeat Shape AND Distribute it inside another shap...
- Repeat Shape AND Distribute it inside another shap...
Copy link to clipboard
Copied
Hello everyone,
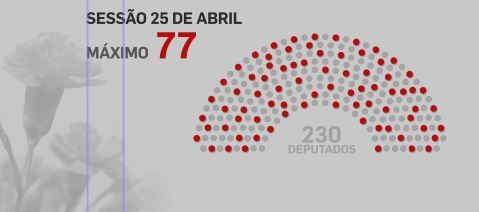
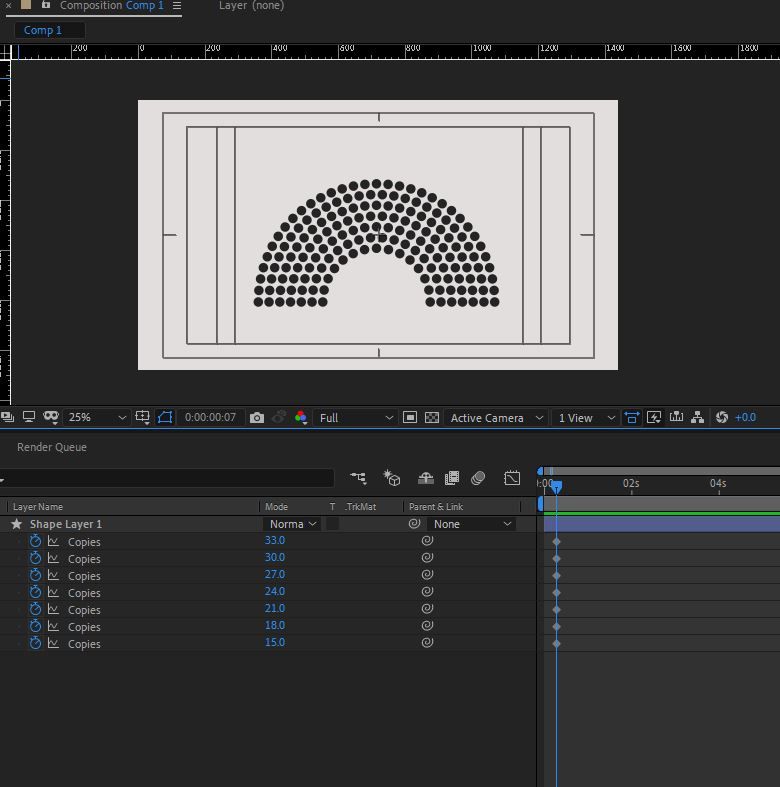
I've been doing a parlement for years shape by shape and distributing it as equal as i can, and count and paint for parties.
Is there a way of doing it with expressions ? Can someone give a start clue to help me do it ?
I will post an exemple just in case my english is not enough.
Thank you
i
 4 Correct answers
If all your graphics are shaped like in the example, you can split it into several imaginary circles. In your example, this will be 9 circles with increating diameter.
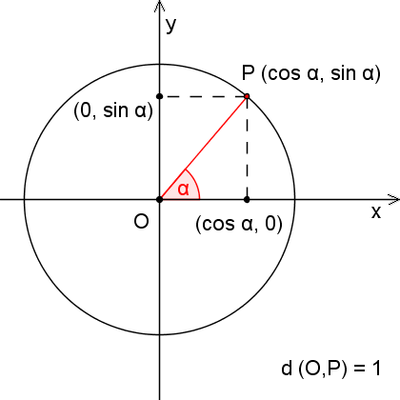
Now you can calculate a point on a cicle, like:
To distribute the dots, all you need to change is alpha. You need to work with rad instead of deg.
I didn't test this, but you should get the idea:
// diameter of the cycle
dia = // drag slider here;

// angle to span, e.g. 180
angle = //drag slider here;

// global rotation of angHere comes the AE project for you to play around and understand the code:
https://www.dropbox.com/s/tzrf2trnvo39xyj/CircleDots.aep?dl=0
Have a close look at the expression in the position of the Dot-Layer. I wrote a lot of comments to make the code as understandable as possible.
Hope this helps!
*Martin
To be clear on that: alpha is just an angle in this case, not the alpha channel!
We need this angle to calculate the position - like in the formular. When we have several object with several positions on the circle, they all have diffent angles to the center of the circle.
The difference is not random, but has a certain value, depening on the objects and circle span we want to distribute them.
If this is still hard to understand, just put in some numbers.
Let's say, we have 120 degress circle spa
...Property Groups are direct references to the properties in a layer in the same way that index is a reference to a specific layer.
For example, if you want to connect the position property of a layer to the position property of the layer above, no matter what that layer is your expression would be written like this:
// thisComp.layer("Null 1").position becomes
thisComp.layer(index - 1).position
The quote marks are removed and index - 1 (the layer number minus one) is used to look at the layer
...Copy link to clipboard
Copied
If all your graphics are shaped like in the example, you can split it into several imaginary circles. In your example, this will be 9 circles with increating diameter.
Now you can calculate a point on a cicle, like:
To distribute the dots, all you need to change is alpha. You need to work with rad instead of deg.
I didn't test this, but you should get the idea:
// diameter of the cycle
dia = // drag slider here;

// angle to span, e.g. 180
angle = //drag slider here;

// global rotation of angle span, like horizontal or vertical
angle_rot = //drag slider here;

// dot-layers in comp, null layer is considered
dots = thisComp.numLayers-1;

// offset between dots, dots are corrected to get full 180°
dots_offset = angle/(dots-1);

// current layer index, corrected to get full 180°, null layer is considered
ind = index-2;

// do the math
alpha = (angle - (ind * dots_offset)) + angle_rot;
alpha_rad = degreesToRadians(alpha);

pointX = dia * (Math.cos(alpha_rad));
pointY = dia * (Math.sin(alpha_rad));

// distribute the dots around comp center
x = (thisComp.width/2) + pointX;
y = (thisComp.height/2) + pointY;

[x, y];
Put the sliders on a controller (null layer) in the same comp, otherwise you have to edit dots and ind.
*Martin
Copy link to clipboard
Copied
The code is working as intended.
If you only have one null and one shape layer, you'll get a division by zero error, because of this line:
dots_offset = angle/(dots-1);But as soon as you add another shape layer, everything works fine.
By adding if-statements, you can make the code bullet proof:
if (thisComp.numLayers >= 2) {
	// do the code;
} else {
	value;
};
Now the dots are working for one imaginary cycle. You can pre-comp this, duplicate the precomp in project panel and drag both into a new comp. Using the controller in each pre-comp to set up the diameter of the cycle.
Master properties will come in handy here, too. Using them will allow you to auto size the diameter by the index of the pre-comp in the main comp.
Adding a size-slider for the dots is also meaningful.
*Martin
Copy link to clipboard
Copied
Hello Martin,
Thak you so much for your answer and i,m sorry for not seeing it and replay sooner but somehow i did not get the notification about it and i am new here.
I did not understand your explanation. I'm a realy beginner.
Can you give me more steps?
I can't even explain all my doubts. Maybe it's to much to start with.
If you are willing to guide me through your code i would be realy thakfull but i understand if you give up on me.
No matter what i will continue to try to understand it and continue to experiencing to write the code 😉
Thak you again for trying.
*
i
Copy link to clipboard
Copied
Hi *i,
I already forget about this, glad you finally answered. The forum is not that user friendly, though.
I'll send you an AE project file. This way you'll understand the code and how to use it the best. I try it by tomorrow ... hold on!
*Martin
Copy link to clipboard
Copied
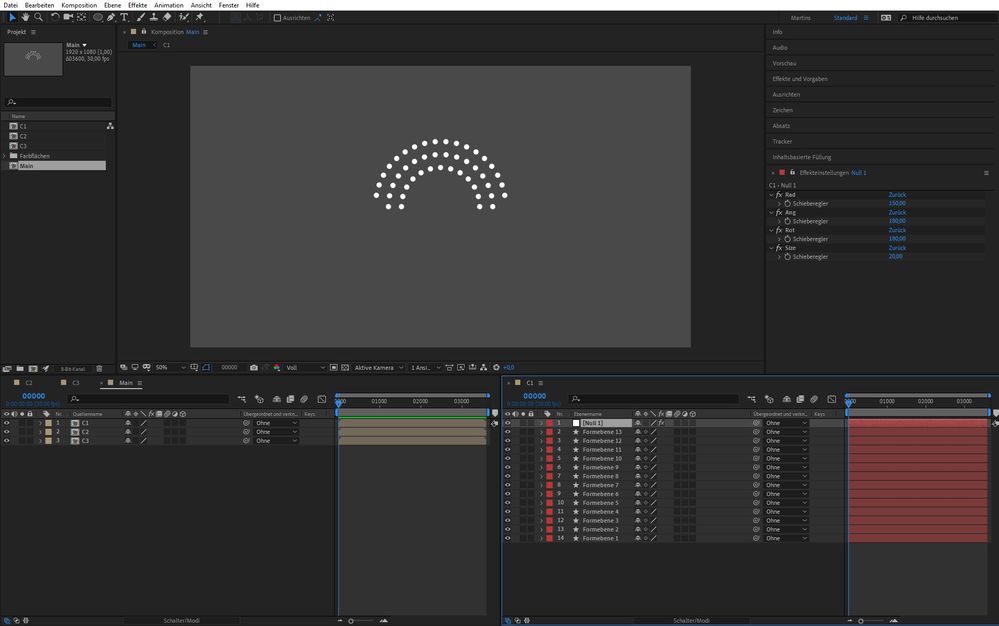
Here comes the AE project for you to play around and understand the code:
https://www.dropbox.com/s/tzrf2trnvo39xyj/CircleDots.aep?dl=0
Have a close look at the expression in the position of the Dot-Layer. I wrote a lot of comments to make the code as understandable as possible.
Hope this helps!
*Martin
Copy link to clipboard
Copied
hello Martin,
It works and i am able to understand a few things but i cannot understand the concept of alpha when used like this. I will take some time to search for answers.
your comments are perfect.
Thank you again for your time.
*
i
Copy link to clipboard
Copied
To be clear on that: alpha is just an angle in this case, not the alpha channel!
We need this angle to calculate the position - like in the formular. When we have several object with several positions on the circle, they all have diffent angles to the center of the circle.
The difference is not random, but has a certain value, depening on the objects and circle span we want to distribute them.
If this is still hard to understand, just put in some numbers.
Let's say, we have 120 degress circle span and 3 dots. We need them at those angles to meet your exampe image:
Dot 1 is at 0 °
Dot 2 is at 60°
Dot 3 is at 120°.
So what is alpha? It's
0*60 for Dot 1
1*60 for Dot 2
2*60 for Dot 3
We can calculate the 60, as well as use the layer index to get the 0, 1, 2.
All the rest of the expression is just there to make it work this way.
Take your time and think about it, play around and sooner or later you'll fully understand.
This was a nice exercise 🙂 Thank you!
*Martin
Copy link to clipboard
Copied
[i'm laughing]
i am from portugal and in portuguese we have AlphaChannel and AlfaAngle (α: alfa, β: beta e γ: gama).
Two diferent words.
Sorry. I will look like it in a absolute diferent way.
🙂
thanks again
*
i
Copy link to clipboard
Copied
Oh man!
Lost in translation I guess.
I'm from Germany and it's like in English: alpha.
However, we say "alpha" and are referring to the alpha channel as well as to the angle. It just depends on the context.
Now things should be clear, aren't they?
*Martin
Copy link to clipboard
Copied
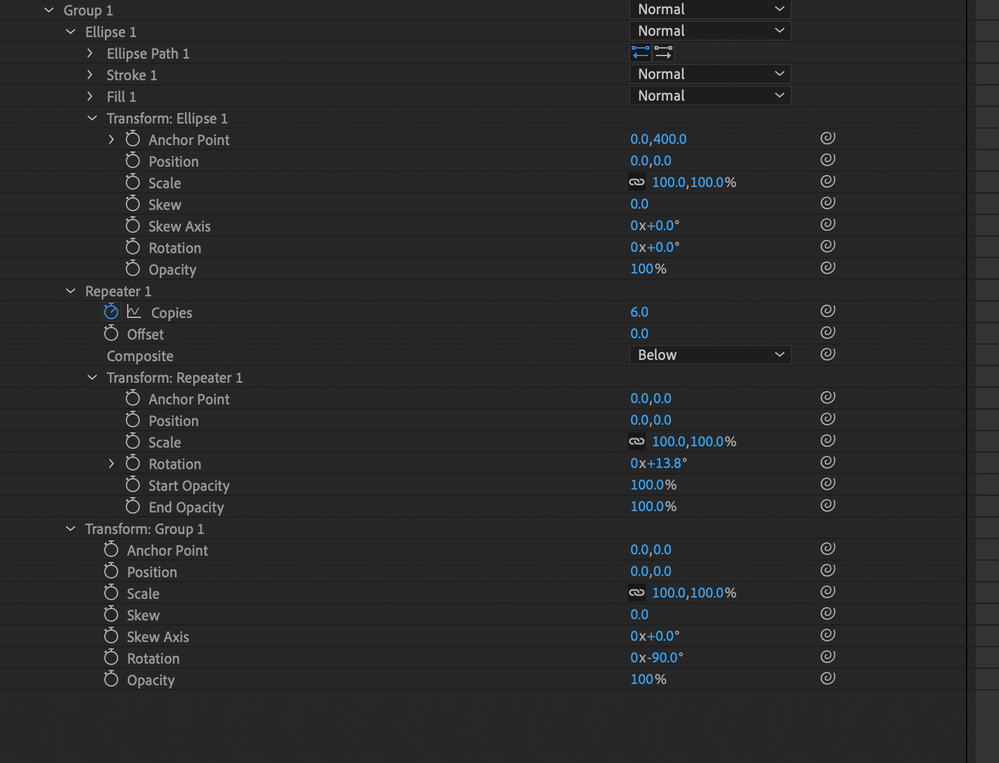
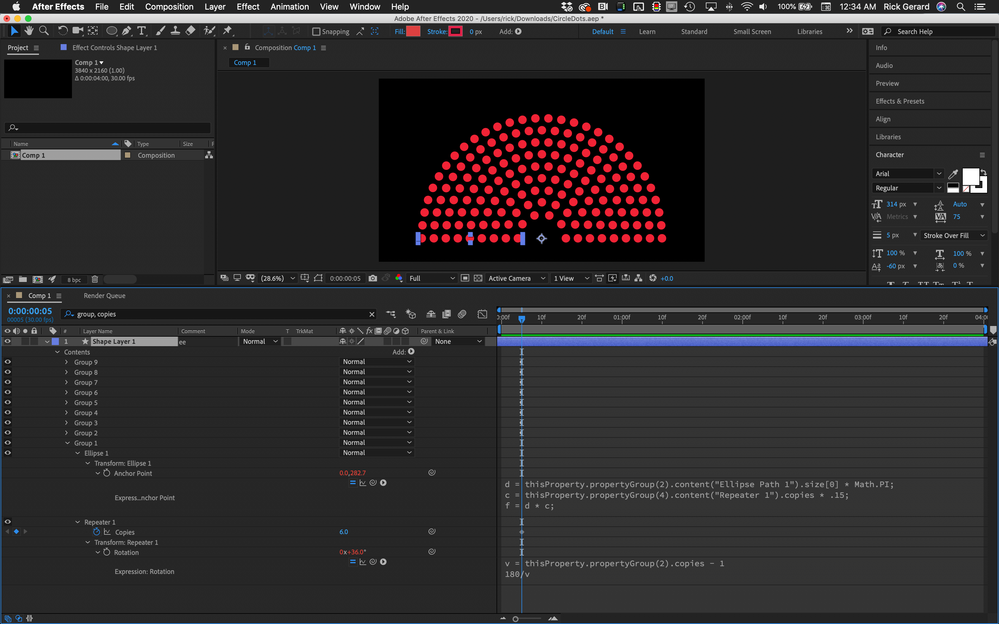
You can do all of the distribution on one shape layer just using repeaters. Start by adding an ellipse, then put the ellipse in a Group. Adjust the Transform Ellipse 1>Anchor point to move it down a bit. Add a repeater to the group, change the default position offset to zero, add a rotation offset to the Transform Repeater, then offset the Transform Repeater 1>Rotation by a few degrees and increase the number of copies. The last step before starting to fiddle with the knobs is to offset the Transform Group Rotation by -90º. You end up with something like this:
When you get something like this setup it is time to start adding some expressions to make things easier. To the Repeater 1>Transform>Rotation property add this expression (uses direct references so you don't have to worry about layer or property names)
v = thisProperty.propertyGroup(2).copies - 1
180/v
Then to make the size of the ellipse help control the radius of the arc add this expression to Transform Ellipse 1>Anchor Point.
d = thisProperty.propertyGroup(2).content("Ellipse Path 1").size[0] * Math.PI;
c = thisProperty.propertyGroup(4).content("Repeater 1").copies * .15;
f = d * c;
[0, f]
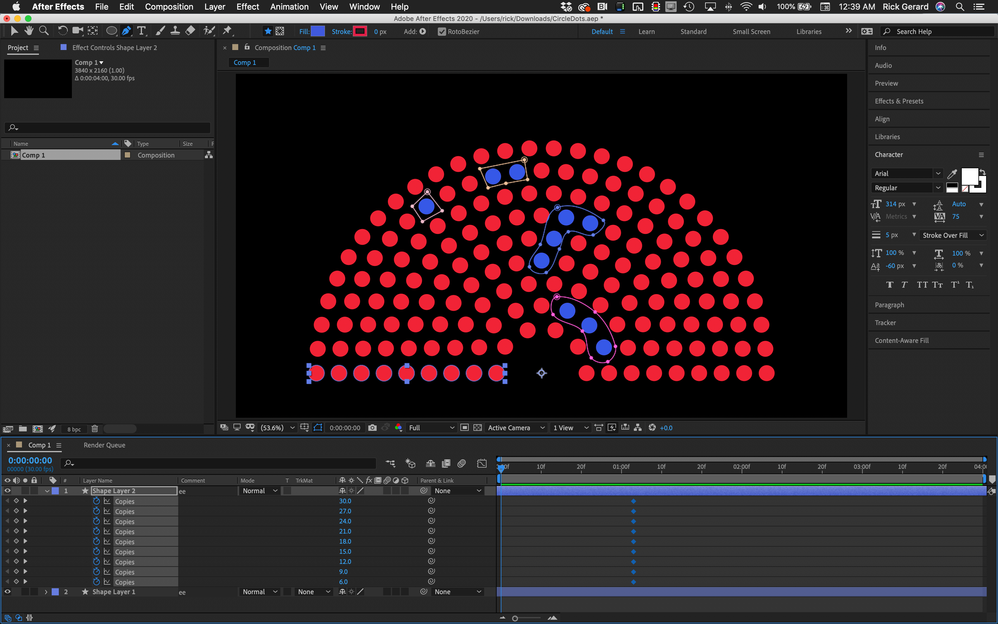
If you duplicate the group a few times and adjust the number of compies You end up with something like this in just a few minutes.
To turn this into a usable animation preset add an Expression Control Sliders and use it as the multiplier for 'copies' in line 2 of the Transform Ellipse 1>Anchor Point expression.
To set the colors for the different seats just duplicate the shape layer, change the fill color, and add some masks.
I am almost certain I posted a very similar workflow a few months ago but I could not find my post. It would be nice to be able to add tags to replies so they are easier to find.
If you want to play around with the project file you will find it here.
(note: sometimes your browser will add a .txt extension to AEP files. If it does, just delete it)
Copy link to clipboard
Copied
Hello Rick,
Thank you so much for your help.
I do not undrstande the propertyGroup direct references:
(i do understand the rest - less one because one is the ellipse and the space beetween and 180/v so that it would be a perfect half)
In
v = thisProperty.propertyGroup(2).copies - 1
180/v
propertyGroup(2) stands for what? for repeater 1
AND if so why is it propertyGroup(4) here?
c = thisProperty.propertyGroup(4).content("Repeater 1").copies * .15;.13 is good for me and i was able to understand that this value works as offset but i can't associate propertyGroup to nothing.
AND why is propertyGroup(2) point to Ellipse Path in here ?
d = thisProperty.propertyGroup(2).content("Ellipse Path 1").size[0] * Math.PI;
I try to change values to propertyGroups(?) in order to understand the logic but it stops working.
but if i obey it works very well 🙂
Now i will download your file just to check.
Thank you again.
*
i
Copy link to clipboard
Copied
Property Groups are direct references to the properties in a layer in the same way that index is a reference to a specific layer.
For example, if you want to connect the position property of a layer to the position property of the layer above, no matter what that layer is your expression would be written like this:
// thisComp.layer("Null 1").position becomes
thisComp.layer(index - 1).position
The quote marks are removed and index - 1 (the layer number minus one) is used to look at the layer above using the layer number instead of the layer name.
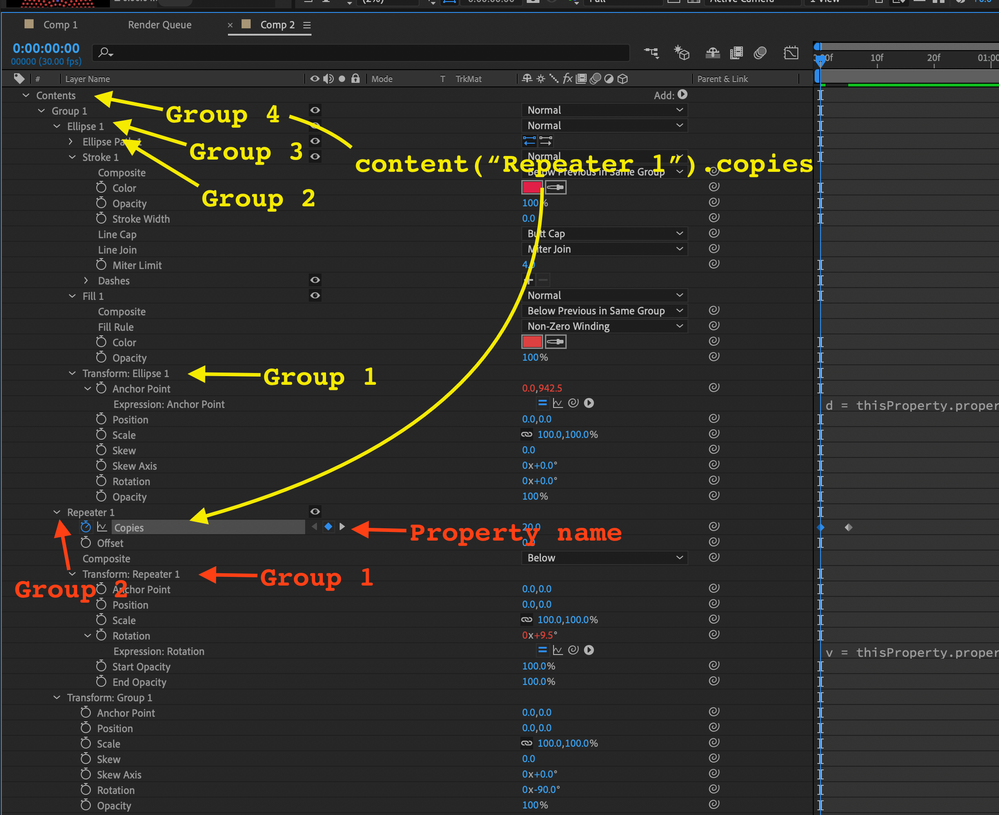
The Property Group is all of the properties under a twirly (>) in the timeline. You just start counting from the current group and you pay attention to the indents.
Carefully check the screenshot. That should help you figure out how to use property groups.
In red: Group 1 is Transforms Repeater 1, group 2 is Repeater 1 - one level back in the hierarchy.
In yellow: Group 1 is Transform Ellipse 1, group 2 is Ellipse 1, group 3 is Group 1, and Group 4 is Contents. So that means:
content("Group 1").content("Repeater 1").copies is exactly the same thing as thisProperty.propertyGroup(4).content("Repeater 1").copies
I hope that clears things up.
