 Adobe Community
Syncing video to wav file

Copy link to clipboard
Copied
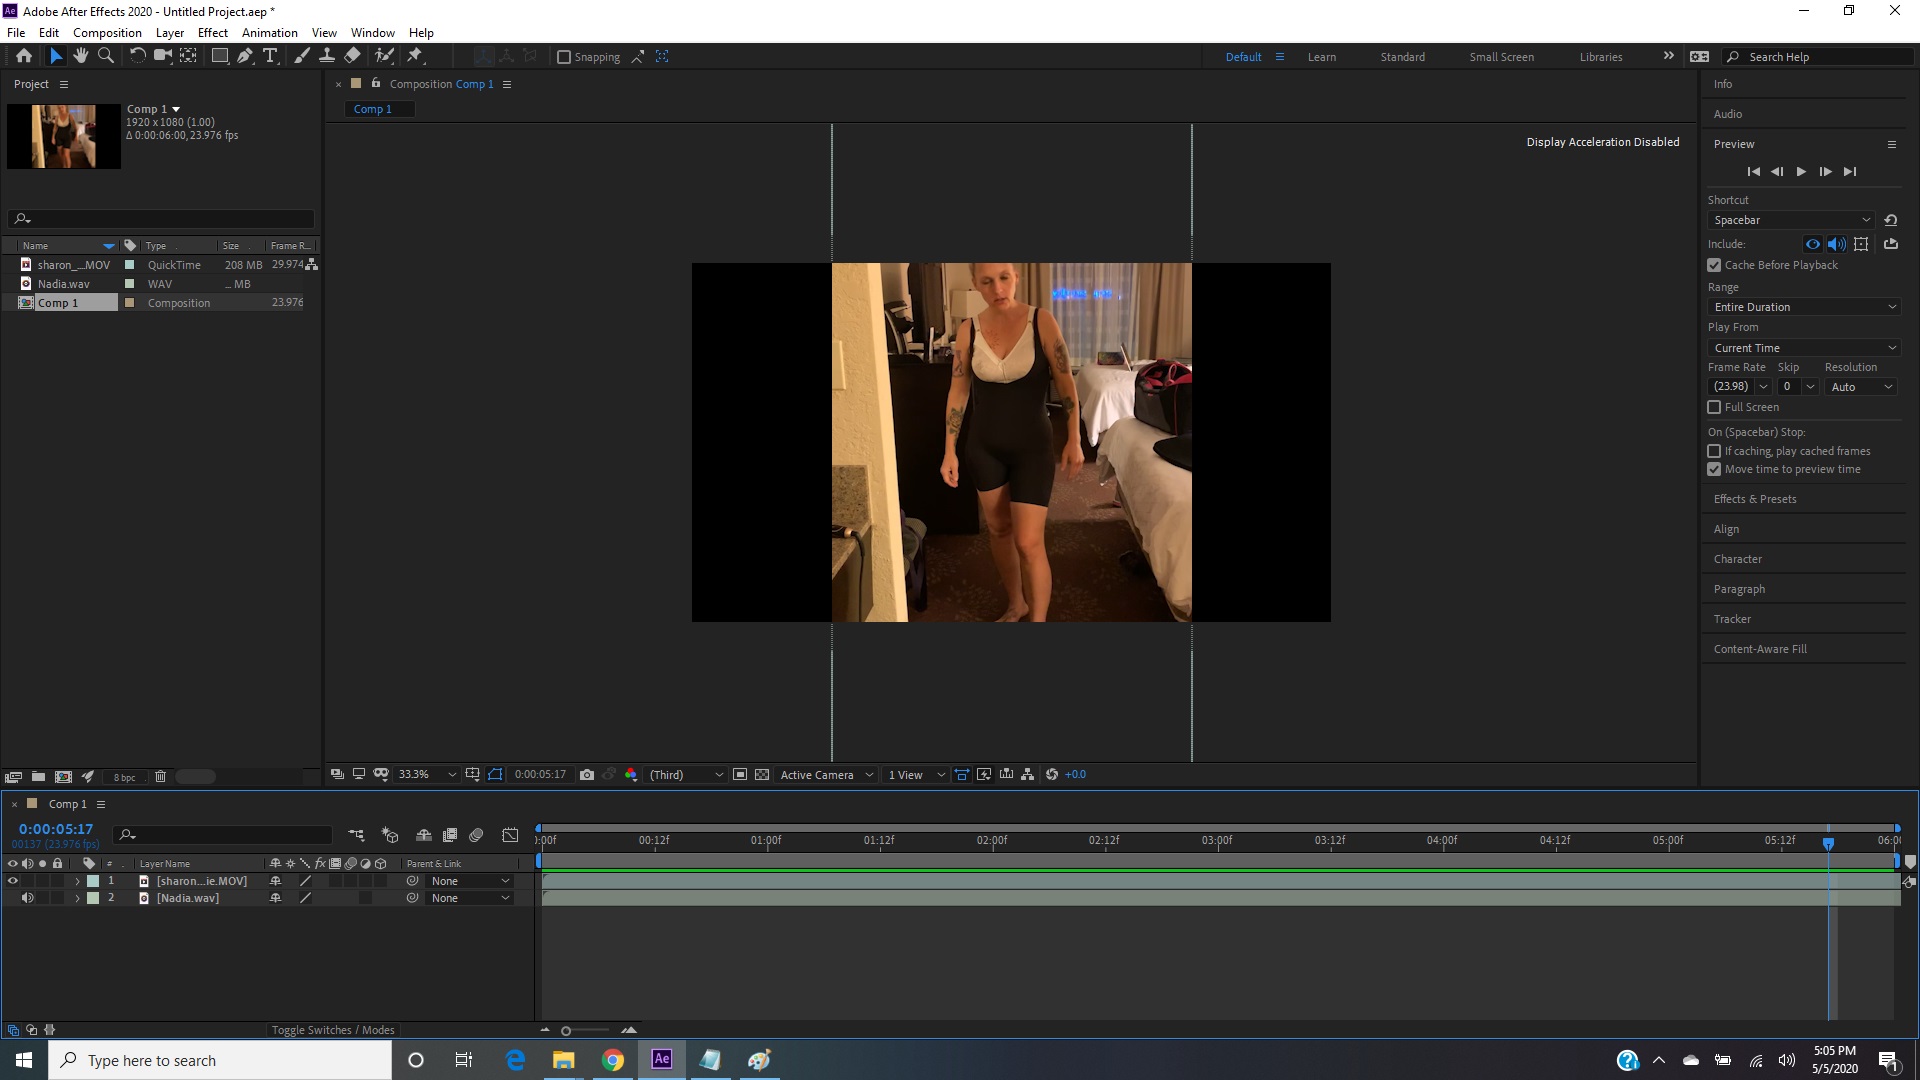
Hello. I am trying to sync video with wav file. So far, I have slowed down the speed on the video, and now I want to work with the timing, but during playback, the thin red line (whats that called?) races across the time line and in a ONLY few seconds it starts over again.
I am finding it very hard to find resources for learning the very simple beginner stuff, but I would love some help.
The duration in the settings is 6 minutes.
Thank you.


 5
Replies
5
5
Replies
5

Copy link to clipboard
Copied
The behavior is inherent in your workflow - you change something that forces AE to resample/ recalculate the audio, causing it to use a RAM preview instead of its limited realtime playback capabilities. And the red line is called the current time indicator (CTI). It might help if you actually started reading the online help. All this stuff is explained there and even if it may not be the best resource, it's better than blindly diving into tutorials that assume prior knowledge. That aside AE is scertainly the wrong program for what you are trying to do. That's what Premiere pro is for...
Mylenium

Copy link to clipboard
Copied
So here's what I see in your comp - and it's easier to see when embedded using the toolbar:

Starting in the Project panel, you have created an HD comp that is 23.976 fps, which is the NTSC Standard for 24 fps broadcast video with a 3:2 pulldown. You're ok there because you have not attempted to set a custom frame size or frame rate and your final video will render properly, but there is a but.
The but is that the Sharon _MOV file is vertical and 29.974 fps so you are not matching frame rates so you are missing data. If you were going about this following the proper workflow you would fix the interpretation of the Sharon_MOV file and adjust it to the closest standard - 29.97 fps and check the frame size. If you want to export a vertical video then you need a vertical comp that is 19:6 (1080 X 1920) if you plan to post the video on any of the standard social media platforms that accept vertical videos. I don't know your intention so the only real problem may be the mismatched frame rates, and that problem results in some skipped or blended frames that are usually not noticeable in a cell phone video.
Now let's talk about what is going on in the comp. You have an audio track and a video track that appear to be longer than the comp so you will be losing part of both of them. I know that the audio track is a WAV file so I'm hoping that it is at least a standard 40KHZ 16-bit PCM WAV file, because that is the minimum standard format for video.
From your description it sounds like you just want to sync up the video and the audio. I don't see any added effects, and you did not mention any intention to add some. After Effects is the wrong tool for doing this kind of work. It is easy in Premiere Pro, it is easy in Audition. After Effects is the most inefficient tool in Adobe's toolbox to sync up an audio track that is six minutes long with a video.
If you really want to try and sync up the audio then you at least are started in the right direction because the Comp Panel resolution is set to auto which gives you 1/3 at a 33% magnification factor. This means you will get a few seconds of real-time playback, but you'll never get six minutes. Never. I would not expect 6 minutes of playback even on my fully loaded, and I mean can't buy any more memory or faster drives or a better processor and GPU for AE work for any amount of money, desktop computer.
If you want to sync up the audio move the CTI (current time indicator) down the timeline until the actor (Sharon?) starts to sing, or dance, or do what you want to sync up with the music and add a layer marker (use the Layer menu if you do not know the keystroke but take note of the Keyboard Shortcut). The second step is to select the audio layer (Nadia.wav). solo the layer so AE won't have to preview the video, and press the 'l' key twice to reveal the waveform. Look for a significant change in the audio that might be a downbeat or the event you want to sync to, move the CTi to that location, and press the Spacebar (default) to start a preview. You should see the red line move and hear the audio almost immediately. You will hear if you have chosen correctly. If you are a frame or two off you can hold down the Ctrl/Cmnd key and drag a frame at a time to play just one frame of audio. When you have found the magic sync spot add a marker to the audio track layer.
All you have to do then is to drag one or both of the layers around in the timeline using the selection tool (v) until the markers line up. You have now synced the audio to the video track.
To check and see if the sync holds up for the entire duration of the comp you just have to move to the ending part of the video and run a short preview to see if Sharon is still in sync with the audio track. If she is, then you are done. If she is not then you are going to have to time stretch the Sharon video - not the WAV flayer to get them back in sync.
All of this is much easier to do in Premiere Pro, and if the video timing is perfect and you need to adjust the audio timing without changing the pitch, Audition is the right tool for that.
The project would take me about 2 minutes to sync up in Premiere Pro, maybe 4 in After Effects, if I didn't have to adjust the timing of the video to fix the duration problems. If I had to stretch the video two or three different ways to get it in perfect sync with the audio I would still use Premiere before I used After Effects. The only time I would use AE for this kind of project is if I had to do things to the entire 6 minutes of the video layer that could not possibly be done in Premiere Pro, but even then, I would probably sync the audio in PPro or Audition, render a new video file to a production format with the new audio track, and then do my visual effects in AE.
I hope this helps. The biggest newbie problem I see with AE users is trying to use AE to edit. The second biggest problem, doing things in AE that are more efficiently done in another app, and the third biggest problem I see is trying to do everything on one layer. More than 90% of my AE comps are under seven seconds because 7 seconds is about the average shot length in any movie and AE was designed for and best suited to creating shots.
Good luck. Make sure that you vet the presenter in every tutorial you find (most are enthusiasts that don't know how to explain or how to work efficiently), and spend some serious time with the User Guide. It will save you days of fiddling around pushing buttons and waiting for responses from the forums.
Copy link to clipboard
Copied
Hello! I am finally taking the time to read your response, and there is a lot to take in there, so for now, I just want to say thank you. If I have a follow up question, is it better to post it to this thread, or to start a new one?
Warm Regards,
Marlene
Copy link to clipboard
Copied
If you have more questions on this same workflow stick to this thread. The first thing to do is expose the waveform (LL) on the audio layer, then set some markers. You should be able to preview audio-only and watch the time marker (red line) move in realtime so you can see how accurate your markers are. Then it's just a matter of making the adjustments you want to make in the video by setting keyframes where you want the action to change and dragging them to the markers on the audio layer.
Copy link to clipboard
Copied
I am returning to this information now, and learn from it ongoingly. I cannot thank you enough for all the information!

 AdChoices