 Adobe Community
- Home
- After Effects
- Discussions
- Use scale from an object in comp to scale a separa...
- Use scale from an object in comp to scale a separa...
Copy link to clipboard
Copied
I work for an NBA team that has dozens of sizes of digital signage screens. Long, tall, small, you name it.
One of the most time consuming things is getting backgrounds into all the comps every time we create a new job starting from scratch.
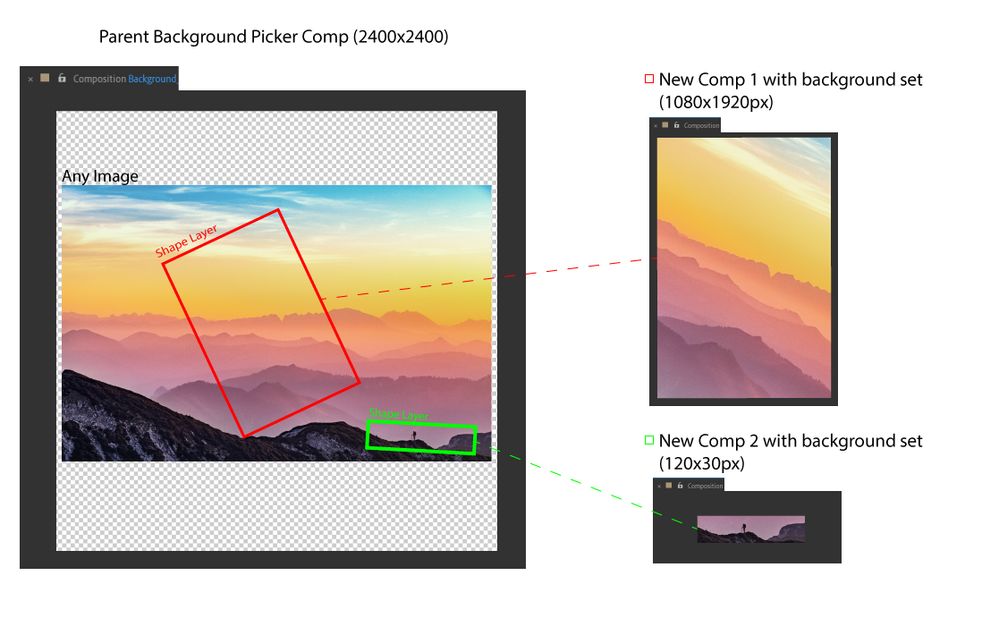
I am creating a template that will (hopefully) allow a user to place one background into a master precomp - and then move around shape layers for the corresponding sign which will drive the position/rotation/scale properties for the pre-placed background layer in each comp.
For instance if I have this landscape picture, and as I move around the two (example) shape layers, the following comps will have the background set.
The rotation and position are relatively easy for me to figure out with expressions. (Rotation for example is Rotation of shapeX in source comp *-1)
But the scale is killing me.
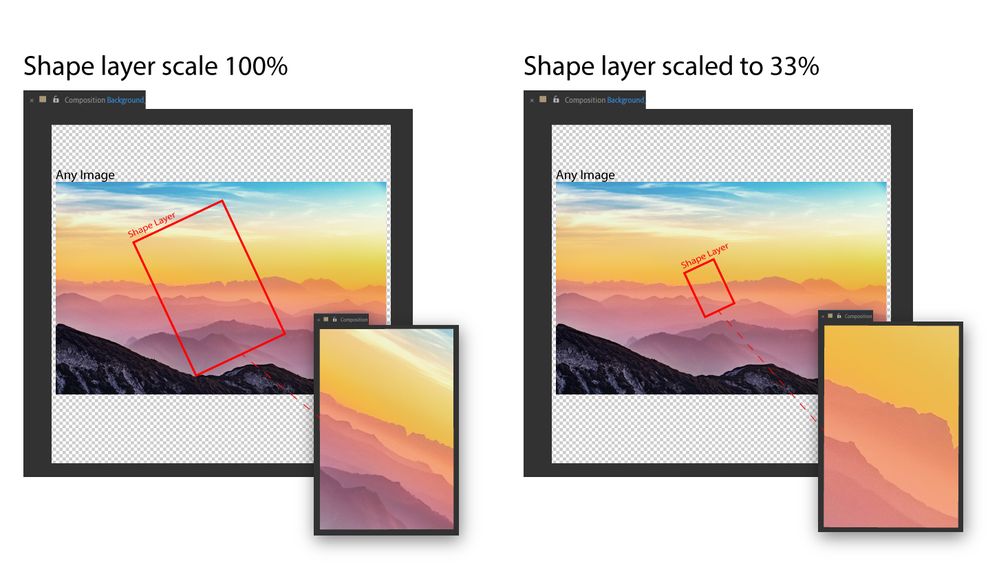
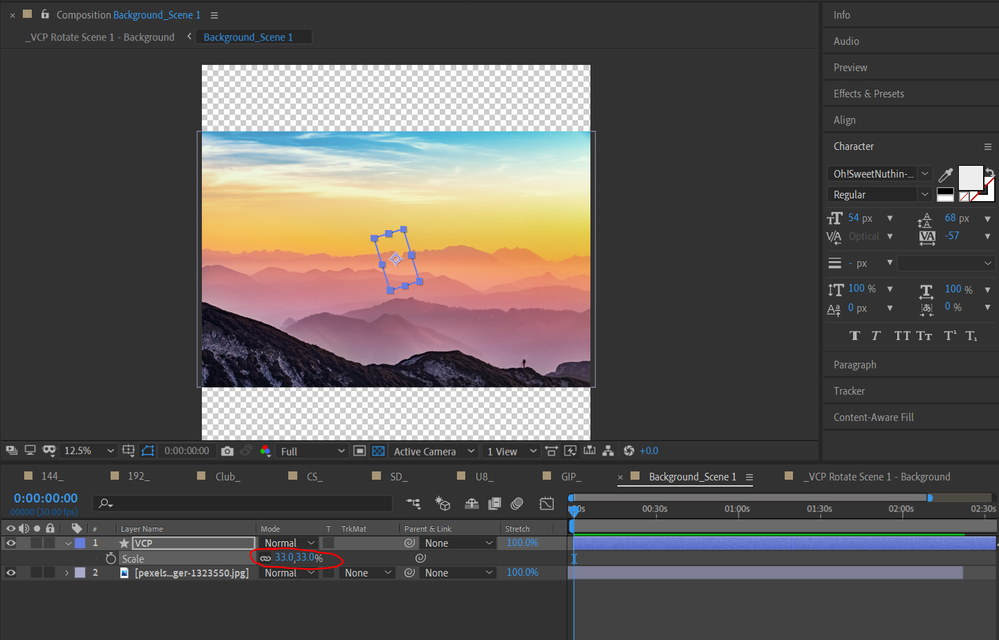
If I don't scale the shape there's no problem. If I do want to scale the shape (using "scale" not shape size) I can't figure out a formula that will fit the background into place like it would in this 33% example.
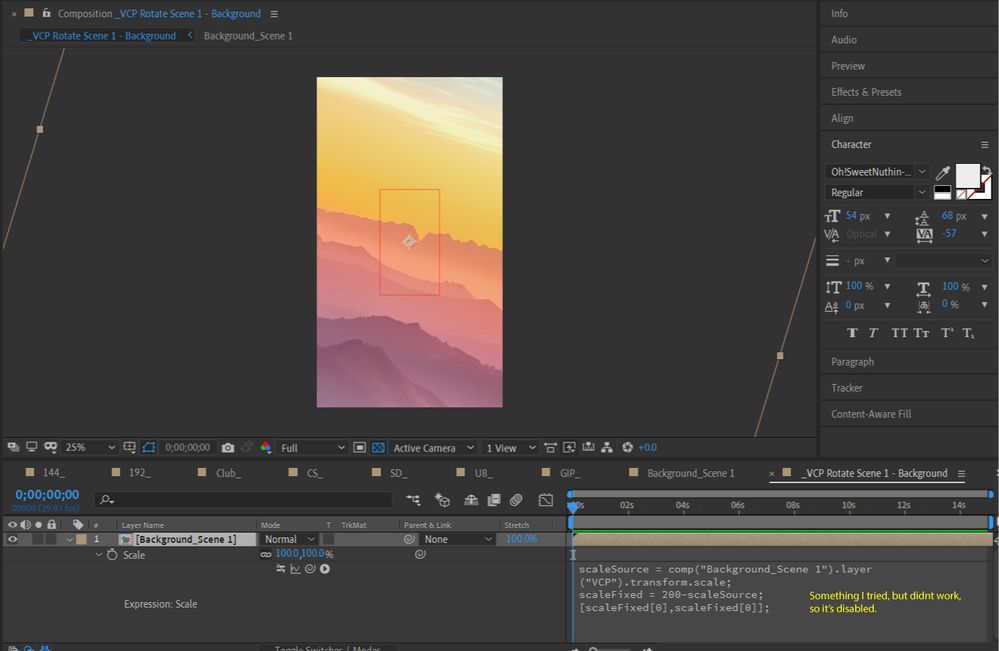
What formula/expression would I use that takes the (33%) scale of the shape layer, to then scale up the background in the corresponding comp?
Master Comp Above
Corresponding LED Screen Comp Below
Thank you!
 1 Correct answer
You can tackle problems like this by sketching them out and keeping it simple; testing the formula with simple figures at first.
You already know how to match the Position and Rotation.
For the Scale:
Make sure the Picker is the same size (and aspect) in pixels as the Target Composition at Scale 100%
Now if you Scale the Picker, get the Scale value as decimal (100% = 1 ; 50% = 0.5)
The Scale in the Target is (1/Picker Scale)*100
eg when you zoom in, scale the picker to 50%, the comp in the Target is
...Copy link to clipboard
Copied
I'm not going much into detail here, but things should get easier if your shapes original size is equal the size of your picker comp. A scale of 100 is something you'll probably never use, but the math will get way simplier, just like you did on rotation.
*Martin
Copy link to clipboard
Copied
You can tackle problems like this by sketching them out and keeping it simple; testing the formula with simple figures at first.
You already know how to match the Position and Rotation.
For the Scale:
Make sure the Picker is the same size (and aspect) in pixels as the Target Composition at Scale 100%
Now if you Scale the Picker, get the Scale value as decimal (100% = 1 ; 50% = 0.5)
The Scale in the Target is (1/Picker Scale)*100
eg when you zoom in, scale the picker to 50%, the comp in the Target is 1/0.5 * 100 = 200%
Hope this helps!
Copy link to clipboard
Copied
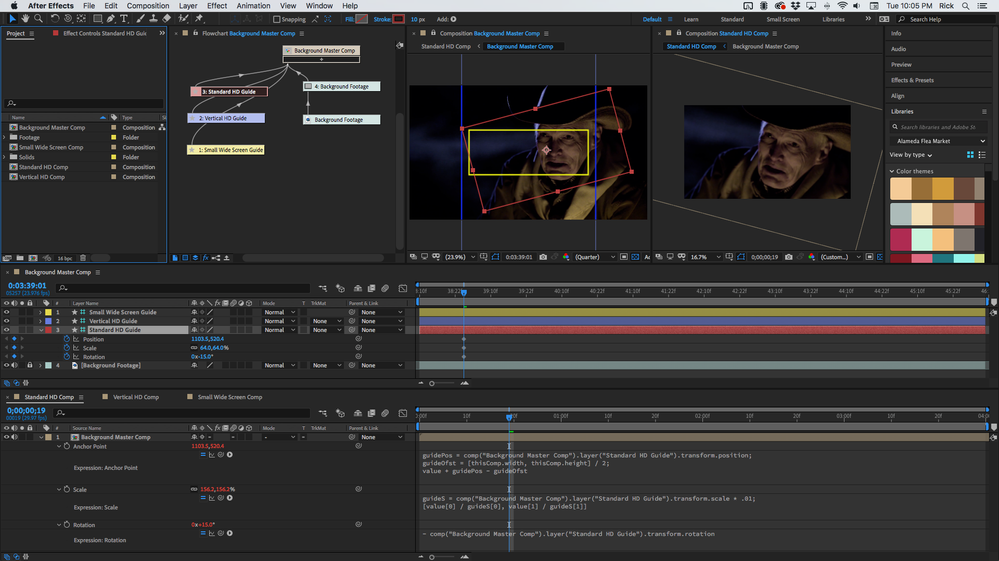
I'm not sure that I am following you at all. It sounds like you want a background comp containing a shape layer that isn't rendered that can be used as a framing guide for rendering comps that contain the background and maybe some other graphics. Did I get that right? Your master Background Comp will have an image and 3 guide layers that are shape layers, that you can use to position the background in a standard HD comp, Vertical HD comp, and a Small Landscape Comp.
If that is right then you have to calculate the difference between the scale of the guide layer, the rotation of the guide layer, and the position of the guide layer using Position Scale and Rotation of the Guide layer in the appropriate rendering comp by offsetting the position rotation and scale so the framing in the rendering comps matches the framing of the guide layers. If that is right my comp structure flow chart would look like this:
This is what the expressions would look like:
// Anchor Point
bgComp = comp("Background Master Comp");
guidePos = bgComp.layer("Standard HD Guide").transform.position;
guideOfst = [bgComp.width, bgComp.height] / 2;
value + guidePos - guideOfst

//Scale
guideS = comp("Background Master Comp").layer("Standard HD Guide").transform.scale * .01;
[value[0] / guideS[0], value[1] / guideS[1]]

//Rotation
- comp("Background Master Comp").layer("Standard HD Guide").transform.rotation
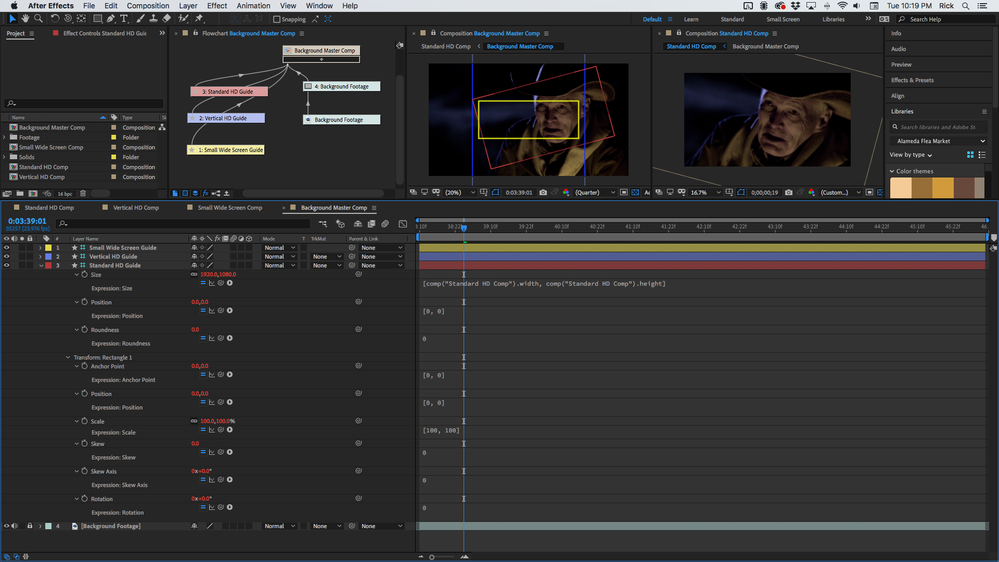
Set up a shape layer guide the same size as your Rendering Comps, make sure the Shape Layer Rectangle properties are all zeroed out so the rectangle is centered on the anchor point, and change the Layer name to match the guide and positioning the guides will position the background.
I would also add these expressions to the shape layers contents properties so that you couldn't inadvertently get things out of alignment. Just modify the comp names and set the comp sized guide layers up like this:
Here's a sample comp for you to play with. Use your own footage and fiddle with the comp size of the Background Master Comp. I made a short video showing how the project works.
If that is not what you are trying to do let us know. It's not how I would have handled the project. I would be using Master Properties.
