 Adobe Community
- Home
- After Effects
- Discussions
- What Color Working Space for Feature Film VFX Done...
- What Color Working Space for Feature Film VFX Done...
Copy link to clipboard
Copied
I'm editing my first feature and am doing the first VFX shot to set up the workflow we'll be using for VFX on this project. The VFX team will be using .R3Ds within AE for the effects and exporting log DPX sequences for each VFX clip to go to color. We would like to follow the RED IPP2 pipeline as much as possible, and so I am wondering if I should set the interpret footage settings of the R3Ds to WideGamutRGB log3G10 and the AE working space to Rec.709 Gamma 2.4 or have the working space set to WideGammutRGB like the footage.
I have an adjustment layer with a LUT in the vfx comp to approximate the final color and which I am disabling before I export. Also, we'll be grading the film to Rec.709 before creating the DCP as the budget doesn't allow for a P3 grade and VFX pipeline.
I appreciate any help, thanks.
 2 Correct answers
My standard workflow is to work with uncorrected footage as much as possible, use an adjustment layer on top with very simple color correction to double-check the composites and effects for accuracy, then turn it off and render to a visually lossless format to send to the edit so color correction inside the NLE is consistent. Inside the NLE I do 90% of my color correction with an adjustment layer above all of the video tracks that sets the basic look, then additional adjustment layers or color c
...That's a perfect example. Temp CC adjustment layer on top of everything + color correction on the added material to make it match the original. If I am visualizing the transition and the changes to Still Plate 1 that are required I think you are animating the color correction of that plage so that it matches both incoming and outgoing frames. When you turn off the temp CC adjustment layer the transition should still look like it matches when you look at the log footage.
Copy link to clipboard
Copied
My standard workflow is to work with uncorrected footage as much as possible, use an adjustment layer on top with very simple color correction to double-check the composites and effects for accuracy, then turn it off and render to a visually lossless format to send to the edit so color correction inside the NLE is consistent. Inside the NLE I do 90% of my color correction with an adjustment layer above all of the video tracks that sets the basic look, then additional adjustment layers or color corrections are applied to each shot for the final grade. The choice of color correction that you use to check shots in AE is completely up to you but you must make sure that you are NOT adding any baked-in color correction to the original footage in the shots. This doesn't mean that you don't color correct the other layers in the shot.
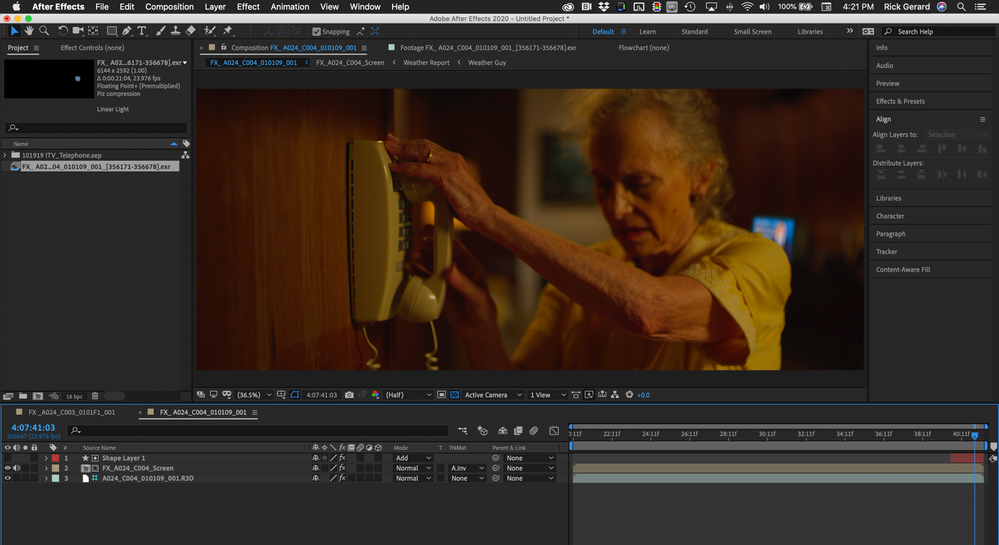
For some types of VFX shots, I'll set the original footage layer as a guide layer and render a DI with transparency so that the composite can be done by just dropping the composite above the original shot in the NLE and fine-tuning the color grade there. I recently did a bunch of TV screen replacement shots for a film and I sent the replacement screen to them so they could perform separate color corrections on the screen and the original footage. The comp looked like this:
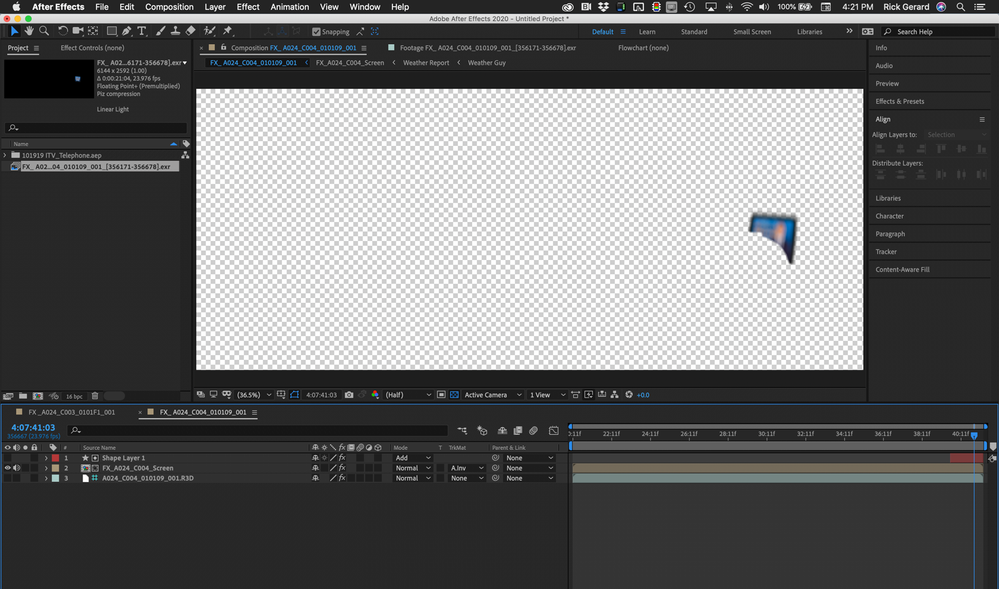
But this is what the render looked like, just the replacement TV screen. That gave the colorist the ability to fine-tune both the original shot and the replacement screen. If I had rendered the entire composite and they wanted to remove saturation and add blue to the TV screen the final color grade would have been a lot more difficult.
It is almost always a really bad idea to color correct an After Effects project, then render the shot and add it to a project that is going to need additional color correction.
When you do the final render for delivery to the editor it is important that you either turn of color management completely or perfectly match the color workflow for everyone else in the team. More than 90% of the time, I have CM turned completely off.
I hope this helps. When I get to my desktop I might be able to post a couple more screenshots to give you a little better idea about the workflow.
Copy link to clipboard
Copied
Hey thank you for your thorough response. This is really helpful.
I am using the method of putting the LUT used on set on an adjustment layer above my footage, the footage being set to a log (widegamutRGB) colorspace, and I am disabling that LUT when I render out.
The shot I'm currently working on is a vfx-made whip pan from one shot to the next with two plate DPX plate stills in between to sell the effect. The pan is so fast and motion blurred that the still plates are just filler and sell the impression that the "camera" is panning 180 degrees.
The order of the whip pan is:
Shot 1 - .r3d
Still Plate 1 - .dpx (originally from an .r3d)
Still Plate 2 - .dpx (originally from an .r3d)
Shot 2 - .r3d
Shot 1 and Still Plate 1 appear on screen simultaneously as the camera begins to pan, so I've adjusted the color balance of Still Plate 1 to match Shot 1 (they were shot a different times of day and so do not perfectly match). I'm still rendering out the whole export in the log colorspace, but is it an issue that I have applied mild color correction to Still Plate 1 so that it matches Shot 1 and the effect is seamless? I would think that I am saving the colorist a headache by making this minor color adjustment to the different elements of the VFX sequence in order to match them, especially when they are heavily motioned blurred in the final VFX shot. Does this qualify for what you meant when you said:
The choice of color correction that you use to check shots in AE is completely up to you but you must make sure that you are NOT adding any baked-in color correction to the original footage in the shots. This doesn't mean that you don't color correct the other layers in the shot.
Copy link to clipboard
Copied
That's a perfect example. Temp CC adjustment layer on top of everything + color correction on the added material to make it match the original. If I am visualizing the transition and the changes to Still Plate 1 that are required I think you are animating the color correction of that plage so that it matches both incoming and outgoing frames. When you turn off the temp CC adjustment layer the transition should still look like it matches when you look at the log footage.
Copy link to clipboard
Copied
Exactly. That answers my question, thank you!
One further question:
This was an indie feature and was shot pretty quickly, so Shot 2 color balance/exposure does not match Shot 1 closely enough. Would you advocate adjusting the color balance/exposure of Shot 2 to match the color balance/exposure of Shot 1 so that all elements match seamlessly, as opposed to say altering the color of Still Plate 1 to match Shot 1, and then altering the color of Still Plate 2 to match Shot 2 and placing a cut in the clip within the whip pan between Still Plate 1 and Still Plate 2.
Basically, my question is is it okay to make some minor color changes to Shot 2 to match it to Shot 1 in this scenario, and if so, is Lumetri fine to use for that adjustment.
We are at the very beginning of post on this project, so I'm trying to be very cautious and thorough with establishing the workflow. Thanks for your help
Copy link to clipboard
Copied
My standard workflow is to put an adjustment layer on top of all of the footage in the Premiere Pro timeline and apply the basic correction there. That is where I establish the basic look of the film. I usually have to pick a specific shot in the sequence and get that color nailed down as close as I can.
Then each shot is graded to match with another instance of Lumetri applied.
Here's another hint. Create a new sequence for each shot in the movie. I recently cut a 3-minute industrial video shot in 4 locations. I made 4 separate sequences, one for each location, then combined them in the final sequence. All of the sequences had the same adjustment layer with the same settings, but each sequence was individually corrected to change the tone of the story. I may work that way because I started editing on a Moviola when reels could only be 10 minutes long, but I still think that is the most effective and efficient way to edit anything longer than a few minutes. You'll really appreciate the "each scene is a separate sequence" method when you start doing the final polish.
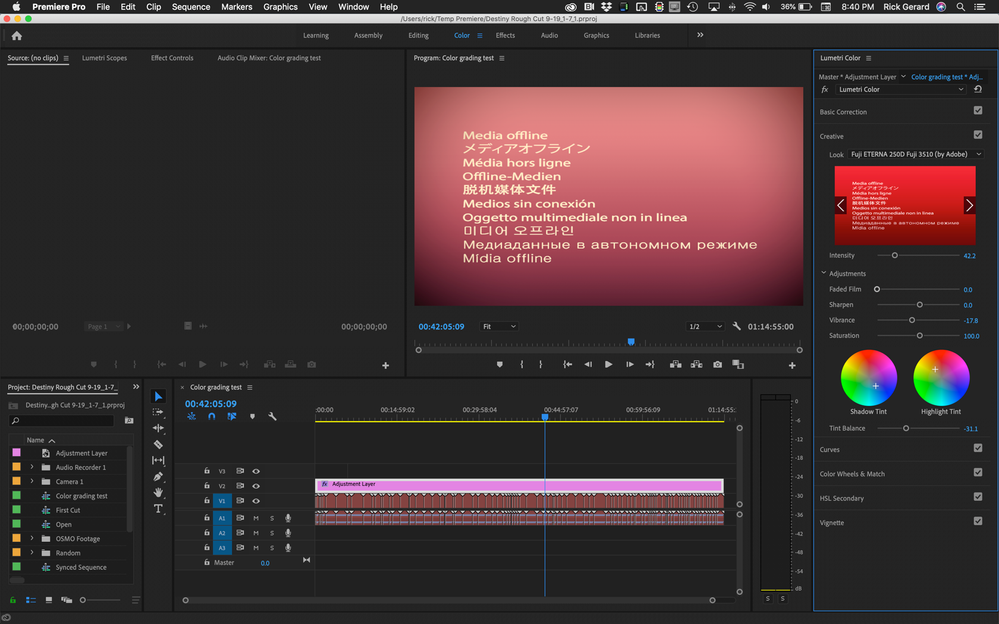
Here is a screenshot of one of the final color tests that I made on a recent film. I did not take the time to hook up the drive with the footage but here is what the one of the last color grading passes looked like on a 40-minute film:
Every one of the cuts you see is a separate color graded sequence. Every one of those sequences had several shots that were individually color graded and a master color correction adjustment layer as the top layer. To finalize the grading of the entire film I added another adjustment layer on top of the entire movie to finalize the color grading. There are no keyframes on that adjustment layer. You can see my final tweaks on the Highlight and Shadow tint. Curves, HSL secondary, and Vignette are also adjusted for the final color pass. This gave me a very easy way to finalize the look of the project and when the director wanted things a little warmer one small adjustment in the Highlight tint fixed the entire movie.
I hope this helps.
Copy link to clipboard
Copied
Yeah thanks for sending!
We'll be doing the grade in Resolve, so my intent is to be as non-destructive with the VFX shots as possible so that the colorist will just be able to grade them in the color timeline(s) along with the rest of the footage and the VFX shots will behave very similarly to the raw footage.
It's looking like I'm at least in the ballpark, though every workflow is different. Hopefully I can just avoid any dangerous mistakes early on in the process.
Copy link to clipboard
Copied
Hi. I've been looking for answers about this all over the web for days. This is the first decent answer I've seen. The main issue I have with this aproach is when using something really colourful like Red Giants Trapcode particular that I would have to grade each effects layer to fit in. Is there no other way of setting a colour space like ACES so that it does the work for you, instead of having to have adjustment layers?
Copy link to clipboard
Copied
I would use the practices here as my guide and choose a workflow that suits me depending on the comp tasks and post production pipeline. typically for vfx comp work that's more than basic I would use a linear workflow with or without ACES.
https://www.youtube.com/watch?v=lns6AuJzBnI&t


