
Feature Focus: Starter mode and Quick Export
Everyone can start animating now through live performance and triggerable poses and emotions.
Introducing Starter mode, a streamlined interface that focuses on performing, recording, and exporting characters. No need to be an expert rigger. No need to have a Creative Cloud subscription to use. Upgrade to Pro mode when you are ready.
We’re also introducing Quick Export. Easily generate a movie file of your animation. Quick Export takes the frustration and guesswork out of exporting. Just click the Quick Export button in the header bar, then click Export. Quick Export is available in both Starter mode and Pro mode (the existing, fully featured experience of Character Animator).
Creating a free Adobe account and installing the Beta build
Starter mode for Character Animator (Beta) can be used even if you do not have a Creative Cloud subscription. You still need to have an Adobe account. Also, note the system requirements, which are similar to the non-Beta version.
The following steps describe how to create a free Adobe account and download Character Animator (Beta). If you have an existing Adobe account, you can also use it with Starter mode.
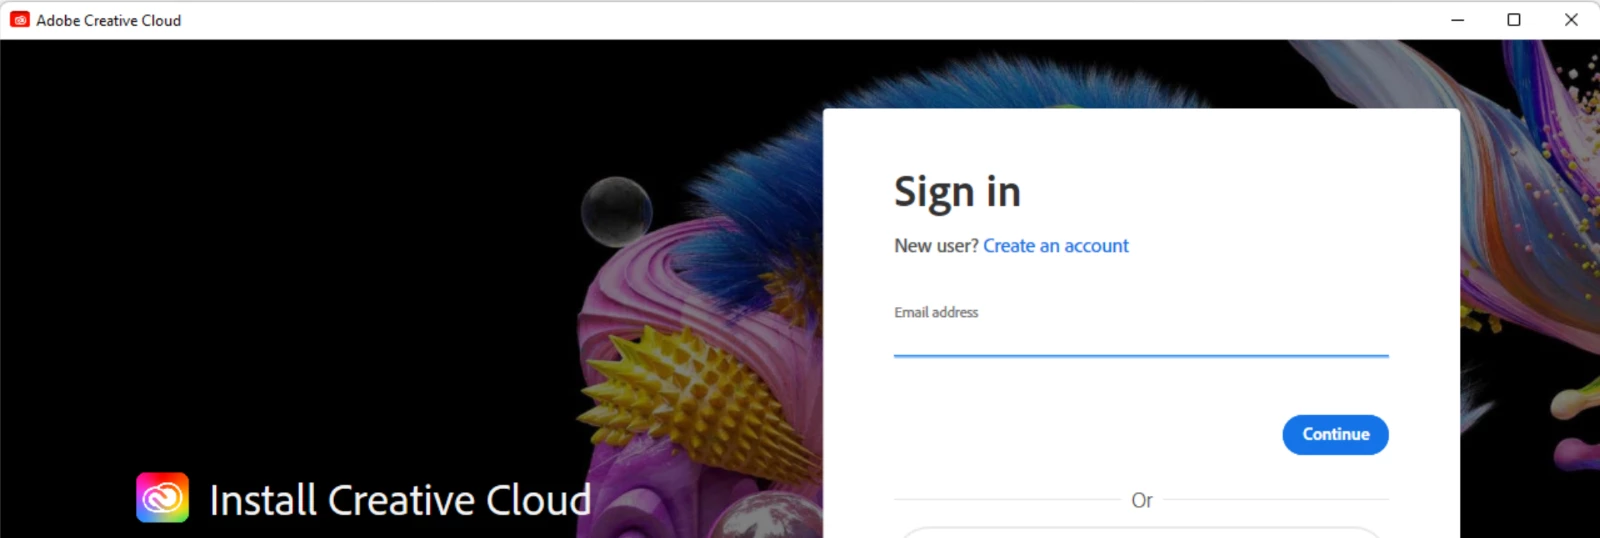
- Download the Creative Cloud desktop app and create a free Adobe account, as follows:
a. From a web browser, go to https://creativecloud.adobe.com/ and click Download Creative Cloud.
b. Run the Creative Cloud installer and follow the prompts.
c. On the Sign in screen, click Create an account, then fill in the information to create a new Adobe account.
d. Follow the prompts after that to complete the installation of the Creative Cloud desktop app. - In the Creative Cloud desktop app, go to the Apps tab, then the Beta apps category, then click Install for Character Animator (Beta).

The installation of Character Animator (Beta) also installs Media Encoder (Beta), but you can cancel the Media Encoder (Beta) installation as Starter mode does not require it for exporting to a movie file.
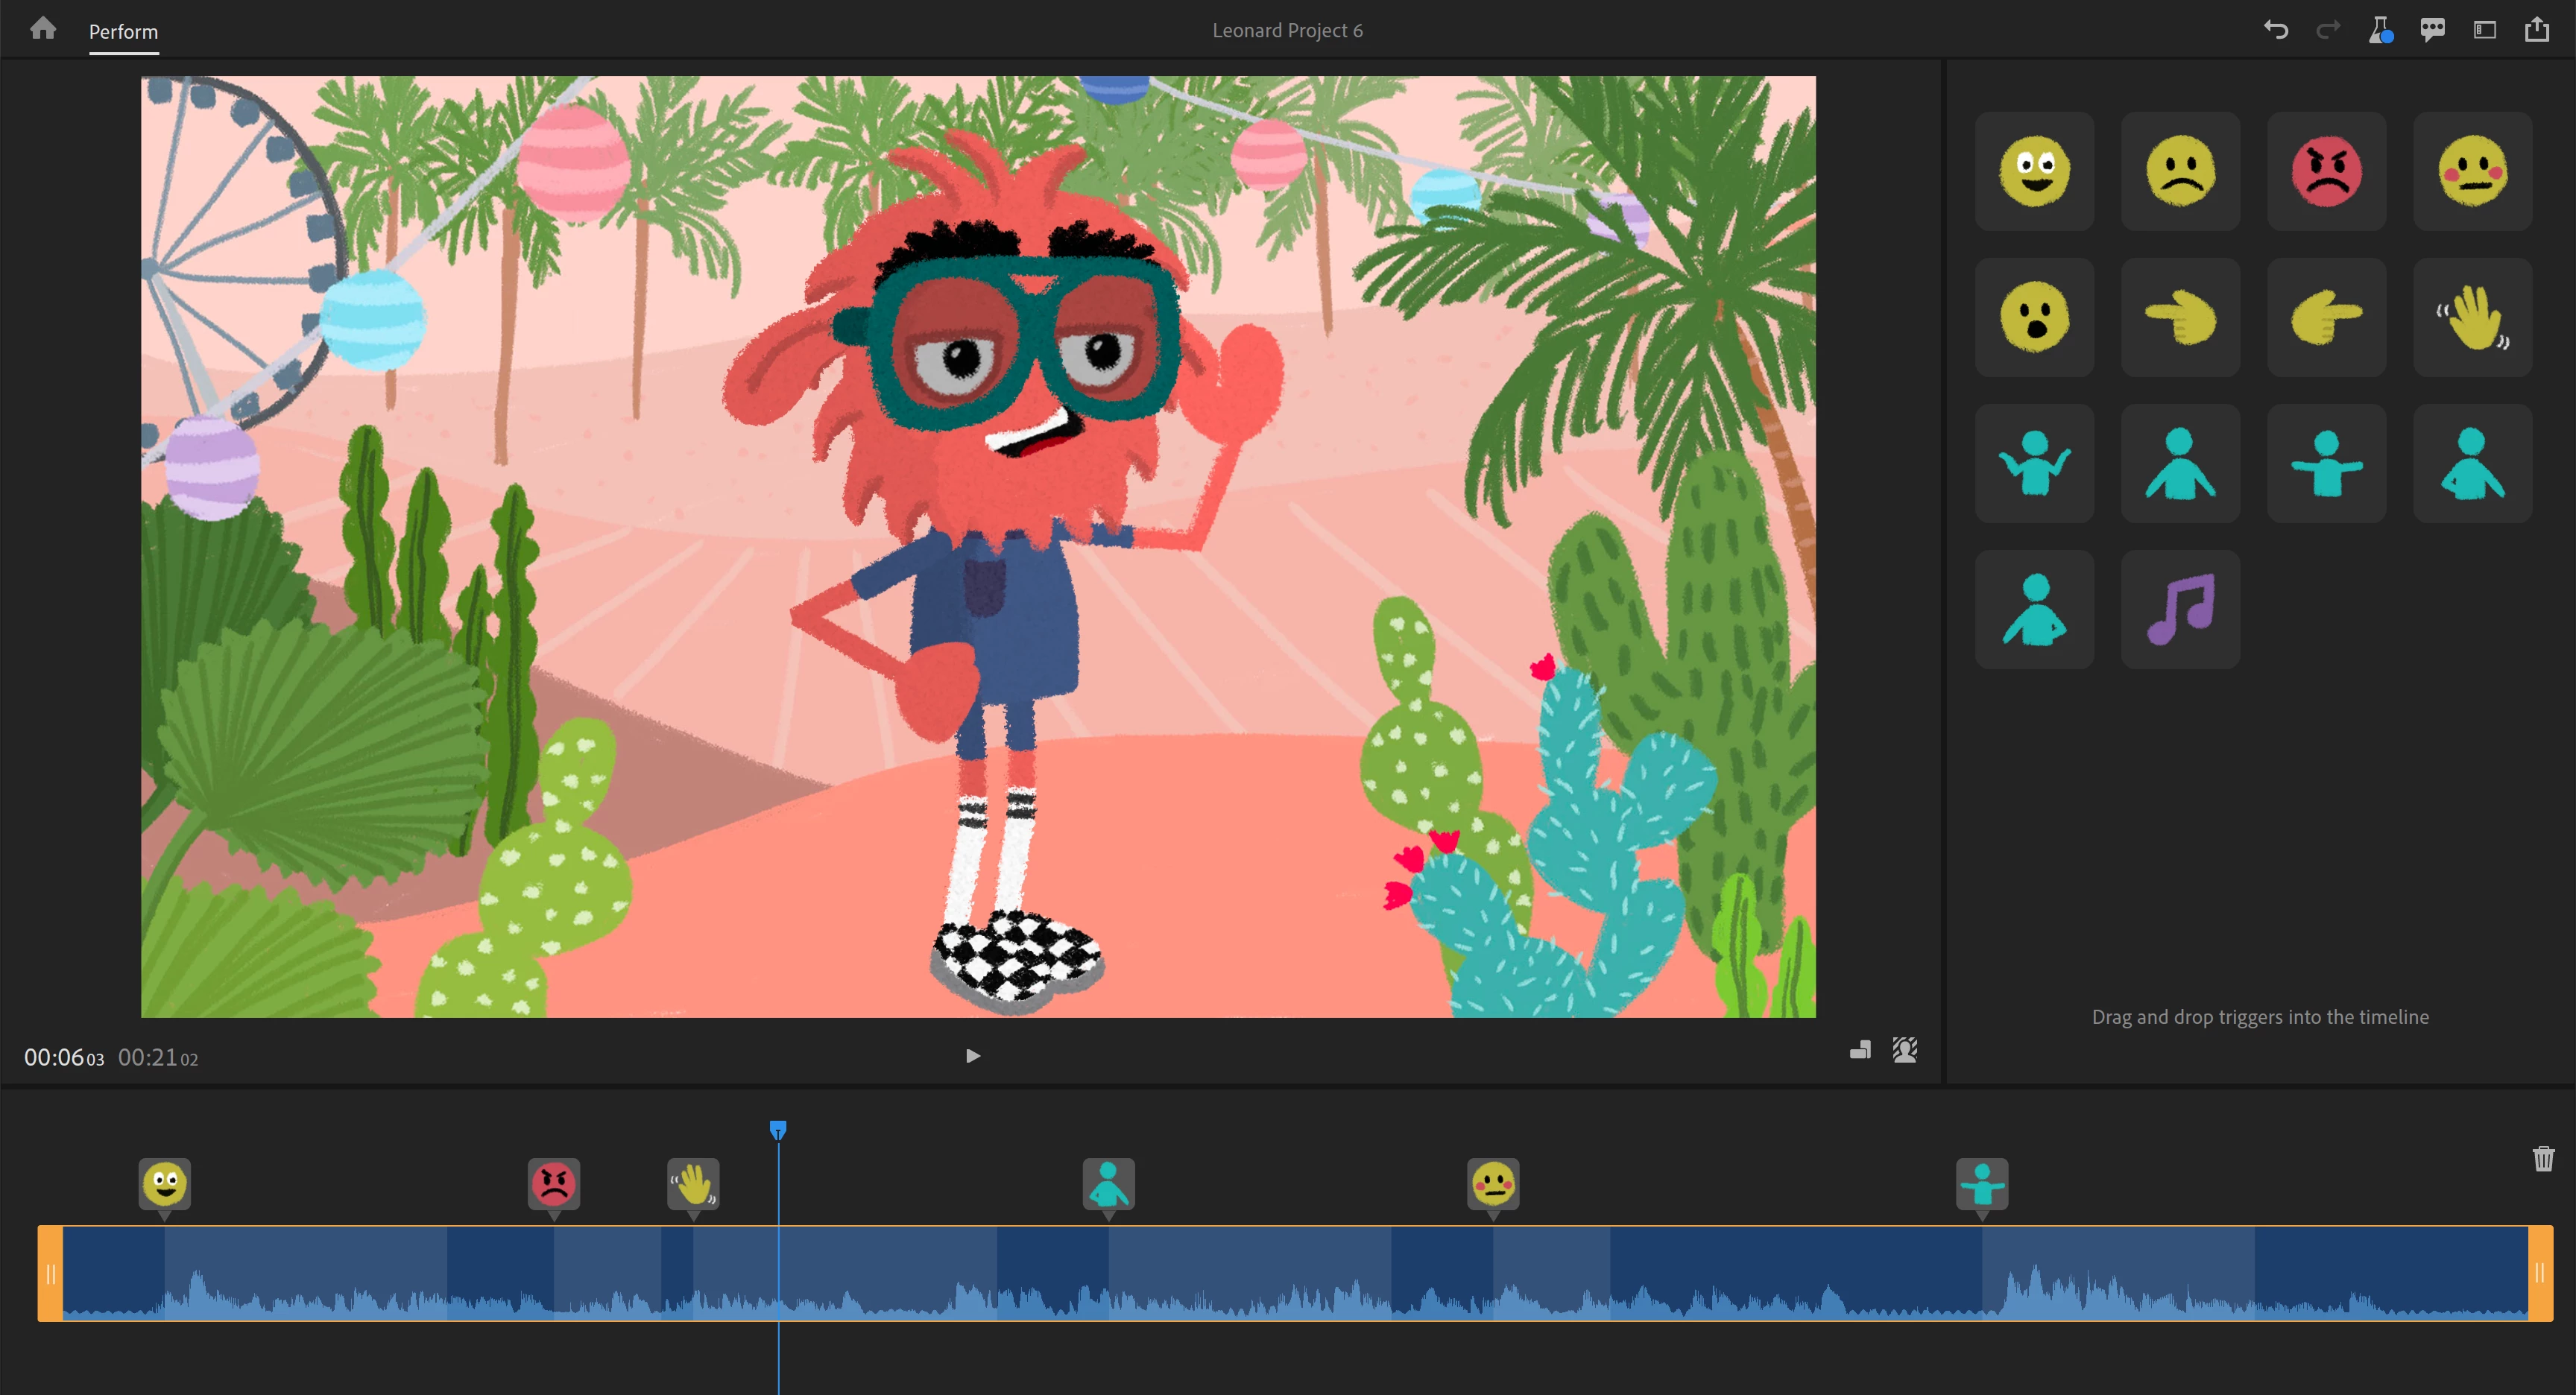
Creating and exporting your first animation in Starter mode
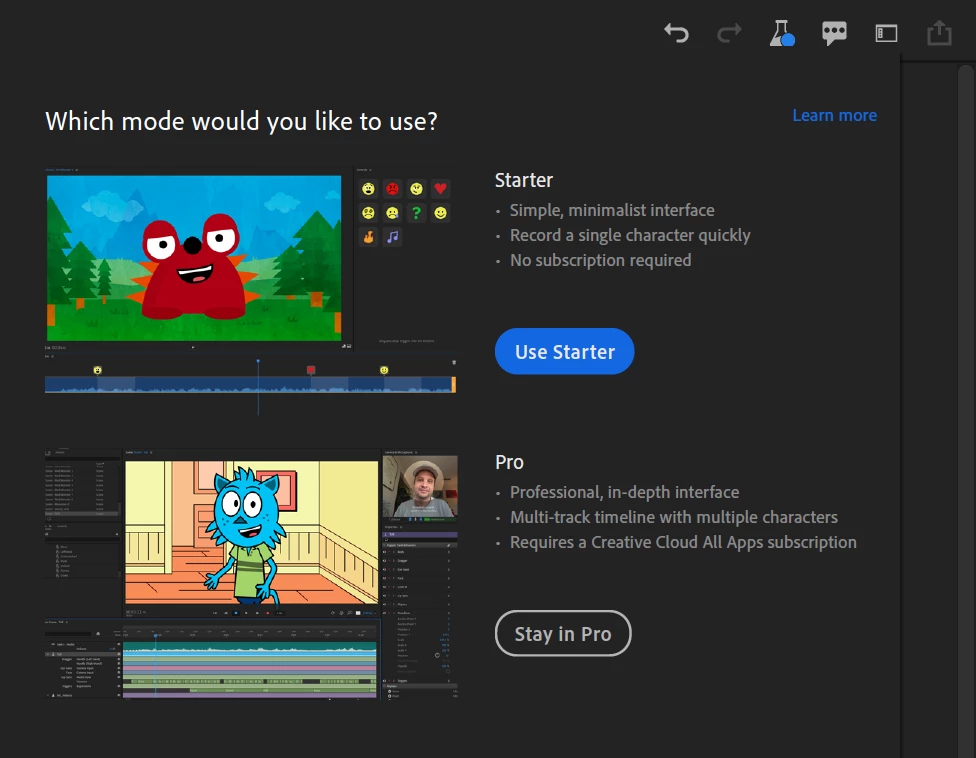
- Switch to Starter mode if you’re currently in Pro mode. Click App mode
 in the header bar, then click Use Starter. If you don’t see Use Starter and instead see Stay in Starter, you’re already in Starter mode.
- On the Home screen, click one of the puppets.
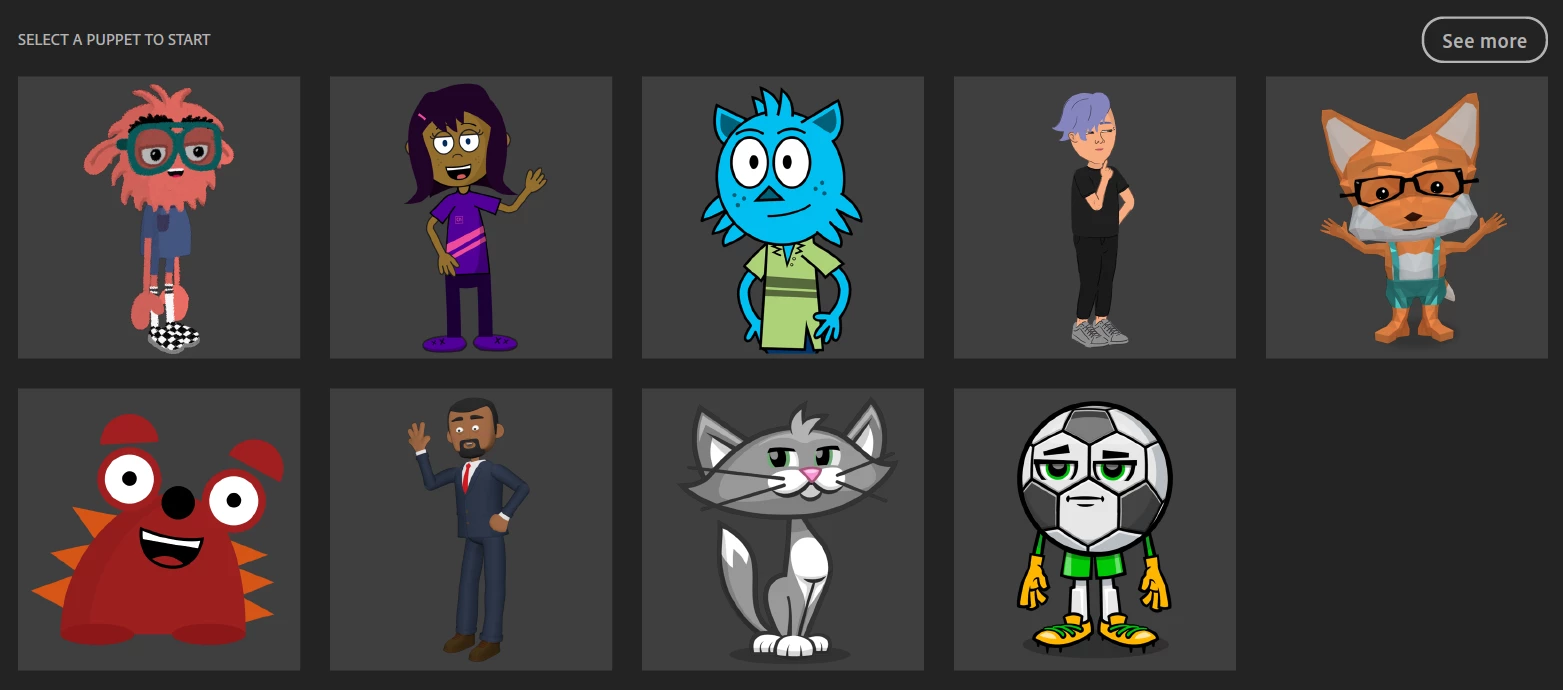
The Perform workspace shows the selected puppet in the Scene panel. - To change the dimensions and background for your animation, select options from the Aspect ratio
 and Background
  menus.
 - There are two ways to start your recording – by speaking or by using prerecorded audio:
- To start by speaking: click Record face and voice, move your head, blink, and look around in front of your webcam as you talk into the microphone. The puppet’s mouth will move based on your speech.
- To use prerecorded audio: click Import recorded speech, then select the audio file. After the file is imported, click Record face, move your head, blink, and look around in front of your webcam to capture your facial performance. The puppet’s mouth will move based on the prerecorded audio. - When done with your performance, click Finish recording.
The Timeline panel shows the duration of your recorded performance as a track with audio waveform.
The Controls panel opens with different poses and emotions that can enhance your captured performance.
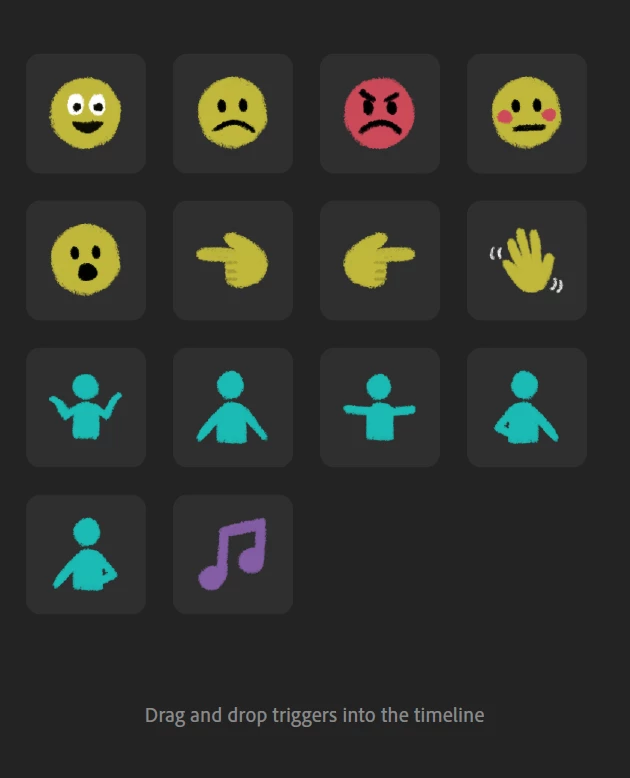
- Hover over icons in the Controls panel to preview how they’d change the puppet, then drag the ones you want to use to the puppet track in the timeline.
- Click Play to preview your animation, then Stop when you want to make more changes.
- To trim the duration of the scene, use the trim handles on either end of the puppet track. To trim the duration of an applied control, select its small icon, then trim the edges superimposed on the track.
- If you need to undo a recent change or redo an undone change, use the Undo and Redo buttons
 in the header bar. To undo all changes to a puppet and restart recording, click Delete recording
  in the timeline.
 - When you are ready to export your animation to a movie file, click Quick Export
 in the header bar, change the File Name and Location and Preset if needed, then click Export.
- Switch to Starter mode if you’re currently in Pro mode. Click App mode
A Finder (macOS) or Explorer (Windows) window opens showing the location of the exported MP4 file of your animation, ready to play and use in other apps.
Customizing app settings
Camera and tracking calibration
To select a camera to use for face and body tracking, click Camera and microphone settings  (available only before recording a performance), then select the camera from the top list of available cameras.
To horizontally flip camera tracking (so tilting your head to the left causes the puppet to tilt to the right), uncheck the Mirror Camera Input option in that menu. By default, the camera tracks your motion like a mirror.
To calibrate face and body tracking, before starting a recording, look at the puppet centered in the scene, then click Calibrate. This will make sure the puppet is upright at its rest pose before starting, instead of tilted or skewed to the side.
Microphone
To select a microphone to use for lip sync, click Camera and microphone settings  , choose Audio Settings, then select the microphone from the Default Input list. Alternatively, open app preferences by choosing the Edit > Preferences menu command (on Windows) or Character Animator (Beta) > Preferences menu command (on macOS).
Switching between Starter and Pro modes
If you want additional controls beyond what Starter mode provides, you can switch to Pro mode for the full capabilities of Character Animator. A project created in Starter mode can be opened in Pro mode.
Note: A project created in Pro mode cannot be opened in Starter mode.
To switch between Starter and Pro modes:
- Click App mode
 in the header bar or switch to the Home workspace, then click Use Starter or Use Pro.
To upgrade from Starter to Pro mode (initially only for the United States during the Beta period):
- Click App mode
 in the header bar or switch to the Home workspace, then click Start Pro trial mode or Buy now (if you no longer have access to a trial version).
 - Follow the instructions for starting a 7-day trial of Creative Cloud All Apps plan.
- Quick and then relaunch Character Animator (Beta).
The Undo and Redo buttons in the header bar are also available in Pro mode.
Known issues and limitations
Starter mode and Quick Export are still in development.
In the first public Beta version (v22.4.0.14), please note the following:
- Starter mode: Some text in the user interface might not be translated but will in future Beta builds.
- Quick Export generates an H.264 (MP4) file, so transparent regions in the scene will appear as black in the file.
What we want to know
We want to hear about your experience with Starter mode and Quick Export:
- What are your overall impressions?
- Are you able to create and export an animation quickly and easily?
- How will you use Starter mode and Quick Export in your work?
- How can we improve Starter mode and Quick Export?
Also, we’d love to see what you create with Starter mode. Share your animations on social media with the #CharacterAnimator hashtag.
Thank you! We’re looking forward to your feedback.
(Use this Beta forum thread to discuss Starter mode and Quick Export and share your feedback with the Character Animator team and other Beta users. If you encounter a bug, let us know by posting a reply here or choosing “Report a bug” from the “Provide feedback” icon in the top-right corner of the app.)
