

- Home
- Character Animator
- Discussions
- Hair layer behind body is moving and distorting wi...
- Hair layer behind body is moving and distorting wi...

Copy link to clipboard
Copied
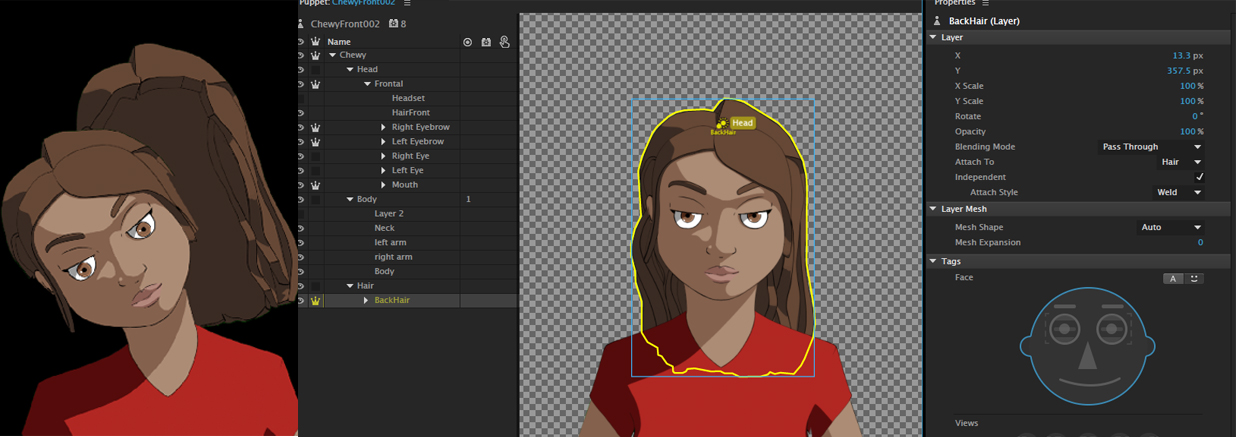
With the removal of the staple system in Character Animator, I can't get the back long hair layer to move and attach with the head, and definitely can't add dangle physics to it. Currently, it moves with the body no matter which way I rig it, and dangle either doesn't work or adds the body to the dangle. Attached are pictures showing what's happening. Opening up previous puppet files that used the old staple system still works, but I can't replicate it with a new puppet in Character Animator CC.
Set up 1: You can see that the back hair layer doesn't move completely with the head, and when I try to attach a dangle to the hair layer here, the body becomes distorted.

Set up 2: Changing the hair layer to independent


 1 Correct answer

Sorry for the delay in my reply Jen. Glad to see others posting solutions to your problem in the meantime.
> It seems like Auto is setting the hair layers to Body instead of Head.
Indeed that's what happening. This is why: the Auto attach mode for a group means "attach this group's origin to an auto-staple in the parent group -- but only if the parent group has some solid mesh to attach to there, otherwise attach to the parent's origin". That's what the dotted green line is trying to tell you.
So,
... 37
Replies
37
37
Replies
37
Copy link to clipboard
Copied
Try making the Frontal groups not independent and see if that helps with any issues you're having
Copy link to clipboard
Copied
Thank you!! It worked! But for some reason, on another puppet that I have (the original one I posted about up at the top called Chewy), this tactic only worked well with dangle if I unclicked "Independent" on the Frontal. The back hair layer was not following the HEAD movement until Independent was clicked off for Frontal. About to start adding head turns for that character, so I will keep everyone posted if I come across any more issues with the hair when I add head turns.
Thanks everyone for chiming in!! Really appreciate it!

Copy link to clipboard
Copied
I'm having the same problem. I created a handle and named it scalp, but it's not showing up in my Attach to drop down.
I'm getting pretty frustrated. I've overlapped my head, body, and back hair and none of it will attach. My head is floating around and my hair won't move at all. 
Copy link to clipboard
Copied
Does you Head need to be independent? Can you share a screenshot of the puppet layer hierarchy? I got it going when Head was not independent. It’s the combination of layers in front/behind that makes it hard when combined with independence.
Copy link to clipboard
Copied
Turning the independence off gets everything attached, but now the head get distorted when I move.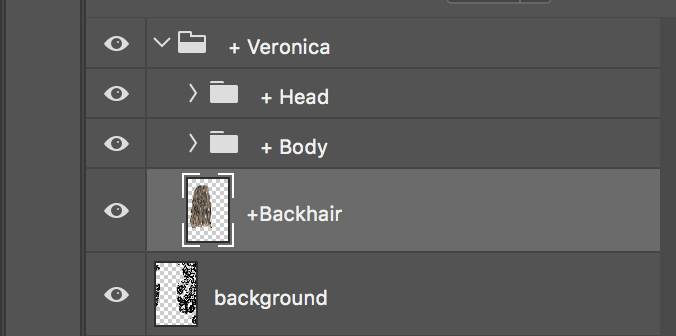

Copy link to clipboard
Copied
These are suggestions only - hard to work out best way without trying it sometimes! My suggestion of what to try: You definitely want the rear hair to be independent, but make the body and head dependent. I am hoping the narrow neck will bend from side to side enough for your head movement. (The rear hair however if not independent would make the “neck” too thick).
Next, putting some sticks around the jawline of the head to limit the warp affect on the head structure. See this thread [Problem] Attack Head to Neck towards the bottom for how it was done on another puppet. I would put a stick across the shoulders at the base of the neck to lock down - so the neck will bend/stretch between fairly solid shoulders and head.
Then you should be able to attach the independent rear hair group using “auto” to the head and get it to dangle nicely.
I assume the dangling earring / tassle could be another independent layer attached to the ear.
Copy link to clipboard
Copied
Oh, and turn on the mesh tool (little icon at bottom of scene and rigging window). Check that the mesh of the different groups is not a rectangle (It should follow the contour of the artwork). If not, you will get strange distortion.
Copy link to clipboard
Copied
Oh, and if you decide you need the face to be independent (the sticks etc don’t work well enough), it is possible to get it to work - but it is a little tricky. The easiest way to explain is you create a second copy of the whole puppet (inside the PSD file) then in one puppet tree show everything but the rear hair, and in the other copy you hide everything except the rear hair. All the movements etc signals then get sent to both internal artwork layers and they react in the same way, so it looks good. In your case I think this should work because of the flowers in the hair will hide any misalignment I was getting.
So I think it is completely doable with your puppet. (Send me a direct message and copy of the puppet if you don’t get it going and want me to have a go after work one night. Your puppet looks pretty easy - its ones with 5 head turns that start taking more time to fix - my will power goes down when I see them! 😉
Copy link to clipboard
Copied
Thanks for the help! This is was much trickier than the tutorials!
Copy link to clipboard
Copied
The hard part is independent hair behind an independent head where there is a body between the two layers. If you don’t have that need, the tutorials should all work. It is the combination of independent face with independent hair behind the body that is not in any tutorials I know of.
I should try again though - I wonder if there is a way to do it by creating two face behaviors and having a “head” which is a ball on the top of the neck... Have a “ball” which moves with the body and head tilts (but has no face). Then have an independent face layer that attaches to the “ball”, sitting in front of it. Then have another independent layer for the rear hair that sits behind the body layer. It gets especially tricky if you have head turners.
I never got it going well however in previous attempts. As soon as I made the head and neck in the same dependence group (so the neck would flex), things got much easier.
Good luck with it!
Copy link to clipboard
Copied
Sorry I haven't had time to dive back into this thread. Regarding this:
> I tried to make the neck-and-ball transparent, but discovered 10% opacity and less disappears from the mesh outline. 20% and higher is visible. So I tried a very thin rectangle (a line did not work) and that minimizes what you can see.
If you want to add invisible mesh, just paint the shape you want in PS (or create layers in AI) and then turn the eyeball off (in PS/AI or Ch).
We are looking at ways to allow attachment across the hierarchy for a future version.

Copy link to clipboard
Copied
what about using sticks to keep that part of the hair from morphing?
Copy link to clipboard
Copied
Thanks for the suggestion!
I think the problem is around getting origins and attachment points right, especially if you use Head Position Strength, Head Tilt Strength, Head Size Strength. E.g. Head Size Strength makes the head bigger or smaller as you lean forwards/backwards. Sticks cannot (and should not) stop that movement. Also it feels more natural to have the head hinging on the neck near the the chin (low on the head), whereas rear hair dangling is more like half way down the head. I suspect sticks can help, but not completely solve the problem. (Or at least I cannot see how they can solve it.)
-
- 1
- 2

Find more inspiration, events, and resources on the new Adobe Community
Explore Now
 AdChoices