 Adobe Community
- Home
- Character Animator
- Discussions
- Re: Importing a .mov file into CA?
- Re: Importing a .mov file into CA?
Importing a .mov file into CA?

Copy link to clipboard
Copied
I would like to import a short .mov file of a flame to go over two characters fighting.
Is this possible? If not, is there another way to do it in CA?
https://drive.google.com/open?id=1uSgzQfwOmHEhGEWx1H1yqLv6dT76Jw4i
Silly me. I thought I could just put it on top of the scene, like an MP3 file.
-Sharon


 6
Replies
6
6
Replies
6
Copy link to clipboard
Copied
PS I bought this. Please do not copy it, as I really like this company and don't want to get into licensing trouble. Their stuff is really good and extremely reasonable. (colourbox.com)

Copy link to clipboard
Copied
I think you should be able to fee into Adobe Media Encoder and make it output a sequence of PNG images. You can then use the "Import Cycle" menu item to load up the PNG images into a cycle layer. Then you don't play the video - you sequence through the images as a puppet.
To do this, start up AME, then select "Add Source" and select the video file to import. THen in the Queue panel, select "PNG" as the first drop down column and click the "run" (green triangle) to start the encoder running. It will create a directory of PNG files, one per frame. You can click on the "Output File" to change the directory etc the sequence will be written to. (I would create an empty directory to put the files into. Give the output file a name like "foo" - it will append numbers to the end of each file creating "foo1.png", "foo2.png" etc.

Once you have the PNG files, you can add them to a sublayer in a puppet, but you can also create a new puppet from the files which might be easier. In the "File" menu there is "import cycle..." and select the first file (number 1) in the directory. This created a number puppet called "Renders Cycle" for me. Then adjust the "Cycle Layer" behavior property onto the layer above all the images and fiddle the properties (e.g. do you want it to loop once or forever? start immediately? etc). The Cycle Layers property will be on the root of the puppet.
Silly me tried with a long video and it took a while... but did work.
(There was a discussion a week or two about this very topic in the forums.)
Copy link to clipboard
Copied
Oops-Here should be a viewable link:
Copy link to clipboard
Copied
That is a fairly long sequence, at fairly high resolution. Unless you have lots of memory that might not work using cycle layers (if you need the whole video). I tried something that long on my laptop and it crashed with out of memory problems. You can try, but it failed on my laptop.
This is where I would suggest using something like Premier Pro (or After Effects). Someone might know a better way, but this is the end result. Is this what you are trying to achieve?

I had a CH video file created first, then I loaded up your MOV file of flames. You then layer the tracks so the flames is above the CH file.

However, the flames movie file does not have transparency support - its black! So I tried the "Color Key" effect. Open it up under the effects panel:

Then drag that icon over the MOV file in the timeline panel - you will see a little green FX icon appear on the MOV file if it works.

If you select the MOV file then open up the "Effects Control" panel, you can change the settings. Here is what I used.
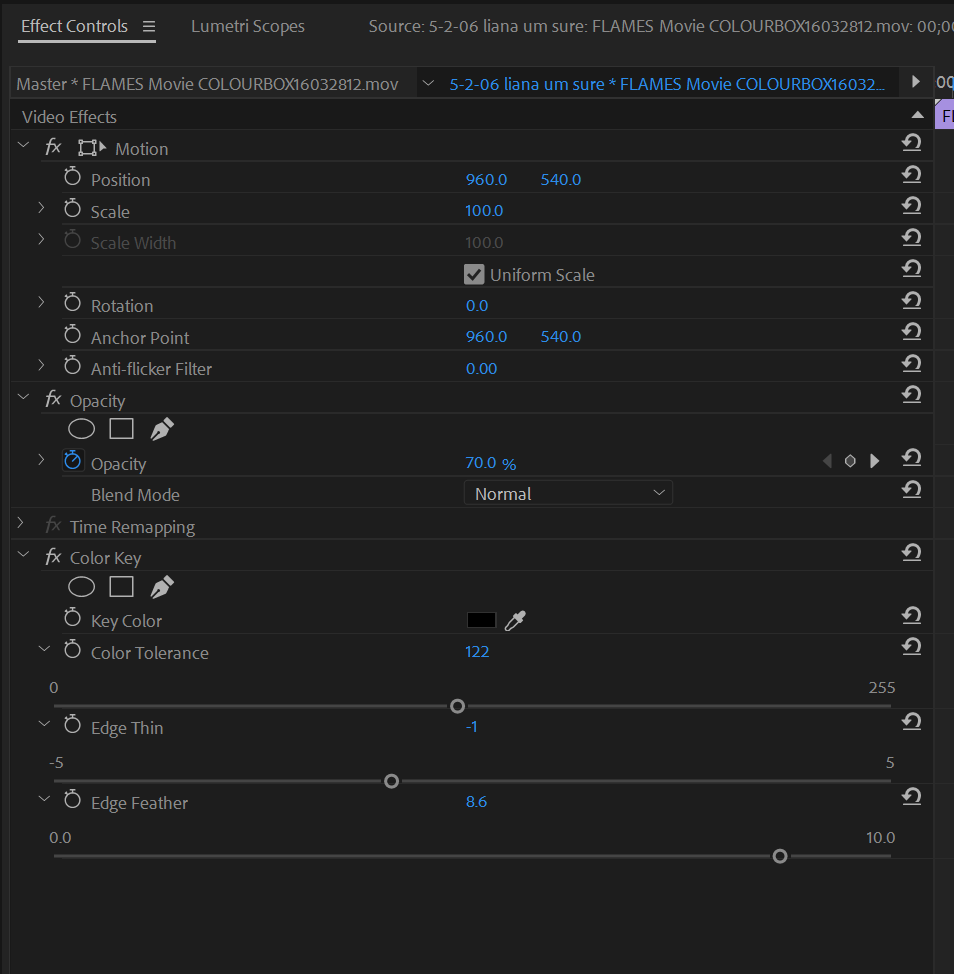
In particular, I set the "Key Color" under the "Color Key" effect to black. This tells it "I want black to be transparent". I then fiddled with the "Color Tolerance" to get it to look about right. I also fiddled with "Edge Feather" to soften the edges a bit. Just try different values until it looks good.
But the flames were still very solid (could not see through them), so I also adjusted "Opacity" which seems to be added by default to clips, so I reduced the "100%" to "70%" to make the flames a bit transparent.
I am not an expert in this - there may be better articles on the web you can find. The idea of making a color transparent is called "Chroma keying". Unfortunately the video file did not seem to half an alpha channel - well, at least not that Prem Pro recognized. So you need to use an effect to do this. There are a few effects listed there - I just picked one. ANother article I found recommended Ultra Key, but I failed to get it to work - Color Key sort of worked.
After Effects might do a better job than Premier Pro as well - this sort of thing is what it is designed to do. (Add effects afterwards!) But this one was so simple that I just used Premier Pro instead.
Copy link to clipboard
Copied
I should add if you only want say a second of flames, you can probably use cycle layers. How long do you need.

Copy link to clipboard
Copied
When compositing flames in Ch or AE that are shot on black, instead of keying it will look better if you use the Linear Dodge (Add) or Screen blending mode, which is a layer property in both apps.

 AdChoices