 Adobe Community
- Home
- Character Animator
- Discussions
- Re: one arm rigging works, the other doesn't
- Re: one arm rigging works, the other doesn't
Copy link to clipboard
Copied
Hi There,
I'm new to character.
i have rigged up the arms of my characters using the tutorial.
one arm is working perfectly. The other isn't. The hand seems like it's locked in the same direction so it isn't rotating to use the direction of the arm.
And the arm is kind of doubling up on itself rather than moving like the other one...
any ideas?
 1 Correct answer
Hi Karen,
I was able to open your puppet. And the problem is you duplicated the left hand into the right hand and its in the left hand position (flip it over and move it to the other side of the puppet).
If you click the Right Arm layer in rig mode inside Character Animator (Ch). You can see there is a big rectangle around that arm... compared to clicking the left arm? You must have copied the left hand and placed it in the right hand but you didn't move it over to the right hand position, so the
Copy link to clipboard
Copied
Hi Karen,
Its tough to tell without seeing your puppet. You can try taking a screenshot or exporting the puppet and sharing it and I can take a look.
some things to check:
Do yo have each arm on it own layer?
Does each arm layer have a "+" on it in the PSD layer or a Crown to the left of it in Rig mode?
When you click each arm layer, did you drag the right arm tag to the shoulder so it pivots from there?
Did it highlight green when you dragged it over (meaning it attached to the graphic underneath?
If not, you can try selecting the Puppet in the Project panel and then choosing File>Export>Puppet then you can attach it here.
Good luck!
mark
Copy link to clipboard
Copied
Thanks for replies.
I have checked those setting you suggested... but maybe i'm missing something obvious. thanks for looking at my puppet...
how do i attach the puppet to this thread?
Copy link to clipboard
Copied
HI Karen,
You should see some buttons above as you reply, icons, for Bold, Italics, Underline, etc.... if you go over 4 more there is a button for "image" that should work to upload your puppet assuming its under about 8mb.
thanks!
mark
Copy link to clipboard
Copied
it keeps saying the file type is forbidden? not sure what i'm doing wrong...
i put it in my public drop box
Copy link to clipboard
Copied
Hi Karen,
I was able to open your puppet. And the problem is you duplicated the left hand into the right hand and its in the left hand position (flip it over and move it to the other side of the puppet).
If you click the Right Arm layer in rig mode inside Character Animator (Ch). You can see there is a big rectangle around that arm... compared to clicking the left arm? You must have copied the left hand and placed it in the right hand but you didn't move it over to the right hand position, so the bounding box is large and confusing Ch. Hope that makes sense! The puppets left hand is duplicated in the right hand folder. Moving it over (and reflecting it in Illustrator) should help a lot. You may also want to make sure the pivot point is at a good spot on the shoulder, and then the sticks should mimic bones, so maybe try making them a bit longer. You can delete the sticks and drag a new the stick from shoulder down to where the elbow would be (leaving a small gap where it bends), and same for the elbow to wrist.
To perfect the arms, you can also try adding the new Arm IK behavior to your puppet and make it so the arms don't stretch or bend in the wrong direction. Playing with the place of attachment can also give you varied results, and either leave a gap or close the armpit area. Learn More here: Arm IK (Adobe Character Animator Tutorial) - YouTube
Hope that helps! Have fun animating!
mark
Copy link to clipboard
Copied
thanks so much... i couldn't figure it out but i just duplicated the arm again and made sure it was all reflected and it works now... thanks heaps.
Copy link to clipboard
Copied
Great, Glad you were able to figure it out! you had a folder with your different hands, and the hidden ones were not reflected.
But glad it is working now! You can mark this question as answered.
happy animating!
cheers,
mark
Copy link to clipboard
Copied
ok so i've done this again but still can't figure out what i've done wrong...
i have 4 new swap sets for the fist and muscle layers for each arm... neither are working. I duplicated the layers on one arm or hand and flipped it and put it on the the other side but i still think something is going wrong... any suggested greatly appreciated.
Copy link to clipboard
Copied
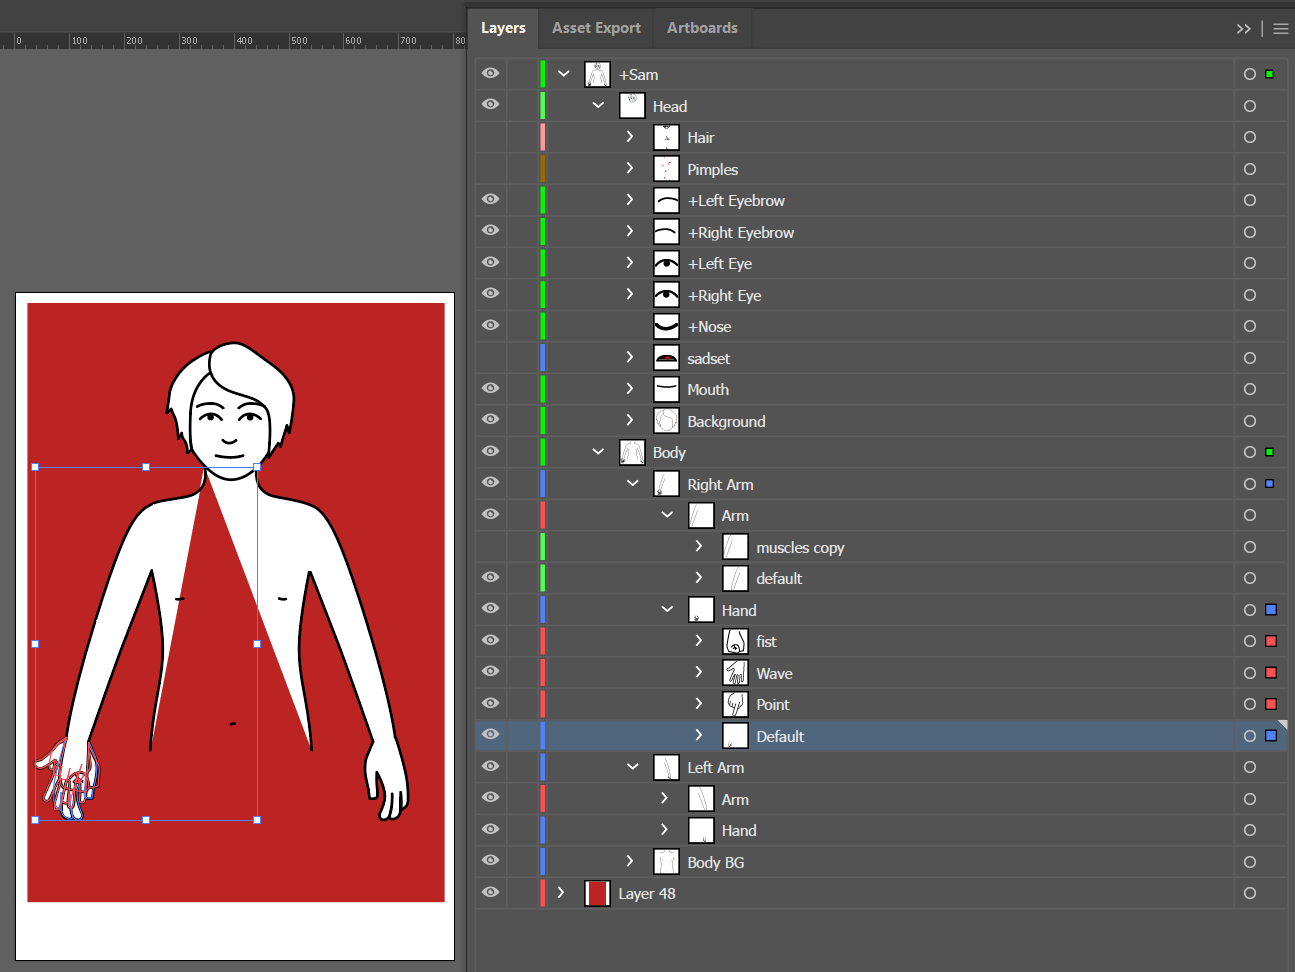
I am wondering if the file got messed up? Clicking on the "Right Arm" layer has a strange outline.

Going to the master artwork file, I dropped in a red rectangle behind - its messed up there. Also revealing all the hands on the right arm then selecting them all, see how there seems to be a point on the chin as well? So the artwork seems to have an error there. And the same problem exists for the left hand. It seems to be in both the default and point hand positions.

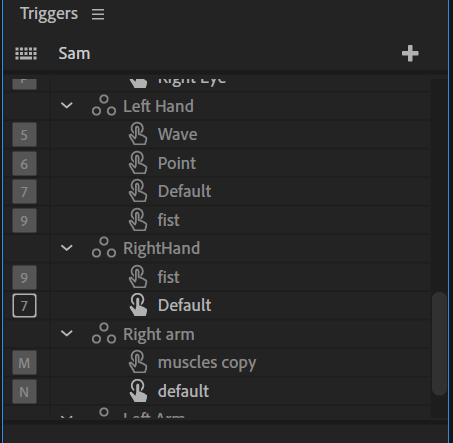
You might need to check the triggers as well - your RightHand swapset / Default does not seem to be bound to anything.

Copy link to clipboard
Copied
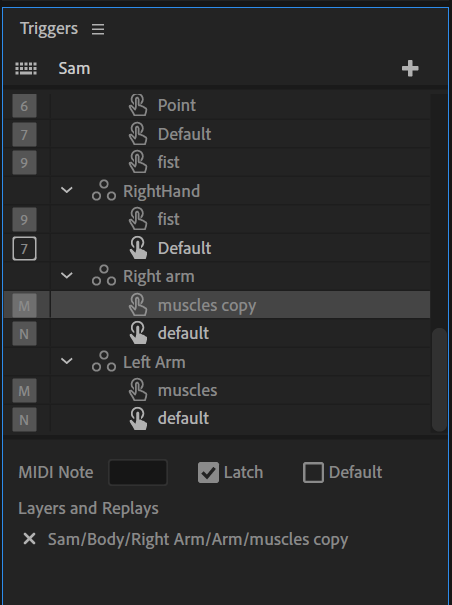
Another little trick to reduce the number of triggers, is you notice how you have M and N bound twice? You can do that, but there is another way.

You can create the first swap set as you have, but then you can drag layers from the rig window over the top of existing triggers, binding multiple layers per trigger. See when you click on a layer you get the "Layers and Replays" at the bottom? It is showing just one. You can have multiple layers attached to the same trigger, which keeps the number of triggers down.
You might also like to make your character pink skinned or something, or change the default AI background color (I think there is an AI setting for that somewhere...). White on white makes spotting things like your fists are not filled in harder.
Copy link to clipboard
Copied
Oh, just realized my mistake on "some triggers are not connected". Ignore that comment! 😉
