 Adobe Community
- Home
- FrameMaker
- Discussions
- Re: FM10: PDF output not including part of graphic...
- Re: FM10: PDF output not including part of graphic...
FM10: PDF output not including part of graphic in header

Copy link to clipboard
Copied
Here are my versions: (TCS3.0)
FM 10.0.1.402
Acrobat 10.1.1
Distiller 10.1.133
I have a book recently created in FM10. I needed to add a very large table. I followed Barb Binder's instructions for setting up landscape master pages (from the IconLogic 8/9/11 Skills & Drills newsletter). Everything worked perfectly. I was able to create the master pages and body pages using them, and eventuallly get the large table in the doc file. So far so good... I wanted to see how the new pages and table would look in PDF, so I did a File > Save as PDF. The PDF was created as expected.
However, I have a strange issue with our company logo in the header. It's in the header on all pages of this document and looks fine on all pages in FM - both on the body and master pages. But in the PDF, the last letter of the company name is cut off. I cannot figure out what's going on. I've also tried to Print to File using the Adobe PDF printer and creating a PS file that I then distilled to PDF. Same problem no matter what method I use. In the PDF, the logos on all non-landscape pages are fine.
Here are some screen caps.
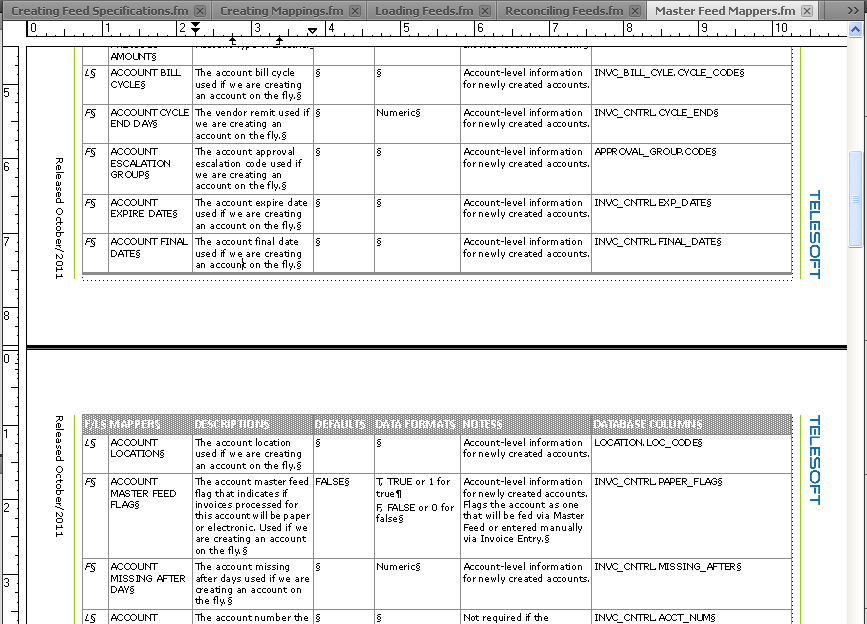
The document open in FM - this shows the Telesoft logo on left and right body pages using the landscape master pages:
Here is the LandscapeLeft master page:
The LandscapeRight master page:
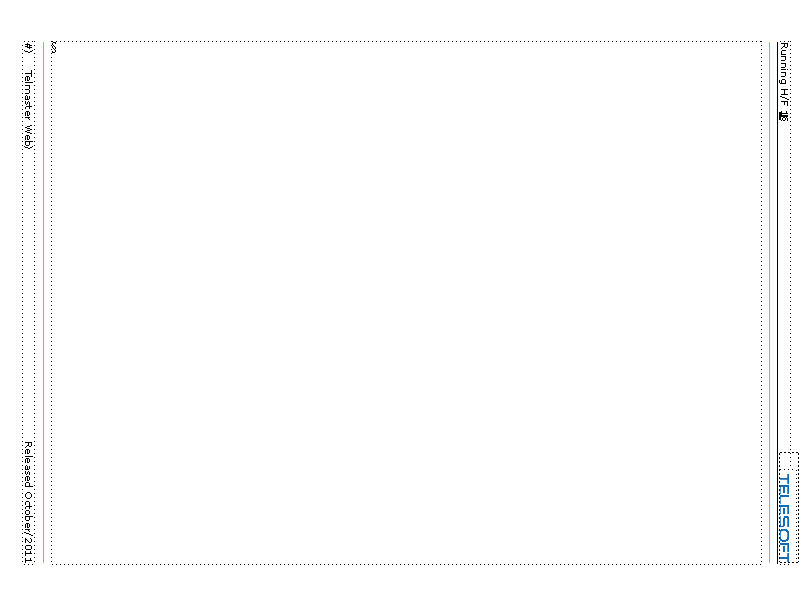
Here's a screen cap of a LandscapeLeft page in the PDF:
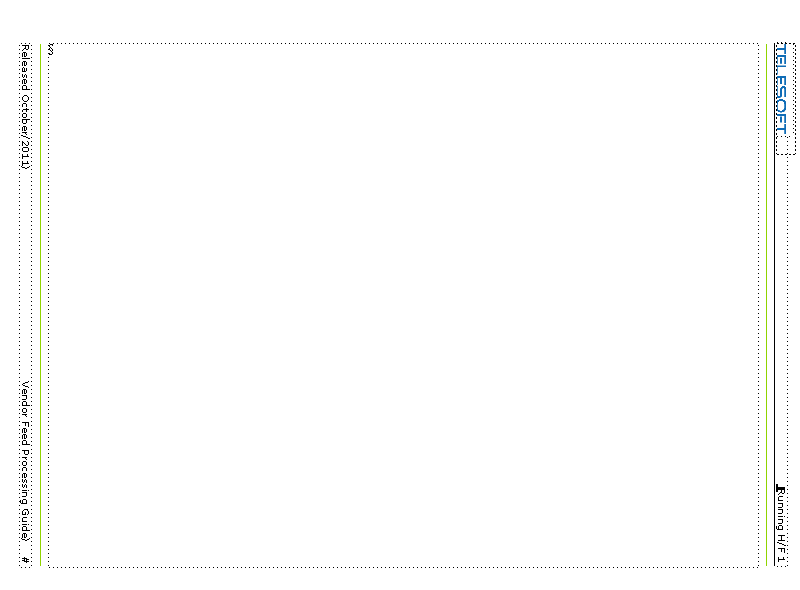
Here's a screen cap of a LandscapeRight page in the PDF:
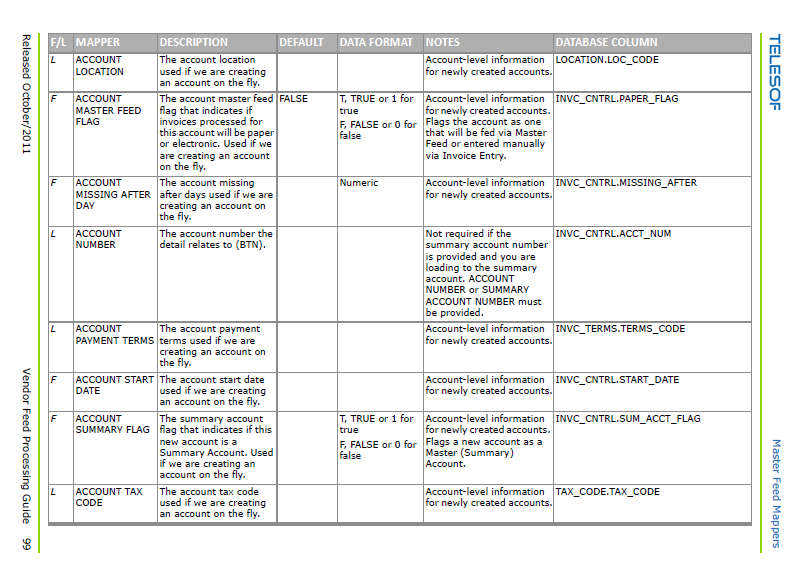
Notice the final "T" missing for the header graphic on both the right and left pages. On the master page, there is plenty of room in the anchored frame that holds the graphic, so the frame isn't cutting anything off. The exact same headers are used on both the regular and landscape master pages and all is well in the PDF for the regular pages.
I really appreciate any suggestions!
Kim


 23
Replies
23
23
Replies
23

Copy link to clipboard
Copied
Kim,
Try a Select All (Ctrl + a) on the rotated pages & corresponding master pages to see if there is an object overlapping the logo. Look for any out of place "handles".
Copy link to clipboard
Copied
Thanks, Arnis. I tried what you suggested. On a landscape body page, the CTRL-a selects the text flow and nothing else. On a landscape master page, it looks like this - I can't see any handles that don't look right and there is nothing over part of the graphic.
So a stray object probably isn't the problem. If I'm doing something wrong or missing something, please let me know.
I was really hoping it was something simple and easily fixed. More suggestions welcome
Copy link to clipboard
Copied
Kim,
With the mouse, try a marquee select covering the logo area. Is there just the single anchored frame there? (unfortunately, the ctrl+a on the page doesn't show the contents inside the frames - sorry about that).
What format is the graphic for the logo?
Could you try a simple test in FM. In a new document, place two copies of the logo with one turned 90 to the other and create a PDF to see if the "T" gets chopped on the rotated one.
Also try to position the logo at a different location in the header to see if the chop still happens.
Copy link to clipboard
Copied
Thanks, Arnis.This am, I was having trouble selecting anything but the anchored frame on the landscape pages. I could not select the graphic. However, on the portrait pages, I can easily select either the frame or the graphic. And now that I could do that I discovered that the graphic had been pasted into the template and there is no graphics file. I'm going to fix that first and then try replacing the frame and importing the graphic on the landscape pages. The source graphic is probably png since that's our std.
I just tried to VPN (working from home today) and the VPN is down. So I can't get the graphic off the network until IT gets me going. It'll be next week until I can post an update. Have a relaxing weekend, everyone!
Kim
Copy link to clipboard
Copied
Kim,
If it's a PNG graphic, then it's probably not the graphic format. There have been some issues with other formats when graphics are rotated on a page, but that may not be the issue here. However, to be certain, test the two orientations when you can. Also try moving the anchored frame (i.e. change the location to centered, left and right) and see if the clipping persists. If it does, then perhaps there's something inside the anchored frame that is going along for the ride?

Copy link to clipboard
Copied
... perhaps there's something inside the anchored frame that is going along for the ride?
Select anchored frame.
Edit > Select All in Frame
Shift_[de]Select the object(s) that is(are) supposed to be there
Graphics > Object Properties
If Object Properties is not greyed out, there are interlopers (often entirely out of frame).
If confidence is high that they should not be there, exit the Graphics menu and press [Del].
______
Note: Select_All_in_Frame will not select any graphics frames within the selected frame, nor anything within the GF, and one of these could be the interloper.
Copy link to clipboard
Copied
I've tried numerous things with no success. First, there was nothing else "along for the ride" in that anchored frame. That would have been a nice easy-to-fix answer.
FYI - I think I've discovered a bug in that there is no way to select the graphic itself inside an anchored frame when it's in landscape orientation (this works fine on the portrait pages).
Here's what I've tried:
1. Start with new doc from template. Replace all pasted-in header graphics with ones placed by reference. Portrait pages work great. Created landscape master pages from the working portrait ones. Graphic is truncated in PDF of landscape pages.
2. Created new graphic with some extra space on the side that keeps getting truncated (the original graphic was closely trimmed to the logo). Imported this graphic into the anchored frames on the portrait pages, then copied the frame & graphic to the landscape pages (had to do this because I cannot delete graphic and reimport on landscape pages). The new graphic is truncated on the landscape pages exactly where it was before, despite there being more space on the right. Very strange - I expected the truncation point to change. (I also tried creating new anchored frames and importing the graphic on the landscape master pages and that didn't work either.)
3. On a body page, I created three anchored frames, each with a copy of the graphic. One is imported in the normal orientation and then I rotated the other two, one clockwise and one counter-clockwise. All of these graphics show up in the PDF just fine, regardless of their orientation. Only the graphics on the landscape page headers seem to be affected.
I finally called Adobe. The rep is still trying to figure out what's going on using copies of my test files. However, he did give me a workaround. Instead of using Save as PDF, I can print to the PDF printer. The key is setting the Scale to 97% - then the PDF looks fine. (FYI - I had previously tried printing to a file and using Distiller but the problem was also visible in the PDF.) So I can now get a PDF with the complete graphic, but my page content is now 3% smaller on the page. I can see it but probably no one else will be able to.
Adobe is going to keep working on the issue. I'll post back when I get more info. Also, I'm going to ask why I can't select a graphic inside an anchored frame on landscape master pages.
Kim

Copy link to clipboard
Copied
For what it is worth, I played with this a little.
I created a blank portrait document, using FrameMaker's default template. I displayed the master page and imported a graphic by reference to it. Then I created another master page from the first one; and then rotated the second page to landscape. I also reimported the graphic to the second master page; so, the graphic is both rotated by the page rotation and not. I displayed the body page, and created one page with each master.
The PDFs, whether by saving or printing to the PDF printer, were just fine. Nothing was clipped. My graphics were eps.
While doing the above and looking through Kim's post, I noted the following:
1. When you import a graphic to a master page (or to ta body page with no insertion point in a text frame), the graphic is ON the page by itself, NOT in an anchored page. You can select only the graphic itself, not the frame around it because there is none. So, there is no need to created an anchored frame on a body page, then copy and paste it to a master page.
2. Because of the above, there is no need to insert the graphic into the text frame where the header goes. It is just a text frame on the master page. Therefore, if the only object that you want in the header is the graphic, then you can delete the header text frame, import the graphic, rotate it or not, and position in the header area where you want it to be.
3. I also imported the graphic into the text frame for the footer. Because this was a text frame, FrameMaker created an anchored frame with the graphic inside it. Again, there was no truncation of the graphic when the PDF was created, even when using save as PDF.
4. I DID note however, that when I saved as PDF with Convert CMYK to RGB UNCHECKED, the landscape page became a portrait page in the PDF but with the content rotated as it would be for the landscape page. Part of it was clipped because the rotated content was off the right side of the page.
When Convert CMYK to RGB is CHECKED, each page in the PDF is as it is in the Frame file.
Again, in all my testing, no graphic was truncated on the portrait page nor on the landscape page.
I hope this gives some clues to solving your problem,
Van

Copy link to clipboard
Copied
Van, In re-reading this thread, I wasn't able to tell what Kim's original logo graphic format was.
I would expect an eps formatted graphic to play well.
I wonder if you repeated your steps with a *.png graphic if you would see the truncation in the horizontal layout?
Copy link to clipboard
Copied
I wonder if you repeated your steps with a *.png graphic if you would see the truncation in the horizontal layout?
OK, I tried it....interesting, but mixed results.
I created a portrait master page, deleted the header text frame, and imported a png image onto it. The png is on the page, not inside a frame. I then rotated the portrait page to a landscape master page. After several other imports, I have the following on the landscape master page.
1. The png from the original PORTRAIT master page.
2. The png imported to the LANDSCAPE master page without further rotation.
3. The png imported to the landscape master page with a rotation to match 1.
4. The png imported into the footer TEXT frame (which is now perpendicular on the left side of the page). This created an anchored frame to hold the png.
5. The standard text frame for the body text.
6. A copy of 4 but rotated back to portrait.
Then, on the body page that uses this lanscape master page, I imported the png. As per normal, this created an anchored frame below the line to hold the png. Of course it is rotated 90 degrees clockwise, because the text frame was rotated with the page.
RESULTS in the PDF:
a. ALL the png images were complete, EXCEPT 1 and 4. Interestingly, 1 was clipped on the right (bottom in landscape) and 4 was clipped on the left (top in landscape).
b. The png in 4 was NOT selectable, as Kim noted. When I clicked it, only the anchored frame was selected. When rotated back to zero degrees (6), the png was then selectable.
HOWEVER:
I was going to show a screen shot, but the png I used had company information in it. So, I created a png (Photoshop) of a flower, and created another master page with all six items.
c. THIS master page showed NO clipping on ANY of the png images.
d. To be complete, I created another png image from an eps file using Illustrator to mimic the workflow that created my original png. AND there was NO clipping of any of the png images in the PDF.
So, the results are mixed. But my tests indicate that the best way to create the master page is to rotate the page FIRST, then import the logo image. Do rotation after the import to get it into the correct orientation. DO NOT import the image into a background text frame (header or footer or other) that is on the master page. This creates an anchored frame holding the image, but the image is not selectable.
Hope this helps,
Van
Copy link to clipboard
Copied
Great follow-up!
Thanks!
Clearly a finnicky tool we all use... 
Copy link to clipboard
Copied
Thanks for your explorations, Van. I really appreciate the time you spent on this. Very interesting results indeed. I'm going to make sure the Adobe rep who is investigating this issue knows about your results.
Meanwhile, I'm using the "Print at 97% to Adobe PDF" workaround to make my PDFs.
I'll post back with any updates from Adobe.
Kim
Copy link to clipboard
Copied
Kim,
Just for the record, I found NO need to print at 97%. All my PDFs were created without scaling. Try rotating the master page first before importing the background images, and not into text frames if necessary.
Van
Copy link to clipboard
Copied
I guess I have way too much time on my hands. I did a little more testing....
I tried to think about what was in the png image that was chopped and not in the images that were not chopped. The only difference was the font. The chopped image used Arial. So, I thought maybe it was a TrueType problem.
I created several png images from a line of text in an Illustrator file, one with Arial, two with other TrueType fonts, and one with an OTF-PostScript font. I then imported them all by reference onto a portrait master page. I rotated the master page to create a landscape master page. I also imported the Arial png again, but did not rotate it. Using Frames drawing tools, I set the border of each png to show its size. I added some text to the body page, and created a PDF.
RESULTS: Only the png created with Arial and imported on the portrait master page before the rotation was clippped. Moreover, it was clipped in the text, NOT in the border. All the other png images were not clipped, including the Arial png imported directly onto the landscape master page. No clipping appears in the Frame files, only the resulting PDF.
This makes no sense to me, because I assume there is no font information in the png images, only bitmap renderings of the text. IF the font information IS there, then it appears to be a problem with Arial.
Here is a screen shot of the Frame file body page:
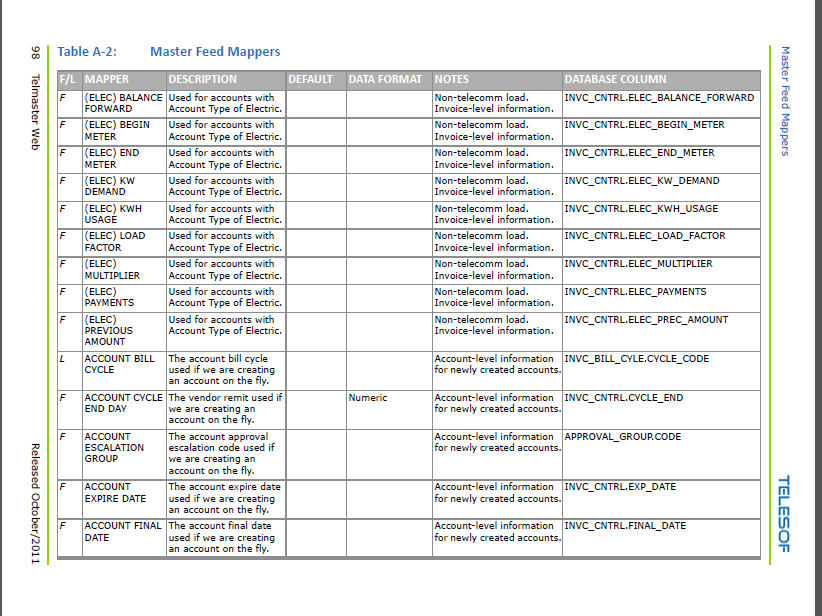
Here is a screen shot of the PDF file:
Regards,
Van
Copy link to clipboard
Copied
Van, as long as you have plenty of time... 
I don't believe a PNG carries anything other than raster - so it wouldn't "know" anything about the font type.
It seems more likely that the issue is position related. Kim's original clipped logo image was the right-most object on the page.
In your clipped PDF, the Arial happens to be the right-most object.
Just for grins, switch the positions of your vertical text strings and see if the new right-most placement gets clipped.
Copy link to clipboard
Copied
G,
Just for grins, switch the positions of your vertical text strings and see if the new right-most placement gets clipped.
Are you grinning?
I put the png with the OTF font right-most, and got:
And you were correct....the right-most png is clipped. I moved the image to several places and it was always clipped, but not in the same place. Here is another position:
For even more grins, I imported a tiff image to check whether format has anything to do with it.
Of course, my original findings that an EPS graphic is just fine remains true.
I would have NOT expected this. I am amazed that the program can print the border of the object but not its bitmapped content.
Van
Copy link to clipboard
Copied
Thanks for indulging me...
Again, I'm not surprised that the *.eps file plays well inside FM.
- Gary
Copy link to clipboard
Copied
Thanks, everyone for looking into this! Here's an update... short version is nothing new to report...
I shared my screen with an Adobe support rep yesterday and walked him through how I created the landscape master pages. Basically, I added new master page called LandscapeRight based on the Right master page, which copies all elements from the original master page including the logo graphic. I then rotated the new page, deleted the text frame and added a new text frame with the correct orientation. As before, the logo looks fine on the body and master pages but is cut off in the PDF, unless you Print to PDF at 97%. We also tried deleting the copied logo graphic and re-inserting it on the mpage. As mentioned before, you cannot control the placement of the logo inside the anchored frame, so doing it this way doesn't put the graphic in the right place and it still doesn't show properly in the PDF. I've given Adobe my templates and test logo files in png format.
I'll post back when I get a response from Adobe.
Kim
Copy link to clipboard
Copied
I just spent another hour with Adobe Support on this issue. We repeated the steps again with the same cropped results for most of the things we tried. The rep decided the issue is truly a bug and is escalating it to the next level.
However, there does appear to be another workaround, which involves using the logo with the extra space for the Right page version. I also had to import the 300dpi graphic at 340dpi (why this works is a mystery). Next, you rotate the landscape page back to portrait. Then you can select the wide graphic and place it so the last letter in the logo is aligned with the right margin (this means the blank space to the right of the graphic is outside the frame). Then you rotate the page back to landscape. At that point, I can print to PDF at 100% and it works - at least in the test file we were using. I'm going to open my real document file and try these workarounds. I'll post back with my results.
Kim
Copy link to clipboard
Copied
I've just tested the workaround on my real doc and am happy to report that I can now Save as PDF or Print to Adobe PDF at 100% with no problems. Here are the steps I followed to get things to work. I needed to use the "wide" version of the graphic that had the extra space to the right of the logo.
- Open the book and all documents.
- In the appendix with the landscape pages, view the LandscapeRight master page.
- Delete the anchored frame and graphic in the header.
- File > Import the wide graphic at 340 dpi (not the 300 dpi that the graphic was created at).
- Adjust the anchored frame to the correct position (Anchoring Position=Bottom of Column, Alignment-Left, Floating).
- Now the anchored frame is in the right place, but the graphic is centered in the frame and needs to be moved so it aligns with the header text and page margin. While the page is rotated to landscape, you can't select the graphic and move it.
- Rotate the landscape master page counter-clockwise back to portrait.
- Now grab the graphic and align it in the frame so the baseline aligns with the running head text and the edge of the logo is at the margin.
- Rotate the landscape master page clockwise back to landscape.
- Make the same changes to the LandscapeLeft master page.
- The body pages don't look any different, but both saving as PDF and printing to PDF work properly at 100%.
To be honest, I don't why this works, but it does. I hope this helps. I'll post back if I get more info from Adobe.
Copy link to clipboard
Copied
Hi Kim,
While it sounds like you are happy with the result, I wonder if the graphic that has been imported at 340dpi is actually smaller (printed) than the one previously imported at 300dpi. I suspect any difference would be hard to see "naked eye" but likely could be measured.
Even if this logo graphic ends up printing smaller, the fact that the rest of the doc prints at 100% should make everyone happy.
- Gary
Copy link to clipboard
Copied
Hi All:
I just had the same issue (.jpg image) and was glad to see I was not alone. I just discoverd one other fix.
- Rotate the actual image file the way it would look in the landscaped page. I used MS Office Picture Manager.
- On the landscape page, create an anchored frame flipped from what you want (a 2 x 3 needs to be built as 3 x 2). It will stick out the perpendicular to what you want when built, but we will fix that.
- Import the image you turned. It enters the frame centered correctly in the frame...perpendicular to what you want.
- Click the image/anchored frame. This will merge the frame and image into one. If you don't click the image at this point, it doesn't look like anything is happening in the next step.
- Rotate the anchored frame so it is the right direction to the page. If you did not click the image in step 4 and started trying to rotate, it looks like nothing is happening. If you click the image after you clicked rotate a few times, then rotate the frame, the anchored frame rotates and the image will rotate for the number of times you clicked rotate. Control-Z to back out of that.
- Repeat for the other landscaped pages.
- View the body pages and create the PDF as normal.
Everything comes out good.
My guess that when you rotate the image there is residual data from the original orientation blocking the image, but the border is on top so it is not affected. I had the same results of the header cut off the right, and the footer cut off the left.
At least there are a few fixes now.
-Emily
Copy link to clipboard
Copied
Van > I would have NOT expected this. I am amazed that the program can print the border of the object but not its bitmapped content.
I wonder if this is another manifestation of the "line at a right edge of raster" problem, where something (possibly Frame, or downstream) is printing bitmap content that isn't there at all.

 AdChoices