 Adobe Community
- Home
- Illustrator
- Discussions
- Re: Creating a repeating 2d radial vortex
- Re: Creating a repeating 2d radial vortex

Copy link to clipboard
Copied
I am creating a design that uses an object in a repeating radial "vortex" pattern, but having a difficult time getting it to look precise. After creating the object, I use the pattern brush tool to repeat the pattern along concentric circular paths. This method does a great job of warping the object to fit the circular path. However I'm eyeballing the scale and spacing, and the success of this design depends on everything lining up geometrically. Any advice is welcome!


 2 Correct answers

I would create the repeat (stack them vertically)
You can use the pattern editing mode for creating that.
Then make a pattern brush out of the result and apply it to one path.
I have built this manually:


Nick,
I just came upon this, and I hope it is in time.
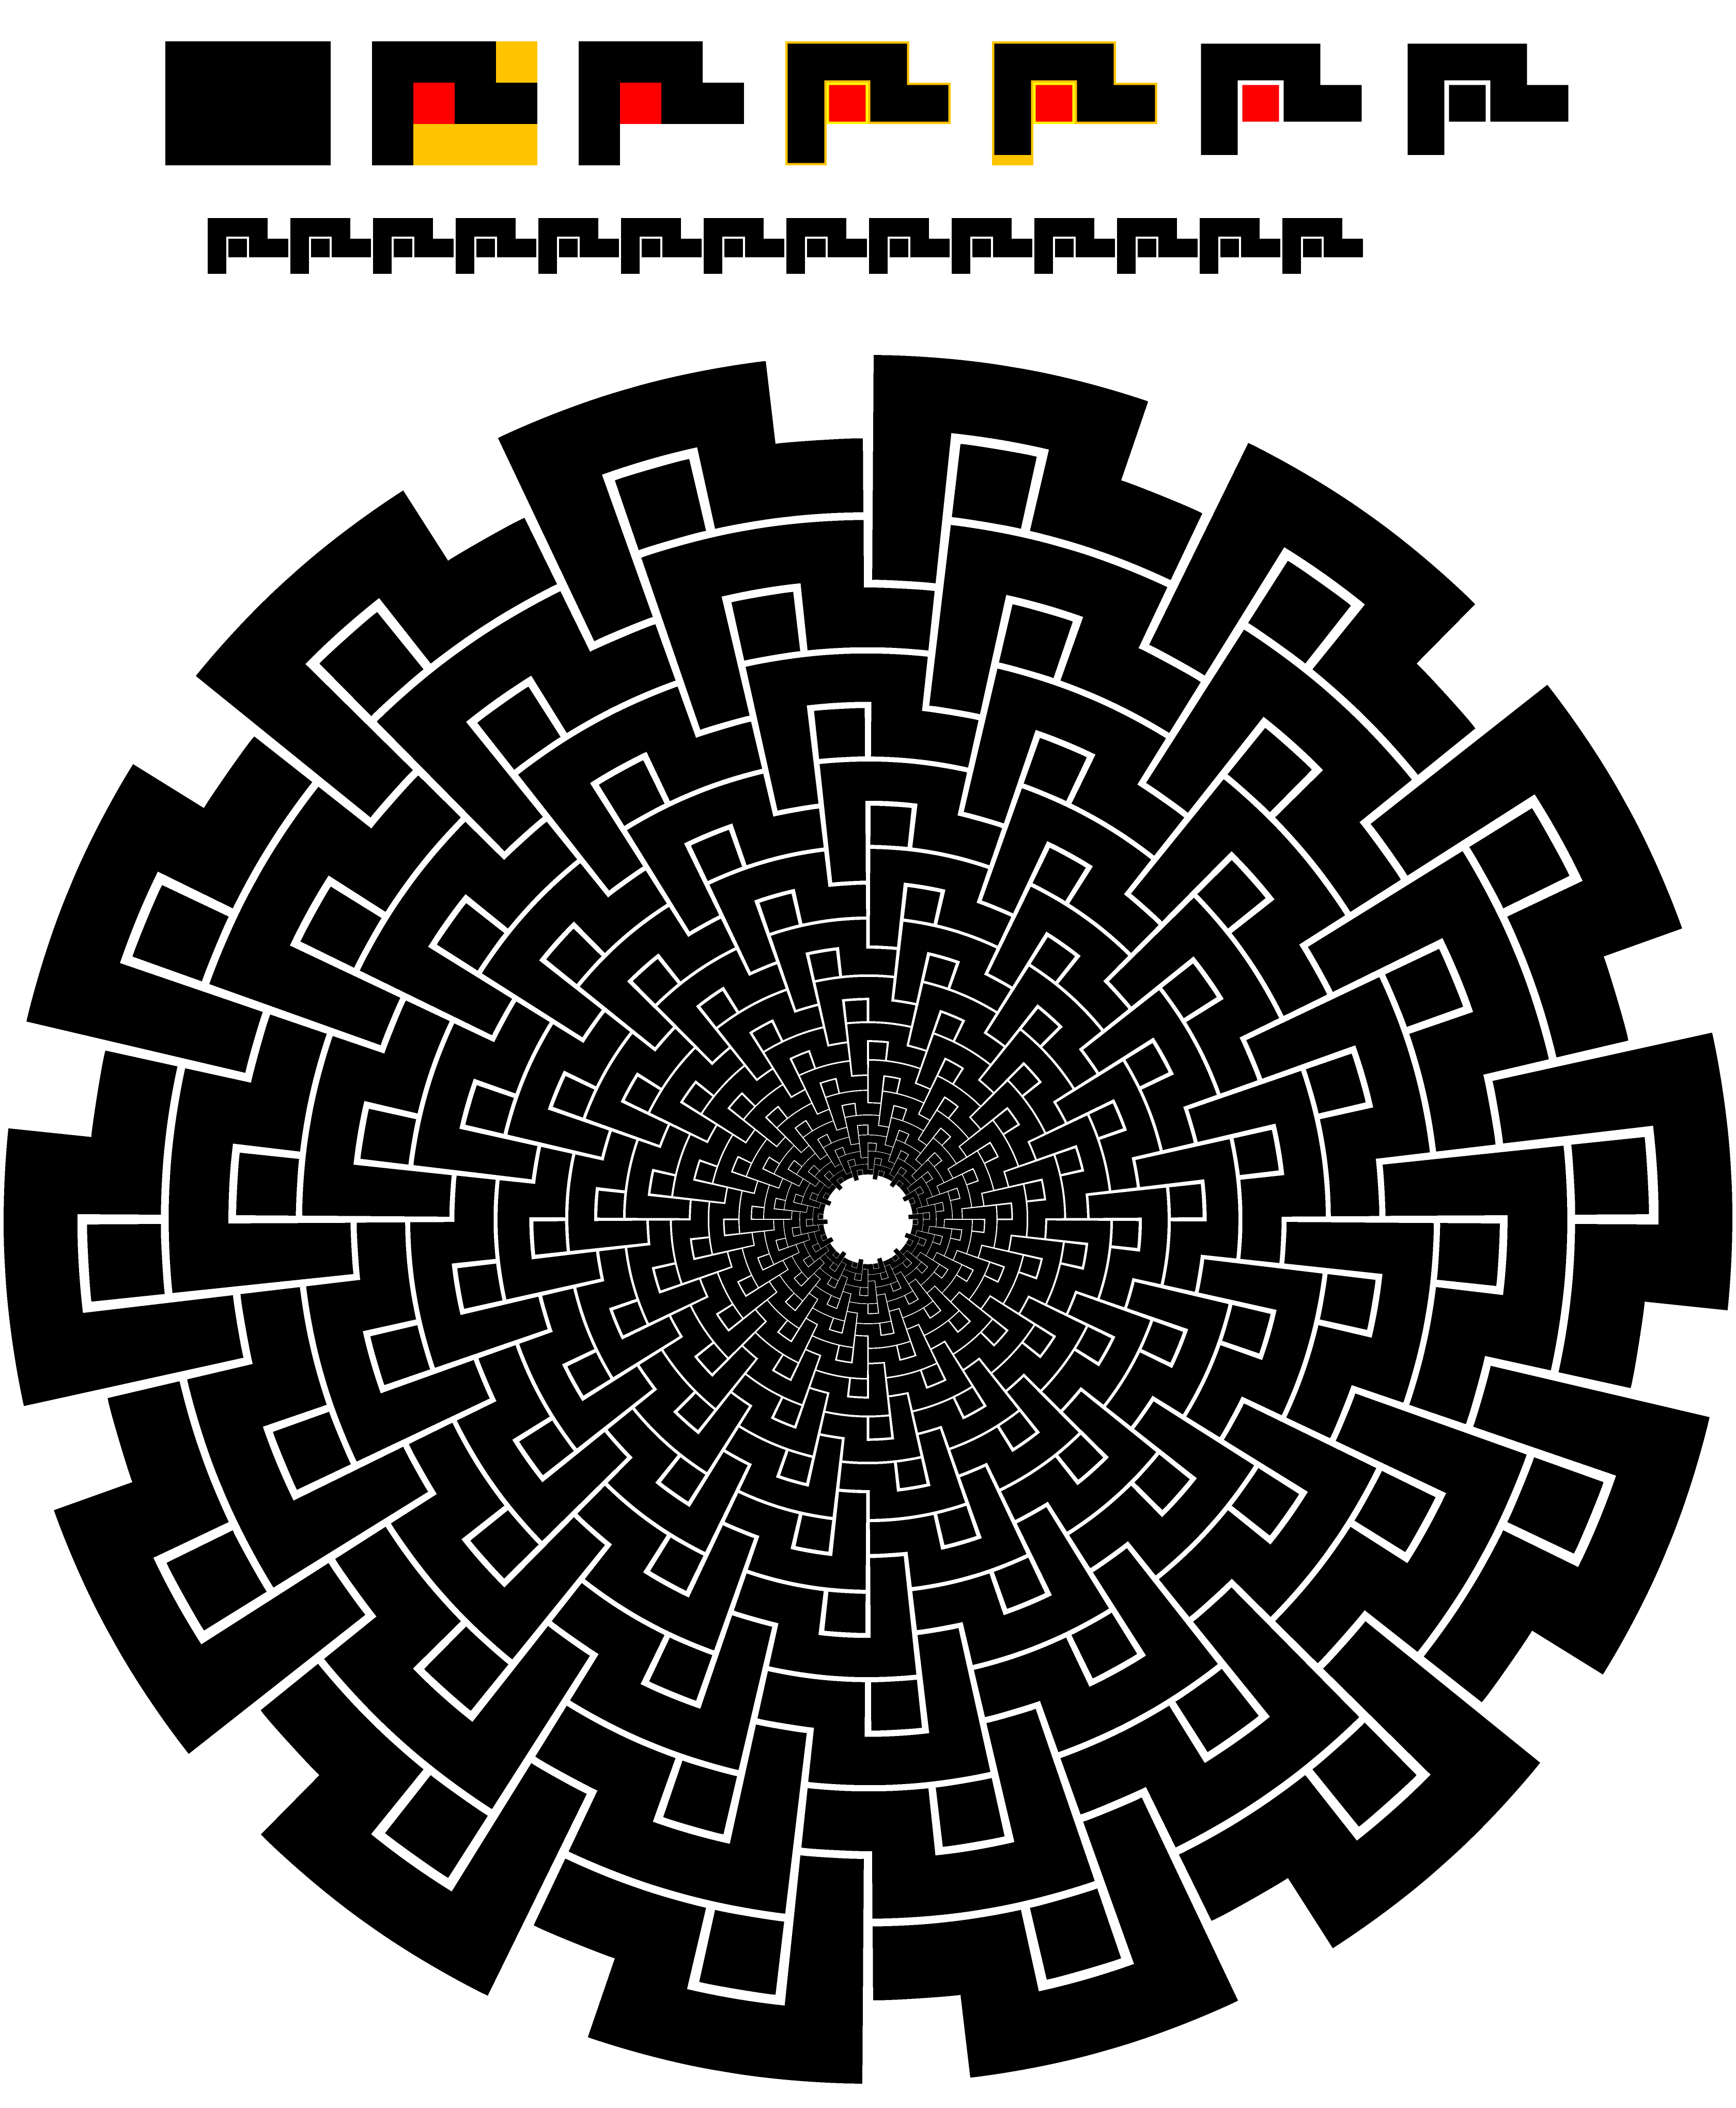
Is this the kind of vortex pattern you are after (see description of steps below)?
Click/RightClick to get closer and Click again to get closer still, Click Here to see in Chrome
DESCRIPTION OF STEPS (WITH VALUES USED):
First row: creation of the basic shape (with measures):
1) Simple rectangle (80x60 pt),
2) Cutouts (red to form separate part 20x20 pt, dark yellow to remove 20x20 pt and 60x20 pt),
3) Two paths left, black and
...Explore related tutorials & articles
 12
Replies
12
12
Replies
12

Copy link to clipboard
Copied
I think that the only thing you're missing is the Blend tool.
Create the smallest circle and apply the brush. Create the largest circle and apply the brush.
Select both circles and Object > Blend > Make.
White the circles are still selected, double- click on the Blend tool in the Tools panel or choose Object > Blend > Blend Options. Change Spacing to Specified Steps, turn on Preview and put in the number of steps (circles) you need.
Copy link to clipboard
Copied
I would create the repeat (stack them vertically)
You can use the pattern editing mode for creating that.
Then make a pattern brush out of the result and apply it to one path.
I have built this manually:
Copy link to clipboard
Copied
Thank you! I did this design previously with a pattern brush and it worked out well enough, but I did it differently and had to - your method would have saved me some time. I had to manually adjust each row of the design each time I resized it. Hard to explain, but this will definitely help me in the future.
Copy link to clipboard
Copied
Nick,
I just came upon this, and I hope it is in time.
Is this the kind of vortex pattern you are after (see description of steps below)?
Click/RightClick to get closer and Click again to get closer still, Click Here to see in Chrome
DESCRIPTION OF STEPS (WITH VALUES USED):
First row: creation of the basic shape (with measures):
1) Simple rectangle (80x60 pt),
2) Cutouts (red to form separate part 20x20 pt, dark yellow to remove 20x20 pt and 60x20 pt),
3) Two paths left, black and red (to discern),
4) Negative offset (-1.2 pt) of each path to create the gaps and still keep the size, original paths in pale colours to discern,
5) Additional negative offset at the downward part of the black path (moved up by 3.8 pt, highly customized, may require Undoing of all the following steps and redoing) to adapt the gap to the downscaling in the vortex,
6) Opacity of original paths changed to 0% to implement the gaps,
7) Red path recoloured to black and all paths Grouped (total size still 80x60 pt)
Second row:
1) Basic shape copied and reduced in size (40x30 pt), optional done here to show in full,
2) Basic shape copied as effect (Effect>Distort&Transform>Transform, moved 40 pt, 13 copies),
3) Basic shape with copies turned into Art Brush with Proportional ticked to keep the shape(s).
Third row:
1) Circle created (720x720 pt) with adapted Stroke Weight (2pt, with no reduction in second row it would be 1pt) and cut at the top Anchor Point (Scissors Tool) to start/stop the Art Brush there, optional,
2) Artbrush applied to circle,
3) Circle with Artbrush copied as effect (Effect>Distort&Transform>Transform, scaled (by 80.9% both ways, highly customized, may require Undoing and redoing) to get the right fit and gaps, rotated (by -360/56 degrees) to make the basic shapes fit into one another thereby creating the vortex, a suitable number of copies (13 copies chosen to clearly show the 14 downward parts at the centre), can be chosen as desired.

Copy link to clipboard
Copied
Excellent construction guide and excellent result, Jacob.
Copy link to clipboard
Copied
Thank you very much for your kind words, Kurt.
Copy link to clipboard
Copied
Nice job!
Copy link to clipboard
Copied
Thank you very much, Barbara.
Copy link to clipboard
Copied
Copy link to clipboard
Copied
You are welcome, Nick.
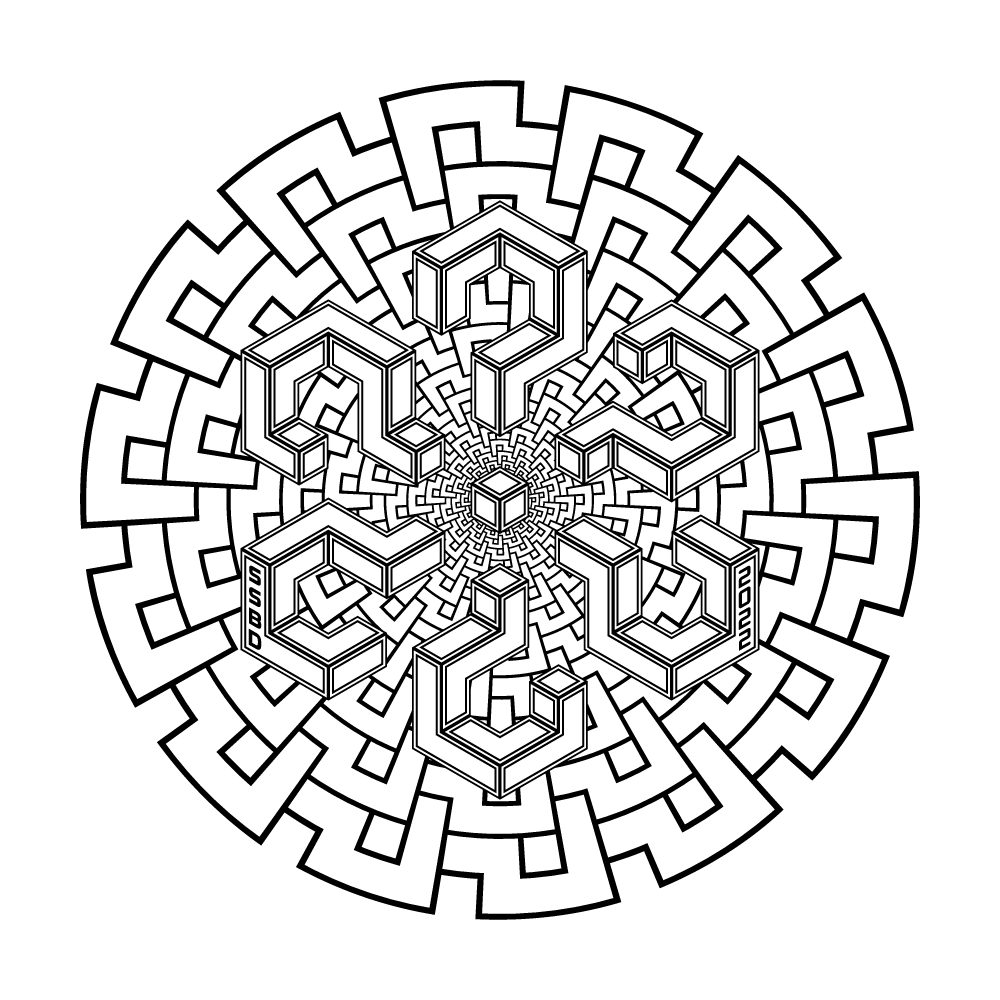
Very nice work on top of the radial vortex.
As far as I can see, this is the way that preserves the proportions of the basic shape instances and the gaps between them all the way into the radial vortex, the inner circles being downscaled replicas of the outermost circle.
Copy link to clipboard
Copied
Thank you again for your help with this design, I'm really happy with how it turned out.
While I was playing with the settings, I noticed this pattern looks especially cool when it animates inward/outward. I want to try my hand at animating this as a loop. I'm sure I could manually create the frames in illustrator, but is there maybe another tool or program that would simplify the process? Thanks in advance!
Copy link to clipboard
Copied
You are welcome, Nick.
It was a very pleasant challenge to develop that way.
How about Animate (formerly Flash) for animating?
You can have a look here,
And you can ask questions here,
https://community.adobe.com/t5/animate/ct-p/ct-animate?page=1&sort=latest_replies&lang=all&tabid=all
and find posts related to Illy (job description Adobe Illustrator) here,

 AdChoices