 Adobe Community

Copy link to clipboard
Copied
Hello,
I have two similar shapes that I am trying to duplicate a few times and then "snap" them to a path. I decided to use "blend", with blend options being 8 independent steps. When I apply the blend, it makes the correct number of steps but for some reason distorts the blended shapes. I made the second shape by duplicating the first, so they're exactly the same. Any ideas why this is happening?


 1 Correct answer
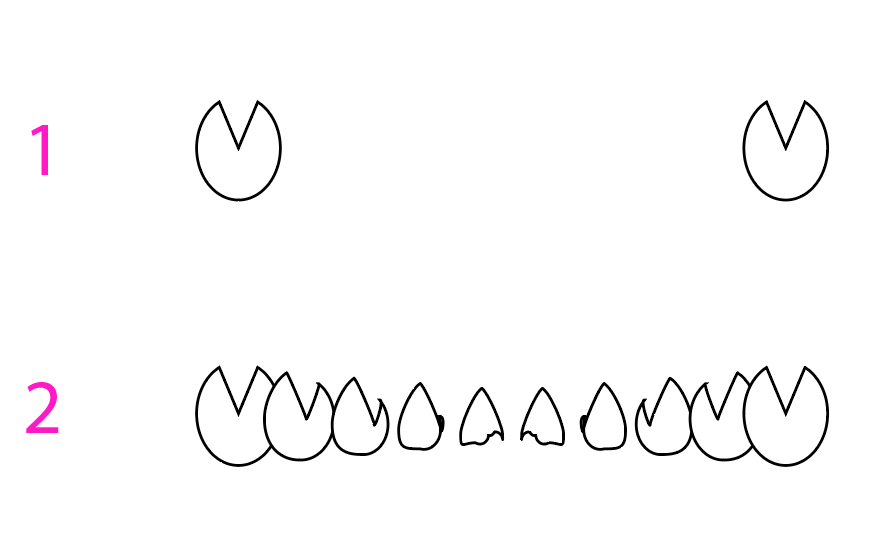
To amplify what Larry said, these blends were created by clicking with the Blend Tool on the indicated anchor points. In the top example, I selected points haphazardly; in the bottom one, I selected corresponding points.

The bottom example is also the result when using the menu command Object > Blend > Make, or the applicable keyboard shortcut.
Peter
Edit: And what JET said.
Explore related tutorials & articles
 13
Replies
13
13
Replies
13

Copy link to clipboard
Copied
Can you indicate the anchor points you used for the blend? It makes a difference.
Copy link to clipboard
Copied
You were right! I had not been selecting the corresponding anchor points, thanks for the help!
Copy link to clipboard
Copied
You’re welcome. And thanks to Peter for the visuals.

Copy link to clipboard
Copied
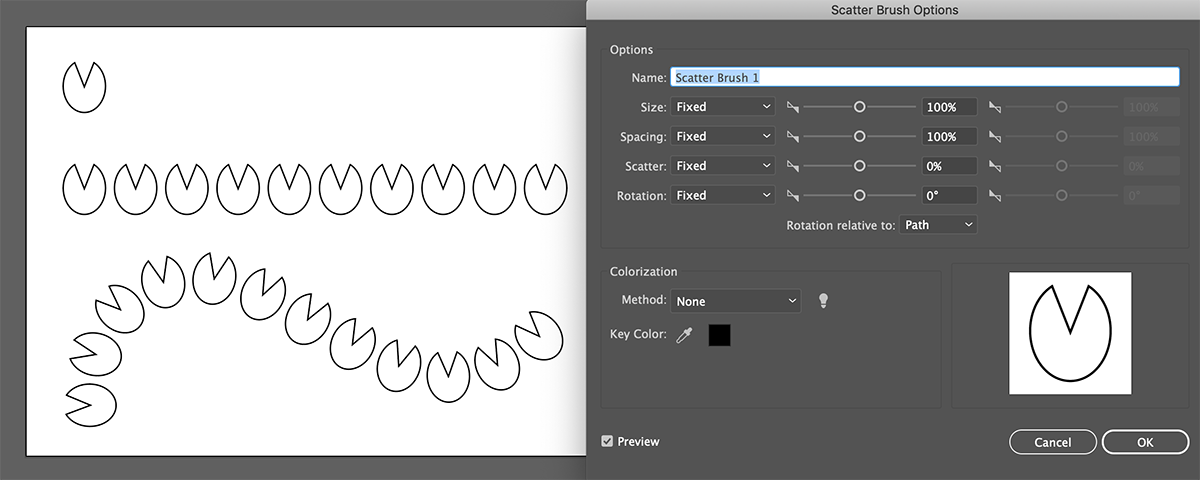
Not knowing what you plan on using this for I may be way off but you could try turning your shape into a Scatter Brush. You could then apply this brush to any kind of straight or curved path.
Note that the "Rotation relative to" option is set to "Path" and you could also play with the Spacing.
You could also turn this into a Pattern Brush.
Copy link to clipboard
Copied
This is a great alternative, thanks for the help!
Copy link to clipboard
Copied
Thank you
Copy link to clipboard
Copied
You're welcome, and thanks, everybody, that was kinda like teamwork!

Copy link to clipboard
Copied
Nana,
I believe you may start out with a path that has asymmetrical Anchor Points, in which case you may wish to start over; you can create the first one, then move a copy horizontally to the right, then make the blend form those (remember to align to path if you wish to have adapted rotations rather than everything upright).
It is better/safer/simpler to work with symmetrical ones.

Copy link to clipboard
Copied
Blends work by interpolating positions of corresponding nodes (anchorPoints) in the base paths. Path direction also comes into play.
Best practice for predictable results is to, when possible, have the same number of nodes and same winding direction in the base paths.
JET
Copy link to clipboard
Copied
James,
Blends work by interpolating positions of corresponding nodes (anchorPoints) in the base paths. Path direction also comes into play.
Best practice for predictable results is to, when possible, have the same number of nodes and same winding direction in the base paths.
That is the most complete and concise Blend explanation I have seen; truly the long answer.
Copy link to clipboard
Copied
To amplify what Larry said, these blends were created by clicking with the Blend Tool on the indicated anchor points. In the top example, I selected points haphazardly; in the bottom one, I selected corresponding points.

The bottom example is also the result when using the menu command Object > Blend > Make, or the applicable keyboard shortcut.
Peter
Edit: And what JET said.
Copy link to clipboard
Copied
Nana, everyone,
An exquisite and enjoyable thread.

Copy link to clipboard
Copied
In fact, the solution of the problem was at a very easy point. The reason I am answering this right now is that I am looking for the answer to this question. If you convert the shape you use to symbol, it is possible to do whatever you want without any problem. It will work as often as you want and color change. Turning and twisting is not a problem.

 AdChoices