 Adobe Community
- Home
- Illustrator
- Discussions
- How to wrap a bar chart around a circle?
- How to wrap a bar chart around a circle?

Copy link to clipboard
Copied
Hi all,
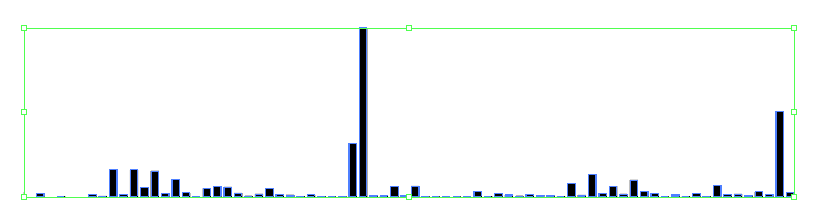
In the process of creating an infographic, I'd like to create a bar chart that gets properly circularized. I've created it with the chart tool, removed everything but the bars and grouped it:
Then I created it as a new art brush, and applied it to a circle:
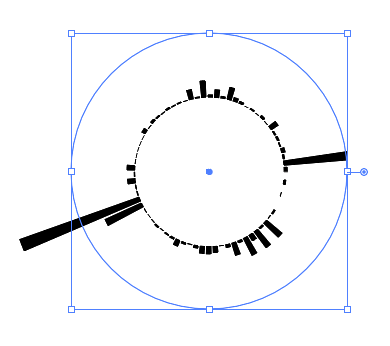
But the bars are warped and it's not on the path of the circle. I end up expanding the circle to size it, rather than having it on that precise path. And when I adjust the stroke size of the circle, the inner diameter and bar height really change, further distorting the shape.
How can I take the original chart and just arrange it around the circle without changing the shapes of the bars?
Many thanks in advance!


 1 Correct answer

Matt,
Sorry, I spotted a serious error in 3) in the description in post #2:
Here is an amended version (the other steps are unchanged):
1) Copy the first bar so it appears at the right distance after the last bar (the same distance as between all the bars) so you have that as a double, then Ctrl/Cmd+G to Group the bars;
2) Ctrl/Cmd+C+F to create a copy of the bar group, then Object>Transform>Reflect with Axis Horizontal, then deselect and ShiftClickDrag by one of the top corners to snap to the corre
...Explore related tutorials & articles
 15
Replies
15
15
Replies
15

Copy link to clipboard
Copied
You would need to create it that way.
Maybe try something like: https://d3js.org/
Copy link to clipboard
Copied
elektrik,
I believe you can do it without too much work, just using the inherent tools and ways, starting (over) from the ungrouped bars, Smart Guides being your friends:
1) Copy the first bar so it appears at the right distance after the last bar (the same distance as between all the bars) so you have that as a double, then Ctrl/Cmd+G to Group the bars;
2) Ctrl/Cmd+C+F to create a copy of the bar group, then Object>Transform>Reflect with Axis Horizontal, then deselect and ShiftClickDrag by one of the top corners to snap to the corresponding bottom corner of the original bar group, then remove the Fill from the copy so it becomes invisible;
3) Group the original and the copy;
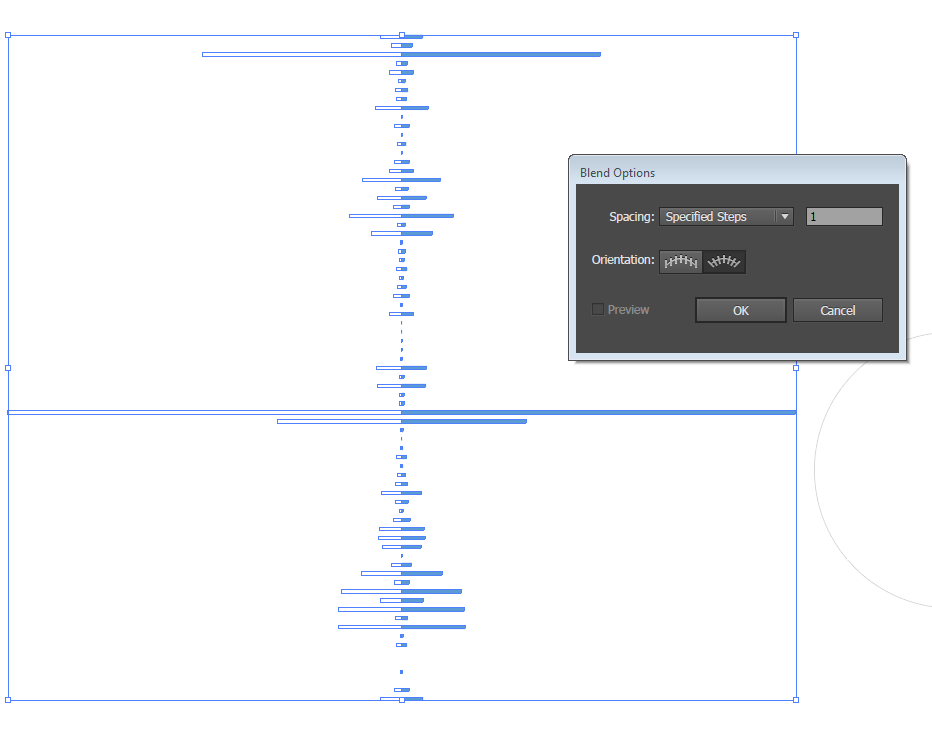
Now comes the one step Blend fake:
4) Object>Blend>Options>Specified steps, set the value to 1 and set Orientation to Align to Path;
5) Select all the objects and Object>Blend>Make (now you have intermediate shapes between the objects, but not for long);
6) Create/Select the circle and cut it where you wish the first/last bar (which will be on top of each other;
7) Select the Blend from 5) and the circle from 6) and Object>Blend>Replace Spine;
8) Object>Blend>Release;
9) Click on the first/last bar and press Delete.
This should leave you with the undistorted bars in place round and outside the circle.
Copy link to clipboard
Copied
Hi Jacob,
Thanks so much for the detailed and thoughtful response -- I appreciate it. I haven't been able to get there and I'm hoping you may know what I'm missing.
After step 6, I'm left with the blended chart and my cut circle (I cut it at the 3 o'clock position):
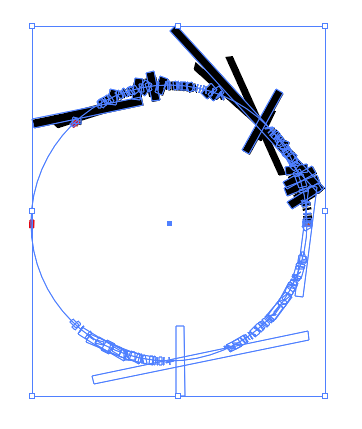
But then when I apply step 7 and Replace Spine, I end up with this:
What am I missing? I'm not sure what that chart has become (it un-reflected the invisible copy?) but it's definitely not the goal  . Any thoughts would be much appreciated.
Thanks again,
Matt
Copy link to clipboard
Copied
Matt,
Sorry, I spotted a serious error in 3) in the description in post #2:
Here is an amended version (the other steps are unchanged):
1) Copy the first bar so it appears at the right distance after the last bar (the same distance as between all the bars) so you have that as a double, then Ctrl/Cmd+G to Group the bars;
2) Ctrl/Cmd+C+F to create a copy of the bar group, then Object>Transform>Reflect with Axis Horizontal, then deselect and ShiftClickDrag by one of the top corners to snap to the corresponding bottom corner of the original bar group, then remove the Fill from the copy so it becomes invisible;
3) Ungroup the original and the copy, then Group each pair of bars to form a double bar (symmetrical over/under the bar base, visible/invisible);
Now comes the one step Blend fake:
4) Object>Blend>Options>Specified steps, set the value to 1 and set Orientation to Align to Path;
5) Select all the objects and Object>Blend>Make (now you have intermediate shapes between the objects, but not for long);
6) Create/Select the circle and cut it where you wish the first/last bar (which will be on top of each other;
7) Select the Blend from 5) and the circle from 6) and Object>Blend>Replace Spine;
8) Object>Blend>Release;
9) Click on the first/last bar and press Delete.
This should leave you with the undistorted bars in place round and outside the circle.
Copy link to clipboard
Copied
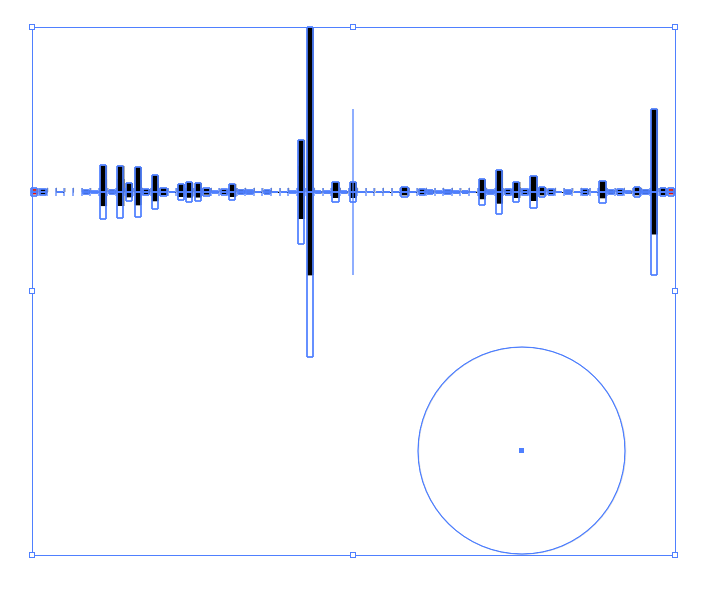
Thanks again, Jacob. I must be doing something wrong. When I do the blend, I get some wacky bars and a very odd result. After the blend:
Then after cutting the circle and replacing the spine:
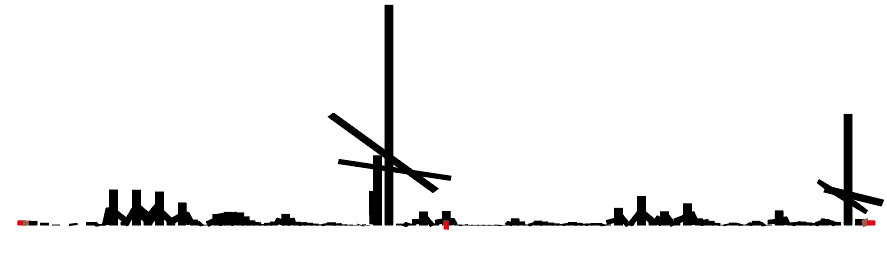
I wonder if I'm creating the bar chart incorrectly? In the examples above, I deleted everything but the bars - axis marks, separators, even the paths around the bars. When I just create a new chart and only erase the X-axis, labels and Y axis, then do the steps again, I get this:
So that's closer to the end result, but it has all the X axis tick marks on the right side and doesn't loop the first bar back around to the duplicated last bar (I've coloured that bar red). Is there a better/different way I should be working with the chart? I just did a simple bar, pasted the data from Excel, then used Object > Flatten Transparency and then Ungroup.
Thanks again for your help! I really appreciate it!
Copy link to clipboard
Copied
Matt,
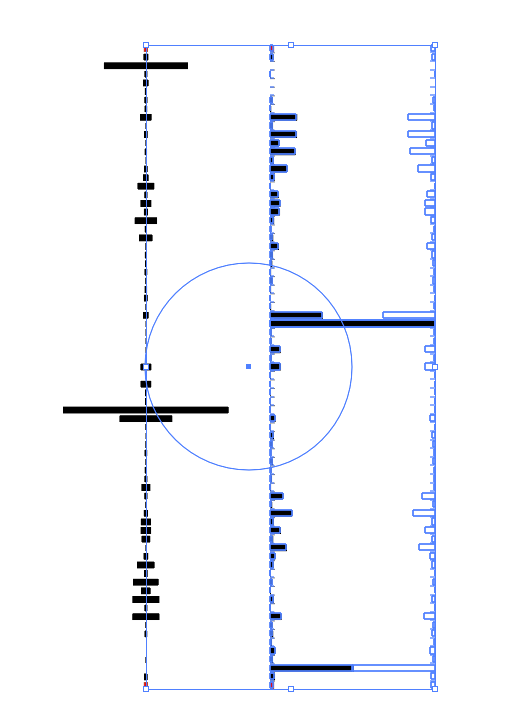
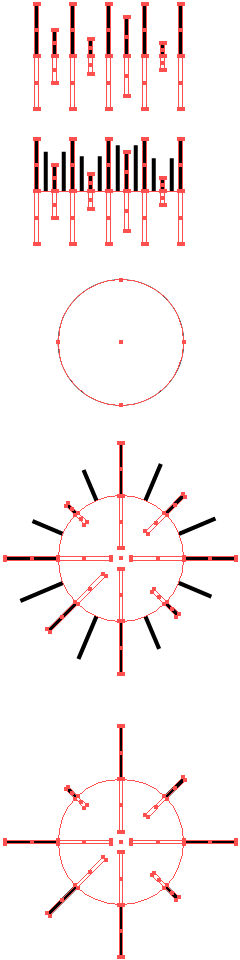
Here is a screenshot with everything selected of certain steps on the way with a crude/simplified version (just 8 (+1) bars corresponding to 45 degrees between them on a circle), all done exactly as described:
The first one shows the set of bar pairs after step 3);
The second one shows the 1 step fake blend after step 5);
The third one shows the circle cut at the top;
The fourth one shows the blend with the circle as the spine (the unseletcable ones are the the 1 steps between the others) after step 7;
The fifth one shows the final bars after releasing the blend (the selected ones in the fourth one) after step 8) which looks like the final result after step 9 because the last bar pair is on top of the first one.
As you can see they all behave, and they are spread evenly round the circle at every 45 degrees, starting/ending at the top.
You may try to compare this to your results at the corresponding steps.
Copy link to clipboard
Copied
Thanks for the detailed examples, Jacob. I'm not sure where I'm going wrong, but when I do the blend, I get bizarre results, and so when I carry that forward, it's wrong. I will keep playing with it. Thank you!
Copy link to clipboard
Copied
I tried a different approach to the bar content by exporting an Excel-made chart as a PDF, then editing that to pull out the elements into a new .AI file.
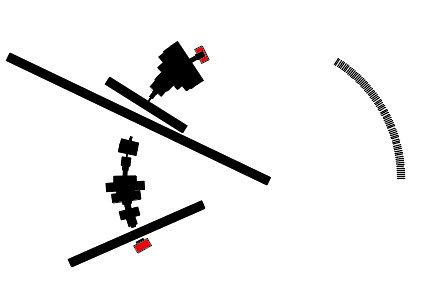
But again the blend generates all these extra/wrong bars:
Before Blend:
After Blend:
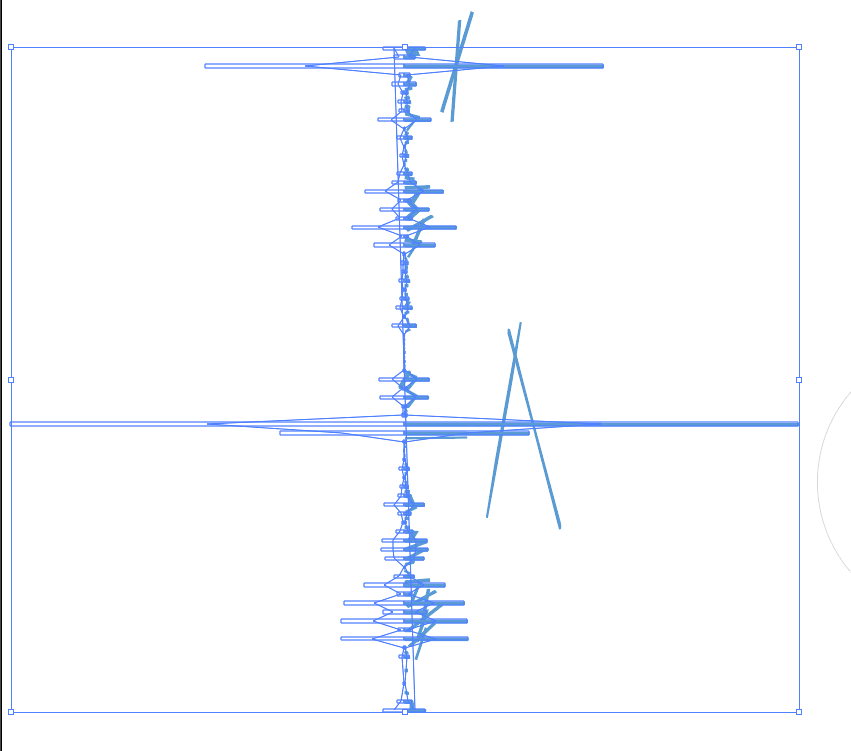
What is my blend doing to get that? I have one group with the 2 sets - normal bars on the right, empty bars on the left. I don't understand. When I would make the first/last bar red, it would pull the red across the whole axis. I'm missing something but I sure don't know what it is.
Thanks for any input.
Copy link to clipboard
Copied
Matt,
I believe the clue may lie in wrong grouping of the bar sets (I prefer creating blends horizontally from left to right as described in the isnstructions):
I have one group with the 2 sets - normal bars on the right, empty bars on the left.
In the amended version it says (to be followed rigorously, blends are easily muddled up):
1) Copy the first bar so it appears at the right distance after the last bar (the same distance as between all the bars) so you have that as a double, then Ctrl/Cmd+G to Group the bars;
2) Ctrl/Cmd+C+F to create a copy of the bar group, then Object>Transform>Reflect with Axis Horizontal, then deselect and ShiftClickDrag by one of the top corners to snap to the corresponding bottom corner of the original bar group, then remove the Fill from the copy so it becomes invisible;
3) Ungroup the original and the copy, then Group each pair of bars to form a double bar (symmetrical over/under the bar base, visible/invisible);
With 3) the ungrouping of the 2 sets, you should have no group(s) but just single independent bars (filled ones at the top, empty ones at the bottom), then you should select the corresponding bars to form each pair (the filled one at the top and the empty one at the bottom) and Group those to form just one group for each pair.

Copy link to clipboard
Copied
Hello, Jacob, could you do video tutorial for this? I have followed the instructions you write but still experienced the same problem from the step (4) to the rest. Or is there any video tutorial about this? Thanks
Copy link to clipboard
Copied
Ari,
I have never made a videeo, nor have I (or wish to have) any clue how to make one.
But:
Here is a further amended version, with an addition in step 1) to reflect what I actually did (and always do) but failed to mention, it is too easy to forget the obvious, sorry:
1) Copy the first bar so it appears at the right distance after the last bar (the same distance as between all the bars) so you have that as a double, then change the stacking order as needed in the expanded Layer in the Layers panel so that it reflects the positions of the bars (presumably with the first bar at the bottom and the double at the top above the last bar (or the reverse), presumably you only need to move the double), then Ctrl/Cmd+G to Group the bars;
2) Ctrl/Cmd+C+F to create a copy of the bar group, then Object>Transform>Reflect with Axis Horizontal, then deselect and ShiftClickDrag by one of the top corners to snap to the corresponding bottom corner of the original bar group, then remove the Fill from the copy so it becomes invisible;
3) Ungroup the original and the copy, then Group each pair of bars to form a double bar (symmetrical over/under the bar base, visible/invisible);
Now comes the one step Blend fake:
4) Object>Blend>Options>Specified steps, set the value to 1 and set Orientation to Align to Path;
5) Select all the objects and Object>Blend>Make (now you have intermediate shapes between the objects, but not for long);
6) Create/Select the circle and cut it where you wish the first/last bar (which will be on top of each other;
7) Select the Blend from 5) and the circle from 6) and Object>Blend>Replace Spine;
8) Object>Blend>Release;
9) Click on the first/last bar and press Delete.
This should leave you with the undistorted bars in place, round the circle with the visible bars outside.
Copy link to clipboard
Copied
Hi Jacob,
I'm sure I already follow all your steps.But this is what I got:
This is how my chart looks after step (3)

Then, this is how it looks after I blend it like in step (4) & (5)

And this is how it looks after replace the spine to the circle like in step (7)

Could you give a screenshots to your explanation? It would be more helpful where did I wrong. Your pos in https://community.adobe.com/t5/illustrator/how-to-wrap-a-bar-chart-around-a-circle/m-p/8822435#M3768... didn't show any picture.
Copy link to clipboard
Copied
Ari,
Some time after September 2019, the combination of forum software and Chrome stopped showing live links, so I have added a link to click there for (any) Chrome users.
Did you use the amended step 1) shown in this post?
In some blend cases there can also be strangenesses if there are fundamental differences between the paths to blend (such as orders/numbers of Anchor Points); in this thread I have presumed none (similar paths with same structure/orientation/direction).
And some blend cases have gone unresolved.

Copy link to clipboard
Copied
Ari, Hi
I recently did a similar file. As always there are different methods with Adobe.
Here I created an Illustrator Pattern Brush and applied it to a close path Circle.
As a starting point, I random colored the first bar tan and ending bar blue.
Pattern brushes need a Fill/Stroke of none. (Shown here in red so you can see.)
The height is twice the size of those rays. (so the brush will fall on the exterior of the circle.)
The width is a 6pt larger (my spacing was 6pt between those rays)
Applied the Brush to a circle.
As you can see, those random rays are evenly distributed on that circle and no overlaps, No distortion, and you can see the starting and ending rays.
K


Copy link to clipboard
Copied
This has been very useful for me. Thank you. But for a small number of bars, it gives perspective to the bars and expands them a little from the top. Do you have a suggestion for this?
Actually, there has to be an easier way. I wish in Illustrator a tool could easily wrap shapes and text around a shape.
During preparing infographics, would be really helpful. I tried this method for text but the texts are really distorted.


 AdChoices