 Adobe Community
- Home
- Illustrator
- Discussions
- Re: Need help with turning a logo into a single tr...
- Re: Need help with turning a logo into a single tr...
Copy link to clipboard
Copied
Hello,
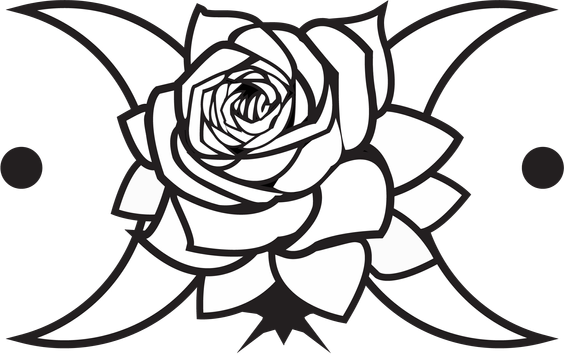
I'm still fairly new to Illustrator and I had a question regarding a project for a client. I created this logo for a business and they loved it but they would like a version that is transparent (only the strokes will be seen). And I can't for the life of me figure out how to do this.
First I tried to use simply remove the fills from all of the petals in the rose, but that reveald all of the underlying layers, which doesn't work for my purposes. Then I tried to make the entire logo filled with white (as seen below), which I was planning on merging together, and then selecting all of the white areas from the flattened image and deleting, but I can't seem to get that to work either without turning the layers into raster art first. To be clear my background in in Photoshop, and I understand that vector and raster art are very different things. I feel like my plan is more inline with PS, but I do want this logo to be rescalable as a vector. So I guess I could use any help or suggestions on how to achieve this goal. Thanks!
 2 Correct answers
Joshua,
How about the good old Knockout group?
1) Select all the paths and in the Appearance palette click the white Fill to select (only that), then in the Transparency palette set the Opacity to 0,
2) Ctrl/Cmd+G to Group everything,
3) In the Transparency palette tick Knockout Group.
You need to first outline all effects and outline all strokes. And then you can use Pathfinder Merge.
Then delete what you don't need.
Explore related tutorials & articles
Copy link to clipboard
Copied
There are many ways, but you could try to select your logo, choose the Shape Builder Tool (Shift M) and while holding down the Alt key drag over the white areas to remove them.
You can turn on View > Show Transparency Grid to see the result.
Copy link to clipboard
Copied
Joshua,
How about the good old Knockout group?
1) Select all the paths and in the Appearance palette click the white Fill to select (only that), then in the Transparency palette set the Opacity to 0,
2) Ctrl/Cmd+G to Group everything,
3) In the Transparency palette tick Knockout Group.
Copy link to clipboard
Copied
Thanks for the replies. The problem with both of those solutions is that the underlying strokes from the other layers of petals all show through. I did try to merge all of the layers together using the pathfinder "merge" option (then knocking out the white), however several of the petals suddenly lost their strokes. I found a temporary solution by exporting to PS, and then simply selecting the white shades and deleting them, and saving as a transparent SVG. It's not really how I want to do it, because I'm worried all of my lines are now pixelated. But the client is happy with the work. (It's a friend too, so she knows I'm learning. No pressure on a deadline). But still I'd like to figure out how to do this more easily for future projects.
Copy link to clipboard
Copied
You need to first outline all effects and outline all strokes. And then you can use Pathfinder Merge.
Then delete what you don't need.
Copy link to clipboard
Copied
Yes! Thank you that fixed it. I wasn't creating outlines. Awesome, this looks perfect. TY again.
Copy link to clipboard
Copied
Joshua,
Are you sure you followed all the steps exactly and in order? The underlying strokes remain visible until you tick Knockout Group in 3).
Copy link to clipboard
Copied
Awww yes I missed the Knockout group checkmark. ty
Copy link to clipboard
Copied
I also found an even easier way of doing this haha. Just export everything to a large PNG, select all the white areas in PS, delete. Save as a PNG, import new PNG into AI, use the trace plugin, and simply create a who object out of only the black outlines of the logo. Exactly what I was trying to do.
Copy link to clipboard
Copied
That way might look easier, but doesn't produce quality results. So it's not recommended to do so.
Copy link to clipboard
Copied
For my part you are welcome, Joshua.
And what Monika said. Just try to zoom in and compare (see also the number of Anchor Points). Especially working for others and especially in connexion with logos, full quality is crucial, such as (given away when zooming in) in the moon(like) parts.


