 Adobe Community
offsetting a messy PNG
Copy link to clipboard
Copied
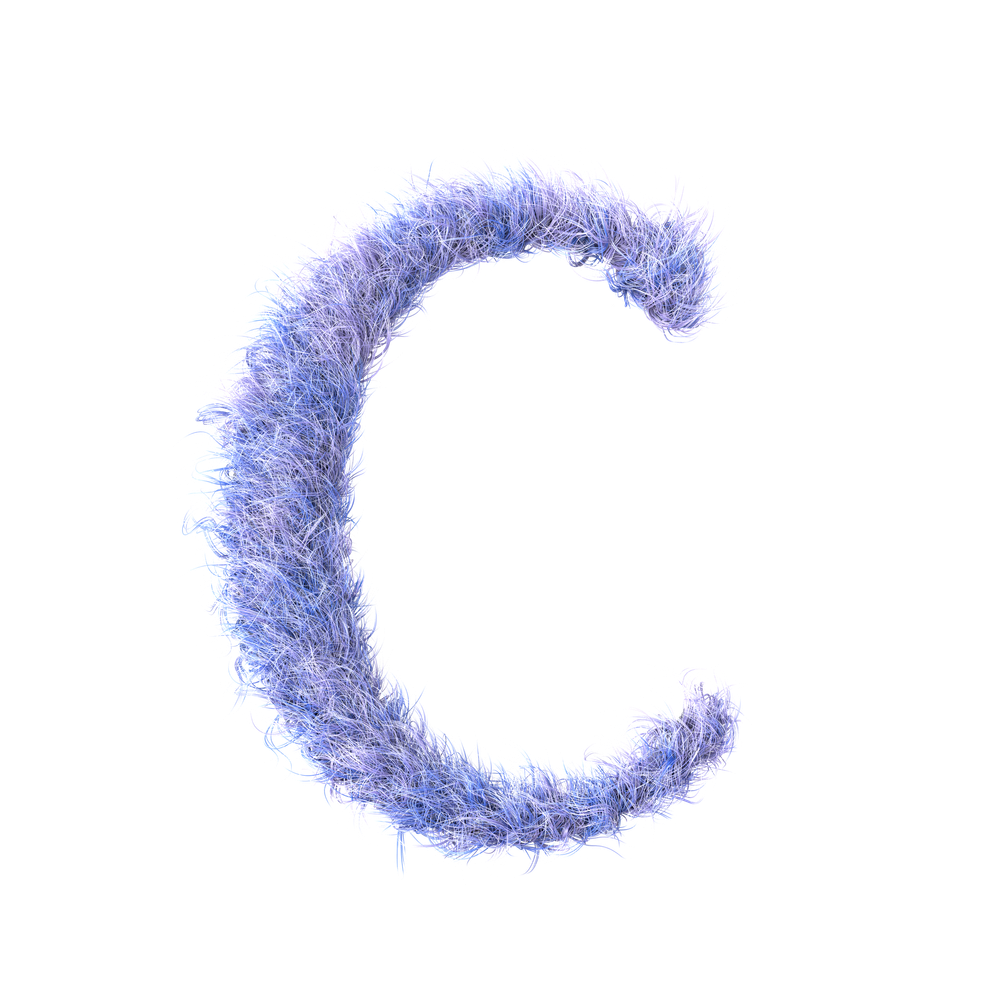
I am trying to understand how to take this "hairy" png and keep the quality the same but add an "offset" to it so I can make it a sticker.
If I do the image trace, it creates a mess and no path to offset. I am still pretty new to vectorizing PNGs so could you please help me with the specific steps you would take to achieve this end result?
Explore related tutorials & articles
Copy link to clipboard
Copied
default80409iqqfhco,
As I (mis)understand it, you wish to have a cut path round the hairy C shape so you have a transparent outer rim part.
In that case I am afraid you would regret it if you managed to have it follow the C shape, too difficult to place and too frail at the ends.
I believe you will be happier if you simply create a shape more or less like a reversed D, only with rounded corners.
You can either:
A: For a reverse D with a possibly partially vertical right side:
1) Create an ellipse with the Ellipse Tool, if needed move/adjust it to get the desired rim shape to the left and top and bottom;
2) Adjust the right side of the ellipse by ClickDragging the rightmost Anchor Point (you can obtain a partially vertical side by dragging until the Handles align with the path) and adjusting the Handles of the top, right side, and bottom, Anchor Points to get a suitable shape; you can .
B: For a reverse D with a more definite vertical side:
1) Create an ellipse with the Ellipse Tool, if needed move/adjust it to get the desired rim shape to the left and top and bottom;
2) Cut it with a vertical path to get the desired distance from the ends of the C (you can use the Shape Builder or (needed in old versions) ShiftClick with the Line (Segment) Tool from above to below the ellipse and move it if needed, then Object>Path>Divide Objects Below);
3) Round the corners at the ends of the C; without Live Corners (if needed you can use the free Round Any Corner script in this bundle, http://shspage.com/aijs/en/ by 佐藤浩之, Satō Hiroyuki).
Edit: I started out with B because the vertical side can make it easier to orient the hairy C for best look, but obviously A is much simpler. Either way, a suiable smallest round will give the most durable adhesion.
If you must, you can make a C shape fit with an inner and an outer ellipse as follows:
C:
1) Create an outer ellipse with the Ellipse Tool, if needed move/adjust it to get the desired rim shape to the left and top and bottom;
2) Repeat 1) for the inner ellipse;
3) Cut/combine the two ellipses in one of the ways suggested above for the D shape.
Copy link to clipboard
Copied
Don't use image trace, you will ruin the image.
Just create a new layer below the image and draw the path.
Copy link to clipboard
Copied
I assume this "hairy" PNG image of a C is going to be printed, possibly laminated and then cut on a vinyl plotter. Correct? If so, here's how I would approach the task.
First of all the "hair" detail on that "C" is too intricate to run a CutContour line right on the edge of the image. If the path detail is too intricate the vinyl plotter blade will just chew up the edges of the image. And even if the plotter cuts the print without marring the image the C sticker may be too difficult to "weed" out of the vinyl without tearing up parts of it in the process. The cut path needs to fall at least a little outside of the edges of the C image to make the cut path a bit more simple to avoid those problems. You'll have a bit of white bordering the image.
In terms of accuracy, nothing beats laying down a clean vector-based cut path by hand. But that can take a good bit of time. There are other ways to generate a reasonably clean cut path in a semi-automatic way.
Here's where I might risk making Illustrator fans a little annoyed, but I would bring that PNG image into Photoshop and create the cut path there. Photoshop has a lot of great tools to isolate images from backgrounds, even intricate subjects like portraits of people with fine hair detail. There is a lot of ways how to "skin the cat," but what I would do is use those methods to create an alpha channel of that "hairy C" image. I would edit the alpha channel to where everything that wasn't the white background was turned black. I'm not going to go into details of how to do that because several methods can be used. Next step: I would create a selection from that modified alpha channel. Under the "Select" menu, go to the "Modify" command and choose "Expand." Enter the amount of pixels you want to grow the selection. The farther you go outside the "hairy C" the more simple the selection will be. Next, in Photoshop's Paths palette, choose "Make Work Path" from the flyout menu. That will create a "work path" from that image selection in the paths palette. Double-click the path thumbnail in the palette to re-name and thus "save" it from being over-written by any new work paths. Next step (and this is important), select the entire image and create a work path of the image border. This will be needed for accurate registration of the cut path when you import the image and its cut path into other applications. Both the cut path and path for the image border need to be exported as an Illustrator file. Go to the File menu, choose the Export command and choose "Paths to Illustrator" from the flyout menu. Save the finished paths. Next, I'll bring the original image (or a new TIFF version of it) into Illustrator, import the cut path AI file I made in Photoshop and align both elements. Once aligned the border path can be deleted. Most print/cut applications want cut paths assigned with a spot color named something like "CutContour". Then you save the end product in the given format required by your printing/cutting software, often EPS format.
It might seem kind of backward, but I personally use Photoshop quite a bit for creating things like vector-based clipping masks for images or even hand digitizing clean vectors from sketched artwork I scanned, photographed or beamed over from my iPad. Photoshop's pen tool is very accurate at placing paths in relation to pixels they cover. And the path drawing performance requirements are very light.


