 Adobe Community

Copy link to clipboard
Copied
Apologies if this is simple, still learning/a bit new in InDesign
I am trying to do a quick example layout for a client on how a graphic might look on a wall. I have a page layout the way I want. On the page, I have a frame with a picture of the area of a building we want to apply a graphic too. I want to be able to take a picture of a proposed graphics and drop it in a frame over the graphic. However, the image we have is definitely at an angle and has some perspective to it. Meaning my shape for the frame needs to be more of a wedge shape. Is there a way to make a frame that is a custom shape like the wedge shape to mirror the perspective? I cannot seem to find something to accurately do that.


 1 Correct answer

You can use the skew tool or use the direct selection tool to move the individual anchor points to get what you need.
 5
Replies
5
5
Replies
5
Copy link to clipboard
Copied
You can use the skew tool or use the direct selection tool to move the individual anchor points to get what you need.
Copy link to clipboard
Copied
Skew seemed to make it "not right" I had tried that. But I think I guess what held me up was the direct selection tool. I put in a rectangular frame and when I used direct select it seems to not be able to move individual anchor points? Is that right?
I did a polygon with 4 sides and I was able to do just what I wanted without issue.
I figured direct selection, but it wasn't working is that normal?

Copy link to clipboard
Copied
matt8445 wrote
…I figured direct selection, but it wasn't working is that normal?
Hi Matt,
no. That's not normal.
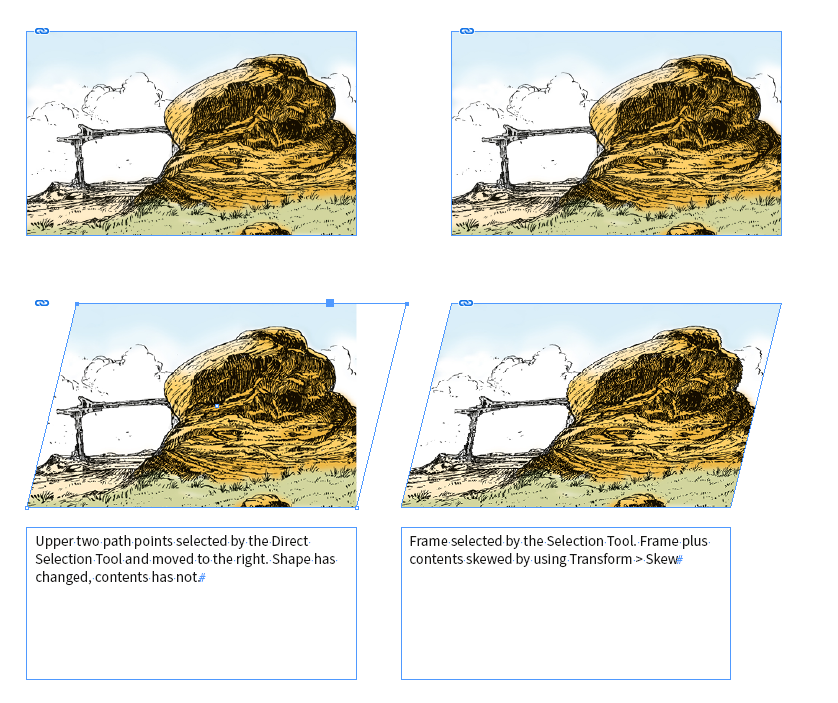
The Direct Selection Tool should work for skewing the frame.
What it not does: It will not skew the contents of the frame if you e.g. placed an image inside.
It just will change the shape by moving path points around:
Regards,
Uwe
Copy link to clipboard
Copied
Not positive what was going on with me then. Must have been operator error. I did restart InDesign and it did seem happier.
I was able to do that all with the direct selection. In my example skew wasn't too useful as what I was trying to do was more the left side height was short the right side height was tall not so much skewed.
The graphics not being adjusted is fine for this purpose. We are doing a proof with the actual graphics.
This is essentially what I was shooting for and it worked well enough. Real artwork will replace the cyan box. I wish I knew a simple way of controlling fill and outline opacity on one object separately. That would be awesome.

Copy link to clipboard
Copied
Hi Matt,
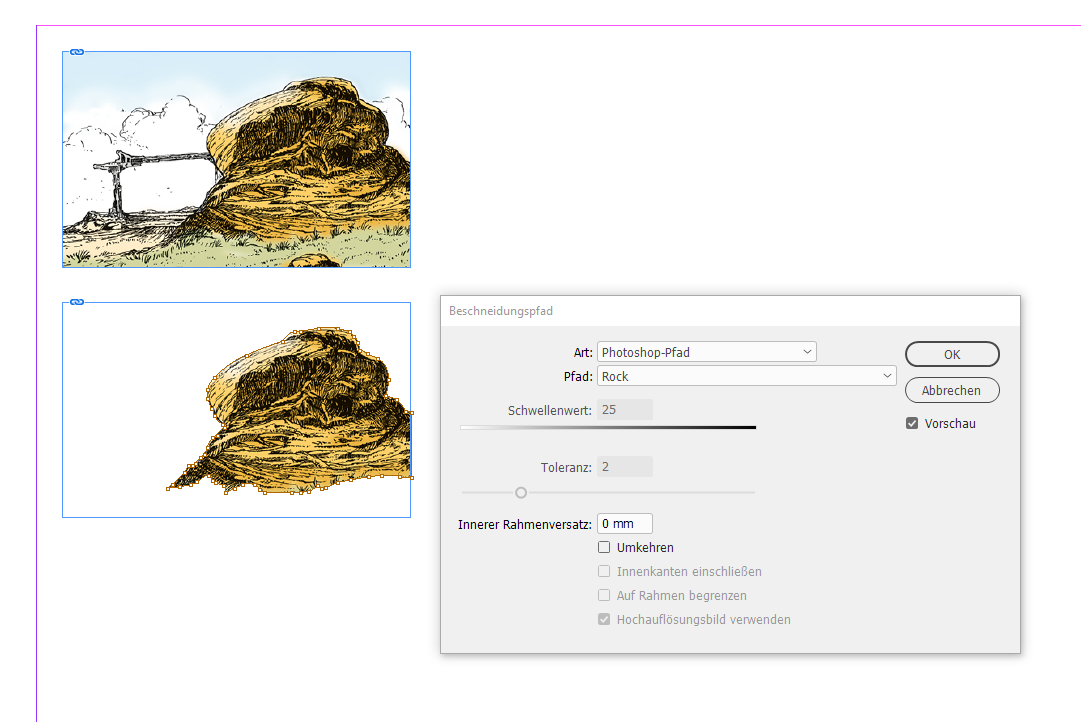
you could also open the image with PhotoShop, draw a vector path there, name the path, save and place the image.
Convert the path to a InDesign path object.
See screenshots below from my German InDesign CC 2019.
"Beschneidungspfad" means "Clipping Path"
Then convert the clipping path to an InDesign frame:
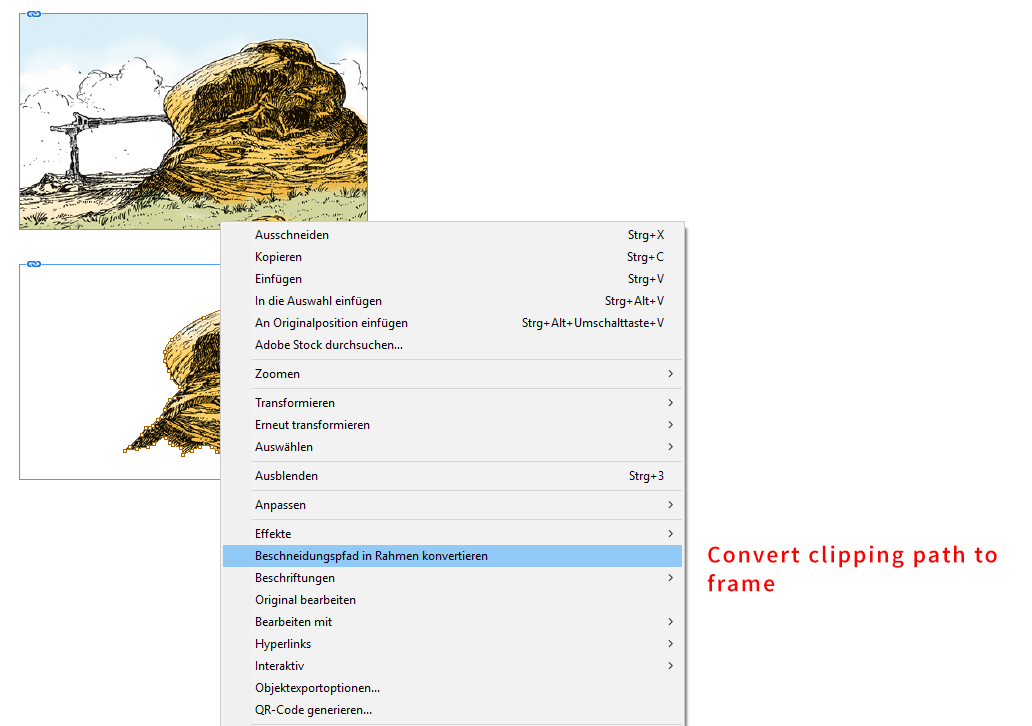
Select the image inside the converted clipping path frame, cut the image to the clipboard, do Paste In Place, send the pasted image to the back.
Use the empty path as overlay:

Regards,
Uwe

 AdChoices