 Adobe Community
- Home
- InDesign
- Discussions
- Re: PDF is not giving me the correct black
- Re: PDF is not giving me the correct black

Copy link to clipboard
Copied
Ok, I'll explain this the best I can.
I've been working on a catalog with a lot of black in it.
I get my bosses to review the content so I've been exporting as PDF "smallest file size" so it sends in email. Which results in the image on the left, grainy photos, but a rich black color. I don't care about the photos since my bosses are reviewing the content only and they are aware they are getting a low image quality PDF.
The problem is, I've exported the finished file as PDF "High Quality Print" and the images of course are super sharp, but it changes my black to a grey color which results in the image on the right.
I've never messed with the advanced options on either preset. The most I've ever done is tell it to have crop marks and use document bleed settings.
In the file that black color is the default black color that comes in the inDesign swatches.
I've mitigated some of this by going in the "Highest Quality Print" present going to Output and changing the color conversion to "Convert to Destination" not "No Color Converstion" then changing the Destination to "sRGB IEC61966-2.1" and changing the Profile Inclusion policy to "Include Destination Profile". Doing this change has given me my rich black color AND my super sharp photos.
I need to
1) know why this happened in the first place
2) Get the Highest Quality Print format back to were it gives me my rich blacks back
3) know if changing the color conversion, will that affect the printing process when i send it off to the printer to be printed?
Thanks in advance!


 1 Correct answer

I need to
1) know why this happened in the first place
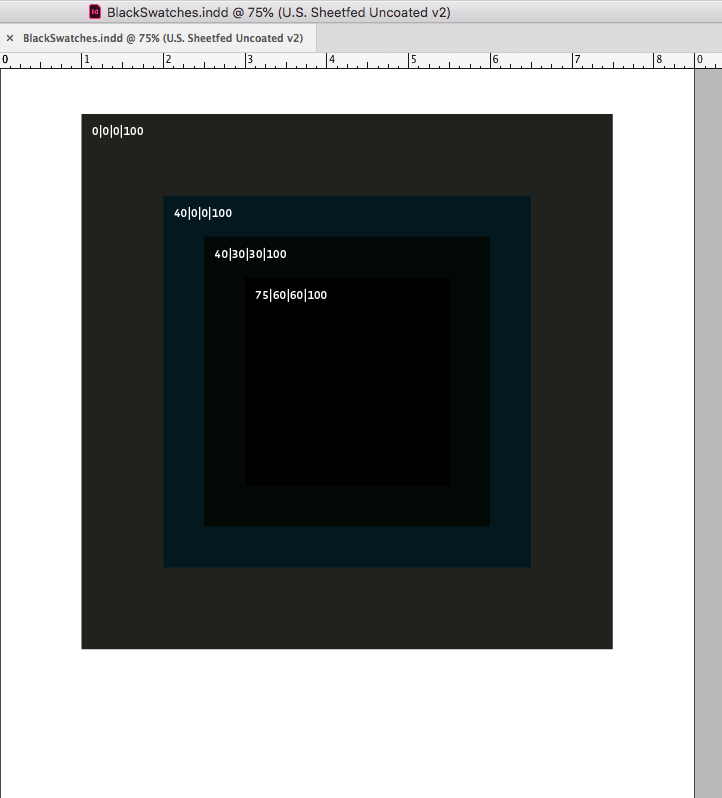
Litho printing inks are transparent, so black by itself is never absolute black on an offset press. The document’s assigned CMYK profile attempts to display black as it will print.
On an uncoated sheet the effect is more obvious, it is displayed with an uncoated profile US Sheetfed Uncoated:
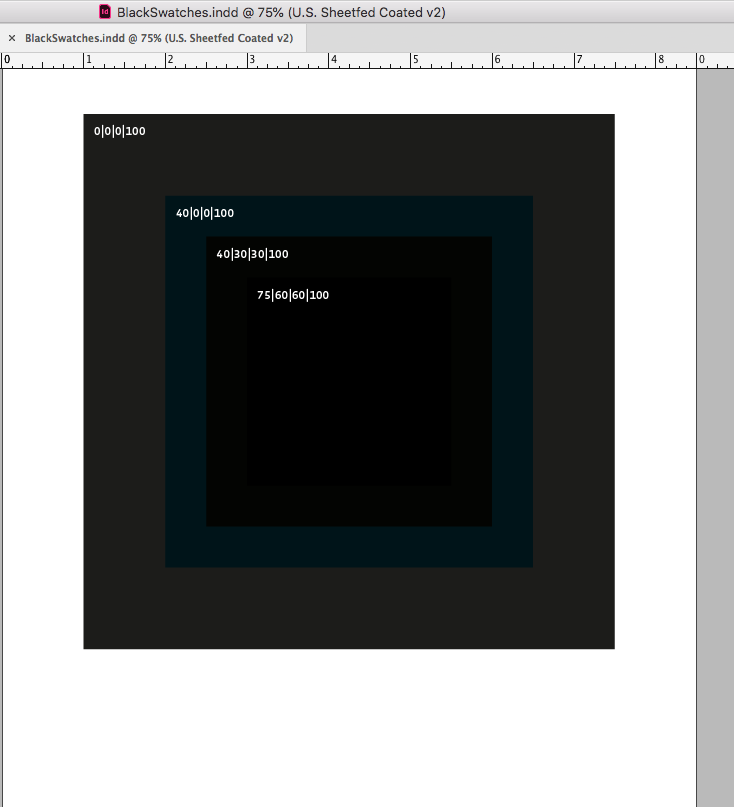
US Sheetfed Coated:
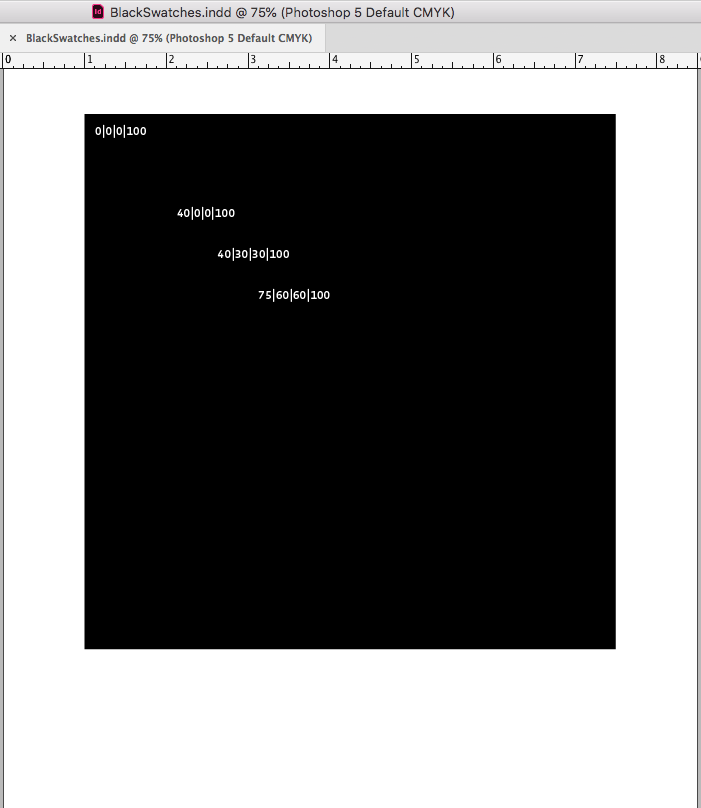
Legacy profiles like Photoshop 5 are less accurate and don't make the distinction
 6
Replies
6
6
Replies
6

Copy link to clipboard
Copied
Default black is simply 100% black and it overprints by default. For large areas of black you should be using a rich black to avoid the overprinting and the dark grainy gray that you get with only black ink.
Images should be saved as RGB and not converted to CMYK. Export the PDF using PDF/X-4.

Copy link to clipboard
Copied
Thank you, this helped too!

Copy link to clipboard
Copied
To add to Bob's sage advice, don't confuse rich black (for printing) with RGB black.
It seems everyone has a slightly different way to create a rich black--mine is 40C, 20M, 20Y, 100K.
Also, I always change my black prefs in ID and AI:

Copy link to clipboard
Copied
Thank you! I have been reading 100 ways to do this and your description worked perfectly!! You saved my presentation!

Copy link to clipboard
Copied
From your screen captures I get the impression you are referring to blacks in images, not vector elements. If that is true, one question is what color space is the image now? The PDF preset "Smallest File Size" converts color to sRGB. Doing so will give a "richer" appearance on screen, but of course will never be ink on paper without further conversion. The PDF preset "High Quality Print" leaves color unchanged. So again it all depends on what the image color space is to begin with. Were it RGB, likely either preset would give the same result. However, I will guess the image is CMYK, and probably converted to CMYK using Web coated (SWOP) profile. So yes it will look "less black" because that profile is for web press (think newspaper) the standard for which is 300% total ink coverage. But if the job is printing commercial sheetfed, and particularly on coated stock, going up to 340% is going to look a lot blacker in the final result (and likely even more on screen, though not ever as black as RGB appears). If printing commercial sheetfed, use GRACoL profile which is higher total ink. Best workflow is keep your images RGB (whatever you prefer, sRGB, Adobe98, etc.) and when making PDFs use PDF-X/4 preset but convert color to the desired profile at the last minute. Then you can easily switch printing conditions if needed, like changing from SWOP to GRACoL without having to go back and re-purpose every image.
William
Copy link to clipboard
Copied
I need to
1) know why this happened in the first place
Litho printing inks are transparent, so black by itself is never absolute black on an offset press. The document’s assigned CMYK profile attempts to display black as it will print.
On an uncoated sheet the effect is more obvious, it is displayed with an uncoated profile US Sheetfed Uncoated:
US Sheetfed Coated:
Legacy profiles like Photoshop 5 are less accurate and don't make the distinction

 AdChoices