 Adobe Community
- Home
- Lightroom Classic
- Discussions
- Re: HDR image, -100 highlight is slider not enough
- Re: HDR image, -100 highlight is slider not enough
Copy link to clipboard
Copied
Hey,
I have some real estate shots that are shot on a Sony A7 III with 5 shots with 3 stops between each shot, mereged as HDR in lightroom. When i try to pull down the highlight slider all the way down to -100, and pull up the exposure and shaddows around 1-2 stops to keep the details inside the room the highlighted areas are still over-exposed. There is details in the file because if i pull down the exposure i can recover all the details that gets over exposed.
Yes i tried the classic way with masking to mask all the image and pull highlights down, but it does not fix the job.
Is there a workaround for this when working with HDR files? to pull the slider further than the max -100?
 1 Correct answer
Tone Map Strength has not be removed in Camera Raw 14.3. Adobe has always hidden the Profile Creator in Camera Raw.
If you want to create a Tone Map Strength Profile using Adobe Landscape as the base profile in ACR open a Raw in ACR with NO adjustments and assign Adobe Landscape as the base profile. Then open the Presets panel where you will see this.
Hold the Alt(Win) or Option(Mac) key and click the upturned corner square and the following dialog will show up.
Check the boxes as
...Copy link to clipboard
Copied
You may be using too many shots. This Adobe document provides guidance on HDR merge https://helpx.adobe.com/lightroom-classic/help/hdr-photo-merge.html you'll see that the optimum number of shots is three when difference is 3 stops.
Copy link to clipboard
Copied
I suggest, go to Exposure first as - loosely speaking - a primary ('pictorial midtone establishing') adjustment, but also don't forget Contrast as the other primary ('effective dynamic range establishing') adjustment.
I think of these two together as performing a virtual, shutter-press 'exposure' working from the HDR captured data. Certainly Exposure - which overtly extends to cover more 'stops' - but also perhaps Contrast become "turbo charged" when working from an HDR source.
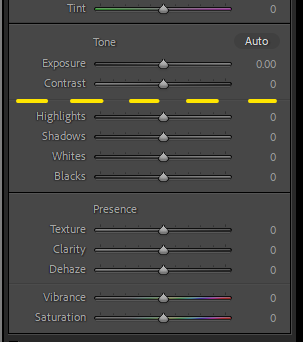
Adobe has apparently echoed some such distinction, with a subtle dividing line across the panel.
AFAICT the Highlights, Shadows, Blacks and Whites sliders below that line, are more like 'tweak' type adjustments and less suited to HDR heavy-lifting. These may well make an effective tag-team onto a standard exposure but HDR does not produce a standard exposure. It is for the user to choose which of the many possible "re-captures" that a scene-referred HDR can still give rise to, is their most desirable starting point for further adjustment of those kinds.
In other words: use Exposure and Contrast to bring the picture's tones within a suitable working range. Then you won't need any more "practical power" for e.g. Highlights: it can then act as more of an "aesthetic" tone shaper. You may even find yourself wanting positive values for that, or Whites, to get to a more typically 'dramatic' tonality. Or, slightly nudge Contrast up and then you can oppose that change with more negative Highlights - which increases local-contrast characteristically.
Copy link to clipboard
Copied
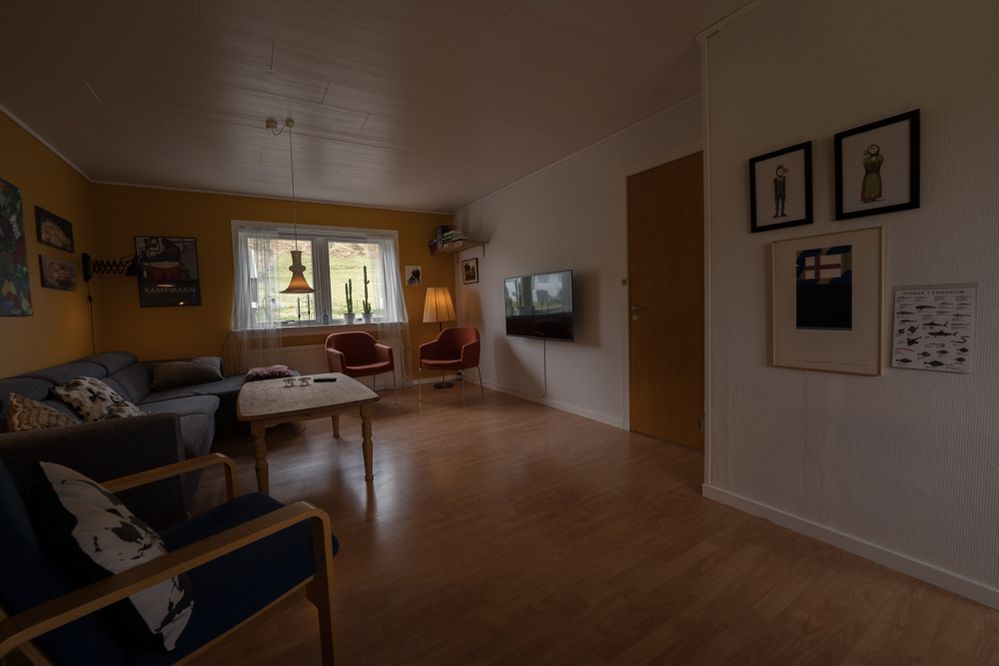
If i follow this, the image will be under-exposed, but here is the image without adjustments + image with adjustments highlights -100 which and -0.5 stop exposure, it recovers the window detail, but a soon as i change exposure to 0 it will be blown out.
I think my best bet is to mask out the window, and work more with the tone curve.
Copy link to clipboard
Copied
In my experience the image will only be underexposed if you use too low an Exposure setting. You will only be unable to process the bright window without blowing it out, just as you will only lose shadows altogether, if you use too high a Contrast setting. The image may well look flat as a result but all the tones will be properly separated and "white" and "black" will be located suitably. Then you can stretch and shrink parts of that tonal range between "picture white" and "picture black" however seems best to you aesthetically. If it helps rebalance the photo of course you will further select areas for local adjustment... but it should IMO not be necessary to do that merely in order to "expose" the roomspace and the outside together. HDR can handle that much by itself.
Copy link to clipboard
Copied
There are more edit options than just the Basic panel sliders. With a combination of Exposure and Highlights you could first correct details in the highlights. Then, if the Shadows slider isn't enough to pull the details out of the shadows, go to the Curves panel and do it there. Also note that Lightroom always increases the contrast if you select Auto in the HDR dialog. That does not make a lot of sense, because the reason you use HDR is because the contrast in the scene is too high for your sensor...
Copy link to clipboard
Copied
I used the Profile Creator in Camera as documented here to create some Profiles with expanded Highlight/Shadow Sliders. I eventually only kept the Medium setting Profiles as the High generally was too strong and things broke down in the image. The documentation in available here.
https://helpx.adobe.com/camera-raw/digital-negative.html#resources
An clip from the documentation explaing the settings. See the last paragraph.
Copy link to clipboard
Copied
This looks interesting, i looked in to it and tried to create a new profile, but with the camera raw version i'm running (the newest one) they have removed "Tone Map Strenght" so I was unable to create a profile with "higher" tone map strenght.
Copy link to clipboard
Copied
Tone Map Strength has not be removed in Camera Raw 14.3. Adobe has always hidden the Profile Creator in Camera Raw.
If you want to create a Tone Map Strength Profile using Adobe Landscape as the base profile in ACR open a Raw in ACR with NO adjustments and assign Adobe Landscape as the base profile. Then open the Presets panel where you will see this.
Hold the Alt(Win) or Option(Mac) key and click the upturned corner square and the following dialog will show up.
Check the boxes as shown (I forgot to uncheck Adobe Standard) and Click OK
Copy link to clipboard
Copied
Hey Bob, this is a hidden feature, Adobe really wants to hide it! But i found the setting now, thanks for the reply! I'm going to test this out on some files over the weekend and see how it works, thanks a lot!
Copy link to clipboard
Copied
I tried this on a couple of photos now, and this is exactly what i was looking for! It's going to help my processing time quite a bit! Thanks bob!
Copy link to clipboard
Copied
I think Ian is spot on.
If you have (too many) or images where highlights are totally blown in the raw, on all three channels, nothing will bring that back; it's gone. This HDR mapping may simply be confused and using too many areas of blown highlights and again, nothing in these sliders will fix that. Maybe try using fewer captures where the most clipped highlights are not used if possible.
Copy link to clipboard
Copied
I disagree. There is nothing wrong with the HDR file itself. Read what the OP says about what he is doing (he increases Exposure 1-2 stop to pull shadow detail), and that he can get detail in the highlights if he simply lowers the Exposure:
"When i try to pull down the highlight slider all the way down to -100, and pull up the exposure and shaddows around 1-2 stops to keep the details inside the room the highlighted areas are still over-exposed. There is details in the file because if i pull down the exposure i can recover all the details that gets over exposed."
He is simply not using the right editing techniques.
Copy link to clipboard
Copied
This is correct, I do have details in the highlights, i tried to make the same HDR image using only 3 of the images and the results were the same.


