 Adobe Community
- Home
- Lightroom Classic
- Discussions
- How can I recreate the PHOTO FILTER (Cooling Filte...
- How can I recreate the PHOTO FILTER (Cooling Filte...
How can I recreate the PHOTO FILTER (Cooling Filter (82)) within LR CC 2022
Copy link to clipboard
Copied
I cannot find any option to get this going in LR. Any pointers/ideas how to get that exact setting?
Copy link to clipboard
Copied
I don't know if this will work, especially "Preserve Luminosity", but you can try it and compare the results to what Photoshop does. I didn't compare.
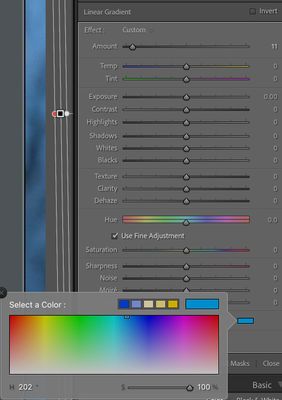
Use Color in the local adjustments with Hue of 202 and Saturation of 100. This is what the Color Picker chose for the Blue square. Than change the Amount to 12
Copy link to clipboard
Copied
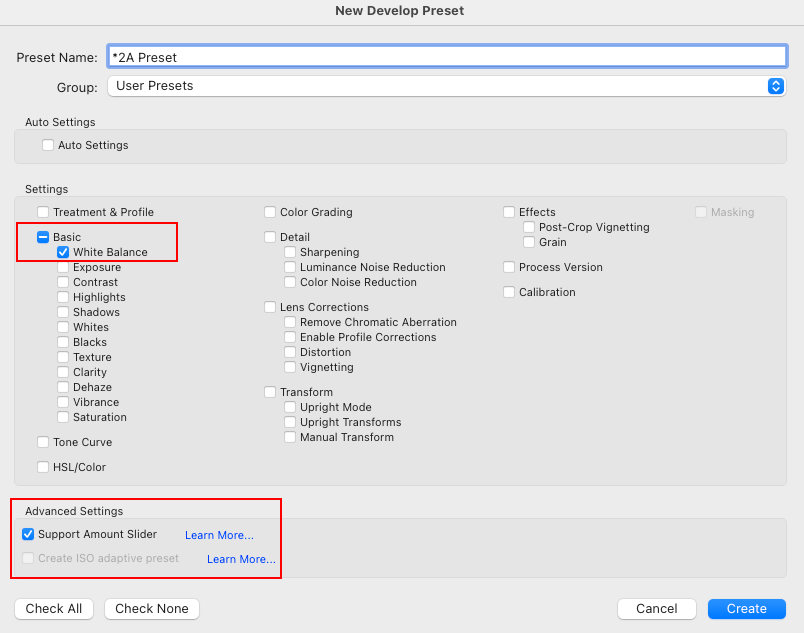
Surely the 82A filter is used to tame white balance. Therefore, would it not be easier to create a preset with White Balance of 3200K (or 3000K - I can't recall which direction the correction applied by the filter goes), then save with settings shown in below screenshot. With the Amount Slider enabled it should be possible to tweak the WB to taste on image by image basis.
Copy link to clipboard
Copied
For REAL photo filters the 82a and 82b change the color temp by 200 or 300 of visa versa. The real photo filter does not create an absolute color temperature. It appears this is what Photo Filter does., You could just see what the as shot WB is and change the Temp by 200 or 300. I didn't take the time to compare the Photoshop Photo Filter, Temp change and Local Color methods to see any differences. I will let the OP do that.
Copy link to clipboard
Copied
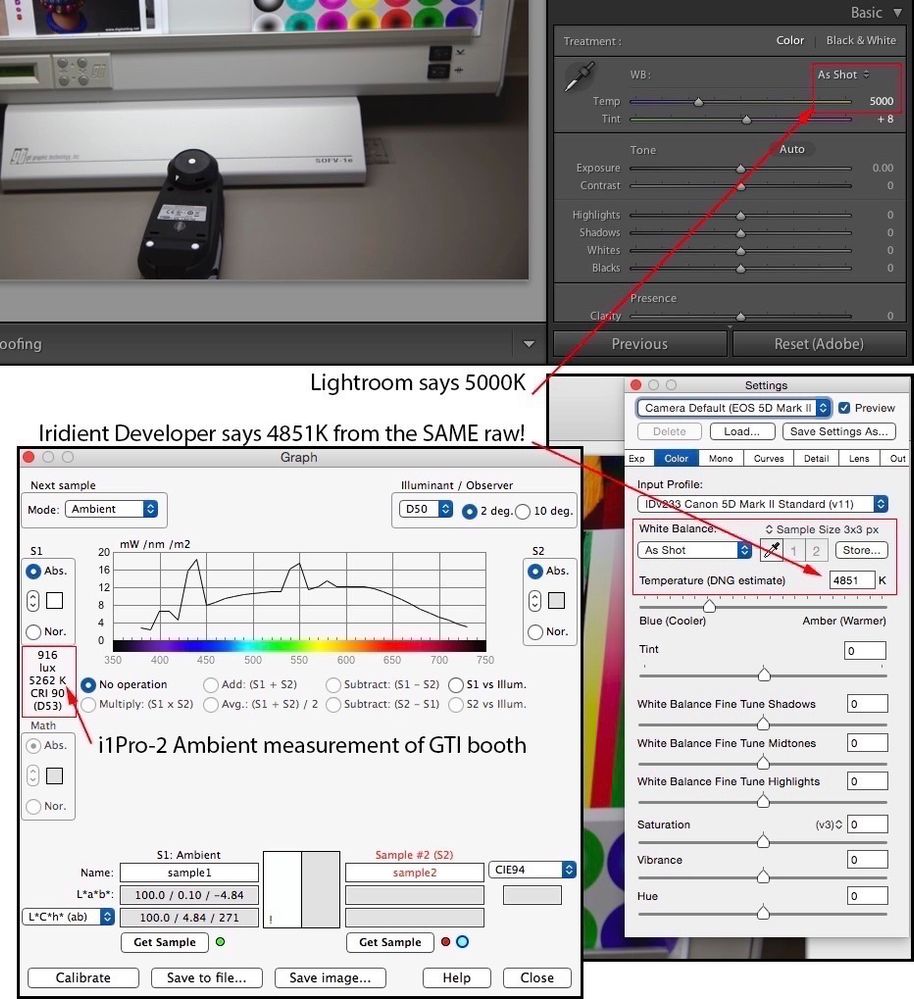
Ah, if only the 200 or 300 CCT value expressed was really just that; it isn't. It defines a pretty significant range of colors, not anything specific or in range and virtually every raw converter will report (and produce) differing values from the same CCT value just provided by the camera (which isn't the tool to measure this in the first place):
The simple fix is as Rikk suggested; move the Tint slider until visually, you as the image creator feel it should be, call it whatever you wish (82B or otherwise), and if that's the color appearance you want, then you're done.
The numbers don't experss a specific color filter for film!
Copy link to clipboard
Copied
I think everyone, including me, may have gotten off track on the OPs original question which was how to Mimic the settings of the Photoshop Photo Filter they show in the original post. I didn't test the Photo Filter too much but the "Cooling Filter 82" just seems to be a preset color for the Color setting and has NOTHING to do with White Balance but is just a color overlay. I could be wrong with how the Color Filter works so hopefully someone who knows will confirm. If my guess was close to correct, than using the Color Tool (its not a slider) in Local with the setting I gave might mimic the Color Filter. I will leave it up to the OP to test.
Copy link to clipboard
Copied
@Bob Somrak wrote:
I think everyone, including me, may have gotten off track on the OPs original question which was how to Mimic the settings of the Photoshop Photo Filter they show in the original post.
I doubt it can be done and it is pointless. The OP askes for the "exact setting". The answer is, it isn't possible. For one, just the color space adjustment in values changes significantly with the filter asked for in Photoshop.
Make a Lstar 50 value in Photoshop and apply the default of the filter and opacity in sRGB vs. ProPhoto RGB and look at the differences (before and after) of the RGB values; the scaling differs in each case for the three channels. Then add the option for luminosity check box and differing percentages.
Just alter the color towards cool (blue), get where you want it to appear per image, call it whatever you want.
Copy link to clipboard
Copied
I thought it was pointless for a method for an "exact match" too so did not do any in depth experiments.
Copy link to clipboard
Copied
Quick Develop Panel (Library)
White Balance Tint "Single Right Arrow Button" [>] will provide a relative adjustment in the range of an 82A/B.
No need to worry about the absolute value created by a preset.
Copy link to clipboard
Copied
Yes these Quick Develop buttons do apply relative change, but I'll just note that using the Tint > button will move the image toward magenta, not make it seem "cooler". It's the Temp < button which will do that - a tooltip shows, e.g. "Make Cooler", as you hover over these buttons - and if you click, the new History step of the image reports whatever that tooltip said.
This is as distinct from moving the Temp slider in Develop, in which case the absolute change of Temp or Tint value is reported.
By highlighting several images in Grid view, multiple images can all have the same relative "Make Cooler" action applied together by Quick Develop: a confirmation message pops up "Temperature updated for [number] images".
Copy link to clipboard
Copied
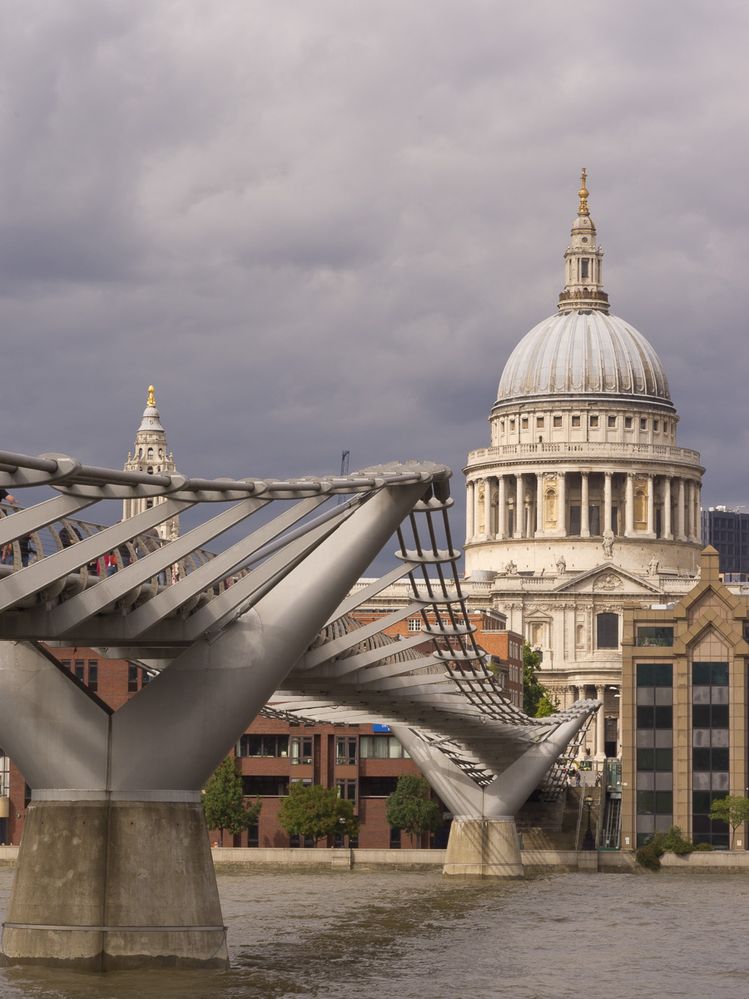
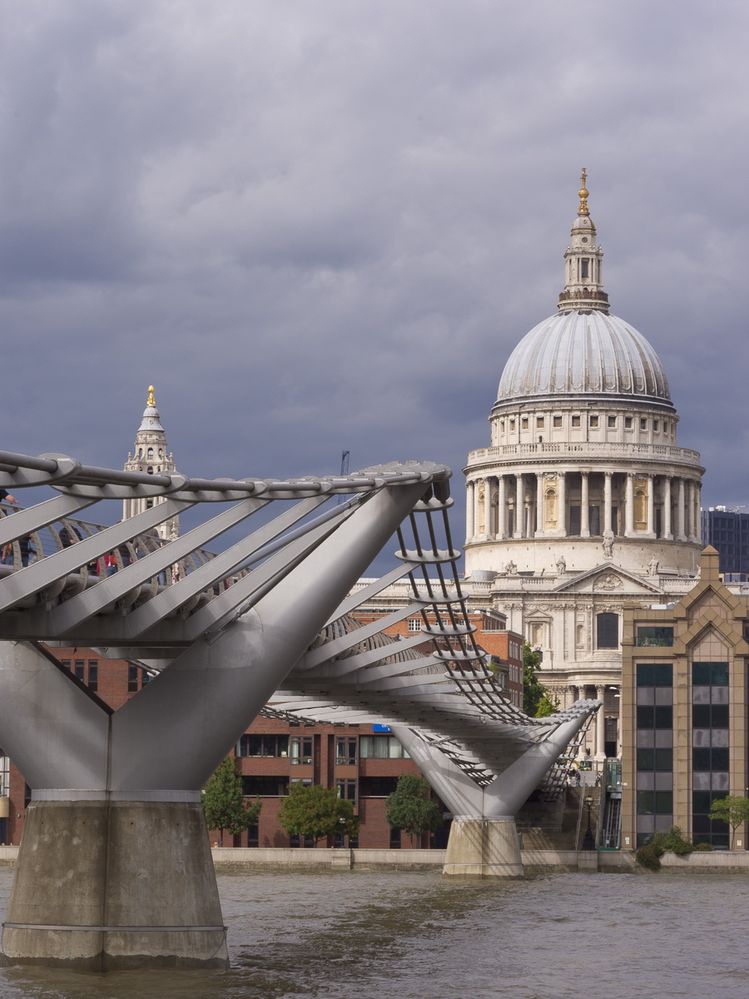
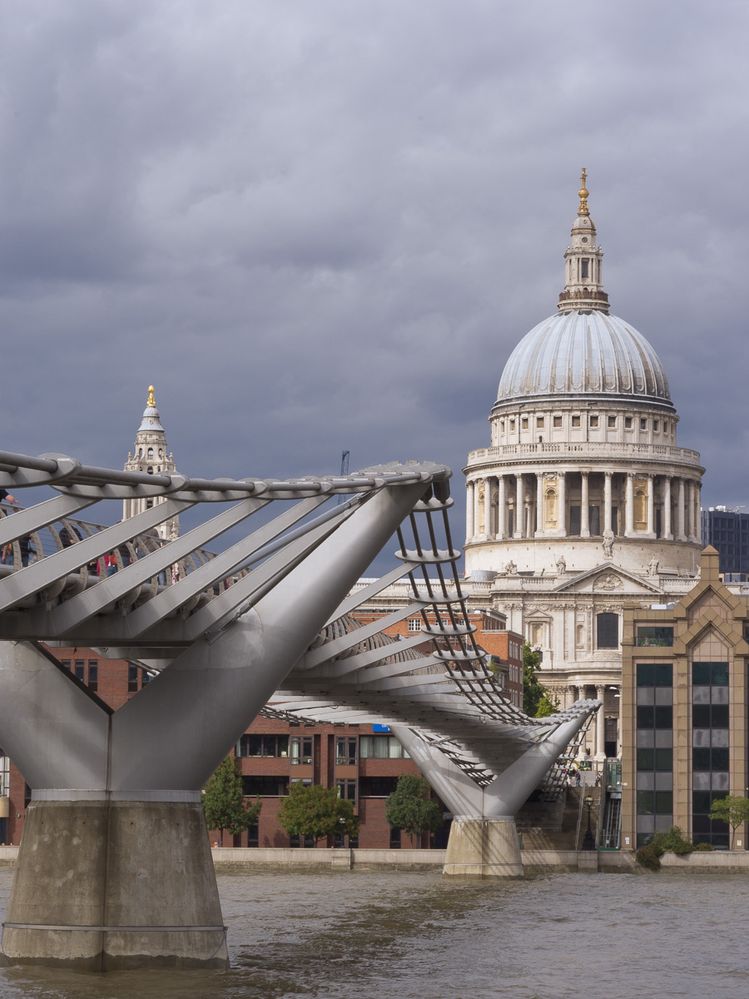
Actual samples: first, an image deliberately set (to my taste) a little overwarm in normal LrC processing (Raw)
then the same with < Temp button in LrC Quick Develop, clicked twice. The first click lowered WB Temp from 7238 K by -511, and the second click by a further -455, so not a constant numerical change - apparently proportional in some way?
lastly the starting (overwarm) with instead, Photo Filter 82 applied in PS at 10% strength. The initial 25% was of course much stronger an adjustment. Preserve Luminosity was checked. All images then exported from LrC with same settings.
Copy link to clipboard
Copied
Using your top photo, I used my technique I posted above using Color in local with the amount at 10 and got this.
Copy link to clipboard
Copied
I didn't know the Temp Slider using clicks in Quick Develop did not move in equal amounts.
For me one click was 239 and another click was 211. I wonder why that is.
Copy link to clipboard
Copied
Andrew, as you are the resident expert on this, do you have an explaination why when using Quick Develop that clicks on the triangles produce different changes in the relative value for the Temp.
Copy link to clipboard
Copied
@Bob Somrak wrote:
Andrew, as you are the resident expert on this, do you have an explaination why when using Quick Develop that clicks on the triangles produce different changes in the relative value for the Temp.
What relative value for temp?
Copy link to clipboard
Copied
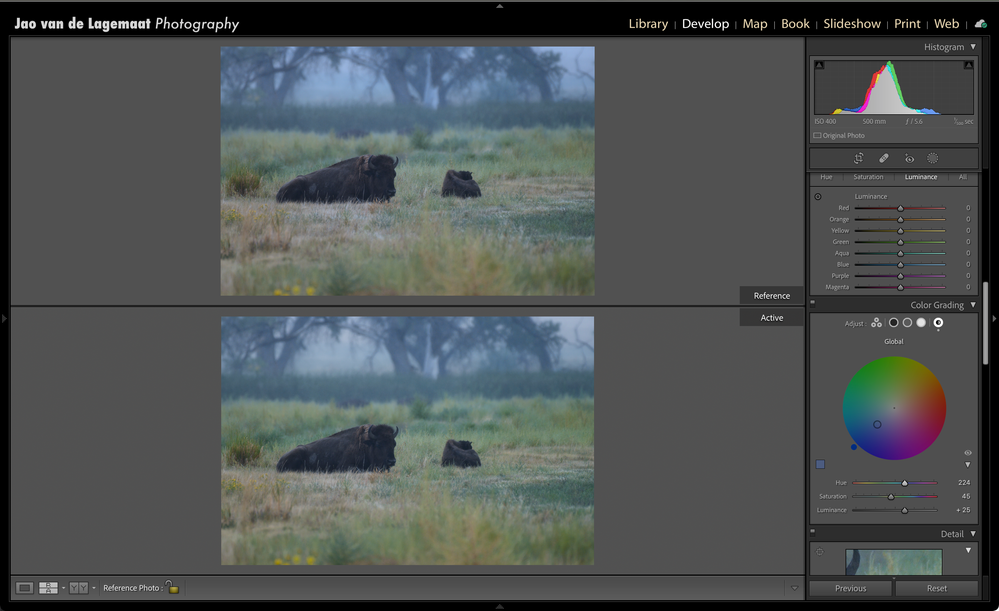
I'll offer another way to do this in addition to all the great advice you've already received. You can use the Global adjustment in the Color Grading tool. Set it to hue 224, saturation 45 and luminance +25. This appears to have an identical effect to Cooling Filter (82) in Photoshop. Example below. Reference was the same image pulled through Photoshop.
Copy link to clipboard
Copied
Its definately not identical but to your credit it is pretty close. The sky is way different and the greens are slightly off. I don't think there is a setting you could use to create a preset to get even a close match to the Photoshop Photo Filter in LrC as shown by the OP.
Copy link to clipboard
Copied
I am somewhat colorblind in blue/green and hadn't noticed the difference but you are right! You get much better correspondence when using smaller hue, higher saturation and somewhat lower luminance than I listed. I didn't realize this but when you are in refence view, when you hover the mouse over the image, it shows you the color values for both the reference and active image.
Another thing you can do is to use photoshop to create a LUT (File->export->color lookup tables) from a file with the photofilter adjustment layer and use this LUT to create a xmp profile with just the LUT applied that will work in Lightroom. Just tried this and it seems to work perfectly.
Copy link to clipboard
Copied
One tactical advantage of the colour grading idea, is that it can be applied to images - or a set of images - as an overlaid "pictorial look" when that's appropriate, then later removed or reconsidered, independently of and without touching the images' various global or local adjustments otherwise.
But OTOH when it's a matter of "cooling" the image in compensation for a lighting or camera setting issue (say), then IMO altering the WB - however that is done - is probably the right approach. There will in that case be some different absolute WB value that you are correcting towards, not so much as a specific usage "look" but more for general usage purposes.
Copy link to clipboard
Copied
The LUT idea sounds perfect!!! It sure would be nice if the OP would reply and say why they needed this.

