 Adobe Community
- Home
- Lightroom Classic
- Discussions
- Help! Lightroom's gone insane and displaying every...
- Help! Lightroom's gone insane and displaying every...
Help! Lightroom's gone insane and displaying everything darker!!

Copy link to clipboard
Copied
Hi, I'm a beginner photographer and I spent the last 2 weeks shooting several sdcards worth of stuff , importing in lightroom classic 9.3 R on windows 10 without any issues whatsoever.
Today I followed the tutorial on how to enable sync because i wanted to show my work on behance and create a portfolio. It worked, and my custom collection synced.
BUT - for some reason now everything is displayed with the shadows pulled down considerably and the blacks crushed to nothing.
I checked and ALL MY FILES do that, not just the synced collection. Everything i worked on is lost it feels like, and I have no idea why. History shows no changes. I have 3 different screens including one HDR capable and all 3 show the same thing: the RAW in adobe lightroom classic is dark, while the original JPGs (thank goodness my GH5 shoots RAW+jpg) are fine.
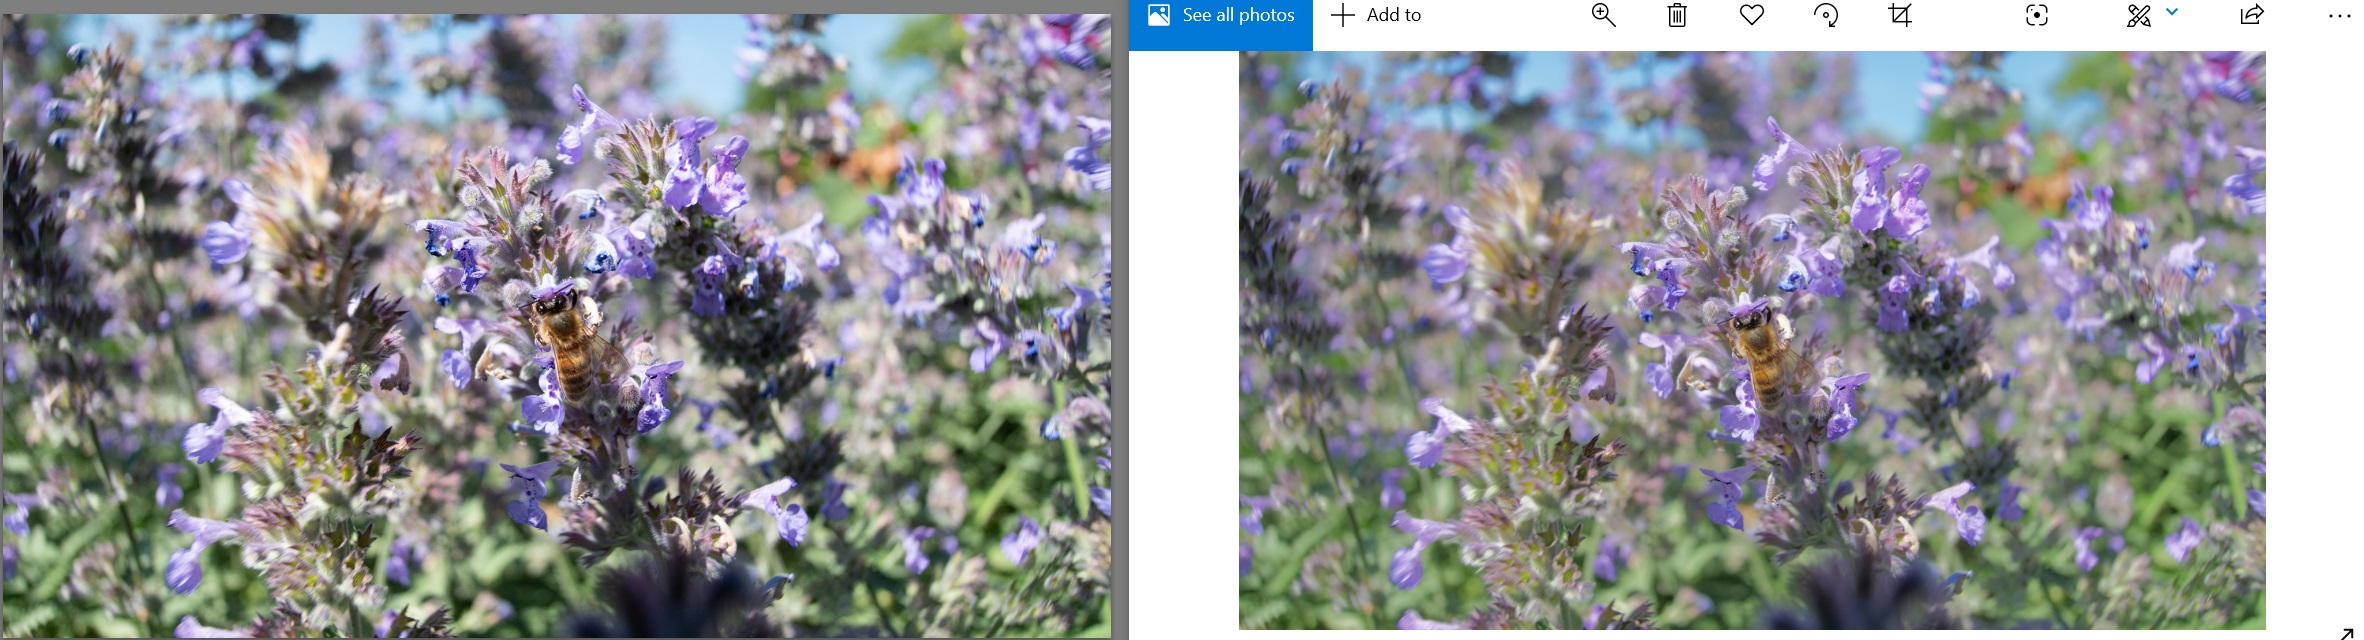
I include an example for comparison. On the left, lightroom , on the right, the original jpg.
Please help me, I'm a beginner and this is really crushing to lose all your work because the software is acting up 😞 😞 😞
Thank you


 7
Replies
7
7
Replies
7
Copy link to clipboard
Copied
Update: i made some progress, it seems related to 'embedded' preview, and them having been disabled for mysterious reasons once the sync completed.
The crush of the shadows seem related to my gh5 highlight/shadow settings being ignored in the 'regular' preview.
So i guess the actual question is how do i restore my 'embedded previews'? There's no way i can correct my shadows and highlight by hand back to the orignal output (what's in the jpg) on 1,000 of RAW files.
Copy link to clipboard
Copied
Well adding the above, i found the menu to rebuild previews, but of course it's just an internal raw renderer based on arbitrary color profiles also ignoring all in-camera settings, so nothing looks the same as the jpg.
How do i restore the preview to the original, matching jpg that sits in the same folder?

Copy link to clipboard
Copied
LrC has not gone insane, it is doing exactly what it is supposed to do. The embedded preview was made by the camera according to Panasonic's judgement and the way you have set up the camera for jpgs. It is used by LrC temporarily until it has made its own rendering according to Adobe's judgement and the way you have set up the sliders. They can never be identical. If you want Raw renders that are the same as the camera jpgs (which makes no sense to me because the reason for shooting Raw is to be able to do your own renders) use whatever software is supplied by Panasonic.
Copy link to clipboard
Copied
Thank you - however, is there a way to re-use the jpgs from the camera as previews?
You see, if i edit from the preview LR gives me, i first have to retrace the camera settings before i can start editing.
If i edit from the embedded preview instead, i'm starting from what was on the back of the camera when i took the photo.
Sadly, i cannot find a way back from LR once you pressed the 'embedded preview' marker overlaid on the photo in the library. There doesn't seem to be a way back, or is there?
Thanks again
Copy link to clipboard
Copied
There is no way back.
But even if there was it would not show you what the actual RAW data is.
Once you start editing the Embedded preview will be replaced with either a Standard preview or a 1:1 preview. Even if you just view the image in the Library module in Loupe view, full center section displaying one photo, the embedded preview is replaced with one created by LrC.
If you really want to shoot RAW images to give you room to do more and better editing then you need to adjust your camera for that and forget about what the In Camera JPG looks like.
I run all my cameras at Flat, Default, settings. I do record RAW + JPG but never use the JPG except if someone wants, needs, a quick copy of the image.

Copy link to clipboard
Copied
I do not have your camera, so without getting off my rear end, turning on a computer (on iPad) , downloading an exemplar, and experimenting in LrC, I can not be sure if this.
However
To alter those flat RAW files so that they look more like the in camera JPEG files, including the embedded itty bitty JPEG file you see when pixel peeping in camera post shot. As a starting point. Change the profile from Adobe Standard (color) to a Camera Matching profile.
boom, done.
Now these Camera Matching profiles are not from your camera mfg, they are from Adobe, so not a perfect match.
Copy link to clipboard
Copied
Oh, and read the link below, you can maake life easier at import

 AdChoices