 Adobe Community
- Home
- Muse (read-only)
- Discussions
- HAMBURGER MENU -- SEPARATE STATES
- HAMBURGER MENU -- SEPARATE STATES

Copy link to clipboard
Copied
Hi,
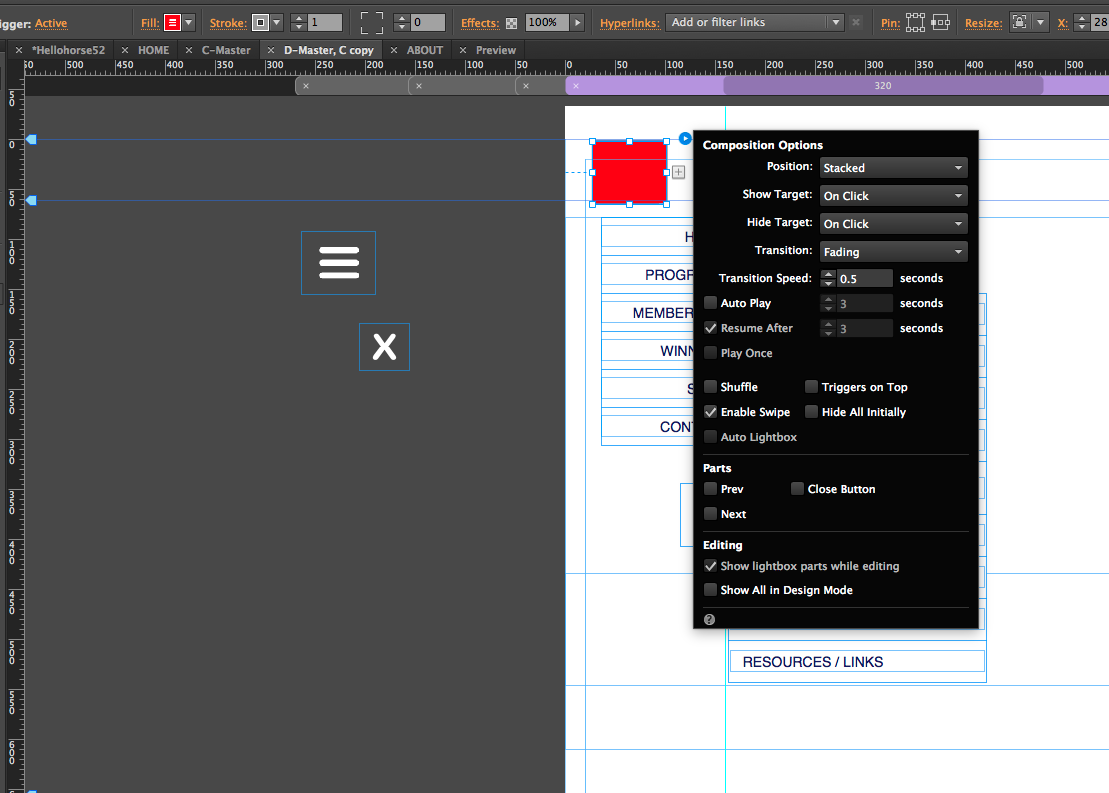
When tying to cut and paste an icon into NORMAL state, it activates in all the states. The red box is the trigger box where I want to place the icons.
I want the white hamburger icon to display in NORMAL and the white X Icon to display in ACTIVE. I started with a blank composition widget. Except for the icons that are missing, the menu seems to work well responsively.
-Anita


 1 Correct answer
Paste the image into normal state, go to rollover state and set the image to „Opacity: 0“, by using the respective command in the upper control strip. Now do the same, but „vice versa“ with your other icon. Here a .muse file, demonstrating this technique: https://www.dropbox.com/s/y68fd3xyvne349l/Trigger-effects.muse?dl=0
Alternatively, don‘t paste the icons into the trigger, but use the „Fill“ command in the upper control strip. Don‘t click onto the colour icon, but onto the word “Fill“ and you
... 2
Replies
2
2
Replies
2
Copy link to clipboard
Copied
Paste the image into normal state, go to rollover state and set the image to „Opacity: 0“, by using the respective command in the upper control strip. Now do the same, but „vice versa“ with your other icon. Here a .muse file, demonstrating this technique: https://www.dropbox.com/s/y68fd3xyvne349l/Trigger-effects.muse?dl=0
Alternatively, don‘t paste the icons into the trigger, but use the „Fill“ command in the upper control strip. Don‘t click onto the colour icon, but onto the word “Fill“ and you will find the appropriate command.
Copy link to clipboard
Copied
Günter, thank you.
 AdChoices