 Adobe Community
- Home
- Photoshop ecosystem
- Discussions
- Re: A white border added to my original image usin...
- Re: A white border added to my original image usin...
A white border added to my original image using contact sheet II
Copy link to clipboard
Copied
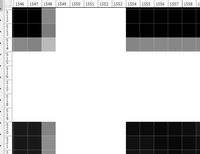
When I used `Contact Sheet II ` to splicing many pictures into a grid-shape picture, I got the correct layout result, including the spacing distance between 2 pictures, but a white border was added to my original image, just like this:
The borders were added at bottom and right. If I copy and paste the original picture, no border was added!
Why I got a image like this? Is there due to wrong parameters? How could I slove this problem?Thanks a lot!
Explore related tutorials & articles
Copy link to clipboard
Copied
Flatten the image first. You sometimes get that when resampling a floating layer.
Copy link to clipboard
Copied
Thanks, but how to flatten image in Photoshop or is there any other tools I need to use?
Copy link to clipboard
Copied
Open upper-right dropdown menu of Layers panel and click Flatten Image.
Copy link to clipboard
Copied
My original image is a tiff, which just have one layer. I don't know how to flatten on that? I have tried to flatten the contact sheet image, but the border is still.
Copy link to clipboard
Copied
If you want to tile you different Aspect ratio image without any white boards added you need to use a script that will resize your images to a common tile size that will be virtually cropped foe the tile aspect ratio, a Script like my PasteImageRoll
right click this link and use Save Link As PasteImageRoll.jsx
Copy link to clipboard
Copied
Thanks, but my images is the same size. The white border appeared on my original image, instead of the gap.
Copy link to clipboard
Copied
There are boarders on you original image because they are fitted to a rectangle area the has a different aspect ratio than your images therefor there will be boarders on two side of your fitted images. Images that have the same aspect ratio of the rectangle are will fill the area. The ContactSheet II script does not rescale distort crop you images. Portrait, Panorama, landscape, Croped images all retain their aspect ratio when ContactSheets II fits your images to its Picture grid. Read about my script here http://www.mouseprints.net/old/dpr/PasteImageRoll.html
My Script does not create multiple documents like contact sheet II, It create a single document with all images tiled and masked over the canvas. Images have their original aspect ratio but are masked to the tile size, you can tweak the virtual crops by moving the masked layer image content. The masks are not linked to the image layers they mask.
Copy link to clipboard
Copied
Excellent script, JJMack! I have tried your script, and the white border disappeared! But my aim is to contact my experiment images, rather than print on roll photo paper, so could I modify your script and only use to finsh our contact sheet? Thanks a lot!


