 Adobe Community
Turn on suggestions
Auto-suggest helps you quickly narrow down your search results by suggesting possible matches as you type.
Exit
Locked


 1
Reply
1
1
Reply
1


0
Adding Lens Flares
Community Beginner
,
/t5/photoshop-ecosystem-discussions/adding-lens-flares/td-p/13363495
Nov 22, 2022
Nov 22, 2022
Copy link to clipboard
Copied
Adding lens flare
- Import your images into Photoshop
- Duplicate your images in the layers panel
- Locate the menu bar at the top of the interface
- Locate and select the filter menu
- From the drop-down menu select, Render
- From the drop-down menu select, Lens Flare
- A new dialog box will open and now you can choose a lens flare and manually adjust the brightness. When you are confident with your adjustments select, Ok.
- Adjust the Eraser tool and remove the flare that you do not wish to be present.
All the best,
Laura Foulds Moody
Laura Foulds Moody
TOPICS
macOS
Community guidelines
Be kind and respectful, give credit to the original source of content, and search for duplicates before posting.
Learn more
Explore related tutorials & articles
Community Expert
,
LATEST
/t5/photoshop-ecosystem-discussions/adding-lens-flares/m-p/13364355#M686312
Nov 22, 2022
Nov 22, 2022
Copy link to clipboard
Copied
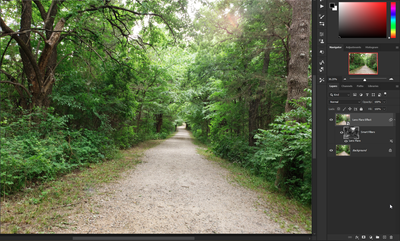
Thanks for the prompt, @Laura Foulds Moody on adding Lens Flare effects. Here's another way to go about that:
- Open an image in Photoshop.
- From the Layers panel, right-click on the Background image and select “Duplicate Layer...” and rename the layer if you like.
- Right-click on the Duplicate Layer and choose “Convert to Smart Object” for non-destructive editing. This also allows you later to reposition the Lens Flare if needed.
- From the top menu, select Filter > Render > Lens Flare.
- In the Lens Flare dialog box, select the Lens Type and Brightness level. Use your mouse to adjust the position of the Flare in the preview window. Click OK when done.
- To soften or remove areas of the Flare effect, select the Layer Mask on the Smart Filter layer.
- With a large, soft brush, set with an Opacity of around 33% to start (depending on your image and desired outcome), paint on the Layer Mask with black. If you go too far, switch to white and re-brush over the area.
Before:
After:
Community guidelines
Be kind and respectful, give credit to the original source of content, and search for duplicates before posting.
Learn more
Resources
Quick links - Photoshop
Quick links - Photoshop Mobile
Troubleshoot & Learn new things
Copyright © 2024 Adobe. All rights reserved.


