 Adobe Community
- Home
- Photoshop ecosystem
- Discussions
- Changing background Colours in Photoshop
- Changing background Colours in Photoshop
Copy link to clipboard
Copied
Hi, I have 2 problems I need help with.
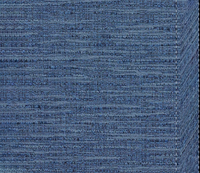
My background I use for portraits is a muslin mottled blue one;
1: When I try to extend the background using content aware, the background becomes warped
2: I would like to deepen the colour of the background as it is a washed out blue colour. Watching numerous videos on You-tube it only shows how to change the colour if it is a solid colour.
It would be great is someone could offer advice and any videos that may be available. I'm still in the novice stage and videos are always a great help.
 1 Correct answer
Hi!
In extending the background, hae you tried either the Clone Stamp tool or the Healing Brush tool? If you make your canvas larger, to the size you want you can Clone Stamp big sections of your image to blend in with the current background. Then once you have the background texture the way you want it, you can add a vignette to darken the edges using a preset in Camera Raw or paint it in manually with a layer on top of your image and the blending mode set to Darken, Multiply, or even Soft Ligh
...Explore related tutorials & articles
Copy link to clipboard
Copied
1. How far are you going? Which way? Vertically? Can we see a sample of what you're trying to achieve?
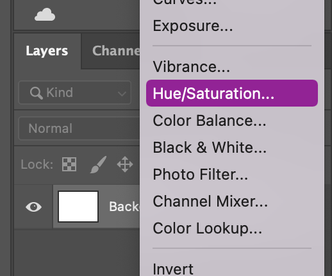
2. In its most basic form: A Hue/Saturation adjustment layer. (Can use other methods like a Curves adjustment layer, which will let you "dial it in" even more with its advanced controls, but baby steps.) 🙂 Obviously, since you want to affect only the background, you'd want to select the background first and then invoke a Hue/Saturation layer adjustment so that you start off with the background masked.
Copy link to clipboard
Copied
for the second point, select the background, you can select subject annd separate the background, go to layers panel, click on create a new fill or adjustmennt layer, Hue/ saturation, move the saturation slider to left as you wish.
you can try curve also (only on the background)
Copy link to clipboard
Copied
Hi!
In extending the background, hae you tried either the Clone Stamp tool or the Healing Brush tool? If you make your canvas larger, to the size you want you can Clone Stamp big sections of your image to blend in with the current background. Then once you have the background texture the way you want it, you can add a vignette to darken the edges using a preset in Camera Raw or paint it in manually with a layer on top of your image and the blending mode set to Darken, Multiply, or even Soft Light (my favorite). Doing it with a really large brush gives you the control over how the darkness appears (not uniform as in the vignette) AND the color.
Are you familiar with the Clone Stamp or Healing Brush Tools? I have used the Clone Stamp tool to add to backgrounds for many many years, and the key is to work randomly so you don't create a repeating pattern.
Let us know if that helps!
Michelle
Copy link to clipboard
Copied
You'll get better suggestions if you show an example of the image. That's because there are many different ways to do things in Photoshop, depending on the image.
Nevertheless, here are a couple of suggestions.
Assuming that the extended background is going over an area that has no pixels, you could start by using content aware, as you are doing now. Then select the warped area.
Choose Edit > Content Aware Fill. This command lets you choose the area to fill from, and you get a preview. After you click OK, it defaults to putting the adjusted fill on a separate layer. If it looks good, merge the two layers.
Moving on to the second question about deepening the background color. Hue/Saturation is a good suggestion from war_unicorn.
Another way would be Curves.
There are other ways as well.
Copy link to clipboard
Copied
Hi, thanks to War Unicorn, Manal, Mglush and Barbara for your responses, and apologies for my delay in responding. The alert e-mails to responses went in to my spam folder.
Manal, brilliant, I have used your idea and have been able to achieve the colour results I wanted.
I have attached the setup I was using, no people in it. Most of my shots were for one / two people and were 3/4 length poses. However, I have group photos to take with a max of 5 people and it is in a very small confined area. I was practicing extending the background to cover the wall and floor but the method I was using was making areas I was extending the background into looking warped.
I was using the marque tool, selected a clean area, used the free transform in the menu and stretched this over the “wall”
Copy link to clipboard
Copied
Hi Mglush, I'm familiar with the clone stamp and healing brush and would use the tools for cleaning up small areas, but it wasnt successful with this image
Copy link to clipboard
Copied
I'm glad that you found a solution! Thank you so much for letting us know.
Michelle


