- Home
- Photoshop ecosystem
- Discussions
- Help Please: step by step how to create a composit...
- Help Please: step by step how to create a composit...
Help Please: step by step how to create a composite image
Copy link to clipboard
Copied
I am having problems finding step by step, (yes i am a somewhat beginner), on how to put 2 images together. What i am specifically trying to do is take 2 night images, 1 of short exposure length 2-3 seconds of people in it-foreground, then the second of the milky way at longer length 25 seconds to expose the sky-background, then combine them. I am trying to eliminate any movement by the people in the first image by shooting it short. I can not find the correct info on how to do step by step to do this. I have both current versions of LR and PS. I have tried watching a few videos on it, none show step by step, they just talk about very generally how to do it. The image below is a single 25 second exposure with obvious movements in my hands etc. Any help would be appreciated.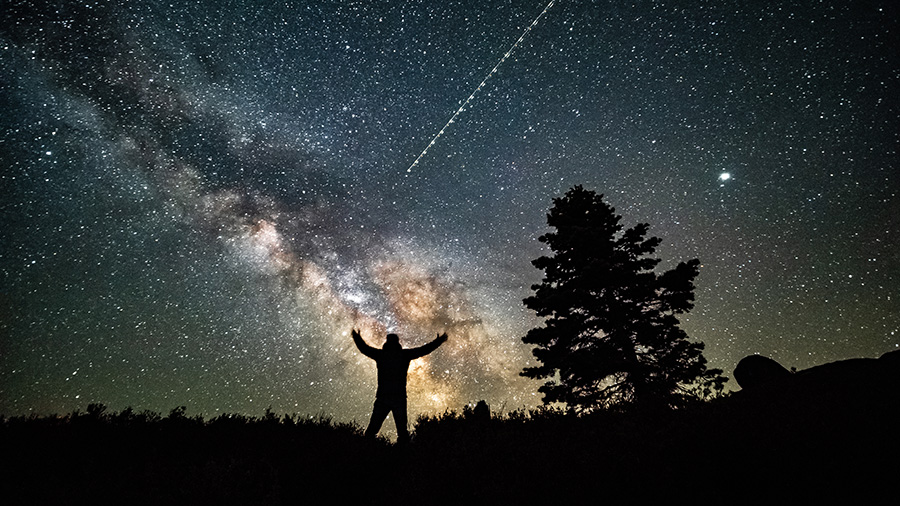
Explore related tutorials & articles
Copy link to clipboard
Copied
Hi
Can you post both images you are trying to composite, at a reasonably high resolution, and we can try and help with steps
Dave
Copy link to clipboard
Copied
Hello,
I have not taken the shots just yet. I will be doing this with a family end of next week. I could post them after that? Or since i will be out shooting this weekend, maybe i will do a test run of the shot idea.
Copy link to clipboard
Copied
Hi
That's even better. If you haven't taken any shots yet then take the background long exposure image with no-one in the foreground. Then take the foreground picture with the people (short exposure) separately. It will be much easier to composite that way as you wont have to clone out any movement on the long exposure shot.
Dave
Copy link to clipboard
Copied
You don't need Photoshop. Start the long exposure. Let's say 30 seconds.
Anywhere within that 30 seconds, get said family members top 'rush' into the shot and pose.
Fire off a flash manually, after which they should 'rush' out of the shot.
I did this a few years ago, but it was not planned, and the young lady was not getting the idea I'd suddenly sprung on her, so there is ghosting. Best to have the subject against a very dark background for obvious reasons.

Or a variation of the same trick. We've all played this game I'm sure.

One thing I have not yet tried, is the setting fire to steel wool trick and twirling it around like a Catherine Wheel, hoping not to set fire to anything too important. This story was on PetaPixel a couple of years ago:
https://petapixel.com/2016/02/23/iconic-shipwrecks-fire-likely-caused-light-painting-photographer/
This nice photograph resulted in the rear of the apparently 'iconic' shipwreck being burnt.
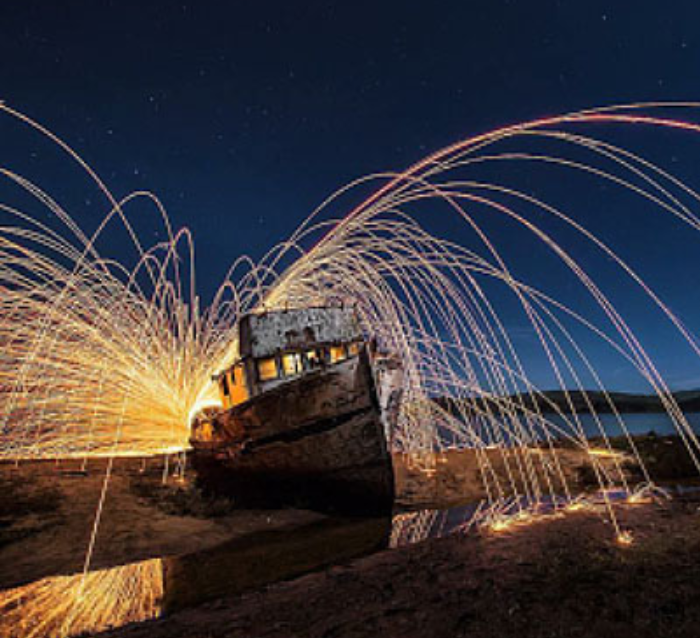
IIRC I managed to upset the PC brigade with a quick boat repair with Photoshop.![]()
Copy link to clipboard
Copied
Hi, I found a step by step tutorial that can be helpful to replace the sky in your image: Quick and Dirty Guide to Replacing Skies in Photoshop | Fstoppers
You can start with step 3: drag the long exposure sky on top of the short exposure photo. This means you'll have two layers, with the long exposure layer on top.
And here's another step by step tutorial: How To Replace The Sky In A Photo With Photoshop
There are several ways to do this, but the workflow in both tutorials is similar.
Good luck with your project!
Copy link to clipboard
Copied
You may like to know you can do this with a single exposure providing you have a camera that can shoot in 'Raw'. Adobe Camera raw will enable you to process the same photograph with two separate exposures, the first with the foreground correctly exposed and the second with the starscape correctly exposed. You then bring the two different exposures into Photoshop as stacked layers. By masking out the sky from the foreground image the starscape will show through and the exposures will be correct. This will also work with a Jpeg but the results are far better with 16bit raw images.
I had to do something similar to this just last week and the photographer had only taken one really usable photograph. I had my doubts but it worked surprisingly well. I am lucky enough to have a subscription to a website which has a 4 hour course on ACR and this technique was one of the modules. If you don't mind paying $35, I have put a link to the course below. It is actually well worth the money as it covers all the features of the latest camera raw which are quite difficult to find for free on YouTube
Copy link to clipboard
Copied
Hi,
Here is a tutorial I created using a few images in a similar fashion and it also show how to produce a pop art finish for the foreground character: Designing a Concert Poster in Photoshop | Pluralsight
Here is another which you may find useful: https://www.skillshare.com/classes/Photo-Manipulation-Master-Photo-Editing/1732902986?via=search-lay...
Copy link to clipboard
Copied
I am leaving tomorrow for 5 days out of town. I will be shooting while gone so i will do a similar version of the shot i talk about. The shot has to be with 6 family members and the milky way in the background, all dark foreground, no light, flash etc on foreground. Then i will try to post something back up to this thread next week. It is the following weekend i have to do the shoot, and have 3 weeks to get it delivered to the family. I have shot tons of night sky images, just never exposed for the sky, then exposed for the foreground and combined them. What is giving me trouble is how to layer them in PS. I can get actions and layers windows open but can not either get both images on layers or some other way to overlay them. Or cut out the sky in the dark shot, showing just foreground silhouette of people, then layer over a second image of the sky exposure. Sorry if i am repeating myself. Again i will show a few test images when i get back of what i have in mind. Thanks everyone so far for any help.
Copy link to clipboard
Copied
Hi
I would expose the sky shot with no people. Then expose the foreground shot with just enough exposure to make out the edge that you will mask. Masking the second and placing it over the first is then straightforward and you can always darken the foreground further to enhance the sillhouette.
Have a good trip
Dave
Copy link to clipboard
Copied
That is likely what i will do, but i do not know how to work masks or layers really. Almost all my editing is light amounts of color, shadow and highlight. I need to learn how to do masks and fast.
Thanks for your reply.
Copy link to clipboard
Copied
When you get back, post a couple of shots and we can help you. There are various methods to select the wanted, or unwanted, area. All are easier with a clear sharp edge so that should be your aim when photographing the image. Once the selection is done the mask is easy (Layer - Layer Mask - Reveal (or hide) selection)
Dave
Copy link to clipboard
Copied
Hello, I am back. 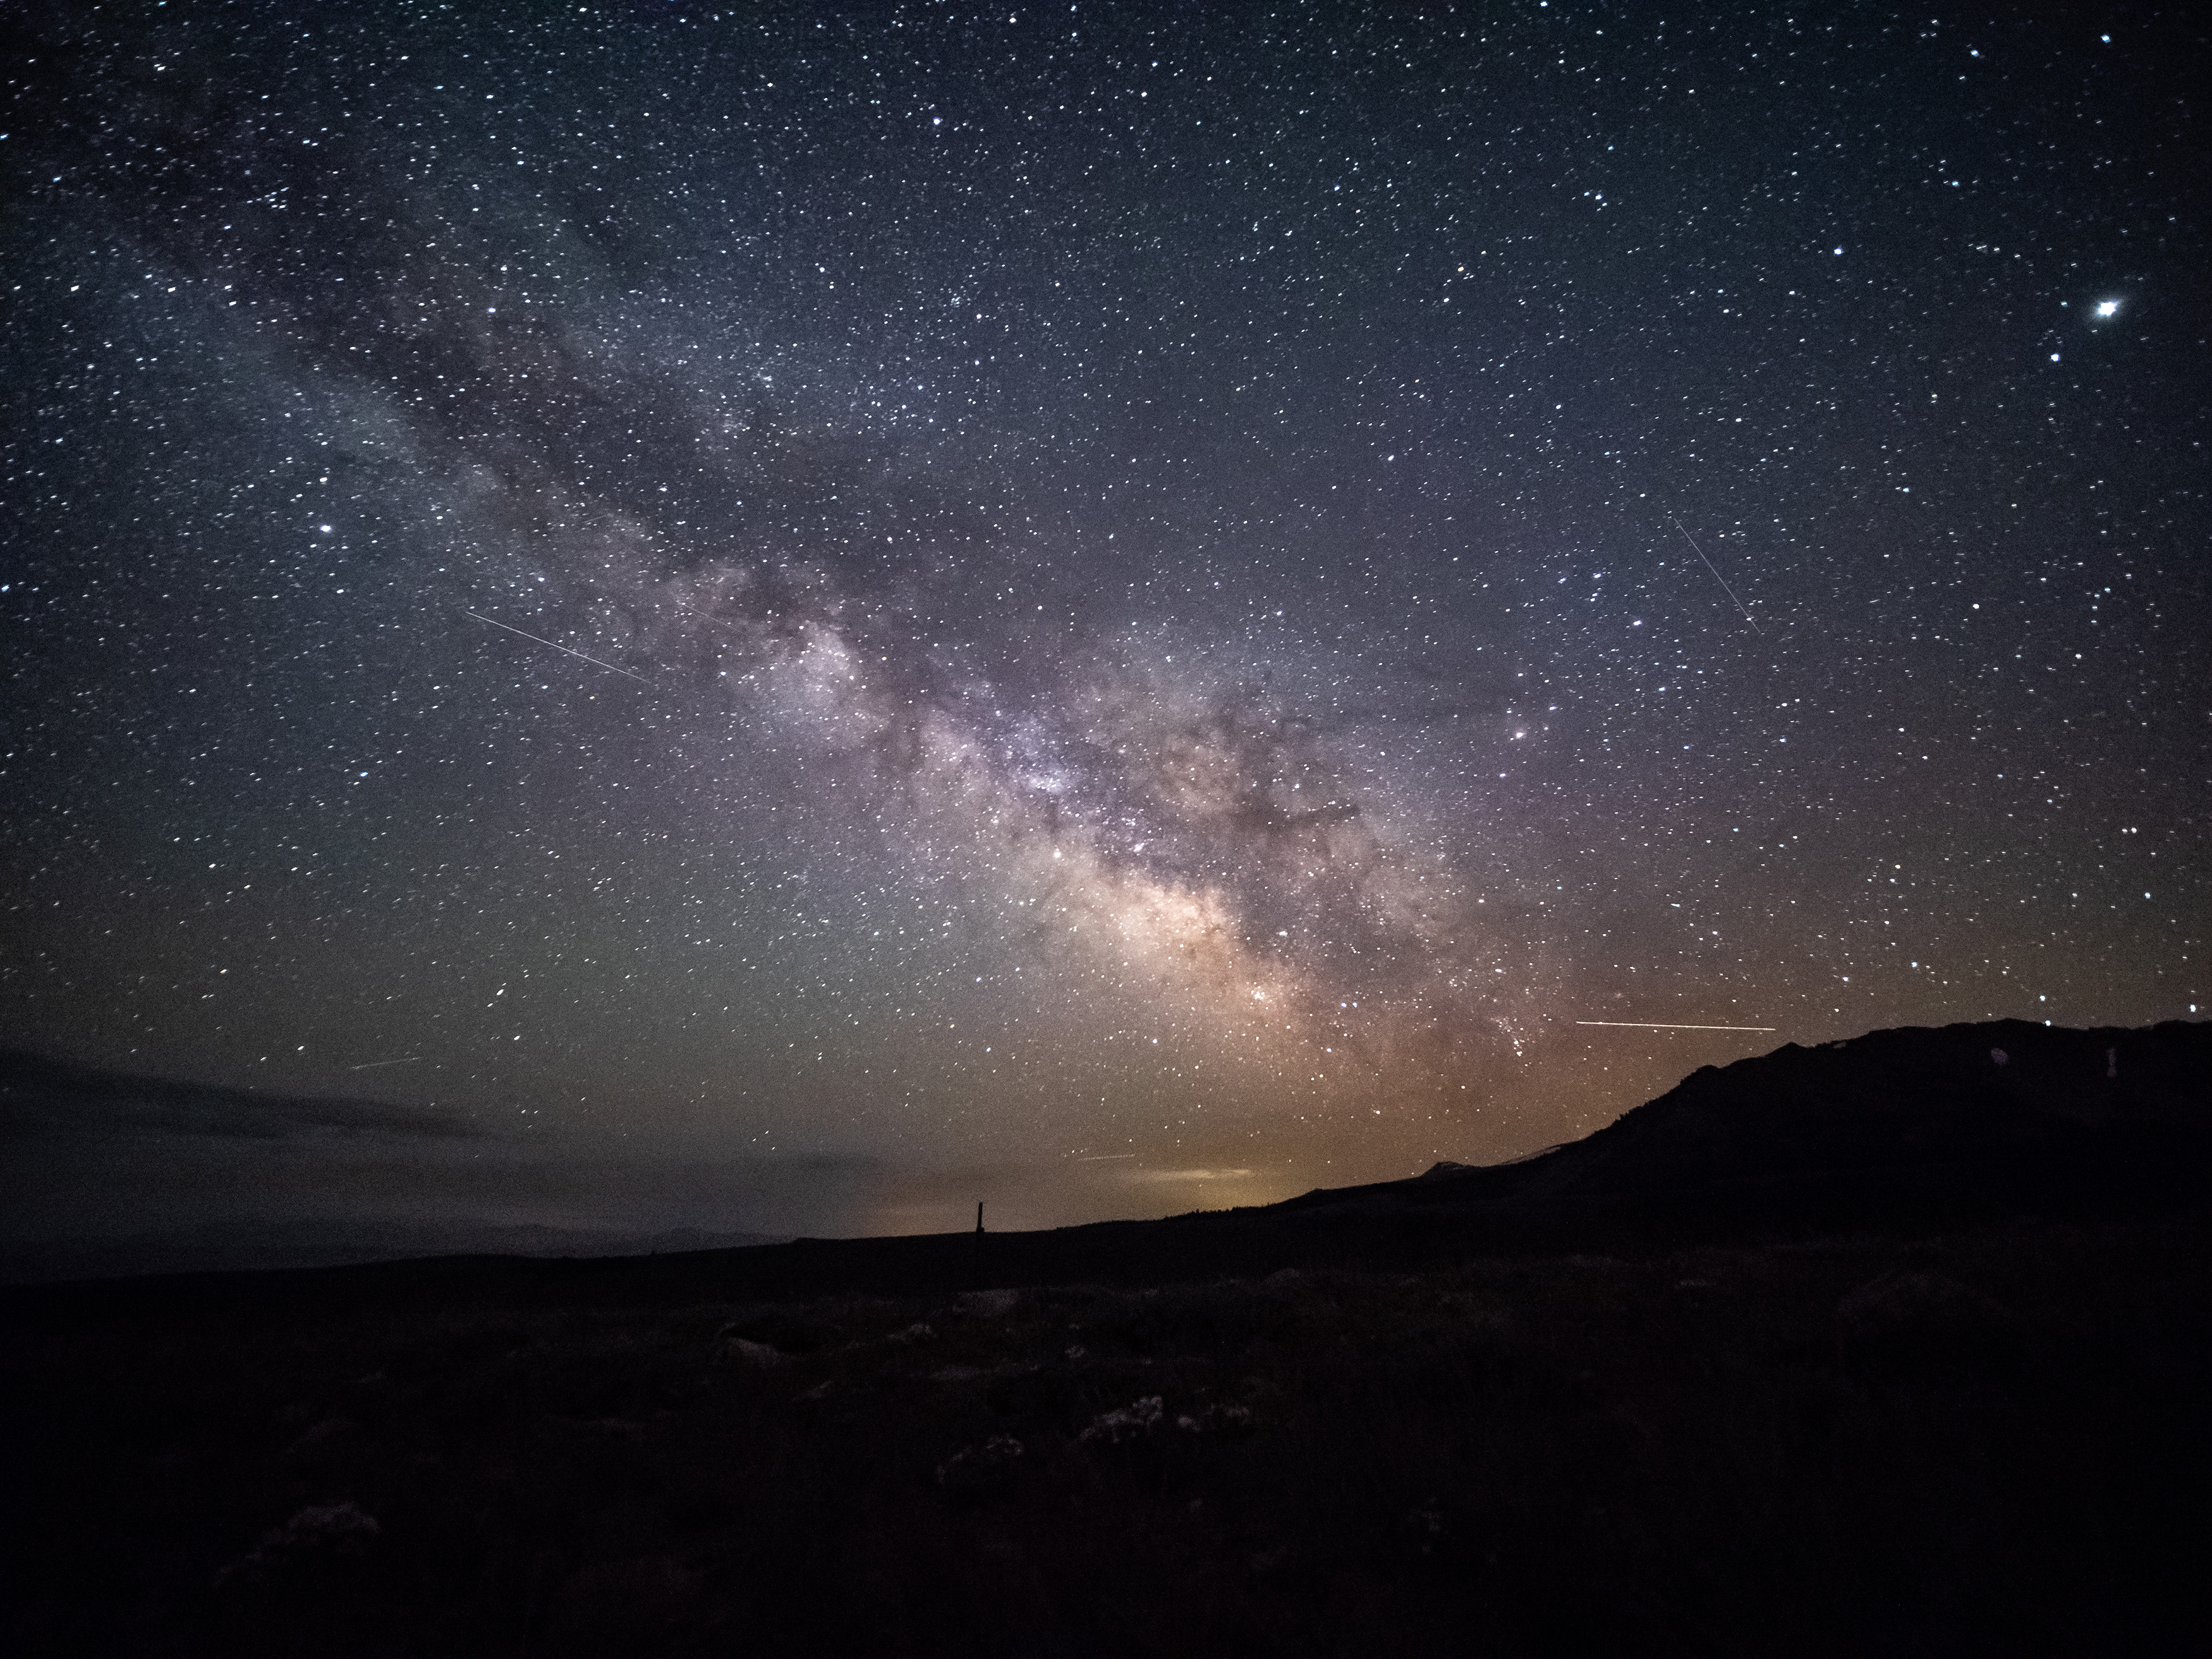
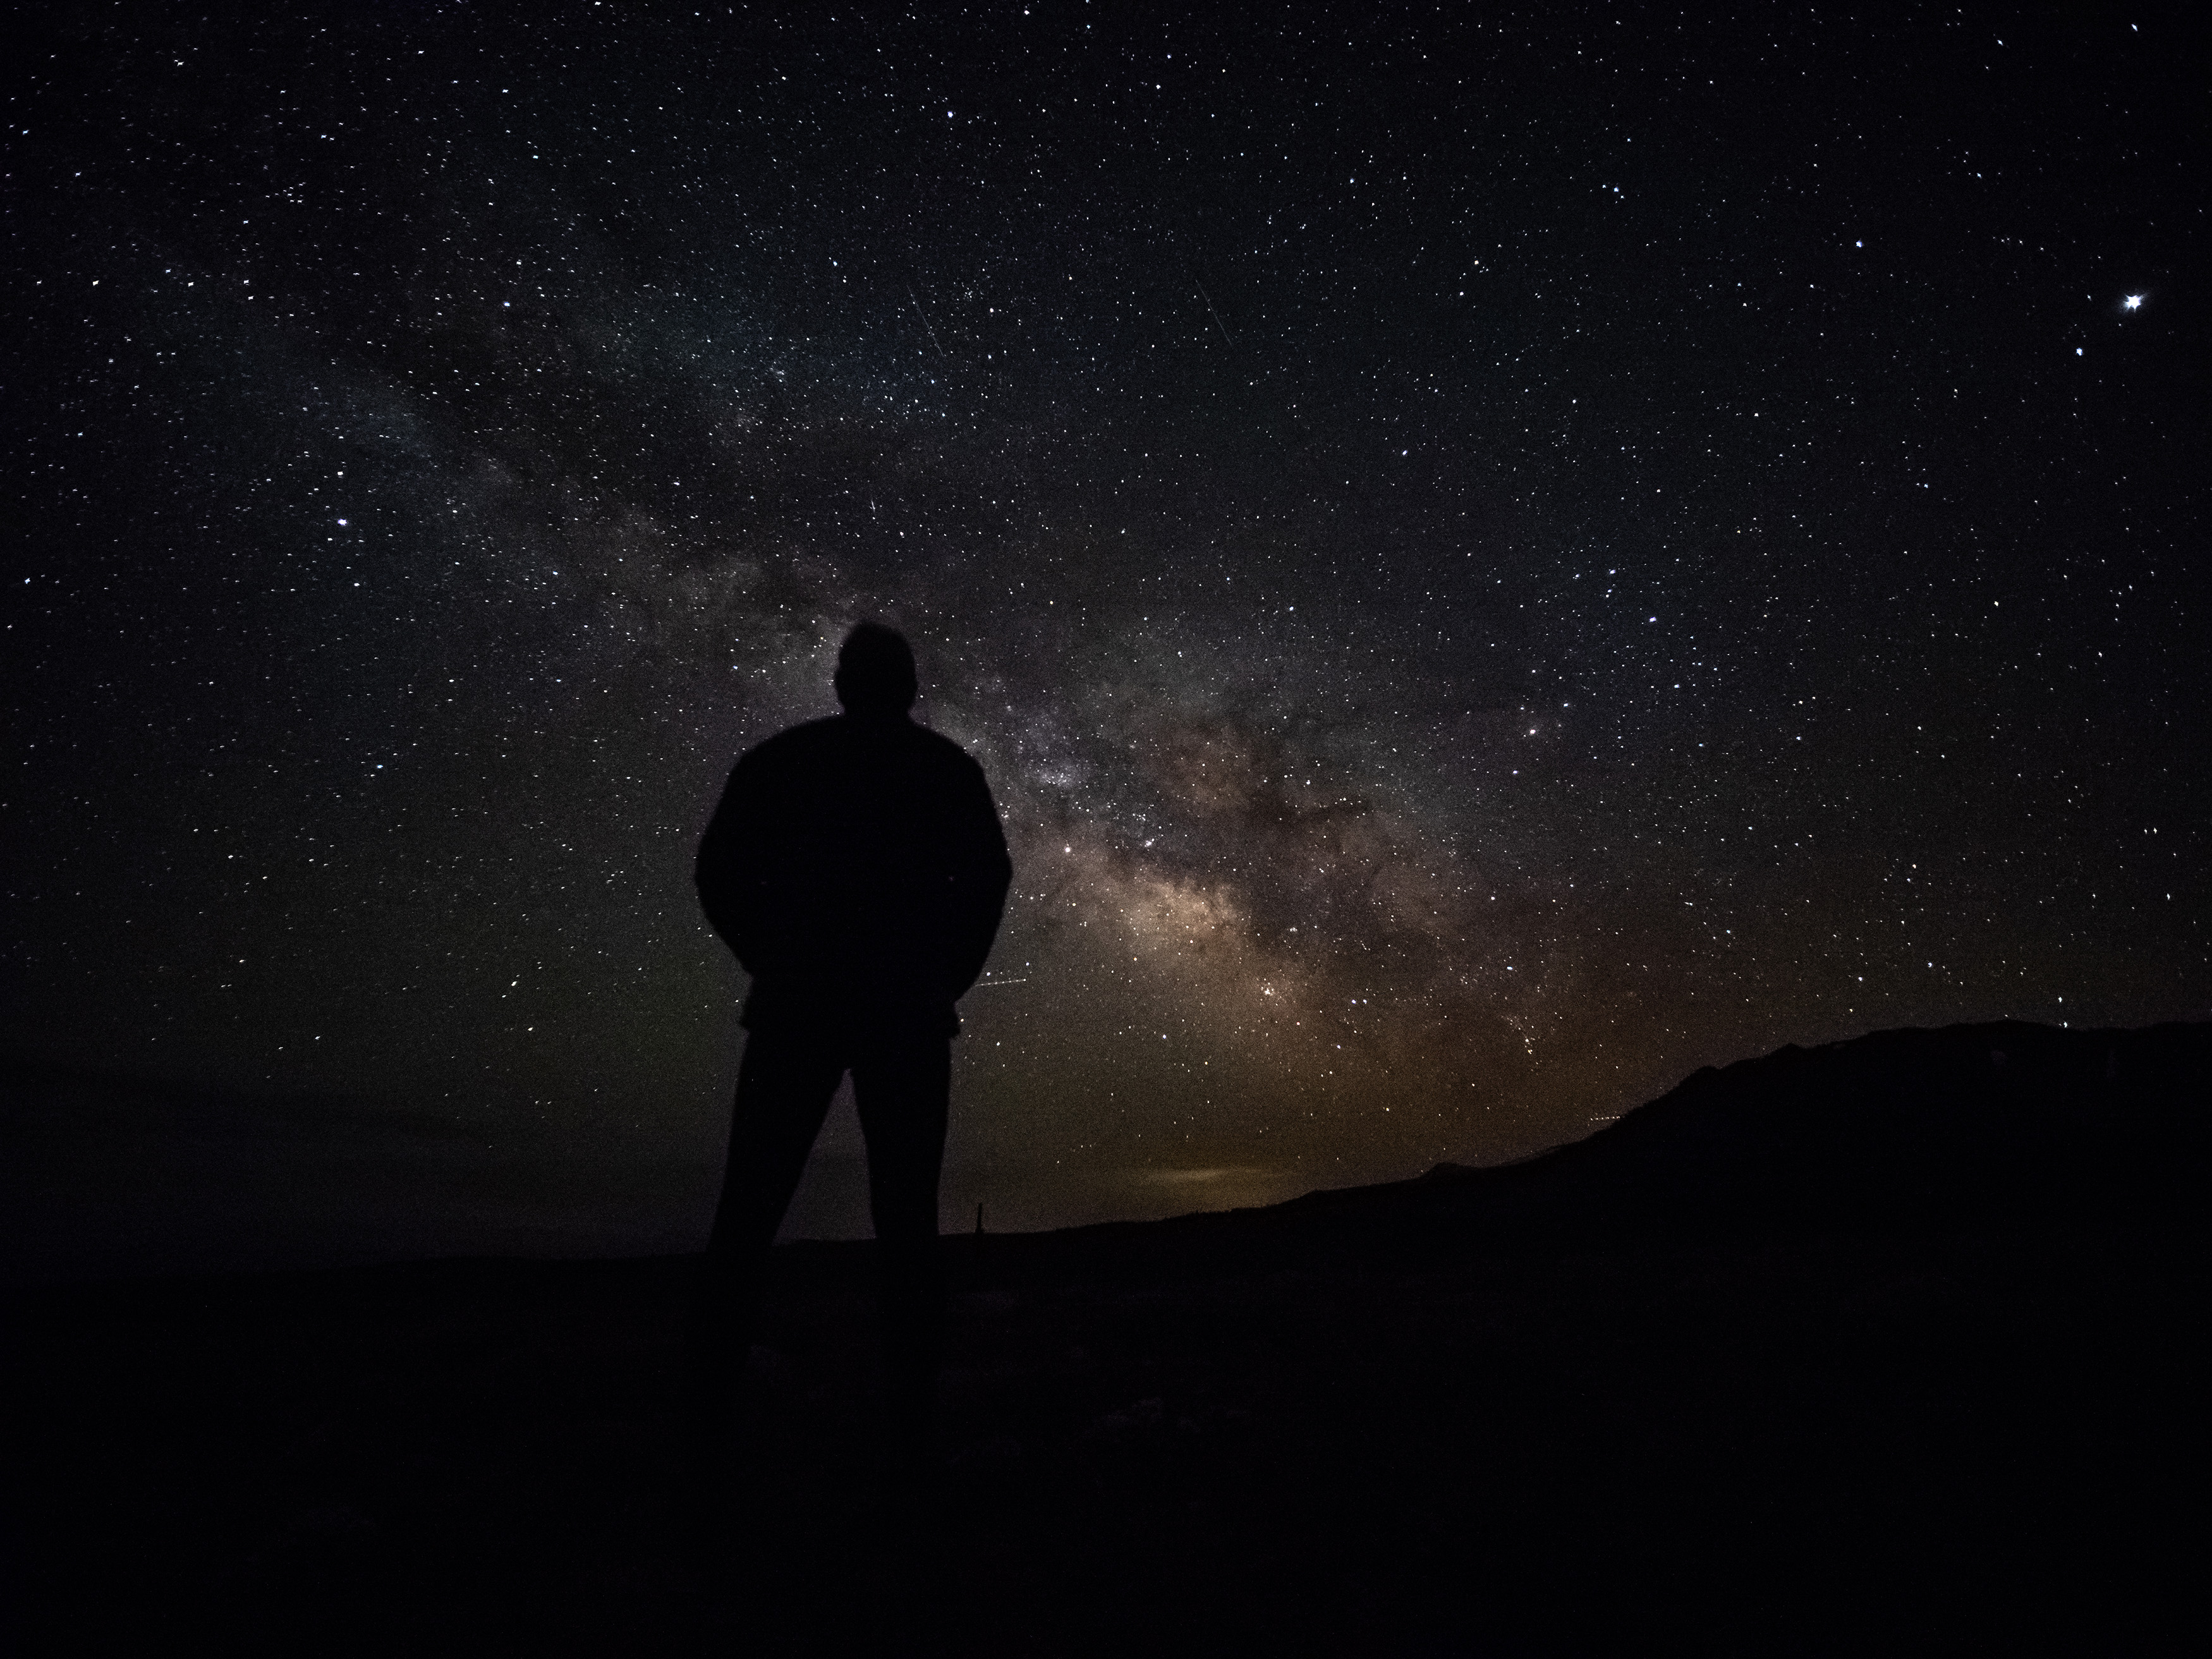 Here is just 2 images for test reasons of what i am talking about working with. Tell me what you all think. The brighter image was a 30 second exposure, the darker one 10 second image. I will likely do the same this weekend when it counts, 6 people in the shot, may have to run the short exposure more like 5 seconds. Want to basically put the dark foreground from the darker image into the brighter sky shot as we talked about before. Thanks, Dave.
Copy link to clipboard
Copied
Hi
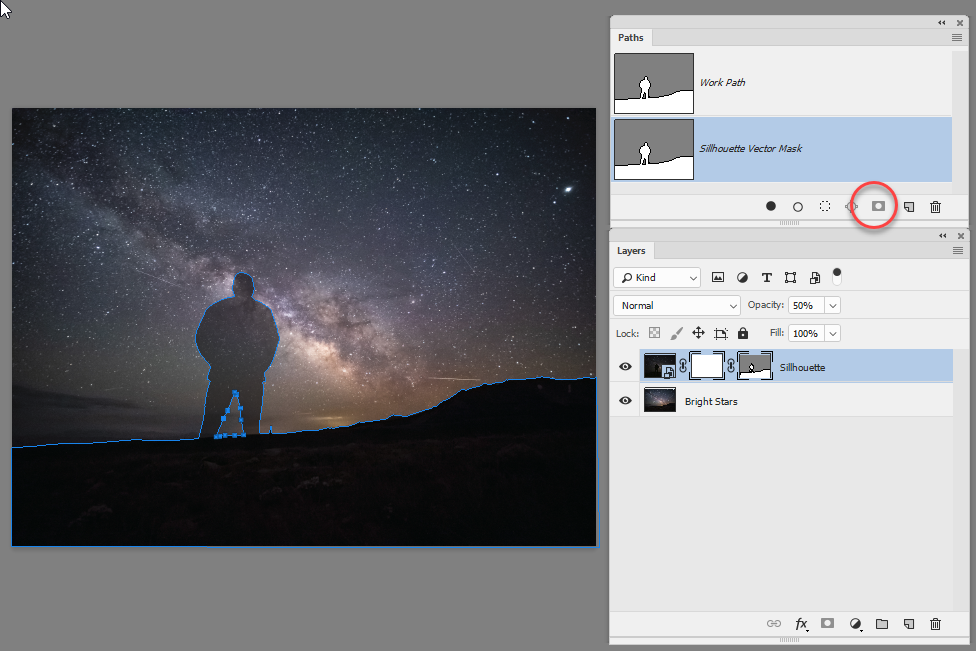
I put the silhouette layer above the bright star layer. The ground is well aligned but obviously the stars have moved. I traced the edge of the silhouette with the pen tool to create a path then turned that path into a vector mask by clicking twice on the mask symbol in the path panel. This gave a nice crisp edge.

Dave
Copy link to clipboard
Copied
That is what i need each step in how to do. Thank you so much for doing this.
Dave.
Copy link to clipboard
Copied
I'm not in my office right now but I'll post some steps when I get back later this evening.
Dave
Copy link to clipboard
Copied
Hi
Sorry for the delay - England took a long time this evening to win their football game ![]()
So the steps I took were :
1. Place the darker layer above the brighter layer (using File >Place Embedded) then turn down the opacity of the top layer so you can see both
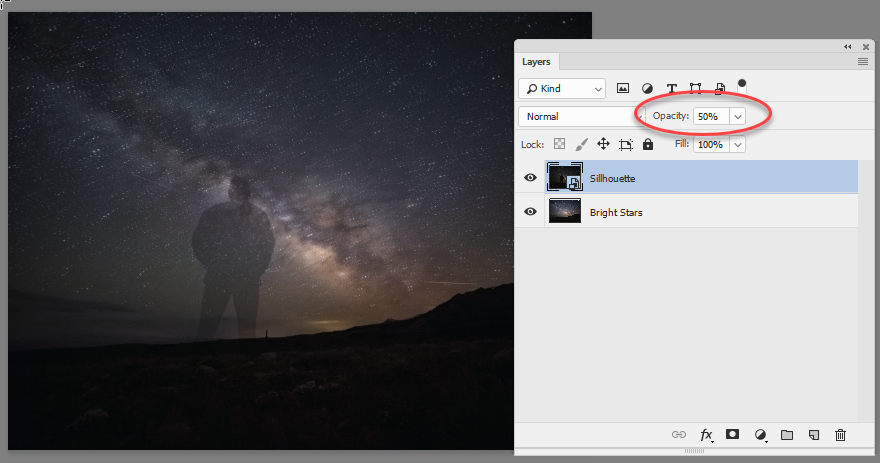
2. Use the pen tool to draw around the black area (including the person) and create a path. Make sure path operations is set to combine when doing this.

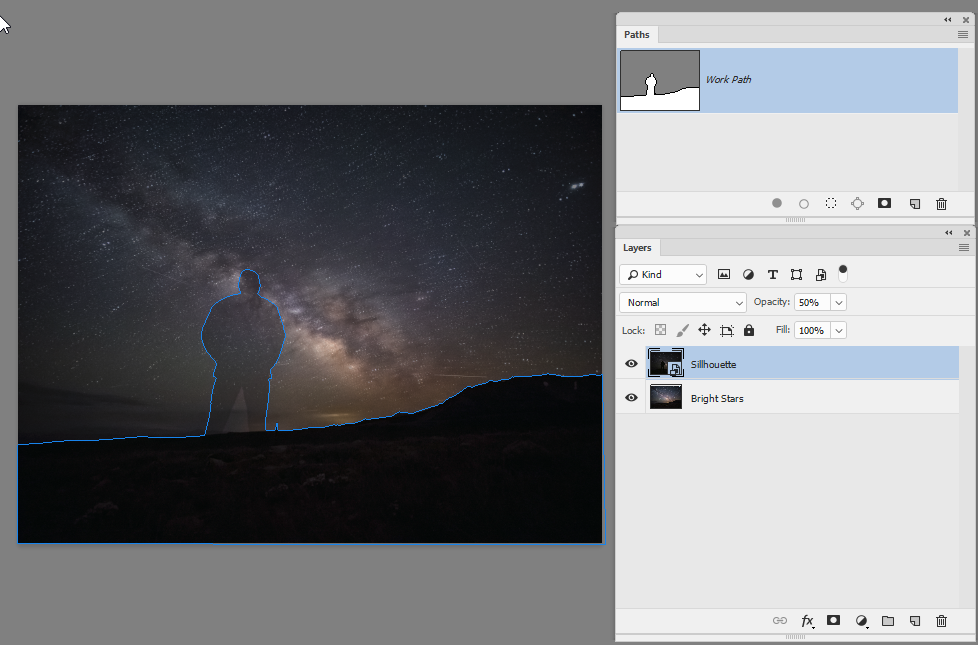
If you are not used to using the pen tool take a look here :
Draw with Pen tools in Photoshop
3. Start a new path for the triangle under his legs and change path operations to subtract front shape


4. With the upper layer selected click twice on the add layer mask symbol in the paths panel
5. Turn the opacity of the upper layer back to 100%
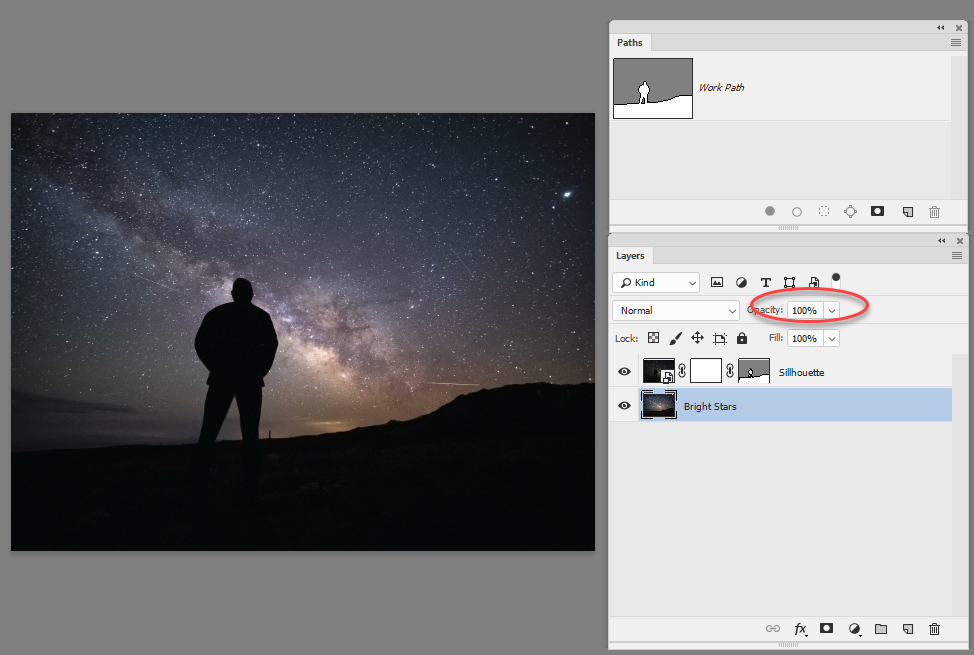
That was it.
Dave
Copy link to clipboard
Copied
Dave,
Thanks so much for the help on this. If it matters, i am on a mac computer. I have not tried your steps yet, but last night messed with just opening the 2 images in PS, then could not move forward from there. I have always used PS and LR for very minimal editing on landscape images, so all this is a bit tough for me to figure out. Never have worked with layers or masks, sad to say. Always work with shadow, highlights, color, sharpness, etc basic panel stuff. I will see if i can figure this out.
Thanks so much again.
Copy link to clipboard
Copied
No problem. If you get stuck at any stage, take a screenshot of your whole screen including the layer and paths panels. Post it alongside a description of what you are trying to do when you are stuck and we'll try and help you.
Dave
Copy link to clipboard
Copied
I tried working with it and managed most of the way how it should look using your steps. Only thing i did not do, likely, is use the correct pen tool and could not match up the dark area of the 2 images while tracing out the path. I will try again tomorrow night, thanks again for your time on this. 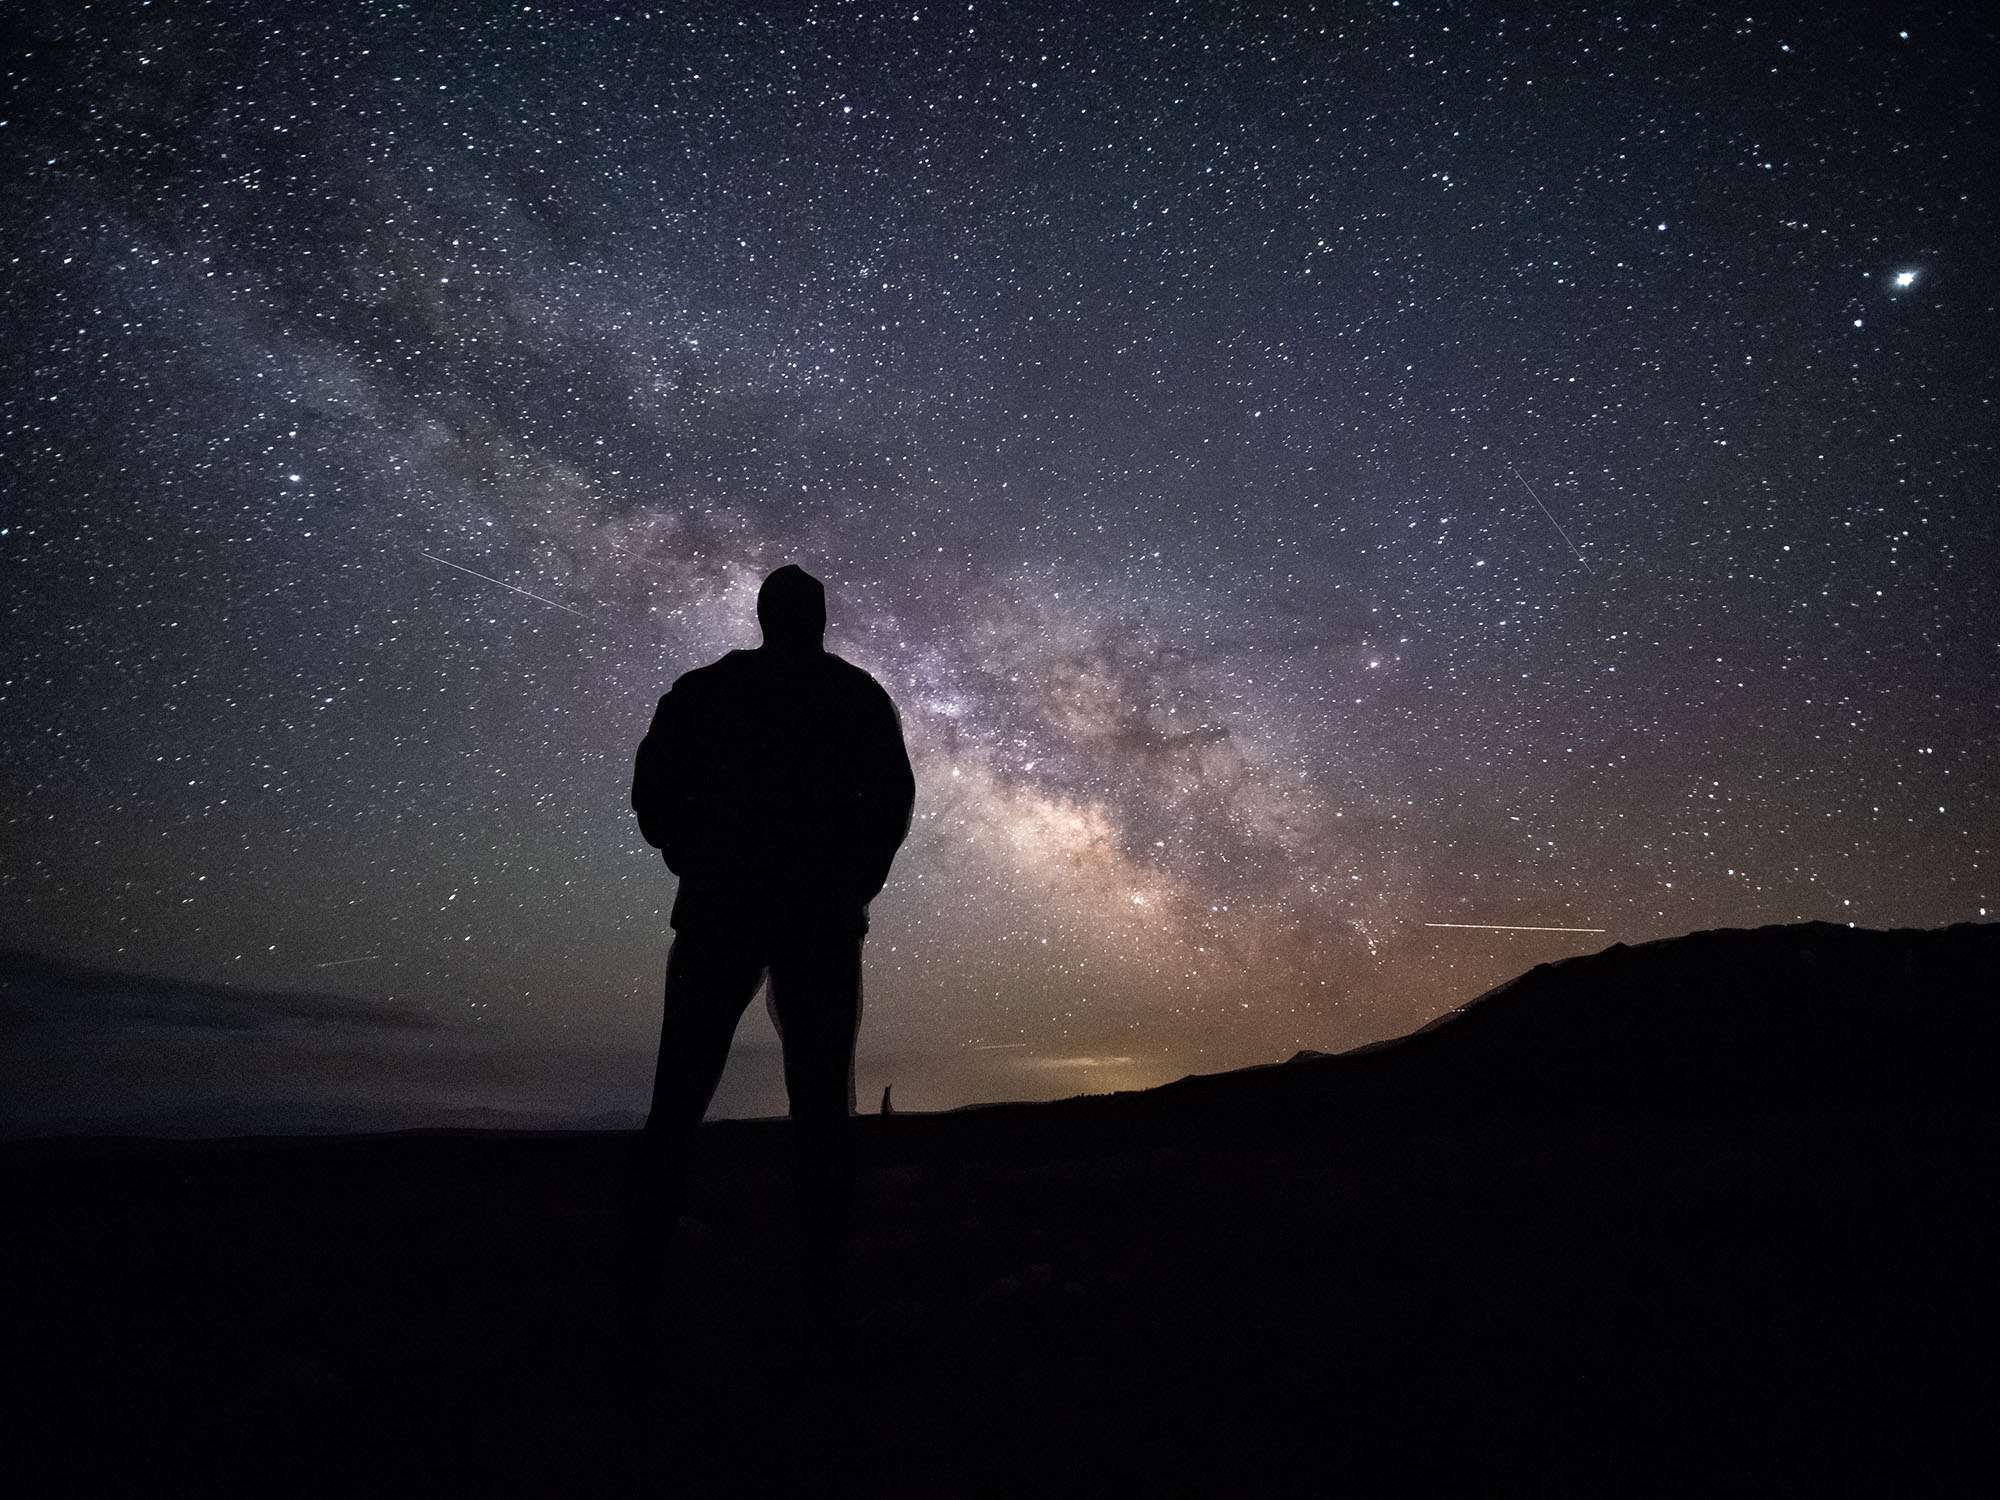
Copy link to clipboard
Copied
Hi
The two dark areas were a good match to start with when I used the two images you linked above. The only reason I temporarily reduced opacity is so that I could see the edge on the area to the left of the person. You could just as easily trace most of it using the dark layer at 100% and temporarily switch of the visibility of that layer when you reach the left of the person. Once done the mask goes on the dark layer,
The pen tool I used was the standard pen tool. Click to lay down a point then drag the handles to set the curve. Keeping one hand on the mouse and the other hovering over the Alt key, this is very quick and accurate.
Dave
Copy link to clipboard
Copied
dave,
I have having all kinds of problems, not sure what i am doing wrong. Super quick rough draw, not at all what i am after in the final image. But trying it out is not quite working. What do you think?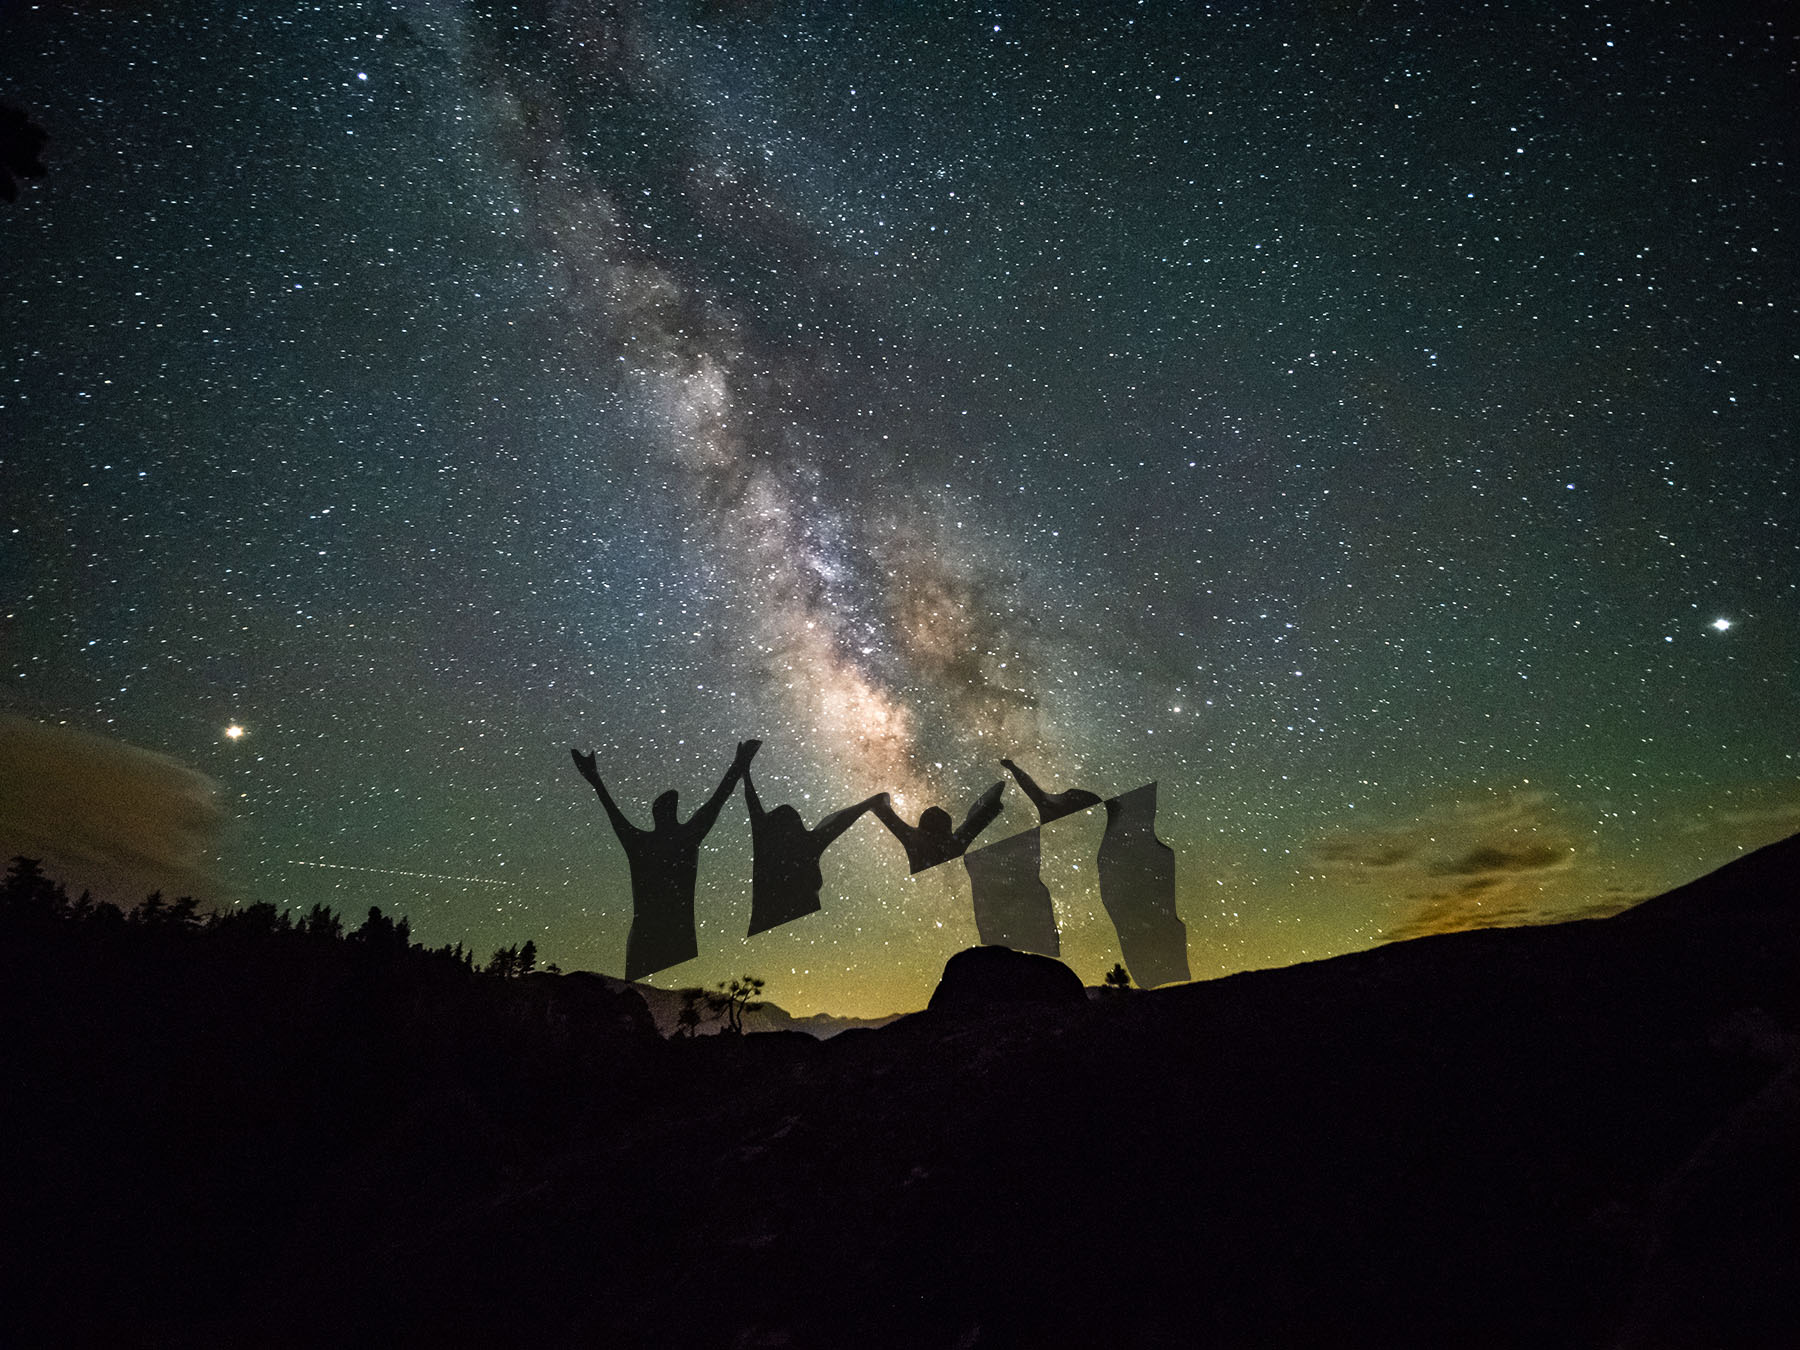 .......
Copy link to clipboard
Copied
Hi
It looks like you are having problems with you pen tool. Can you show the layers separately (just use the eye icon to switch visibility of each) along with the layers and paths panel in each screenshot.
Dave
Copy link to clipboard
Copied
dave,
This will have to wait awhile. I head to Canada (Banff, Jasper, Assiniboine) in a week, wont be back for a month. The family does not need the shot or shots done til November, so i will have time in September/October to get back at this. Quite busy right now getting ready for this trip. Thanks for your help on all this, i will reconnect in the fall.
Dave Clock.
Copy link to clipboard
Copied
No problem Dave. Have a great trip.
Dave
-
- 1
- 2

