• Global community
    • Language:
      • Deutsch
      • English
      • Español
      • Français
      • Português
  • 日本語コミュニティ
    Dedicated community for Japanese speakers
  • 한국 커뮤니티
    Dedicated community for Korean speakers
Exit
0

Help with focus in photo stack with moving subject.

New Here ,
Feb 18, 2023 Feb 18, 2023

Copy link to clipboard

Copied

Hello


I'm fairly new to this whole editing thing. I was looking for some guidance on issue I've run into. 
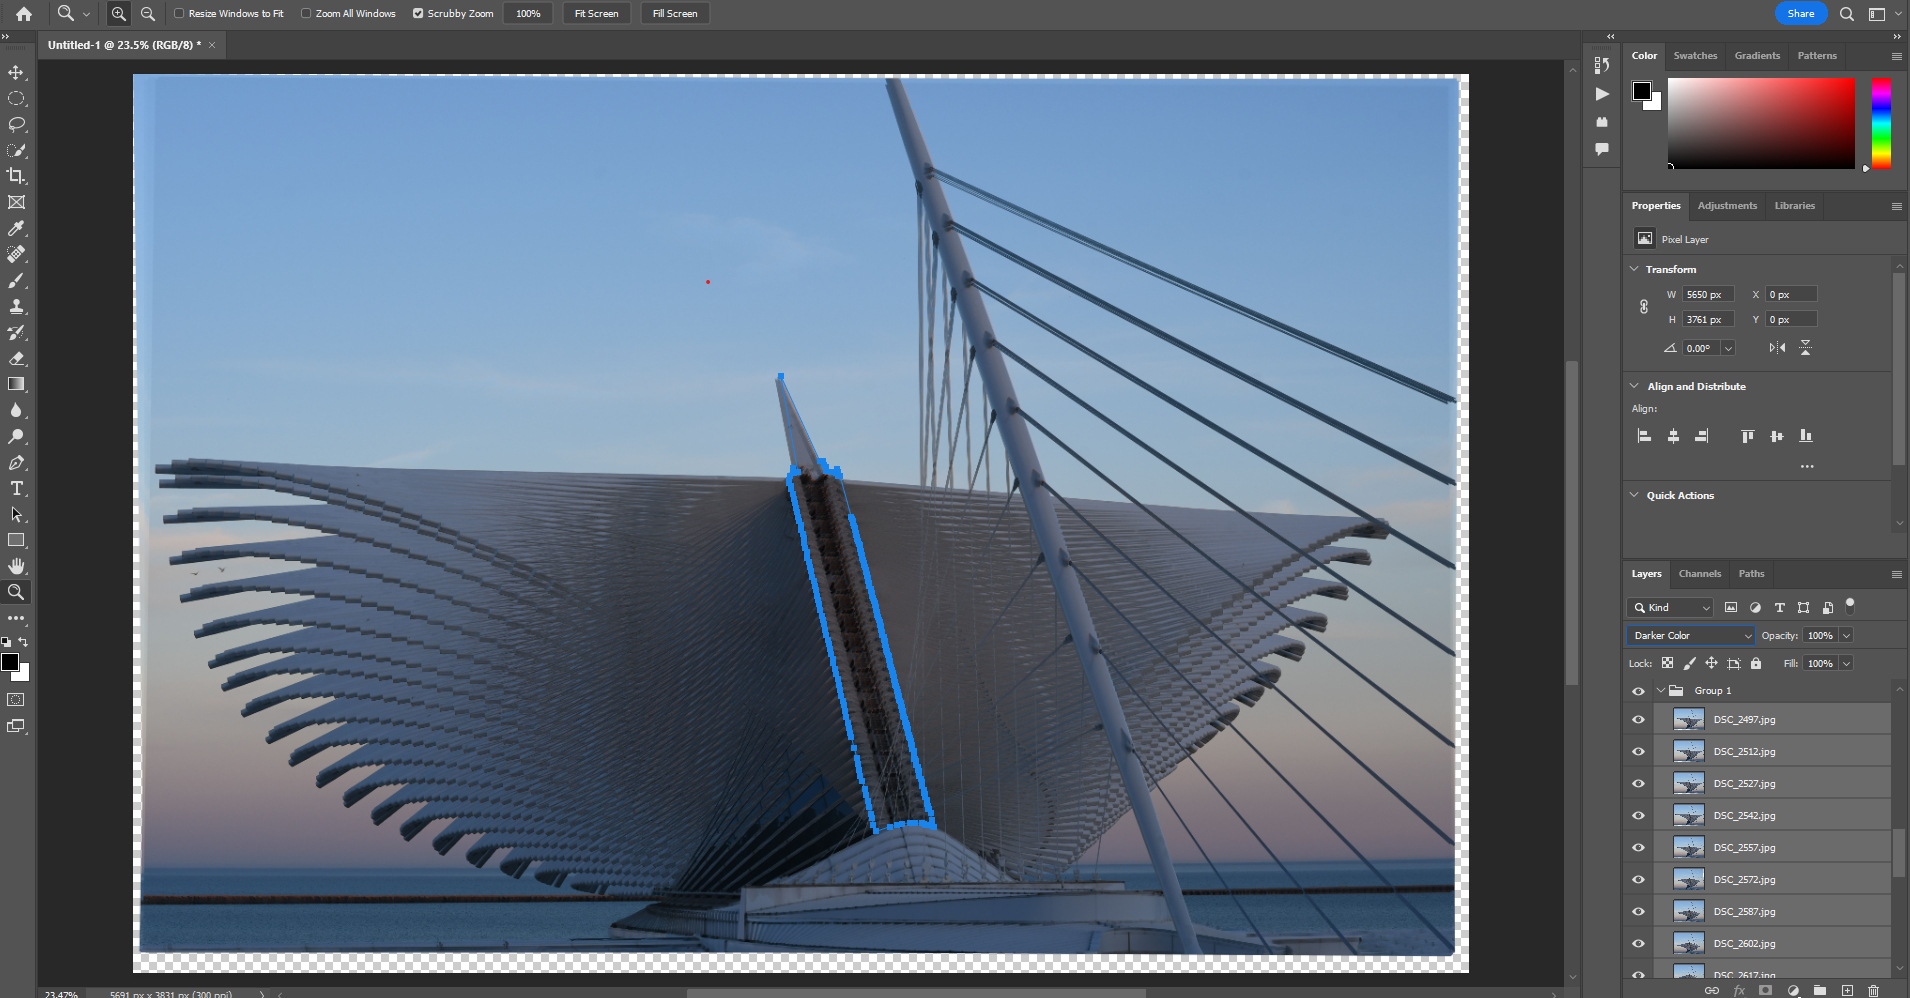
I took multiple shots of the Milwaukee Art Musem as the wings were closing in hopes of creating a stacked image that shows the movement of the wings closing. The stack has quite a few photos in it, and the building moves slightly while closing so there are parts of the building which look super out of focus when the photos are stacked and the opacity settings are adjusted so you can see the movement. 


I guess my questoin is - Is there a tutorial someone can point me to, or does anyone know of a way to get certain aspects of a photo to show through the stack while allowing for the movement of the wings to be shown? 


I've attached a screen shot of the stack and a partially complete edited vs of the photo for reference 

TOPICS
Actions and scripting , Windows

Views

1.4K

Translate

Translate

Report

Report
Community guidelines
Be kind and respectful, give credit to the original source of content, and search for duplicates before posting. Learn more
community guidelines
Adobe
Community Expert ,
Feb 18, 2023 Feb 18, 2023

Copy link to clipboard

Copied

Hello Jacques,
I am not sure if I can answer correctly without seeing your layer stack, but I would imagine that masking the parts of the image that are not moving (supposedly the center of the building) on all layers but the sharpest one would do the trick

see this short tutorial here, but be warned that doing it precisely on a vast number of layer will take some elbow grease. Since the edges of the building are quite hard, the pen tool and a vector mask created from the path seems a good way of masking too. Not a difficult technique, just something that will potentially take time.


https://www.adobe.com/products/photoshop/masking.html
https://helpx.adobe.com/uk/photoshop/using/masking-layers-vector-masks.html

Votes

Translate

Translate

Report

Report
Community guidelines
Be kind and respectful, give credit to the original source of content, and search for duplicates before posting. Learn more
community guidelines
New Here ,
Feb 18, 2023 Feb 18, 2023

Copy link to clipboard

Copied

There's a screen shot of part of the stack attached, if I can make it more imformative let me know. And I'm not opposed to elbow grease with this one, I've already had to edit like a million birds out of 300+ photos. 


Thanks for the linked tutorial!

Votes

Translate

Translate

Report

Report
Community guidelines
Be kind and respectful, give credit to the original source of content, and search for duplicates before posting. Learn more
community guidelines
Community Expert ,
Feb 18, 2023 Feb 18, 2023

Copy link to clipboard

Copied

In that case, kudos to the brave and go for it. 🙂
The best result will be with a vector mask but depending on your drawing skills, you could create a mask with a paint brush too. Given the number a graphic tablet is less taxing on the wrist than a mouse, but you'll see if it worth it.
The advantage of the vector mask will be that once you've made your path, and with the possibility than only small parts of the main body of the building are moving, you'll be able to duplicate the vector mask on all the relevant layers, and tweak individually to follow the edges where it has moved.

Votes

Translate

Translate

Report

Report
Community guidelines
Be kind and respectful, give credit to the original source of content, and search for duplicates before posting. Learn more
community guidelines
Community Expert ,
Feb 18, 2023 Feb 18, 2023

Copy link to clipboard

Copied

LATEST

You can use Stack Mode with a Smart Object to show all of the changes to the wings at the same time. Here's how:

  1. Create your stack (you've already created the stack, but for others who have the same question, you can
    • Go to File > Scripts > Load Files into Stack
    • Select the image files to include 
    • Select Attempt to Automatically Align Source Images
    • Select Create Smart Object after Loading Layers)
  2. Because your layers are in a group and not a Smart Object, select the group, and convert it to a Smart Object (either right-click to the right of the layer group name and select Convert to Smart Object or go to Layer > Smart Objects > Convert to Smart Object).
  3. With the Smart Object layer selected, go to Layer > Smart Objects > Stack Mode > Maximum to show all the wings at the same time. 


If you hadn't already removed the birds, you could have used a similar approach for that where instead of using the Maximum Stack Mode, you would change it to Minimum.

Votes

Translate

Translate

Report

Report
Community guidelines
Be kind and respectful, give credit to the original source of content, and search for duplicates before posting. Learn more
community guidelines