 Adobe Community
- Home
- Photoshop ecosystem
- Discussions
- Re: Help with Graphic Design - Does anyone know wh...
- Re: Help with Graphic Design - Does anyone know wh...
Help with Graphic Design - Does anyone know what tool is used for this?

Copy link to clipboard
Copied

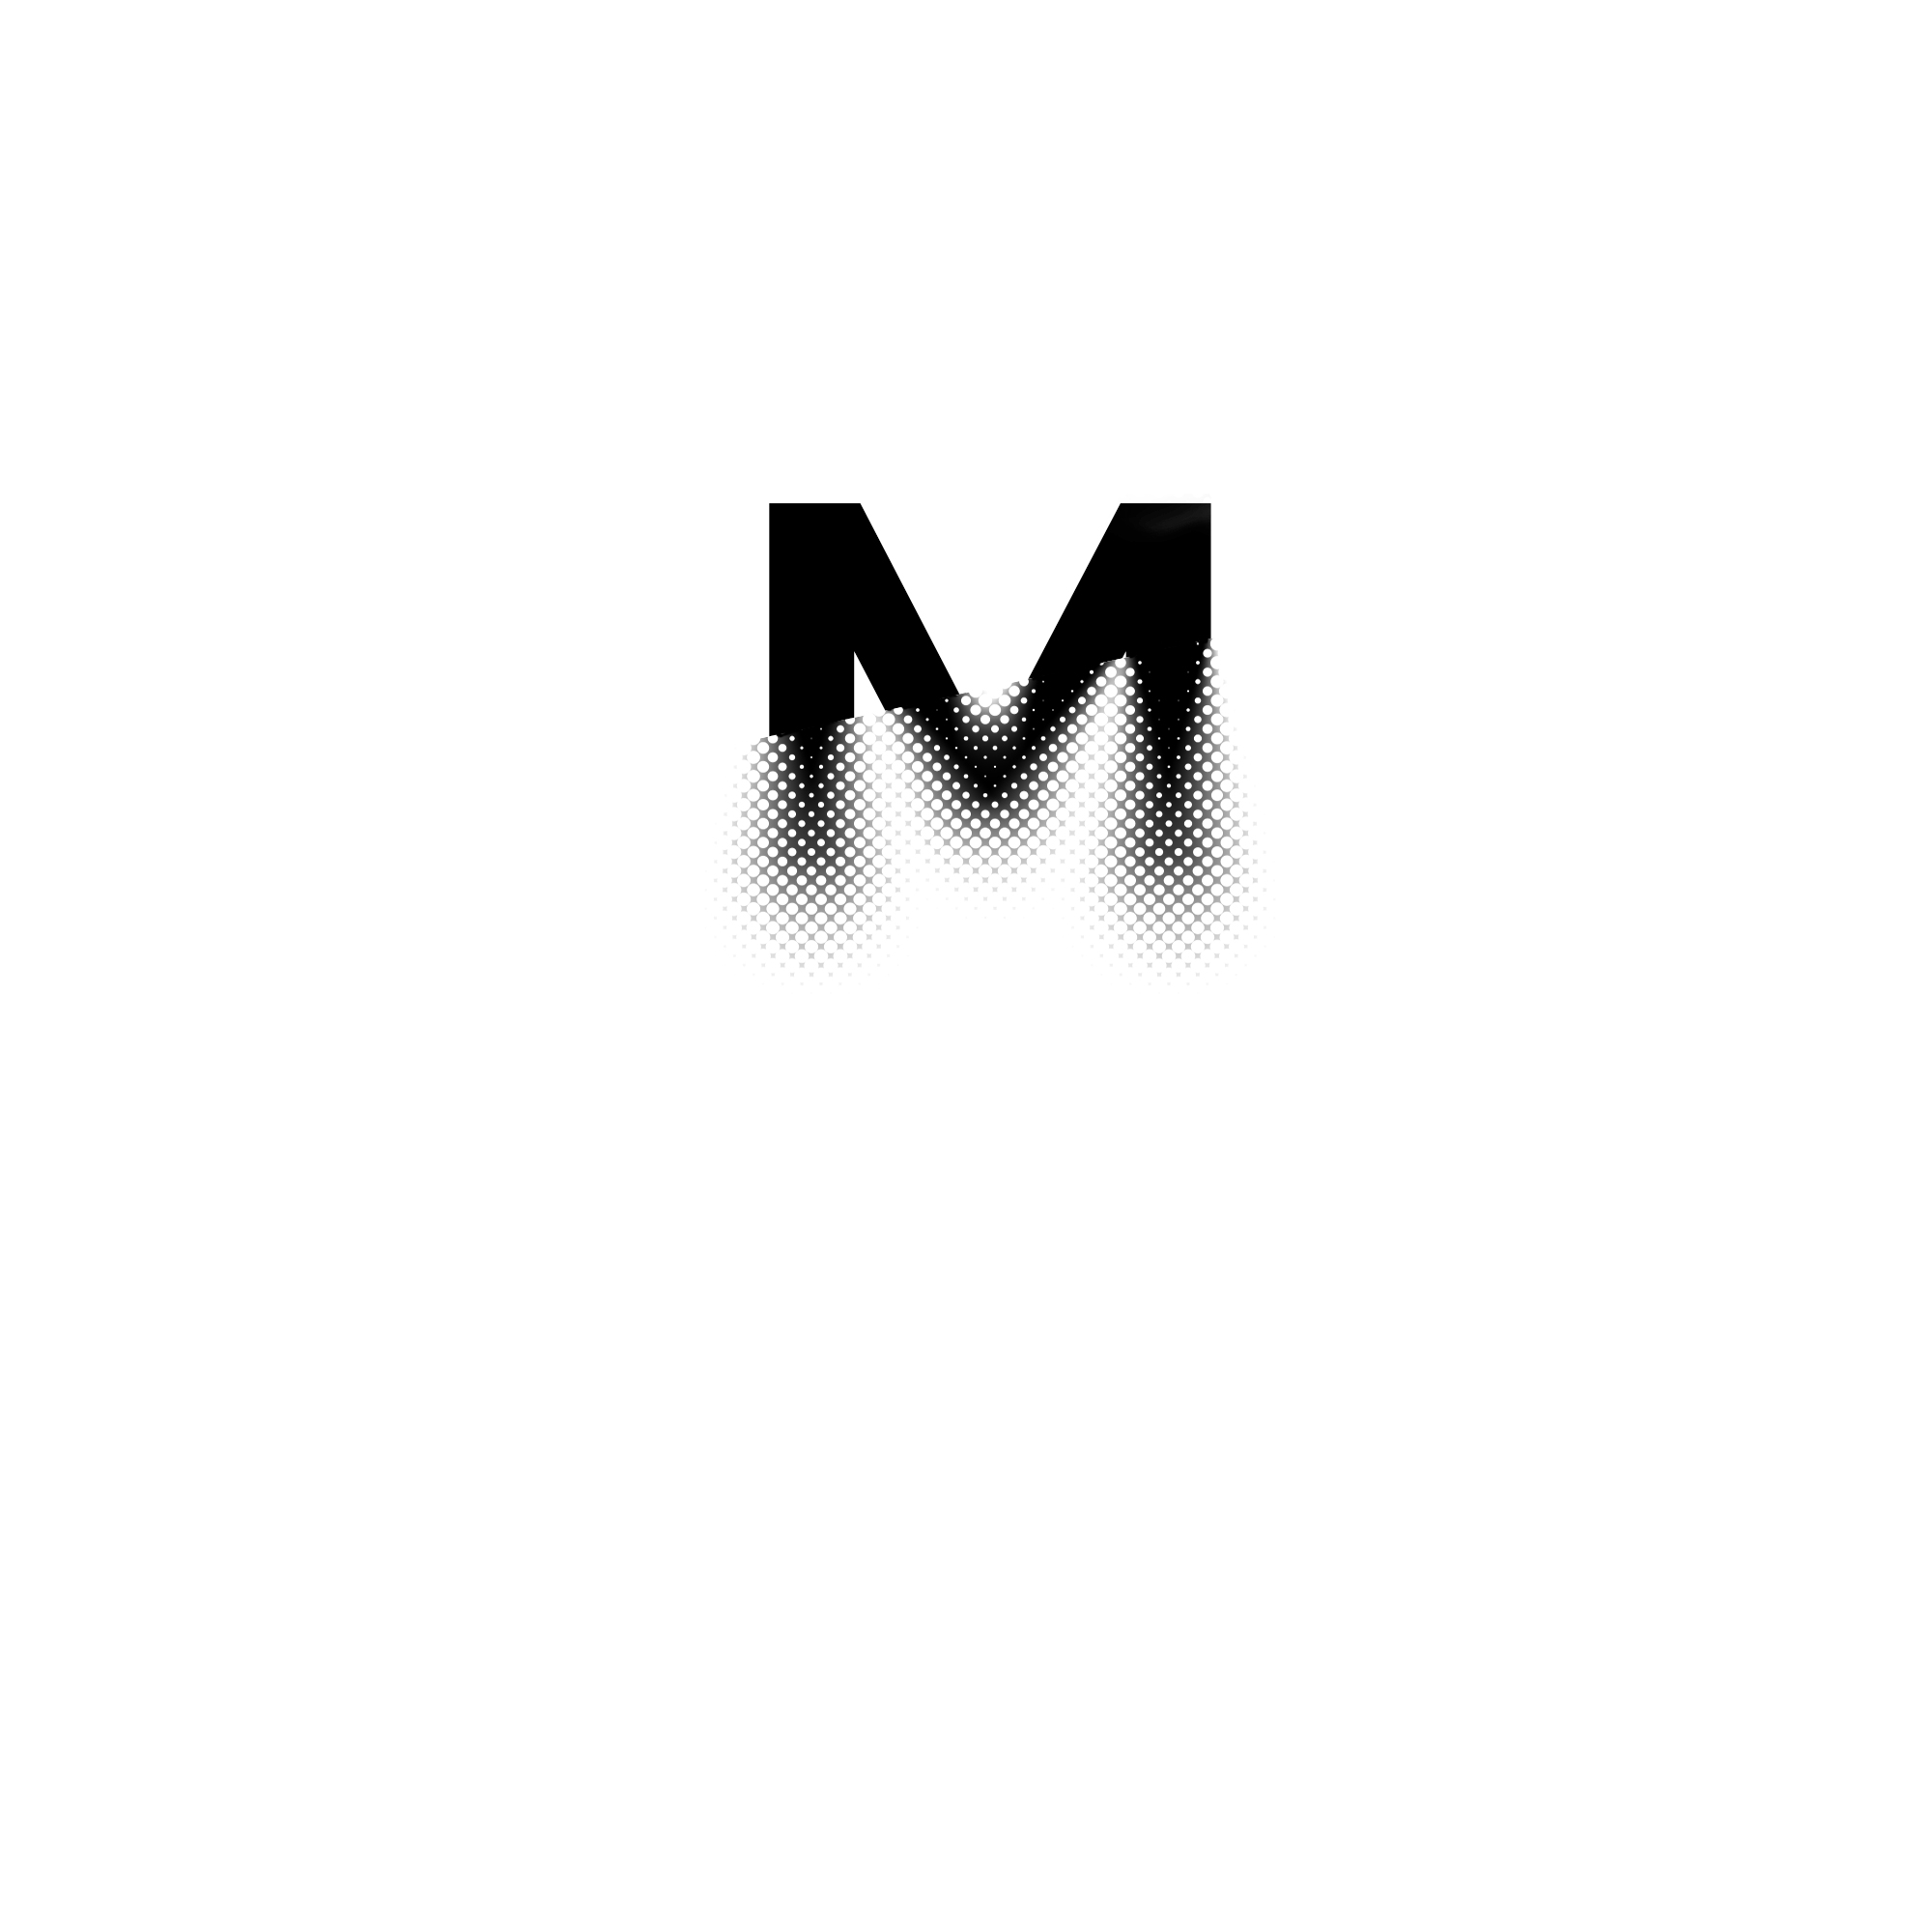
I found this amazing monogram online from Marin Studio and I wanted to create something using the same effect. Does anyone know how it's possible to create this reverse spotting?


Explore related tutorials & articles
 9
Replies
9
9
Replies
9

Copy link to clipboard
Copied
It's a halftone filter, possibly a halftone filter masked (so the top half is not halftoned)
You can either apply the filter to the mask, or to the letter duplicated and mask out the top area to reveal the original layer.
I would suggest trying the Filter>pixelate>colour halftone (even if it's not in colour) and play with the numbers.
A good explanation here.
https://www.makeuseof.com/halftone-effect-in-photoshop/
My method would be to get a halftone pattern somewhere and use it as a mask for the M. That way the effect is not dependant of the colour, or lack thereof) of the original shape, and you could use it on a piece of text, instead of having to rasterise/outline it when using the filters (but that's just me). But it wouldn't necessarily "follow" the shape as in smaller points inside the sahpe, bigger outside)
Now you could also use the halftone filter in the filter gallery, but it would only work if you got more than one colour, Another way would be turning your image (assuming it's in RGB/8) into "bitmap" which simulates halftoning (You'll have to play with the numbers there and go to image>mode Grayscale - then same menu and "bitmap).
So many ways!
PS: Personnaly I think it's done with Illustrator, but since you asked in the Photoshop forum 🙂
Copy link to clipboard
Copied
Thank you so much for taking the time to explain! I have used the method to create the effect with a K and this is the result. As you can see, it has not provided me with the correct finish. Would you know how to resolve this?

Copy link to clipboard
Copied
As I said, the problem with that M, is that it's in one colour only, so you need to simulate a "multicolour" to make it work.
I had a go, and resolved it by adding some blur
The blur turns the pure white into a black to white gradient
and due to the shape of the letters, the only type of blur that would work are tilt shift blurs (or similar - in the blur gallery)
This will not be a one click to make it look like your sample but here is a quick attempt attached, as well as the .psd if it helps you reverse engineer.
Copy link to clipboard
Copied
Copy link to clipboard
Copied
In your sample the bottom has an uneven shape (rounded) the tilt-shift blur is a way to round only the bottom of the shape by blurring it. By definition, the halftone effect will "follow" the shape according to the variations in black and white. A simple gradient will not alter the shape of the letter (the shape will remain sharp edged). it will only trigger a halftone effect on a sharp shape (like your sample above)
The .psd is there for you to play, if you double click on the blur filter in the smart filter section, you'll be able to move the starting point and amount of blur as well as the range. If you try it, you'll have a better understanding of the effect it has on the halftone. The two are linked (That's why I gave them as smart filters, so you can see what happens "live")
Copy link to clipboard
Copied
Ok, thank you very much!
Copy link to clipboard
Copied
You're welcome!

Copy link to clipboard
Copied
You can do it like this
Start with a Grayscale document, and add your shape. Rasterize that layer, fill with white using Behind mode, and convert it to a Smart Object.
On this SO, run the Gaussian Blur and Color Halftone. The great thing about this is you can update the filter values later, if desired. Add a Gradient in the Smart Filter mask if desired.


Copy link to clipboard
Copied
Almost looks like a grunge based typeface or font. Though, I understand it could easily be an effect filter too.

 AdChoices