 Adobe Community
- Home
- Photoshop ecosystem
- Discussions
- Re: Refine edge tool not working
- Re: Refine edge tool not working
Refine edge tool not working
Copy link to clipboard
Copied
I'll tell you what the issue is: Magic Wand > Select subject. Select > Select and mask > View Mode > Overlay. Zoom in on an area with a bad hair selection. Refine Edge Brush Tool > increase brush size to cover problem area. Click and drag. Result: complete muddy mess. Worse than when you started with select subject. Look like Photoshop thinks you chose a waterpainting tool and now want to paint an abstract of clouds. [inappropriate language removed by moderator]. Doesn't work.
[branched from ten-year-old thread by moderator as things have changed]
Explore related tutorials & articles
Copy link to clipboard
Copied
What version of Photoshop are you currently running?
Are you using the Hair Detection settings in Select and Mask workspace?
Copy link to clipboard
Copied
It's just not working. Everything is updated. I've been fighting with the overlay and it keeps reverting back.
Copy link to clipboard
Copied
Is this with one particular image, or all images?
Some situations are just not possible to get a really good result from. If your image has a busy background with lots of fine detail with lots of different colours, then that might be why Select and mask is not working well. If that is the case, try the image below
Do you have Select Subject set to Device or Cloud? If the former and you have a half decent Internet connection, try setting it to Cloud. It takes a tiny bit longer but does a better job.
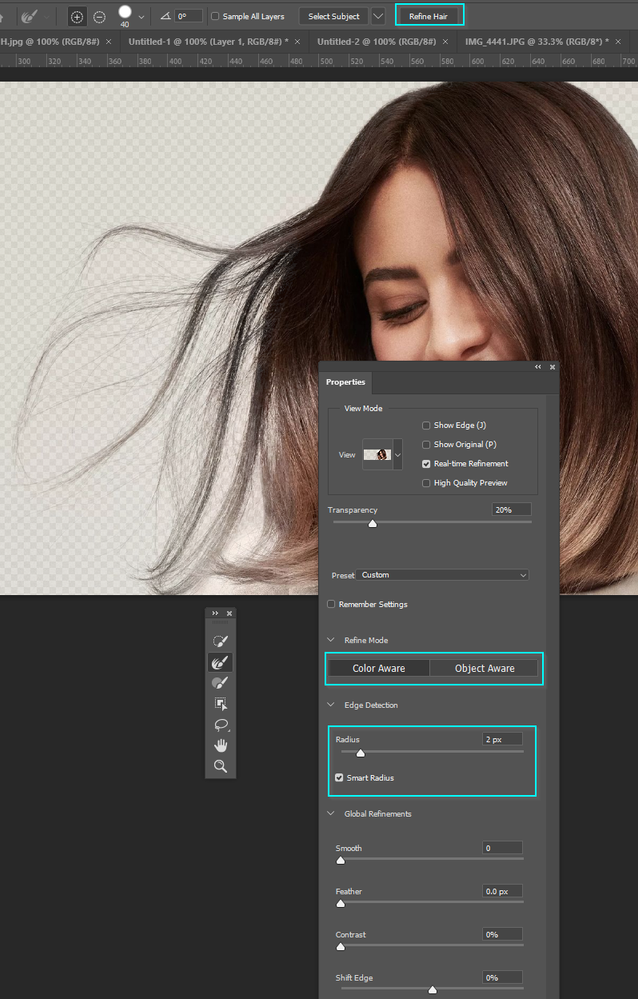
In Select and Mask, do you have Refine Hair checked?
What are your Refine settings?
Try both Color Aware and Object Aware
I usually use about 2 pixels for Edge Detection and have Smart Radius turned on.
IME It is definitely possible for Select and Mask to get its knickers in a twist when nothing seems to work. Make it a last resort, but if think you have tried everything and are getting nowhere, try resetting Preferences
Copy link to clipboard
Copied
I feel like adding that in the last few years, and especially since Adobe started developing its Sensei AI, Photoshop has been getting phenominally good at making selections. It's one click selection tools (Select Subject, Sky, Object Selection) are now particularly good. Focus area not so much so IME, and Color Range does what it says but is of limited use (also IME) but the AI enabled selection tools are now nothing short of magic.
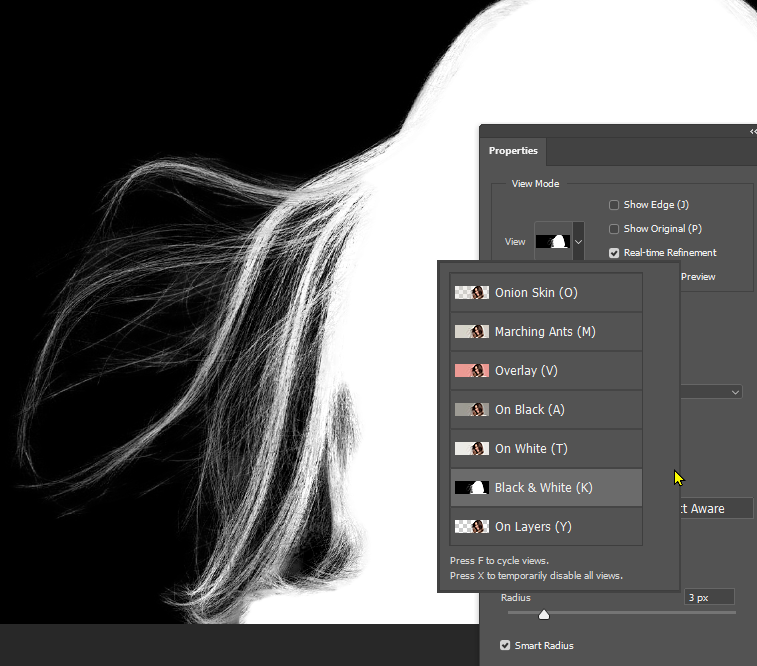
The Black & White View mode is good for flyaway hair as it gives you the best indication of how your selection is looking, and definitely helps you home in on the best settings. i.e. in the example below, I found that increasing Radius to 3 pixels made a small improvement. If you mess up and get a big clumpy mess, I prefer to Ctrl Z back to before things went pear shaped rather than push on and make a bad situation worse. Whatever works for you, but there are all these options, and I have a feeling most users never try them.
One more trick. When you OK your selection, if some of it is on the thin side you can copy the layer to firm it up. Make the layer a Smart Object so you can add a new layer mask, because some areas will be made worse by copying the layer, so you'll need to mask those out.
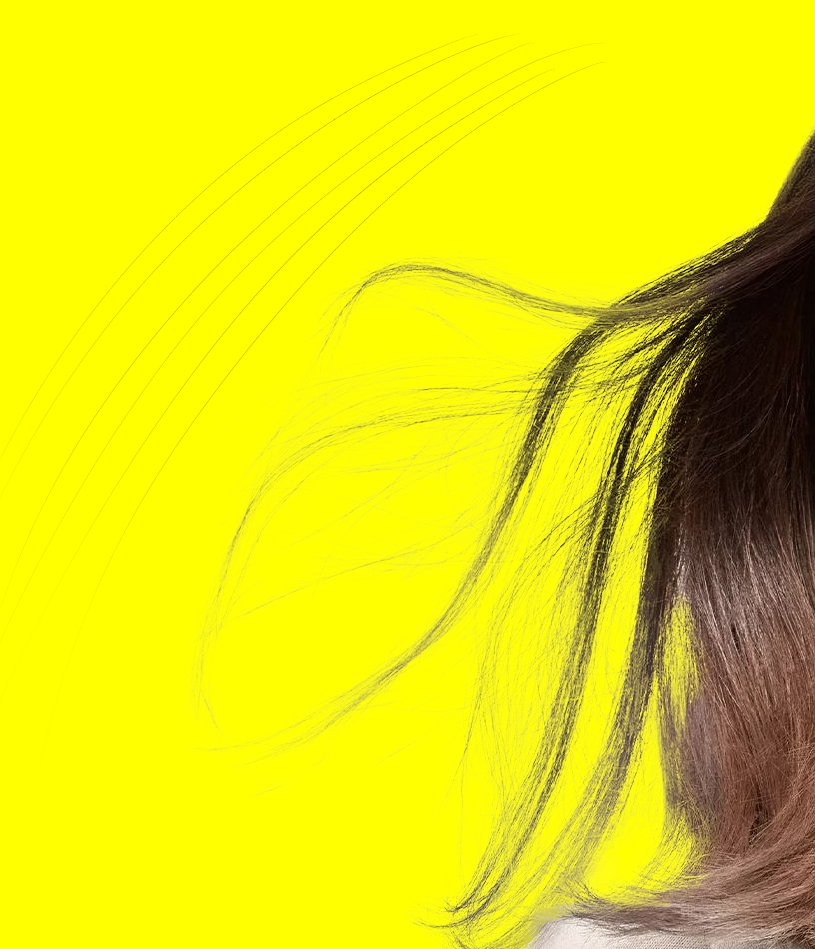
Oh, I nearly forgot. The ultimate trick with flyaway hair selections is to paint new hair in. There are some good hair brush presets out there, but my goto method is a one pixel fully hard brush with spacing set to 5% and opacity jitter set to Fade. The lines top left below had a Fade value of 1200. The new hair layer also has its opacity reduced to 80%


