 Adobe Community
- Home
- Photoshop ecosystem
- Discussions
- Re: Rotate patterns in Photoshop
- Re: Rotate patterns in Photoshop
Rotate patterns in Photoshop
Copy link to clipboard
Copied
Using Rotatable Patterns in Photoshop
One of the cool new features found in the June 2020 release of Photoshop is rotatable patterns. This feature allows you to rotate patterns (non-destructively) to change the angle of the pattern. You can change the orientation of any pattern in Pattern Overlays, Pattern Strokes, and Pattern Fill Layers. For this tutorial, I will rotate a pattern fill layer.

❶ Create a pattern (or use an existing one)
- Open the image you want to make a pattern from
- If you prefer, you can choose a pattern from the Window>Pattern panel

- Select the Rectangular Marquee tool
- Select an area to use as a pattern. (Ensure feather is set to 0 pixels)
- Choose Edit > Define Pattern
- Type a name for the pattern in the dialog box
- Open the pattern window by navigating to Window>Pattern to see your new pattern
- The new pattern now appears in the panel
❷ Open a file - Open an existing file or create a new one
Create, open, and import images


❸ Select an area to fill
- Make a selection around the area you wish to fill using your choice of selection tools

❹ Fill the selection with a pattern
- From the menu, select Layer> New Fill Layer > Pattern

- Click OK

- Click on the pattern thumbnail for select from different pattern options
- Select the pattern you just created


❺ Rotate the pattern
- Adjust the angle of the pattern in the Pattern Fill dialog,

- If you want to adjust the angle later, just click on the pattern in the layers panel and change the angle

Note: The pattern angle selector can be accessed from these locations in the user interface:
| Layers |
|
| Shapes |
|
| Frames |
|
Related links:
Create patterns in Adobe Photoshop


Explore related tutorials & articles
 46
Replies
46
46
Replies
46

Copy link to clipboard
Copied

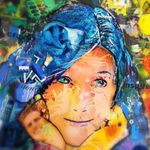
This image has an image resolution of 105 pixels per inch. The file size is 3080 x 2217 @ 105 resolution. It is designed for a digital loom and will weave to a size of 29" inches wide.
The original photograph was first reduced in colors and then deconstructed into 16 layers.
There are 16 layers with pattern overlays. Pattern tiles are : 16 x16 pixels in this example.

This is a close up. It is a .bmp. (just in case uploading to this forum renders the image in a way that shows greys). there are none.....bmp.
It annoys me that a pattern overlay comes in a various scales....SOMETIMES. Why? What is the setting that creates that change? It is easy to fix, but as you have noted these patterns are small- it can be easily overlooked - so it creates an additional step in the work flow to check a thing that I believe could be set from the start.

Copy link to clipboard
Copied
The problem is Layer Styles retain the last used value, even if that is a different layer or document. Instead of Layer Styles, try adding a Pattern Fill layer, with the layer itself used as a clipping mask.
Pattern Fills default to 100%. Or, if you're willing to forgo editablity, Edit > Fill, with Pattern as Contents are only 100%.
Copy link to clipboard
Copied
i can say with certainty that i never use any value other than 100% for layer styles.
This is one of the things I have checked.
pattern fill is destructive- a no go. cannot forego editability.
so far, instruction is to always check this occassionally random value at least for the first layer.
Copy link to clipboard
Copied
>pattern fill is destructive- a no go. cannot forego editability.
That's why I suggested clipping to the layer.
Copy link to clipboard
Copied
Thank you.
the original post was trying to figure out WHY pattern overlays come in occassionally at different scales.
I do clip, I do edit- fill. i do use layer styles and correct the random scale.
the search for an answer continues.

Copy link to clipboard
Copied
What are the resolutions of
• the original Pattern
• the image in which the Style was created
• the image in which the applied Style shows unintended Pattern scaling
?
Copy link to clipboard
Copied
I can easily reproduce the issue of the scaled Pattern Overlay by defining the Style at 72ppi and applying it at 75ppi.
And sorry about the private message, the thread is active now, so either I made some mistake or there was a temporary snafu.
Copy link to clipboard
Copied
I can easily reproduce the issue of the scaled Pattern Overlay by defining the Style at 72ppi and applying it at 75ppi.
And sorry about the private message, the thread seems active now, so either I made some mistake or there was a temporary snafu.
Copy link to clipboard
Copied
I can easily reproduce the issue of the scaled Pattern Overlay by defining the Style at 72ppi and applying it at 75ppi.
And sorry about the private message, the thread seems active now, so either I made some mistake or there was a temporary snafu.

Copy link to clipboard
Copied
Yes my eyes have a hard time with pattern that are 0.15" by 0.15" even a at low 105 DPI resolution my eyes will be 80 in December. Then you scale the down with Photoshop poor zooming to 0.10" x 0.10 my eyes are not up to that task.
Copy link to clipboard
Copied
I congratulate you!
Copy link to clipboard
Copied
I can easily reproduce the issue of the 104% scaled Pattern Overlay by defining the Style with a 100% Patttern at 72ppi and applying it at 75ppi.
chet60, sorry about the private message, the thread seems active now, so either I made some mistake or there was a temporary snafu.
Copy link to clipboard
Copied
I am new to this forum so I am not up to speed on how it works.
so ...thank you for your persistance.
Here is the workflow for building, defining patterns and assigning weaves in photshop.
1. New file : Resolution (matching the loom) in this case 75ppi.
build the pattern, define it.
2. New file: image - colors reduced- colors deconstructed into layers.
Resolution: (matching the loom) in this case 75 ppi.
3. Apply layer style....and result should be 100% on first one?
(I have seen that if you catch and correct the first pattern overlay - the rest will be correct like a "sticky" setting should.)
I see that you used 72ppi and 75 ppi.....
I am often asked what resolution to use for the patterns. They are very small. 2x2, 4x4, 8x8, up to 24 x 24 or so. I usually respond that they should use the same resolution as the loom - to reduce errors - i.e. things they forget to check. The resolution is the baseline in this process. 1 pixel = 1 thread. So most of the time - these 2 values are the same. (sometimes I don't do it...but over time I have checked to see if this has an impact and I havent seen it. )
Do you see that you do?
Copy link to clipboard
Copied
The issue appears to be that the resolttions for the file in which you define the Style and the one in which you apply it are not the same.
In the screenshots you can see the resolution in the Status Bar (bottom left) and the same applied Style has the Pattern at 100% at 72ppi and 104% at 75ppi.
Apparently the Patterns in Styles are applied according to length measurements (as in mm) and not in percent or plain pixels – so resolution matters.


So just make sure that all the files have the exact same resolution.
If the issue arises descpite this please provide the files (the one in which the Style is defined, the one in which it is applied and the asl-file) for testing.
Copy link to clipboard
Copied
I will follow this.
thank you.
Copy link to clipboard
Copied
On thing I noticed when I first started recording Actions was there are special settings for scaling Layer styles when resizing images and that you can also scale them with menu Layer>Layer Style>Scale Effects... . I also notice that when I recorder actions that added Layers styles to layers that there were two ways to record adding a Layer styles to a layer. One way you add layer style is by using the Style palette. This Add a Layer style to a layer by layer style name. That Other way is to use the Layer Style dialog and add the effects you want to add. What surprised me was the there was a difference in how the styles were applied. I thought that layer style effects setting use to create the named layer style were just recorded somewhere in Photoshop's Styles and they would just be applied like the action step that recorded the layer style dialog settings. That you just had two ways to record adding of a layer style to a layer. I was wrong. The document's resolution that Named layer style was create on is also recorded into Photoshop Styles. When you apply a named Layer style the current document resolution is compared to the recorded resolution in the named style the settings recorded may be scaled based on this compare. Document resolution setting is Important.

Copy link to clipboard
Copied
I just messed up with the pattern. Thanks Anyway.
Copy link to clipboard
Copied
I found it takes some getting used to that hitting tab and the intended percentage now actually rotates the pattern, but I am not sure if this is your issue, too.
Could you elaborate?

Copy link to clipboard
Copied
A bizarre bug related to rotatable patterns:

Copy link to clipboard
Copied
Hi all
I am on a Mac, Photoshop CC 2019, and the rotate pattern control doesn't appear at all, what's wrong?


Copy link to clipboard
Copied

There is no angle option available how i enable it ?
like This one

Copy link to clipboard
Copied
What version of photoshop do you have?
You can see the exact version from within photoshop by going to Help>System Info and looking at the top line.
-
- 1
- 2

 AdChoices