• Global community
    • Language:
      • Deutsch
      • English
      • Español
      • Français
      • Português
  • 日本語コミュニティ
    Dedicated community for Japanese speakers
  • 한국 커뮤니티
    Dedicated community for Korean speakers
Exit
0

Select and Separate colors in complex image

New Here ,
Apr 09, 2018 Apr 09, 2018

Copy link to clipboard

Copied

Ok, I have to separate the colors in this image. I have attempted multiple selection methods but haven't found one that seems to work well for my purpose with this image. All colors are closely related and therefore I'm having issues getting accurate selections. Is this doable with this image? Please help! !

Thank you!

Here is the image:

AdobeStock_39885133.jpeg

Views

857

Translate

Translate

Report

Report
Community guidelines
Be kind and respectful, give credit to the original source of content, and search for duplicates before posting. Learn more
community guidelines

correct answers 1 Correct answer

Community Expert , Apr 09, 2018 Apr 09, 2018

Hi!

There are several ways you can make a selection, but I want to say up front that probably the best selection will be one that you finish by painting with your masking tools.

You can start several ways:

1. Use the Quick Selection tool and with a small brush, click on an area that you want to select. Once you have e the color you want selected, go the Select menu and choose Similar and you should end up with something like this (Double click on the image to make it larger):

Screen Shot 2018-04-09 at 9.31.11 PM.png

You can then save your

...

Votes

Translate

Translate
Adobe
Advocate ,
Apr 09, 2018 Apr 09, 2018

Copy link to clipboard

Copied

When you say ‘separate the colors’ are you talking about creating CMYK color separations for printing, or are you just tying to select the various shades of magenta for further photoshop processing?

Votes

Translate

Translate

Report

Report
Community guidelines
Be kind and respectful, give credit to the original source of content, and search for duplicates before posting. Learn more
community guidelines
New Here ,
Apr 09, 2018 Apr 09, 2018

Copy link to clipboard

Copied

The file isn't meant for printing actually, so CMYK isn't required. I need to separate only the colors that make up the patterns and background. Shadows and highlights will need to be grouped within the color block they are part of. Does that  make sense?

Votes

Translate

Translate

Report

Report
Community guidelines
Be kind and respectful, give credit to the original source of content, and search for duplicates before posting. Learn more
community guidelines
Community Expert ,
Apr 09, 2018 Apr 09, 2018

Copy link to clipboard

Copied

Hi!

There are several ways you can make a selection, but I want to say up front that probably the best selection will be one that you finish by painting with your masking tools.

You can start several ways:

1. Use the Quick Selection tool and with a small brush, click on an area that you want to select. Once you have e the color you want selected, go the Select menu and choose Similar and you should end up with something like this (Double click on the image to make it larger):

Screen Shot 2018-04-09 at 9.31.11 PM.png

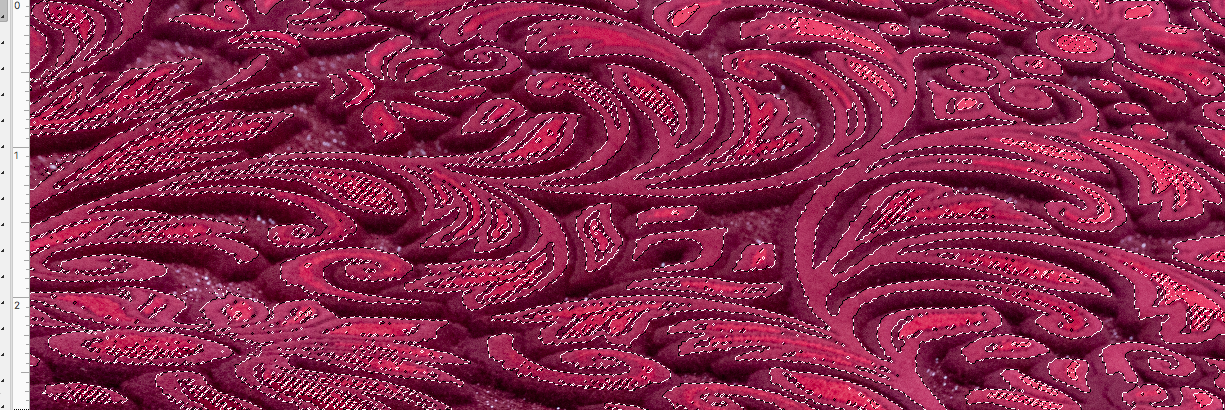
You can then save your selection using Select>Save Selection and name it.

You can also use Quick Mask mode to refine your selection.

The second way you can make a selection is using Color Range (Select>Color Range). In Color Range, use the Eyedropper tool to select one of the colors and then adjust the Fuzziness slider down to a lower number to limit the color selection to just the area you want. See below:

Screen Shot 2018-04-09 at 9.21.00 PM.png

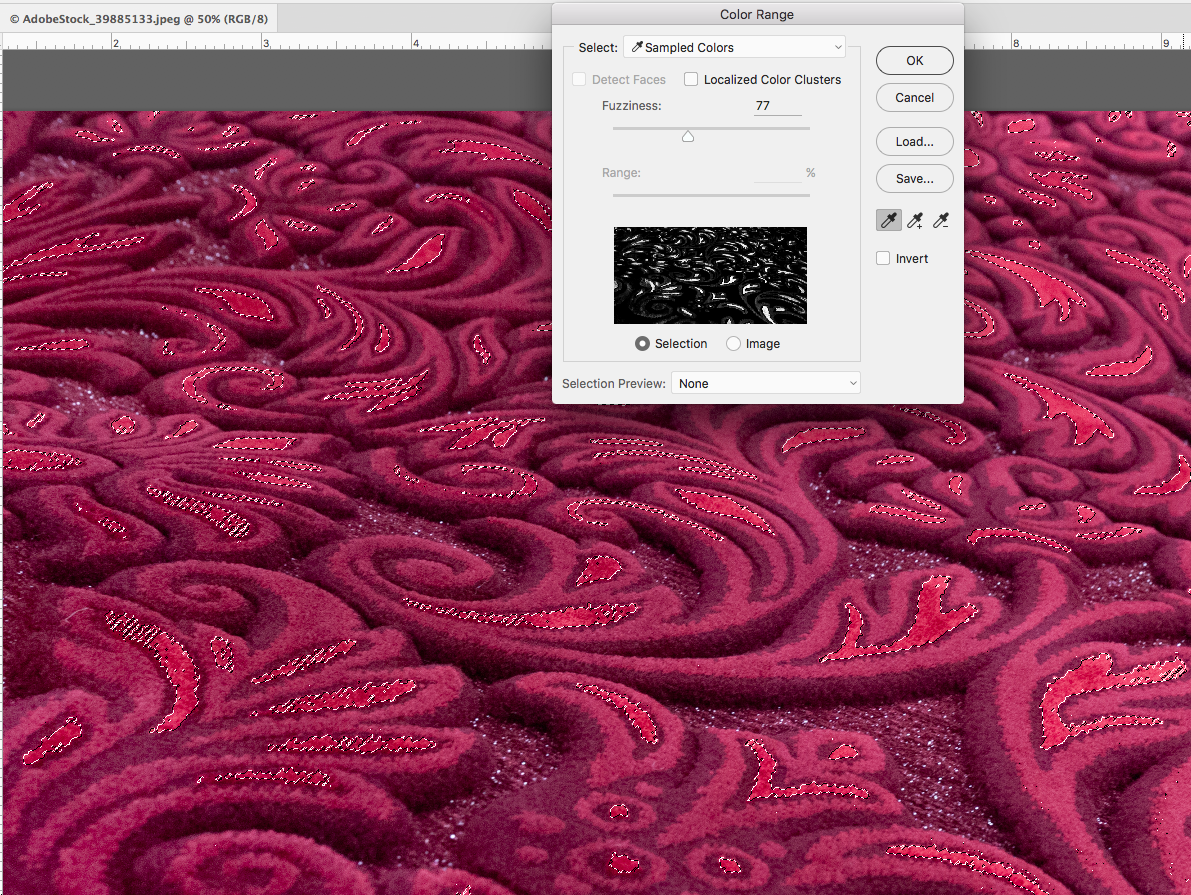
The larger the fuzziness, the more you will select 00 notice here only the center areas are selected. If you select one of the medium or outer colors you will create a larger selected area.

You might also try using LAB mode to separate the Lightness and Darkness values from the color and see if that might help refine your selection.

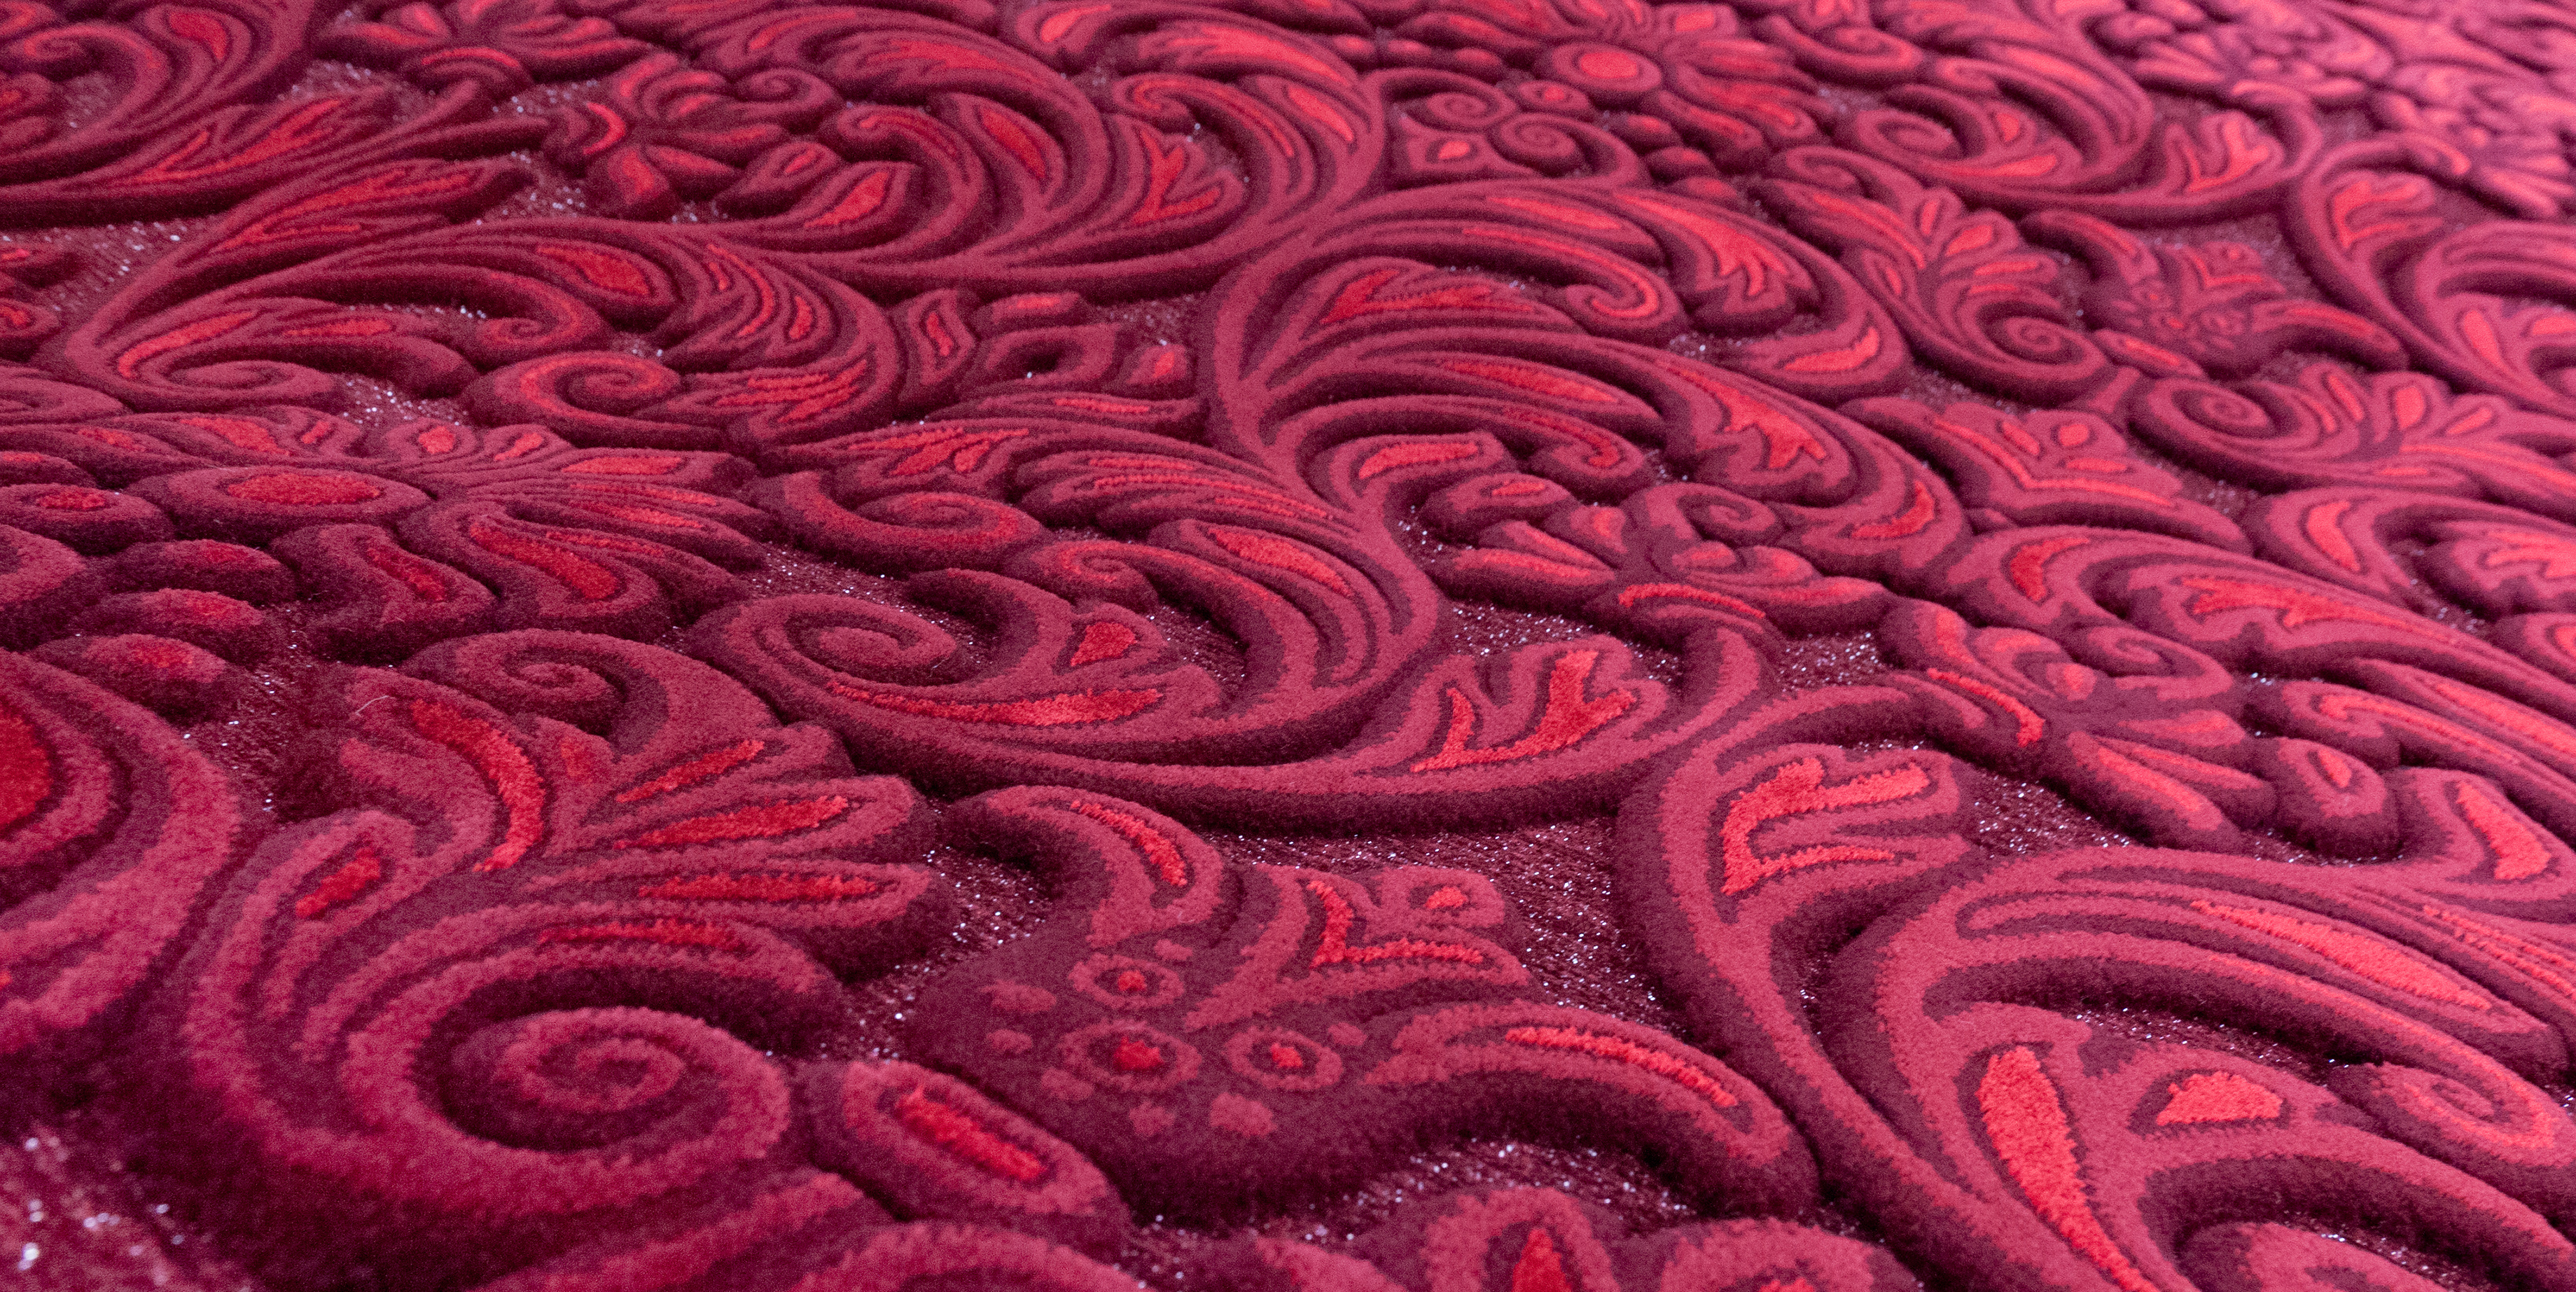
As I am sure you already know--tis is not an easy image to make a selection of-- the edges are very rough. But if you start with (for instance) the Quick Selection tool, you can get a really good start on creating different separated areas, but as I said above, you probably want to do some hand painting and masking.

Let us know if these help, or if you have any other questions.

Michele

Votes

Translate

Translate

Report

Report
Community guidelines
Be kind and respectful, give credit to the original source of content, and search for duplicates before posting. Learn more
community guidelines
Explorer ,
Jun 25, 2022 Jun 25, 2022

Copy link to clipboard

Copied

I have a similar problem, yet slightly different. I also have an image for which I need each color on a separate layer. I began by making an Index image with 27 colors specified. Then I repeatedly used Select Color range (Fuzziness 0, Clusters checkbox NOT checked). [I needed to convert the indexed image to RGB to be able to use Celect Color Range.] I used new Layer by Cut to pull the selected colors to a new layer. When I was done I had 26 layers.  HOWEVER, when I display all the layers there's something missing. Here the first image on the left is the original indexed image, the second is what I get after separating all the colors into separate layers, and the third is the same with a green background to show what is missing. Is there some flaw in this procedure? The only place where I can imagine one is the conversion from the index to RBG?). In any event, is there some other way to separate an Index image into layers, one per color?

TIA.

Votes

Translate

Translate

Report

Report
Community guidelines
Be kind and respectful, give credit to the original source of content, and search for duplicates before posting. Learn more
community guidelines
Explorer ,
Jun 26, 2022 Jun 26, 2022

Copy link to clipboard

Copied

LATEST

It turns out to be a different problem. Whem my wife (the client in this case) told me that the layers looked fine when impored into Illustrator, I (eventually) discovered that the image with the 20+ separated layers looked fine at 66% (or higher) magnification in Photoshop, but not at 50%. (See images, showing the images with and without a green background, at both sizes). Since many of the layers consists of small groups of isolated pixels, I assume that at lower magnification some screen-drawing algorithm is dropping the individual pixels (although I donlt see pixels droped when I look at the layers one at a time). As a photographer I don;t usually work at this level in PS -- I assume that graphic artists know about this (problem? feature?).


Hence, solved. (Though if someone could point me to more information explaining how the algorithm desides to eliminate pixels at lower magnifications, I'd be interested.)

Votes

Translate

Translate

Report

Report
Community guidelines
Be kind and respectful, give credit to the original source of content, and search for duplicates before posting. Learn more
community guidelines
Community Expert ,
Apr 09, 2018 Apr 09, 2018

Copy link to clipboard

Copied

The reason you're having problems is that it's not evenly lit. The background is bright, the foreground in shadow.

So the "same colors" aren't really the same. You need to compensate for this first.

Votes

Translate

Translate

Report

Report
Community guidelines
Be kind and respectful, give credit to the original source of content, and search for duplicates before posting. Learn more
community guidelines