 Adobe Community

Copy link to clipboard
Copied
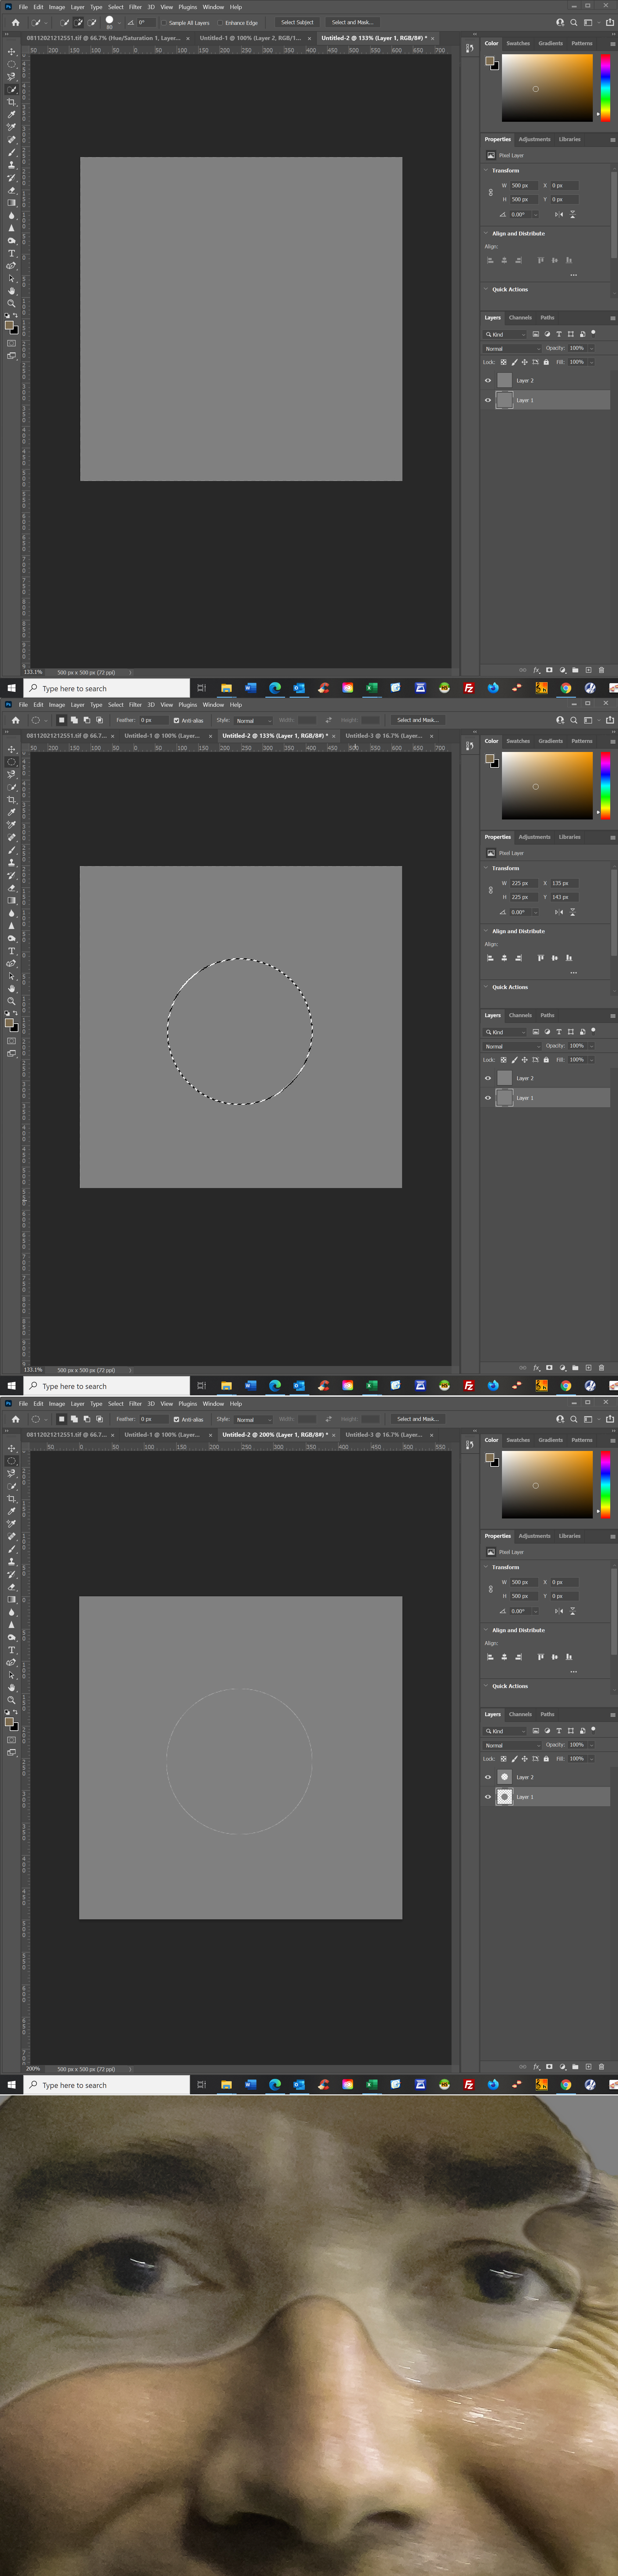
Attached is a simplified illustration of a problem I've had with Photoshop since the last millenium. Lines appear around selections from out of nowhere. The illustration shows to identical gray layers. Below it I placed a circular marquee on top of the layers. On one layer I deleted the contents of the marquee circle and on the other I deleted the inverse. I did not touch the circle. In the lower panel, on the right you can see the edited layers as I described them. You can also see a circle on top of the two layers in the main panel. The circle is formed from destroyed pixels. I didn't assign a width to the stroke of the circle, so the two shapes should fit perfectly together with no gap. I placed a black layer underneath, and you can see the black through the gap.
This might seem like a "so what?" problem, but it's not. Cutouts always end up with unwanted lines around them. Here's a real world example. I've been trying to remove a shadow from a face caused by a baseball cap. I've tried a bunch of different techniques to lighten the shaded portion, but Photoshop keeps highlighting the edge.
I'll be posting a series of "Where the hell did that come from?" questions as they arise. I'm running out of cuss words, and I do want to go to Heaven eventually. Hopefully, one or more of you can save my soul.


 1 Correct answer

You're screenshots do not appear to match your description of the problem. No grey layers - no circles.
It sounds like anti aliasing on the selection edge but it would be good to see the screenshots to confirm.
Dave
Explore related tutorials & articles
 11
Replies
11
11
Replies
11
Copy link to clipboard
Copied
You're screenshots do not appear to match your description of the problem. No grey layers - no circles.
It sounds like anti aliasing on the selection edge but it would be good to see the screenshots to confirm.
Dave
Copy link to clipboard
Copied
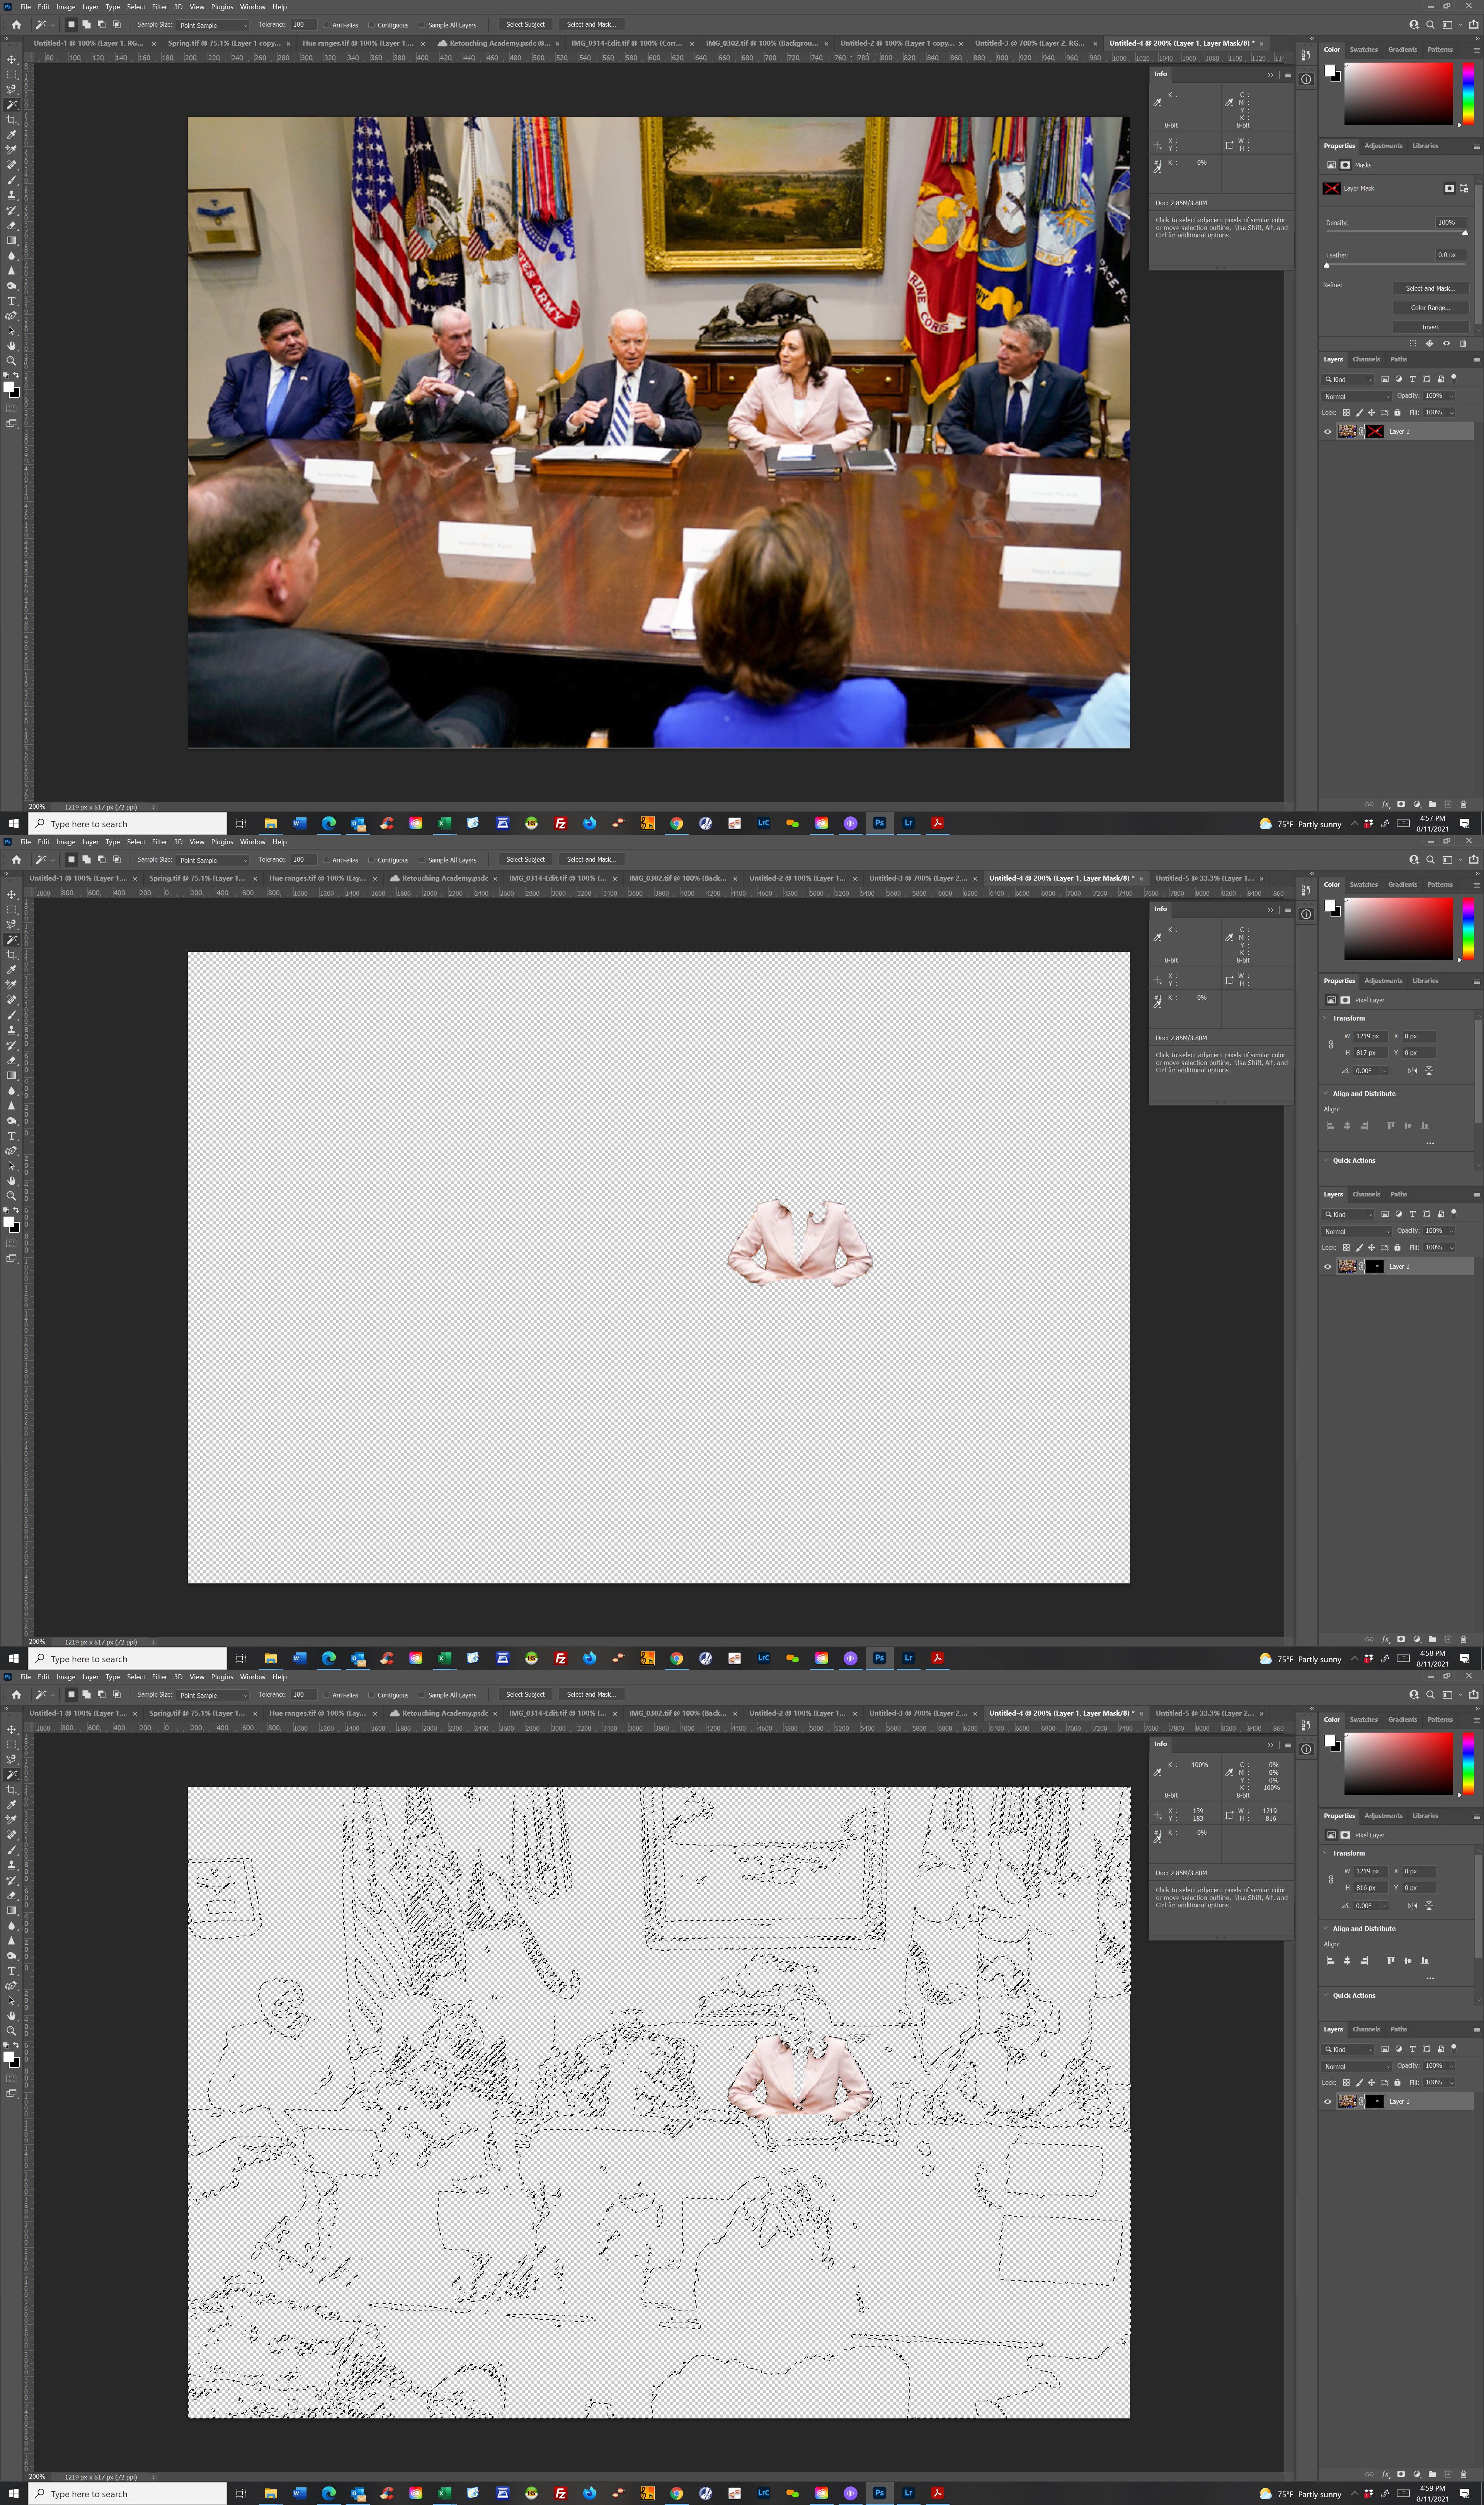
Woops... I posted the graphics for what I was going to send in the day before. I didn't send it in because I figured out what the problem was. I quick selected the jacket and turned it into a layer mask and forgot about it. When I went back later, I saw just the jacket on a transparent field. I clicked on the transparent part of the pic with the magic wand tool expecting all the transparent pixels except the jacket to be selected. Photoshop had other ideas though, and presented the outlines of every object that I purposefully did not include on that layer. It seems like Photoshop files have ghosts of information that I deleted, and they will rear their long-forgotten, unwelcome heads when I least expect them to.
That's VP Kamala Harris. She's a heartbeat away from being the most powerful woman this planet has ever seen. The color of that suit screams "Admin Assistant" rather than "Leader of the Free World." You know Vladimir Putin laughed his butt off when he saw that photo. It drains the color out of her face and makes her look sick and physically weak. I'm getting ready to launch an image consulting business that provides seasonal color analysis (Winter, Spring, Summer, Autumn) for people who want to look their best. Part of the service will include re-colorizing photos sent in by the clients with the harmonious colors of their seasonal palette. I colorized VP Harris' suit red, which is a power color, but chose a warm red that has a hint of yellow that harmonizes with her warm skin tones. It makes her look healthy and vibrant. Putin will see it as symbolizing the color of the blood of Harris' freshly slain enemies. We'll all be safer if he's afraid of her.
If any of you Adobe community members would like a free color analysis, I'll be happy to do one as a token of my appreciation for the support you've provided. Most color analysts sell make-up or in-person consultations, or sell their time. My plan is to sell personalized electronic documents. Send me a photo of yourself taken outside in natural daylight (but not squinting in full sun) with a piece of white paper next to your face. I attached a sample of me looking out a west-facing window holding a white envelope next to my face. The results are more likely to be accurate if you're not wearing make-up (especially foundation), if you pull your hair back away from your face, and if you expose your neck and shoulders. Many people (like me) are redder in the face than the body and get misdiagnosed as having cooler skin. This can lead to catastrophic results. I know, because it happened to me. I was diagnosed as a Summer because my skin is lighter than the human mid-point and appeared pinker because of extra blood flow to my face caused by unhealthy skin conditions. Pink skin is cool skin. Peach skin is warm skin. For 30 years, I stuck to the Summer color palette, which is kind of grayish. It looks great on someone with delicately colored skin, but I'm a Spring. My colors are light and clear. They're basically the simplest Crayola colors. They don't look loud and garish on Spring people. They look like they're equals. Summer colors look colorless and drab on me. No wonder I couldn't find a date.
I also attached the document that should have accompanied my post in the first place. If you read this far, know that words cannot completely express my appreciation.
Scott
Copy link to clipboard
Copied
As already stated by @davescm your description does not match screenshot.
The last screenshot from 3 attached is a bit confusing but let me guess: you are ctrl + clicking on layer mask and you are getting marching ants all around? Which selection technique you are using to create layer mask?

Copy link to clipboard
Copied
It looks like you are trying to show us you have a problem with the layer mask you have created for the image where you are trying to extract just the woman's jacket. How did you create the layer mask selection? It should be easy to edit the layers you have mask ruffly select around the jacket invert the selection and fill with black to fix up the layer mask.
Copy link to clipboard
Copied
I can't remember the exact method I used because I figured out the answer to my question. I didn't intend to send this example yesterday. Please accept my apology for wasting your time.
I have a JJMack directory on my hard drive filled with goodies related to creating Actions. You are definitely someone I wanted to meet. Can I post questions about creating Actions on this community forum?.
Scott
Copy link to clipboard
Copied
with meaningful title so others with the same or similar question can
discover it.
Copy link to clipboard
Copied
Yes the Forum is a great resource. Users here like helping. Any question you ask recieve several good replies and also help other that may be facing issues like you are having.

Copy link to clipboard
Copied
How do you make your selections?
If you use Select & Mask and have Remember Settings checked, then do you have Shift Edge set to a positive value (as opposed to zero?

Do you have a feather set for selections in the Options bar?

If you could detail your selection workflow, then we might be able to spot where it is going wrong. The above suggestions would be fixed by a preference reset, and it seems likely that you have tried that?
Copy link to clipboard
Copied
Hi Trevor -- I sent that picture by mistake. I use a selection workflow I picked up on Phlearn.com that involves using Select Subject and then Select and Mask. He advocates doing it twice -- the first time for the hard edges, and then doing it again, this time starting with the layer mask. During this second round, the focus is on hair and other soft surfaces.
Scott
Copy link to clipboard
Copied
OK. So do you still have the dark fringe problem? It's obviously better to find the cause of the issue and fix that going forward, but there are times when cut out objects have a dark or light periphery. Do you know that Photoshop has tools to fix those?

Copy link to clipboard
Copied
Hi
The "issue" is simple and is caused by anti-aliasing.
If you zoom right in and look at a selection you will see the edges between selected and not selected are filled with grey values. Without these the selection would be hard edged and would step. Making a selection of an angled edge look awful.
You can see what that looks like by turning off anti-aliasing in the options bar and making a circular selection.
So an anti aliased edged when zoomed in looks like this.

Deleting the content of the selection fully deletes the full values but only makes the in between areas semi transparent. Inverting the selection fully inverts the blacks to whites and vice versa- but those in between values are inverted to other "in between" values (e.g. dark grey to light grey). Deleting again leaves those in between values semi-transparent.

Put both together :

So that is the cause. To get around it, after inverting the mask, simply expand it slightly
Dave

 AdChoices