• Global community
    • Language:
      • Deutsch
      • English
      • Español
      • Français
      • Português
  • 日本語コミュニティ
    Dedicated community for Japanese speakers
  • 한국 커뮤니티
    Dedicated community for Korean speakers
Exit
1

What is the best process for making product photography mockups (for metal signs)

New Here ,
Oct 11, 2018 Oct 11, 2018

Copy link to clipboard

Copied

Hi all,

I make custom metal address sign and artwork that I sell online.  Metal is very expensive so every time I create a new design I spend significant time and money cutting the sign out with my machine, then painting, then doing product photography, and finally creating listings on my site.  I have experimented a bit with just using renderings instead of actual photos on my product listings accompanied by some real pictures of the material, paint colors, etc.  I use the Creative Cloud software only as needed....meaning im not a pro at any one thing but when I need to do something I find the right tutorials, videos, forums, etc.

My question is basically this....I don't necessarily need a step by step but am more looking for advice on what process to use and in which application.  It seems like I could use Photoshop, Illustrator, or even Dimension, or a combo of the three and trying to determine what to spend my time on learning.  When I know what I am trying to do I can figure it out but the problem here is I am not sure exactly what I am trying to do.

I am looking to take a design I make in illustrator and place it in a real life image...like on the side of a house for my address signs or on a shelf or above a fireplace for my interior artwork.  I know it is pretty easy to simply overlay a graphic over a picture but I am looking for a more quality result.  Because my work is all made of metal it has some depth to it so simply placing the graphic on an image looks pretty fake.

Should I use illustrator or photoshop to make the design 3D?  Then bring it into Dimension?....(is this even necessary if I can make it 3D and place it on a photo using only Photoshop?)  Is the main benefit to Dimension the ability to apply "material" to an object and then render?

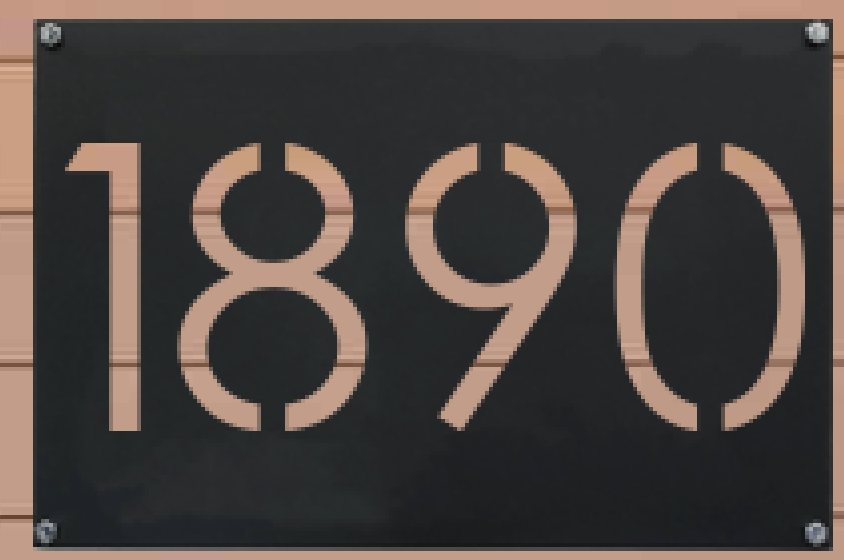
One idea I had that worked decently was to cut out a blank sign, paint it, and take real photos as I usually do.  Then crop the photo to be only the blank sign and nothing else.  I then placed the cropped sign image over the scene (aka front door of house).  I then used a clipping mask and applied the design from illustrator over the image of the sign which then basically made the "cuts" that an actual sign would have and revealed the background scene behind it (see attached image).

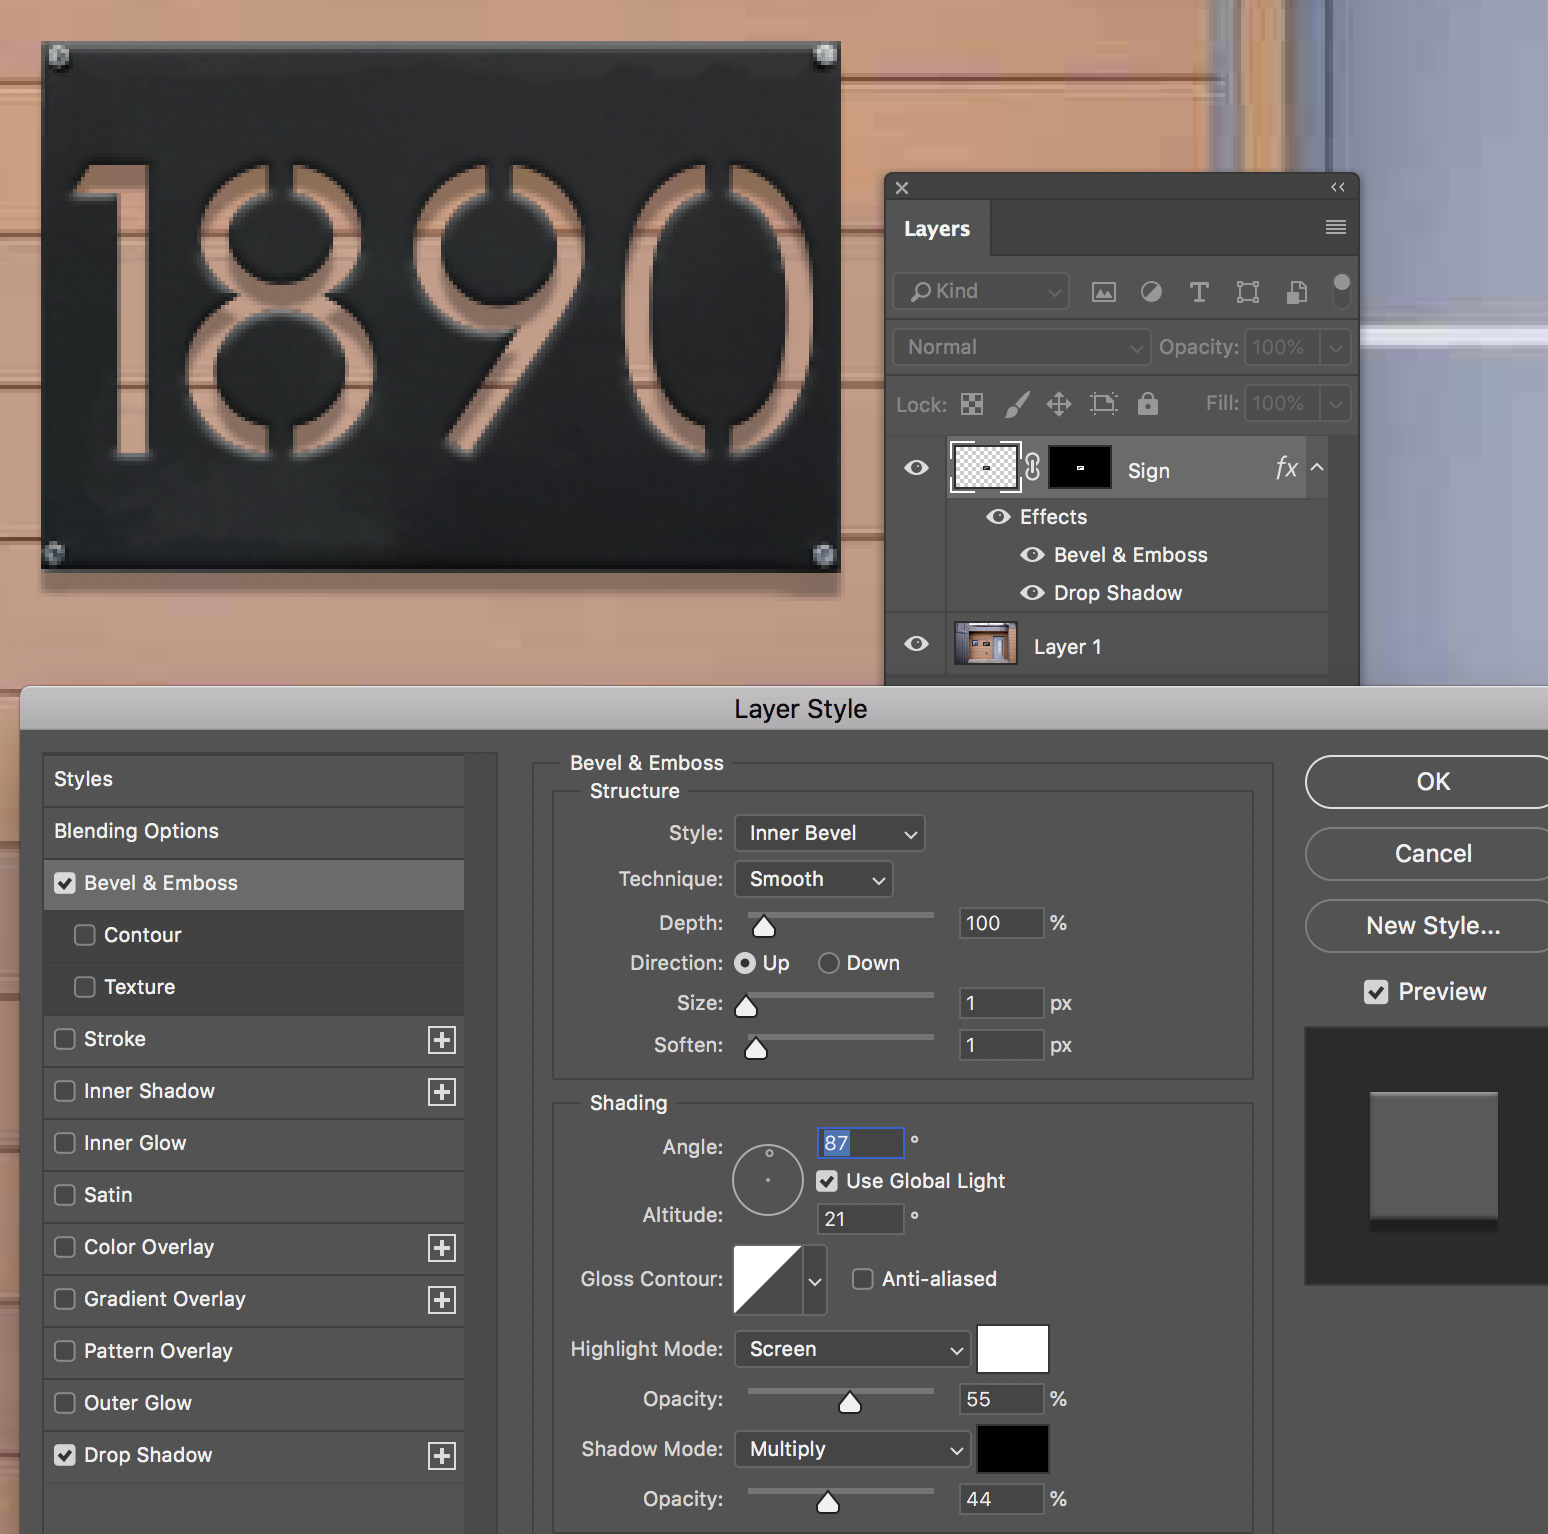
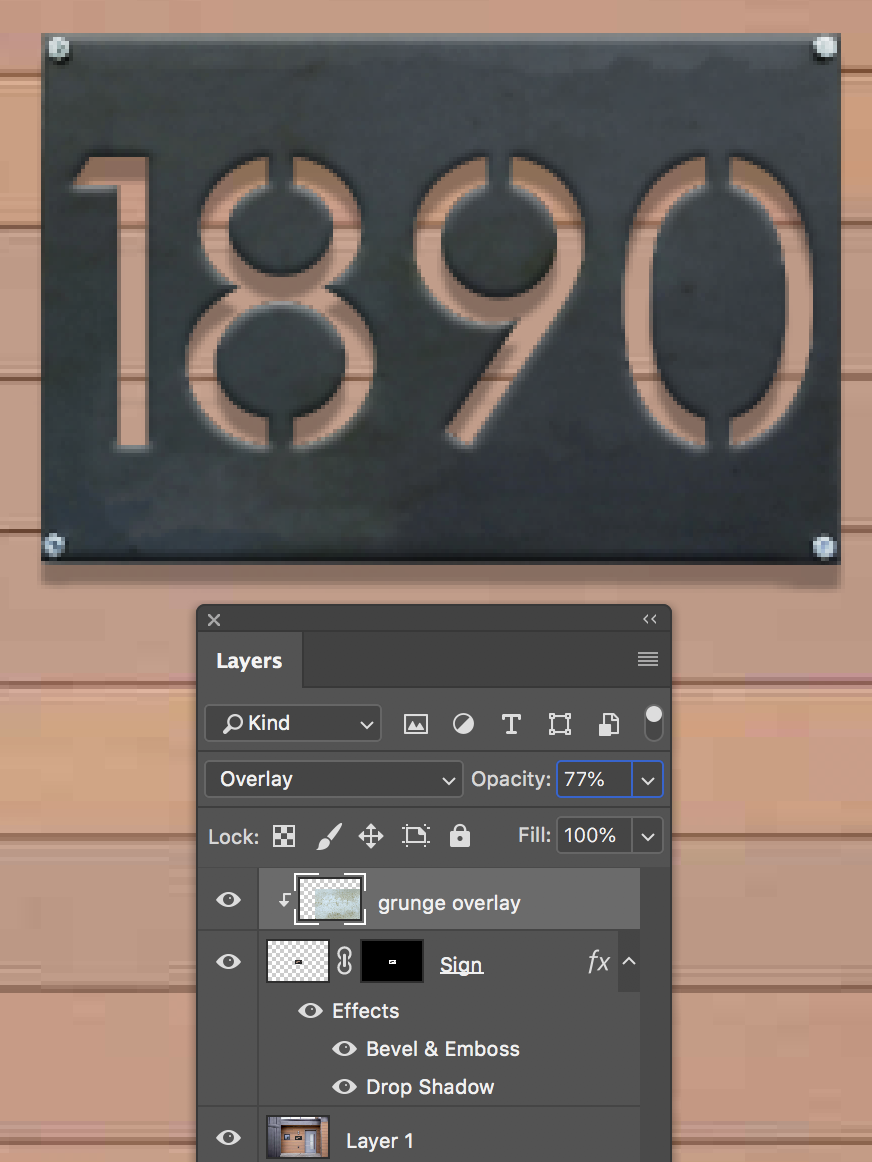
The problem with that is it doesn't have any depth so it still looks pretty fake.  Any suggestions or help on what process I should study up on would be greatly appreciated!  Once I figure out what works I need to reproduce it many times with different items so I need to find a good workflow...
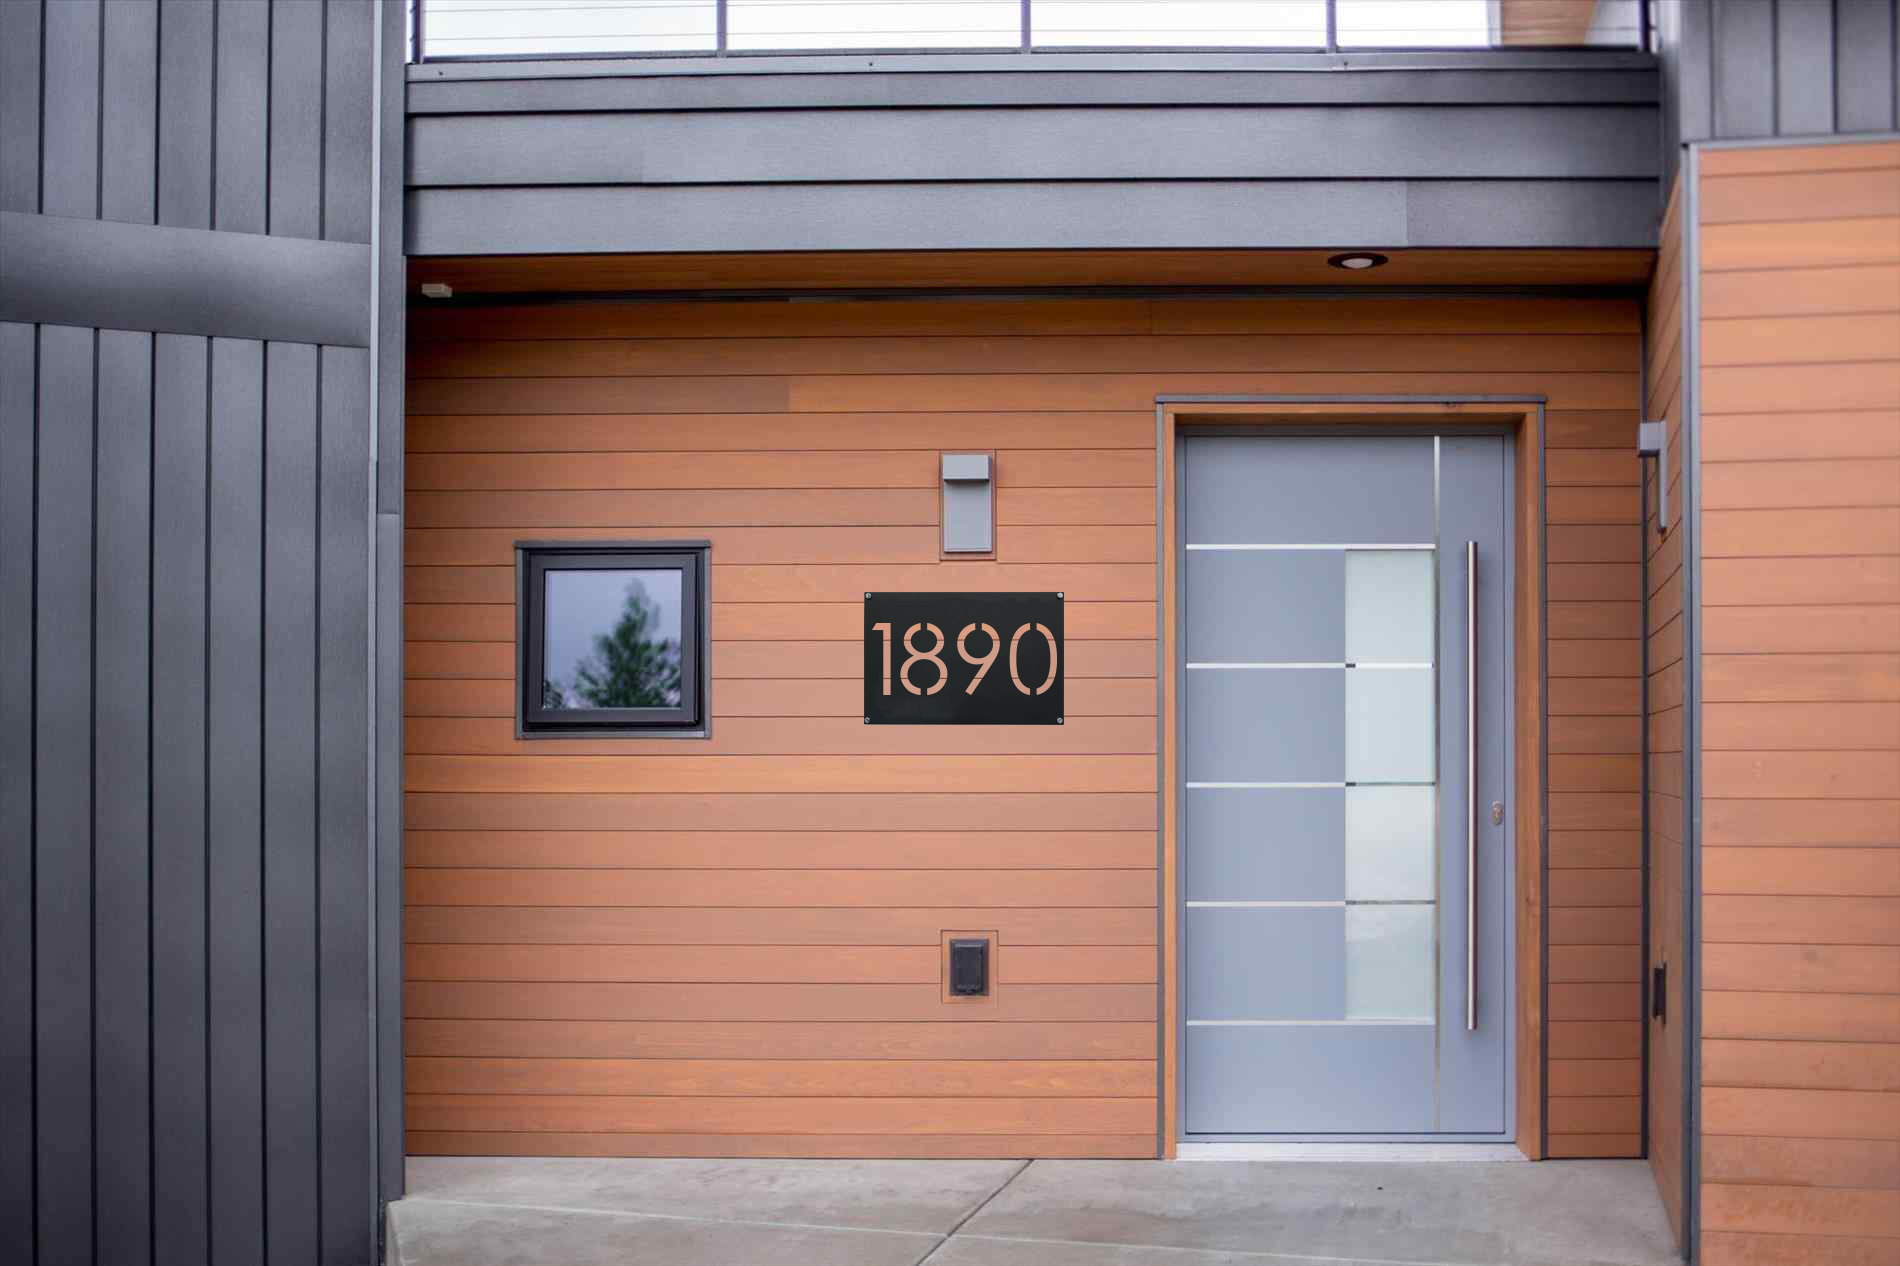
Modern Front Door Image.png

Views

285

Translate

Translate

Report

Report
Community guidelines
Be kind and respectful, give credit to the original source of content, and search for duplicates before posting. Learn more
community guidelines

correct answers 1 Correct answer

Community Expert , Oct 11, 2018 Oct 11, 2018

I would recommend using Photoshop to adjust beveling, texture and lighting as needed to your illustrator art pasted into Photoshop.

Below is your original

Screen Shot 2018-10-11 at 11.55.09 AM.png

add some bevel and drop shadow effects

Screen Shot 2018-10-11 at 11.57.10 AM.png

You can also clip a texture to you sign shape and use blend mode, in this case I use an image (you could shoot with a digital an uncut sheet of metal).

Screen Shot 2018-10-11 at 12.00.11 PM.png

Modern+Front+Door+Image.png

Votes

Translate

Translate
Adobe
Engaged ,
Oct 11, 2018 Oct 11, 2018

Copy link to clipboard

Copied

You can try to see if Adobe Stock has some assets that you can you use Stock photos, royalty-free images, graphics, vectors & videos | Adobe Stock . One big pro of using Adobe Dimension is that it automatically correct the perspective, light and reflection of the project, so you can achieve pretty realistic renders. 

Votes

Translate

Translate

Report

Report
Community guidelines
Be kind and respectful, give credit to the original source of content, and search for duplicates before posting. Learn more
community guidelines
Community Expert ,
Oct 11, 2018 Oct 11, 2018

Copy link to clipboard

Copied

LATEST

I would recommend using Photoshop to adjust beveling, texture and lighting as needed to your illustrator art pasted into Photoshop.

Below is your original

Screen Shot 2018-10-11 at 11.55.09 AM.png

add some bevel and drop shadow effects

Screen Shot 2018-10-11 at 11.57.10 AM.png

You can also clip a texture to you sign shape and use blend mode, in this case I use an image (you could shoot with a digital an uncut sheet of metal).

Screen Shot 2018-10-11 at 12.00.11 PM.png

Modern+Front+Door+Image.png

Votes

Translate

Translate

Report

Report
Community guidelines
Be kind and respectful, give credit to the original source of content, and search for duplicates before posting. Learn more
community guidelines