• Global community
    • Language:
      • Deutsch
      • English
      • Español
      • Français
      • Português
  • 日本語コミュニティ
    Dedicated community for Japanese speakers
  • 한국 커뮤니티
    Dedicated community for Korean speakers
Exit
0

Magnet Area Tool | NEW FEATURE | IDEA

New Here ,
Jan 24, 2023 Jan 24, 2023

Copy link to clipboard

Copied

magneticareatool.jpg

Who doesn't know this? 

You want to make your own card game or you want to make a mockup design for your

own Company this is actually where the "Magnetic Area Tool" comes in handy!

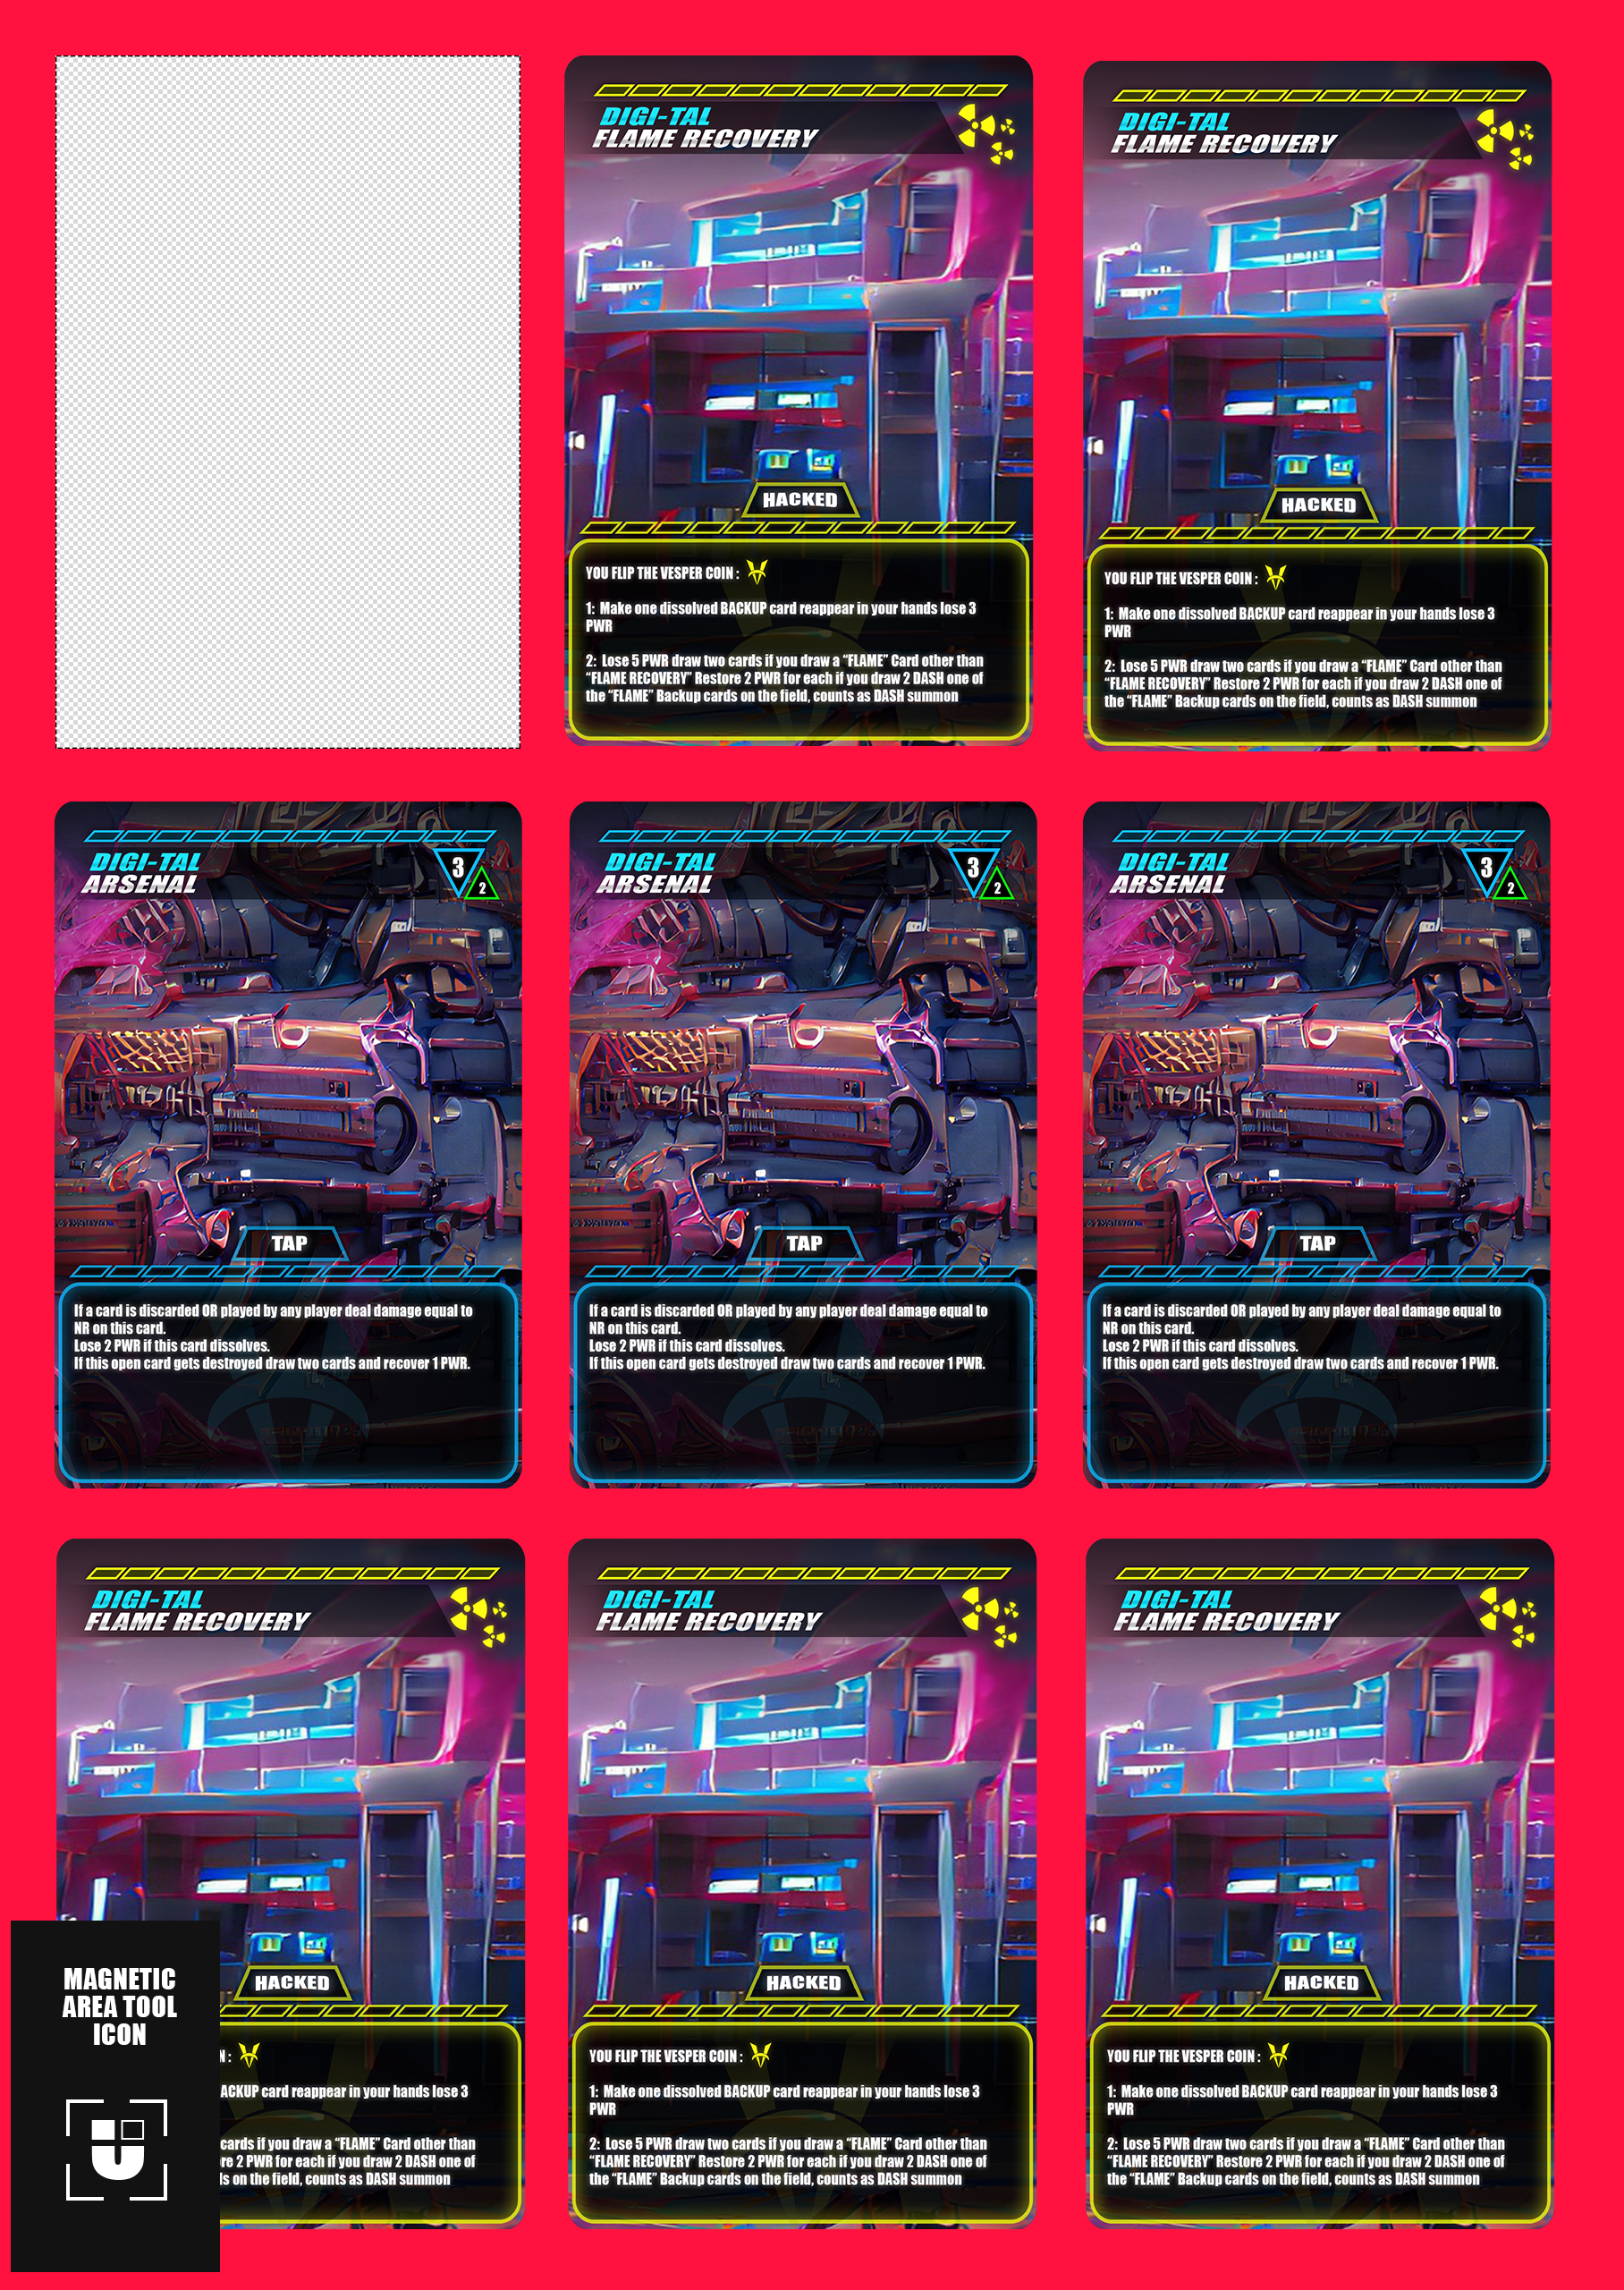
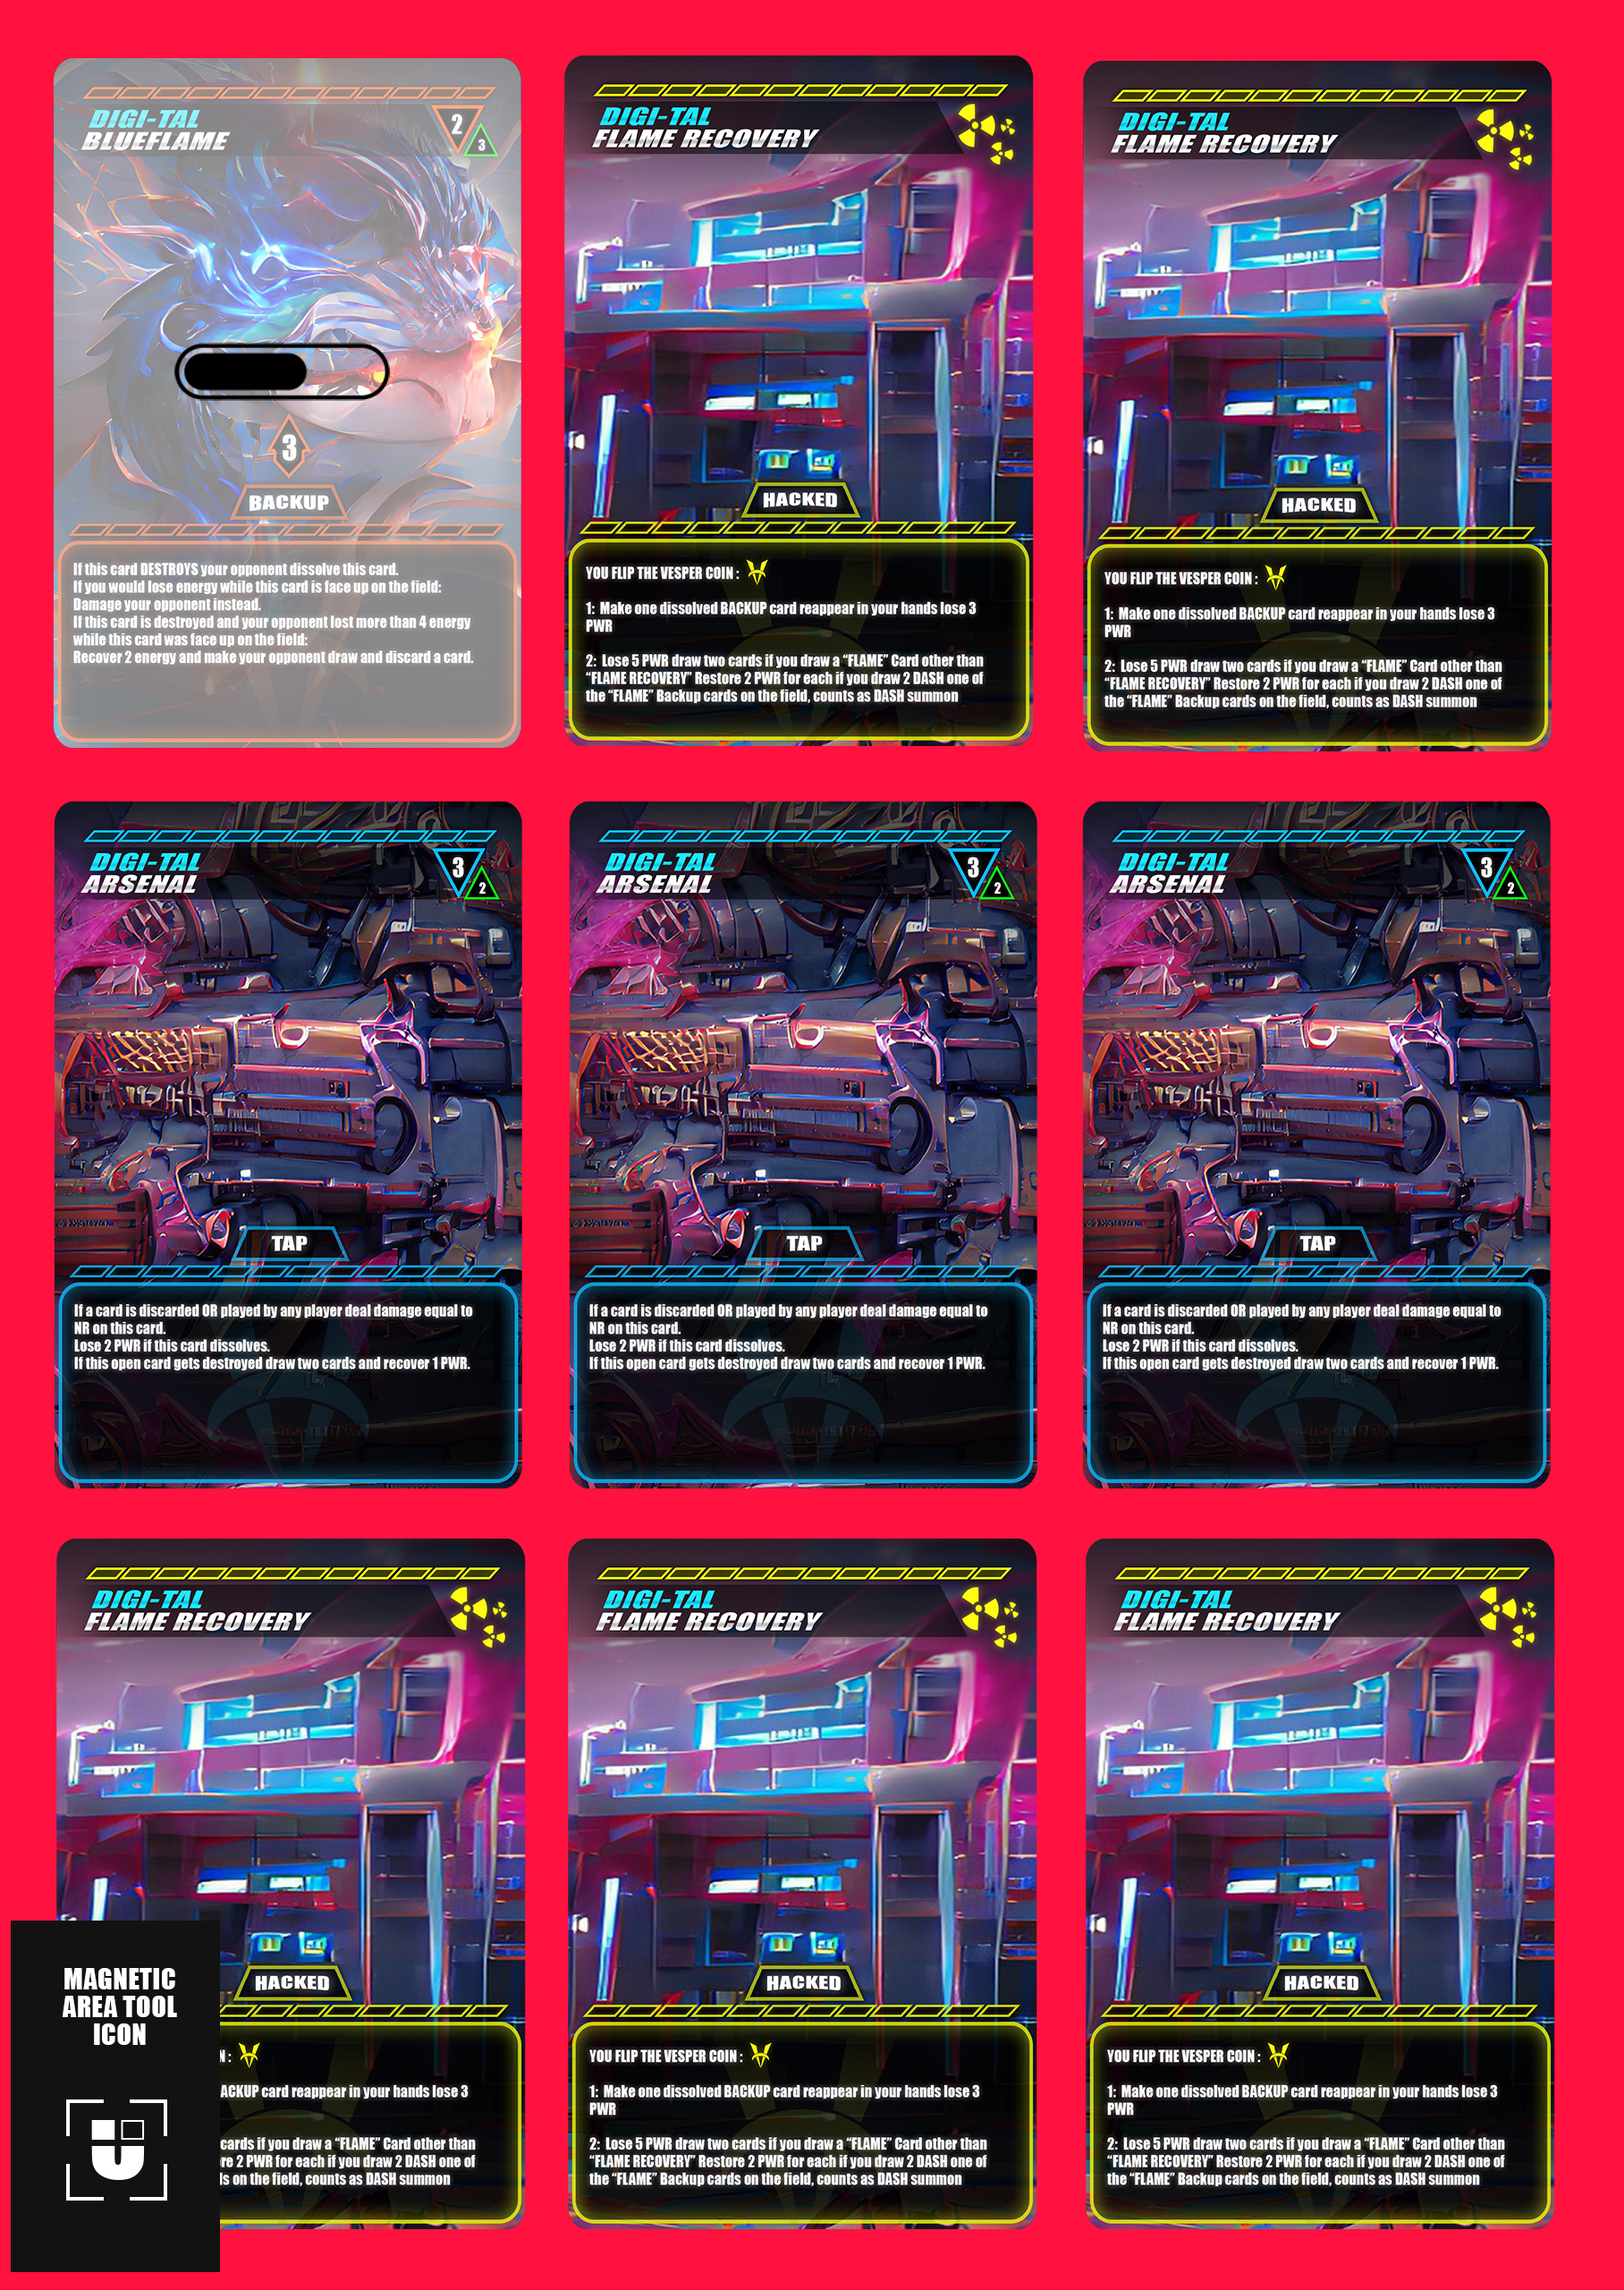
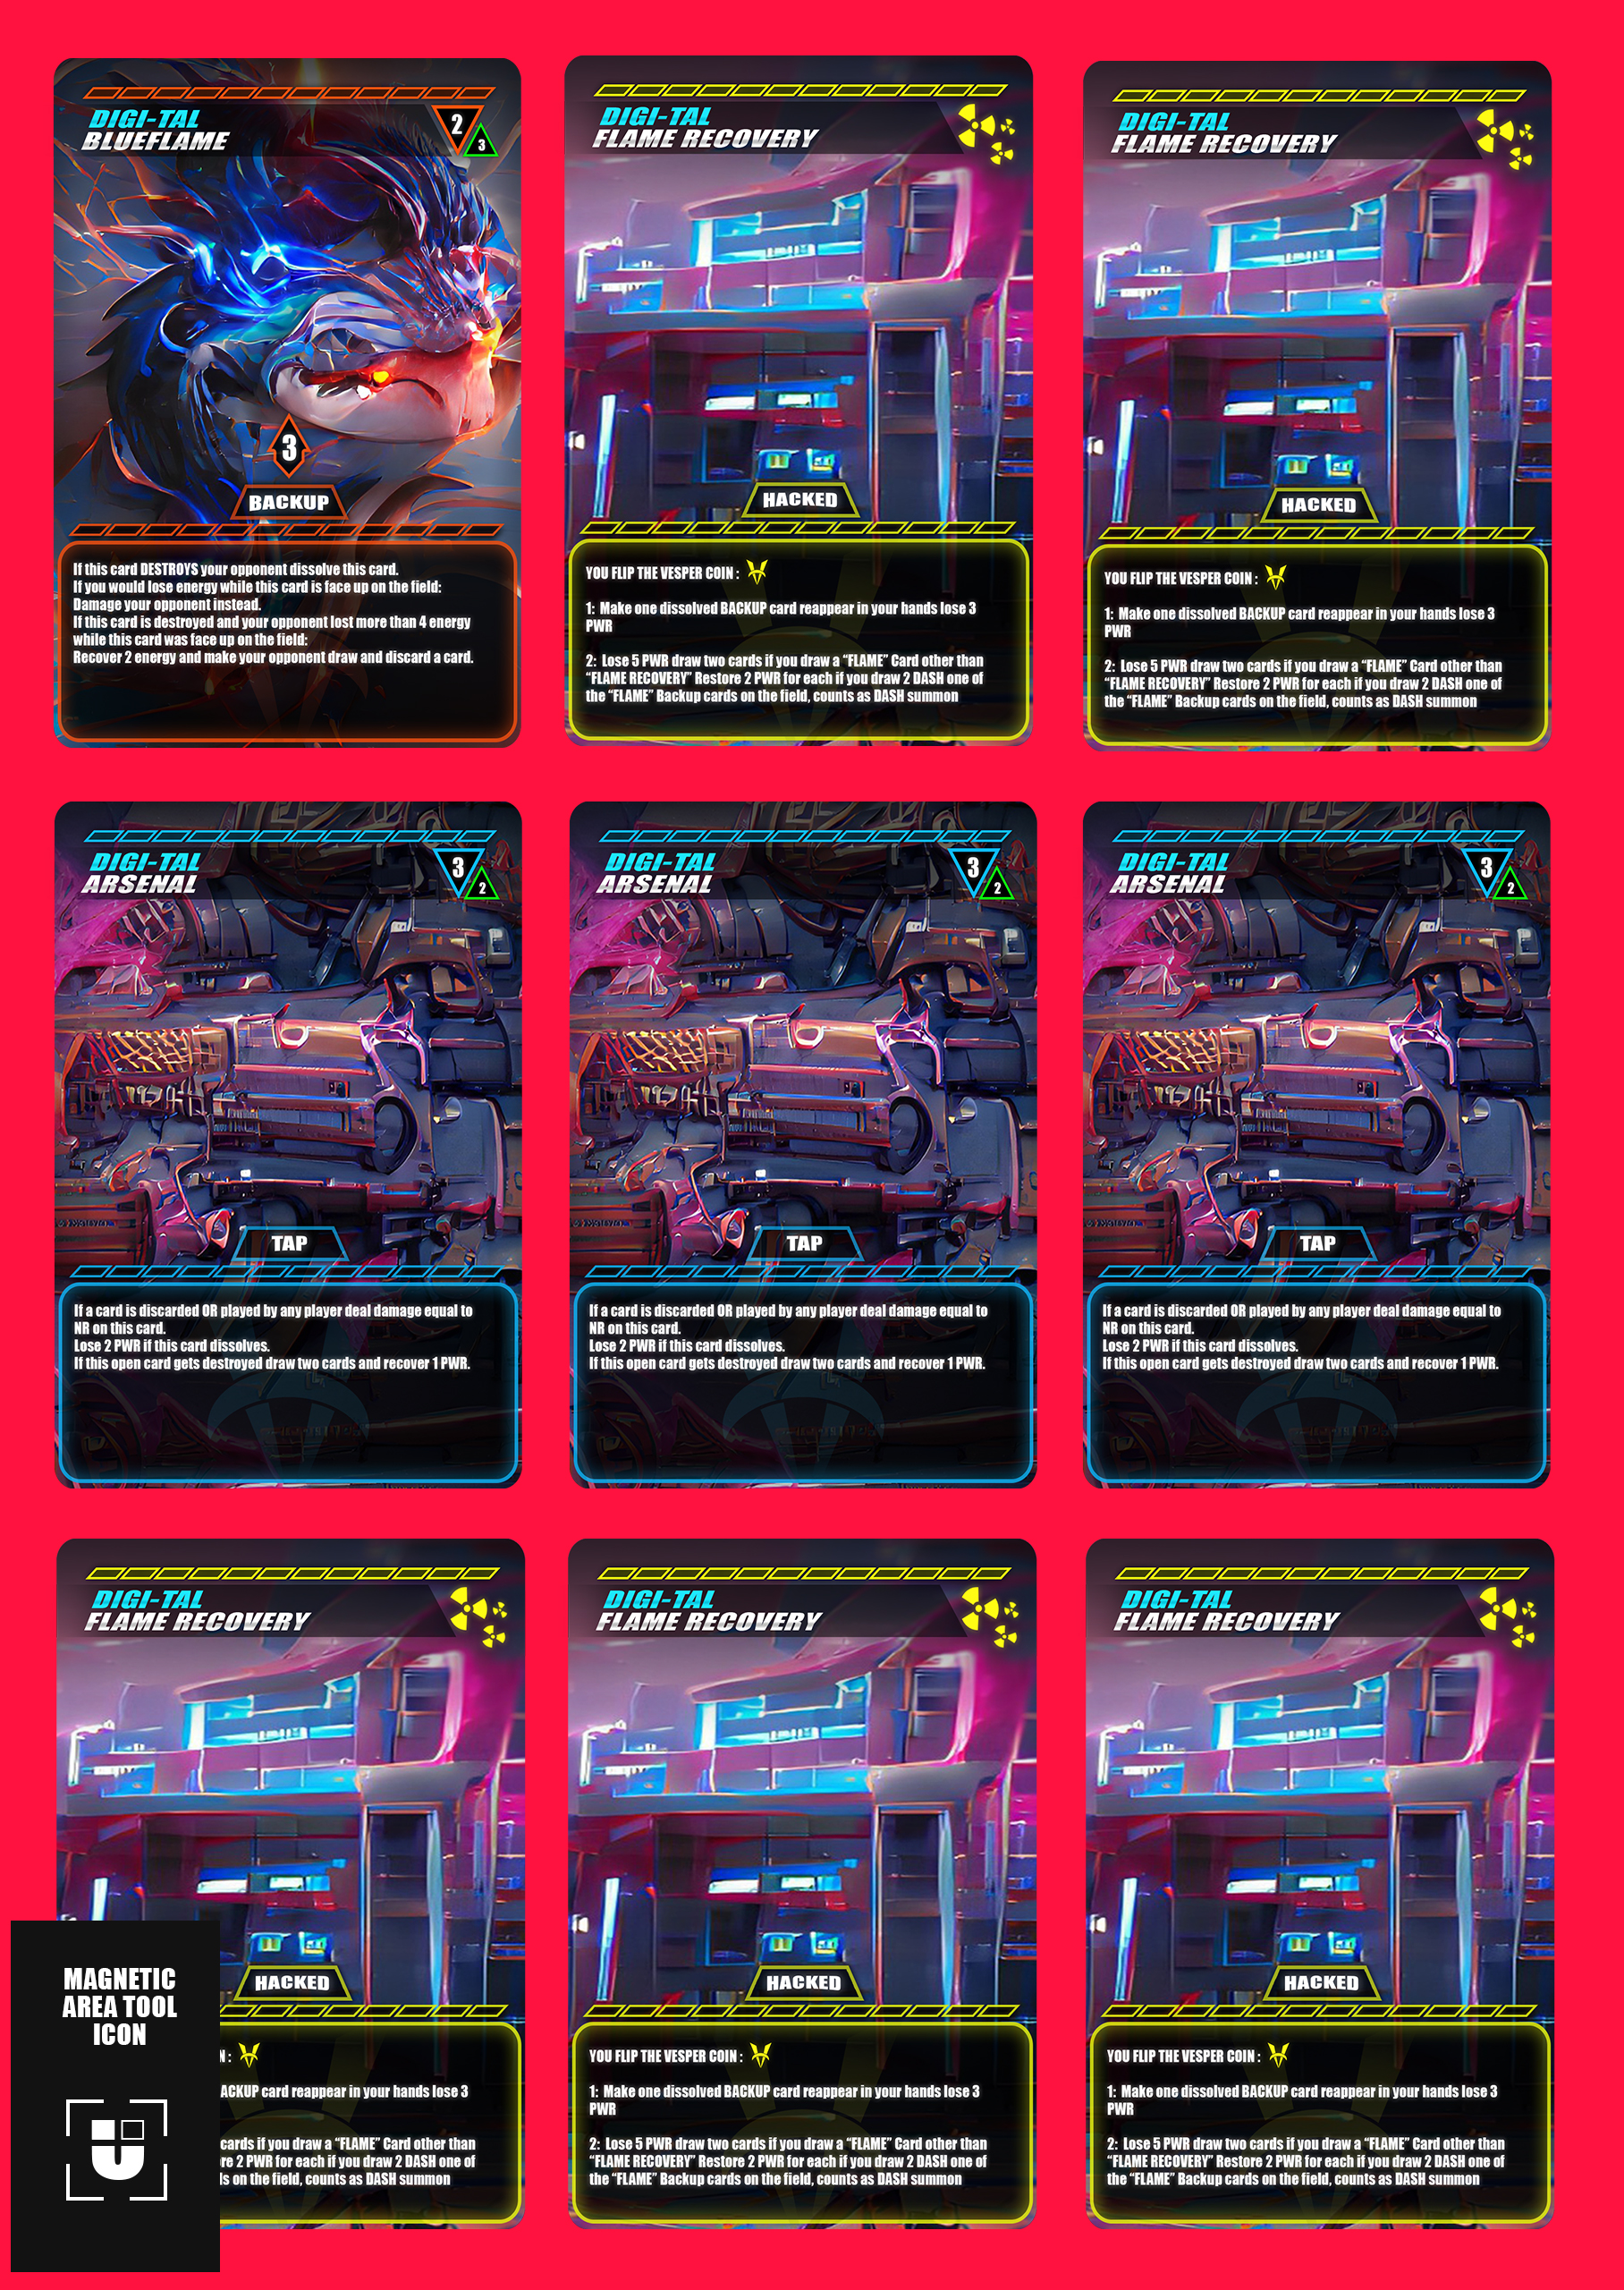
As seen on the picture you'd be able to select an area however you want, also be able to reshape it

however you want too. Once The Area is selected and you save your file it will create a new layer called

"Magnetic Area 01" and on the left will be a tiny Number indicator you won't be able to change the name off you'll see why in a second, you can rename the "Magnetic Area 01" in however you want. 

If you upload an image or file onto the "magnetic area" it will AUTOMATICALLY resize itself to the size of the selected "magnetic area" shape you selected. 

MagneticAreatool2.jpg


and WILL squeeze your image into the preferred selected area (the squeezing depends just on how well 

you manage your sizes if it has the perfect size for it, you won't squeeze it, and it will just appear on top of the selected magnetic layer). 


MagneticAreaTool3.jpg

MagneticAreaTool4.jpg

Once you save the file and open it back up you can still just drag and drop whatever image you have and it will resize/squeeze itself on top of the preferred area you selected and then you can just copy and paste the layer to have multiple Magnetic Area's in one Photoshop file! 


Thought this would be really neat! 🙂


I apologize for my formatting I am fairly new to this.


I really hope you enjoy this idea just had a decent thought for once and wanted to share it with all of you!

Much Love! 


[ Personal information removed by Moderator ]

Idea No status
TOPICS
Actions and scripting , macOS , Windows

Views

195

Translate

Translate

Report

Report
Community guidelines
Be kind and respectful, give credit to the original source of content, and search for duplicates before posting. Learn more
community guidelines
3 Comments
Guide ,
Jan 25, 2023 Jan 25, 2023

Copy link to clipboard

Copied

Hmm... frame tool?

2023-01-25_12-17-39.png

You can also select the area you need with any convenient tool, fill with any color it and convert it to a smart object

Votes

Translate

Translate

Report

Report
New Here ,
Jan 25, 2023 Jan 25, 2023

Copy link to clipboard

Copied

I researched a bit about the Frame Tool you are showing and talking about but it could be a bit better,

by automatically adjusting the size of the image you want to import without you having the need to adjust it you know?

That's why I named it the "Magnetic Area" Tool! 🙂

Because the frame tool will only do a mask and with my idea Photoshop would do all the work for you in this regard,

it's just a couple of seconds of difference but it can definitely make a difference and increase workflow! 🙂


Select Image > Hover over the "Magnetic Area" you created > Drop the Image > Voila it does the resizing magic for you!

(No masks needed)  

Votes

Translate

Translate

Report

Report
Guide ,
Jan 25, 2023 Jan 25, 2023

Copy link to clipboard

Copied

LATEST

The frame tool is not a mask, but a kind of hybrid between a smart object and a layer group.


go to "Preferences" -> "General" and enable "Resize image during place" option

after that try dragging the image into the frame rectangle again


Based on what you wrote, I would agree that it would be a clear improvement to have the frame tool automatically create a frame along the borders of the selection (if there is one in the document). Now the frame needs to be drawn every time.


Votes

Translate

Translate

Report

Report