 Adobe Community
Beauty Retouch
Copy link to clipboard
Copied
Hi!! I'm trying to do a beauty retouch on a woman of colour. I'm new to photoshop so there might be an obvious tool I don't now about 😬. I'm dodging and burning, predominant burning but there are a couple of black patches in the skin that I don't know how to treat. I've tried selective colour and curves on the patch but it's missing the black unless I'm doing it wrong. Or is it best to try and copy and paste skin from another area!? Although this is challenging as the light changes over her face. Any advice appreciated 🙂
Explore related tutorials & articles
Copy link to clipboard
Copied
»I'm dodging and burning«
Destructively?
That would not seem to be an ideal approach and you may want to do a search for »Non-Destructive Dodge and Burn in Photoshop« or something similar.
Please post the image or a relevant section of it.
Please post a meaningful screenshot taken at View > 100% with the relevant Panels visible (Toolbar, Options, Layers, …).
Copy link to clipboard
Copied
Hi. I've done a couple of beauty retouch courses so I usually dodge and burn via curves or I have an action via one of my courses that I use as well.
Copy link to clipboard
Copied
Could you please post screenshots with the pertinent Panels (Toolbar, Layers, Options Bar, …) visible?
Copy link to clipboard
Copied
Hi!
It would be really helpful to see the image you are working with.
One method I use that is non-destructive is to create a layer on top of the image and set the blending mode to Soft Light. Use a brush set at somewhere between 6% to 10% (more if necessary) with the color set to white or black to eliminate shadows and dark spots. This has been very effective for me, and because it is on its own layer, I have complete control. I can reduce the opacity of the layer if it becomes too heavy or even use the eraser tool to fix an area.
You might also add a light tint of color if need be to match the skin tone.
I have found that Dodge and Bun can change the color of the skin. But this technique, using Soft Light, has less of a tendency to do that.
Would still love to see a screenshot of the image!
Michelle
Copy link to clipboard
Copied
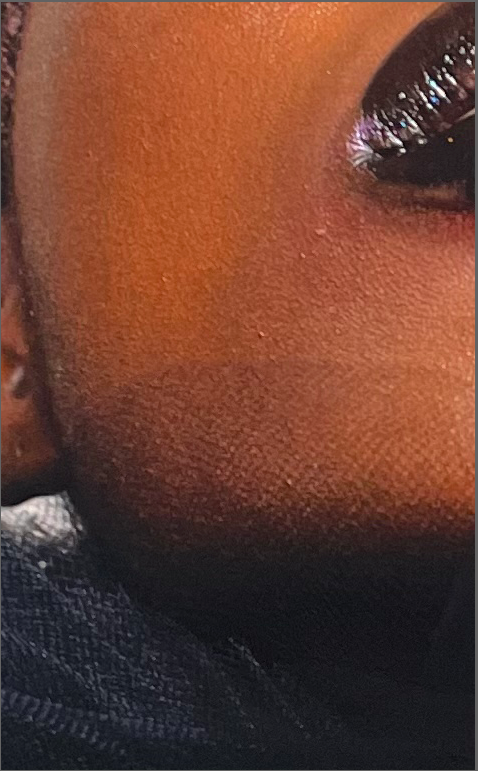
Hi Michelle, thanks for your response. I will have a try with your method. I'll attach a section of the photo. These are for submissions so just don't want to put it up on a public forum. You can see the dark area to the left of the mouth. I had a go with patching tool last night but I think there's to many textures and difference of light over the face for patch tool.
Krista 🙂
Copy link to clipboard
Copied
Does the original image have all the texture I'm seeing in this photo?
Copy link to clipboard
Copied
Copy link to clipboard
Copied
The soft light doesn't seem to be working for me (very possible I'm not doing it right though. I'm thinking I might copy and paste some other areas of skin and try to blend them .
Copy link to clipboard
Copied
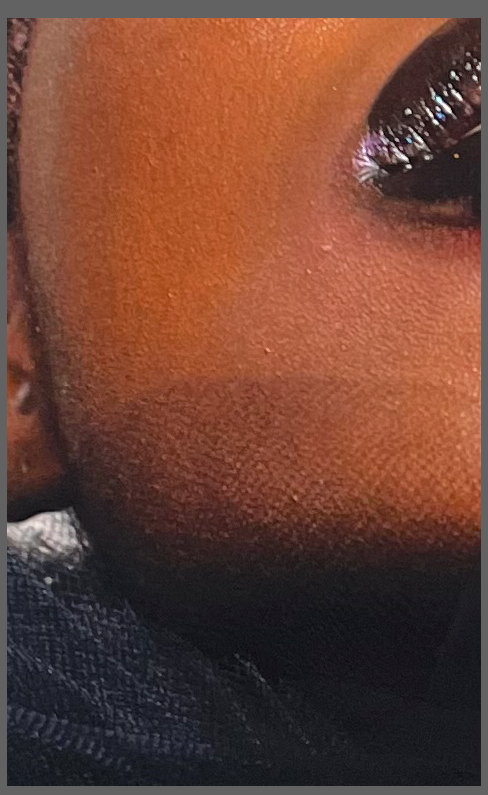
After looking at the image, I don't think Soft Light is the process you need. Here is a screenshot of your image as a before and after:
If you like the result, I used LAB Color to achieve it.
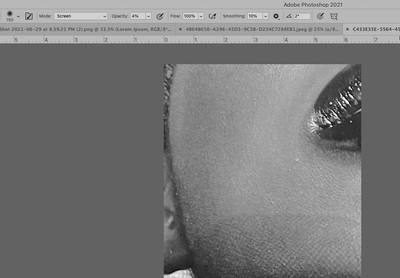
1. Open a copy of your image in Photoshop and change the Mode to LAB Color.
2. In the Channels Panel, select the Lightness channel. Use a large, soft-edged brush, set the color to White with an Opacity of 4%, and the Brush mode to Screen.
3. With the brush, click to add the white to the darker areas around the mouth and blend in to the surrounding area. It takes a little practice, but you will start to build up a smoother area of skin while lightening the dark spot.
4. You may need to click on the a and b channels, to lighten/smooth out the color in the area. You can use a Gaussian Blur to blur the area around the mouth, or use your brush with white and the low opacity.
5. The last thing I did to make sure that the color was consistent, is select the LAB channel, and then select the Foreground color swatch in the Tools panel, and select a darker skin tone color from higher in the cheekbone. Set the brush opacity to a low percentage and the Brush blending mode to Hue (or Color--whichever works best), and with a soft wide brush blend in the color over the area as needed.
It will take a little practice, but by breaking the image apart in LAB using the Lightness and a and b color channels, I think you will have more control over the image.
If you have any questions, let me know.
Have fun!
Michelle
Copy link to clipboard
Copied
Have you considered Frequency Separation?
Copy link to clipboard
Copied
I haven't tried it but have tutorials on the technique. Would that help with the colour though? I just went to town with patch tool. It not sure I'm enjoying the result.
Copy link to clipboard
Copied
Oh sorry I just saw your image. I'll have a try!
Copy link to clipboard
Copied
I've ended up using freq sep with blending brush and it has resoveld the issue. I normally do dodge and burn through curves layers as that is what the courses I have done recommend for beauty retouch but also!! I think for this image and my skill level this will be adequate!!
Thankyou so much for your help! I will post the finished image after submission 🙂


