 Adobe Community
- Home
- Photoshop Elements
- Discussions
- Beginner: Photoshop Elements 2021 Basic quesiton
- Beginner: Photoshop Elements 2021 Basic quesiton
Beginner: Photoshop Elements 2021 Basic quesiton
Copy link to clipboard
Copied
1. I can't seem to find how to copy the original image so I can work on the copy and leave the original. It seems to have automatically copied the original image the first couple of time but on my third image the original is gone and only the PS image is left.
2. On these 2 images I used the spot healing brush and was able to get some of the white spots but I want to get rid of the yellow stain on the dress. I only succeeded in making it purple because I thought I was supposed to use healing brush and hue. I have spent at least 2 hours looking at different tutorials but they all say healing brush fixes stains. Any tips as to how to fix?
Thanks for any help, I 'm finally going to PS all my mom pics
Copy link to clipboard
Copied
1. I can't seem to find how to copy the original image so I can work on the copy and leave the original. It seems to have automatically copied the original image the first couple of time but on my third image the original is gone and only the PS image is left.
By @Basilowl
I suppose you are using the organizer to display and select your photo files thumbnails?
If so, when saving a file, do you use the option to save in a 'version set'?
By default, the organizer is set to show the thumbnails without the name and the date_taken. To alternate with the 'detailed view', use the shortcut Ctrl D.
The 'version sets' or stacks may be 'stacked' so that only the latest edition is shown. Use the right click contextual menu to expand or collapse the stacks.
Copy link to clipboard
Copied
Thanks for your help!
Copy link to clipboard
Copied
1. In addition to Michel's comments, you don't need to make a copy of a file before you work on it. When you open a file in the Editor, nothing will happen to your original file until you save your edits. If you use the Organizer's Version Sets, and have that option checked in the Save As dialog, the file will automatically be renamed with an _edited n suffix (where n is a sequential numeral). If you are not using that option (or the Save as a Copy option), you will be warned that you are overwriting the original and you are given the opportunity to rename the new file to whatever naming convention you desire. Furthermore, once you set the options in the Save As dialog, they become sticky. So, if you open the file from the Organizer, it will automatically be given the edited suffix when saved.
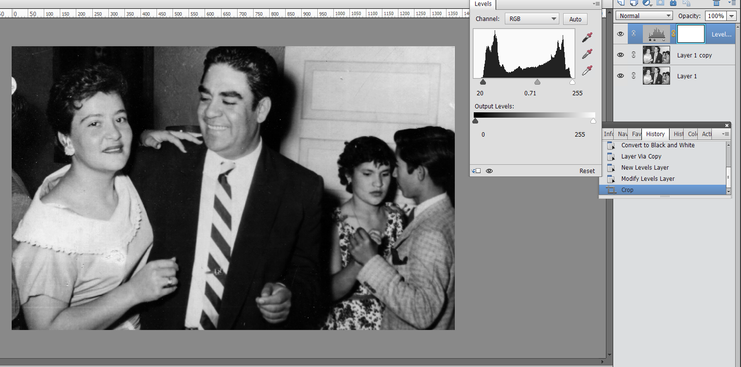
2. Since your original photo is black and white, it makes sense to remove the color stain by changing it back to black and white. (When you scanned the photo, it was saved in a color mode). To do this, use the Enhance>Convert to Black and White option which provides an acceptable result. Here, I added a Levels Adjustment layer to give the photo a bit more contrast:
It's unclear whether the color stain area is part of the dress collar. If it is not, it is possible to clean the area up with a clone tool. Here, I cloned the edge of the collar on the left over the stain. Because it was at a different angle, I placed the cloned pixels on a new layer and then used the Transform tool (Ctrl+T) to rotate the edge of the collar.

And, if you have Elements 2021, you can always use the colorize tool.
Hope this gives you some ideas of what to do with mom's photos.
Copy link to clipboard
Copied
Greg, you are amazing to take the time to help me like this. I am really grateful. I am sorry there is no tip jar that i can find!
Copy link to clipboard
Copied
@Basilowl, no problem. That's what we are here for. 😇 Since you say you are a beginner, I may not have given you sufficient detailed instructions to follow what I suggested. Feel free to come back if you need more help.


