- Home
- Photoshop Elements
- Discussions
- Convert color negatives to positives
- Convert color negatives to positives
Convert color negatives to positives
Copy link to clipboard
Copied
I am new to photoshop element 10. I purchased for the purpose to process color negatives. ie convert negatives to positives. I am copying the originals using my CamCorder to photograph the film. I am not getting what I want using the "invert" process. I have taken the tutorial but it did not cover my subject. Some of my negatives are over 30 years old. Please help or direct me to where I can find my answers.
Thank you
George594
Copy link to clipboard
Copied
Can you post an example?
It takes a little more work than just inverting the negative.
Copy link to clipboard
Copied
I will have to find out how to do that. I am not that good on how to post. Just downloaded Element 10 from Apple. I have an IMAC and I love it. I was a PC guy for many years. I have been dealing with photography since I was 12 years old. (Now 73) Was in charge of Periscope photography on one of our Nuc Submarines.
I thank you for your attention and hope to hear from you again.
Bill Miller (George is my middle name) call me Bill
Copy link to clipboard
Copied
To post an image here, come to the website (can't do it by email) and click the camera button above the message composition area,

then navigate to the photo you want to post.
Copy link to clipboard
Copied
Thanks I will try in morning. Time for some Zzzzz
bill

Copy link to clipboard
Copied
If you have a lot of film negatives, it would be worth your while to invest in a film scanner. You'll get better quality images than from a CamCorder (?!?), and the software included with the scanner should have settings for automatically converting the negatives into positives.
Ken
Copy link to clipboard
Copied
My budget is like my money tree is a brown shrub.
I hope I can use this new device I found on the web. Check it out at< shotcopy.com>.

Copy link to clipboard
Copied
OK, I found a colour negative image to practice on, and here's the drill:
- Use Enhance...Adjust Lighting...Levels.
- Select the "White Point" eyedropper:
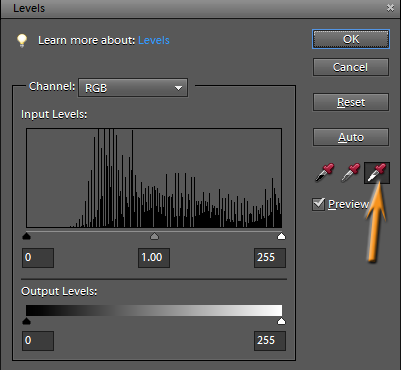
and click in an area near the sprocket holes that is the "base" orange colour to remove the orange cast. - Use Ctrl+I to invert the image.
Ken
Copy link to clipboard
Copied
Thank you I will try that. I guess I need to copy the negative with some of the sprocket holes with the orange are contained in the image.
Bill Miller

Copy link to clipboard
Copied
Exactly right. If you've got that area around the sprocket holes to use as your "base" orange to set the white point (and thus remove the orange cast), you're home free.
Ken
Copy link to clipboard
Copied
Even if you don't have a film scanner, check the software that came with your scanner. It may have a way to remove the orange mask. Also, if you google "color negatives to positives Photoshop Elements" you'll find some tutorials using various methods.
Copy link to clipboard
Copied
Thank you for your help. I have tried some of the methods with success.
Bill

Copy link to clipboard
Copied
Hi Bill,
Glad to hear you're getting some good results!
Ken
Copy link to clipboard
Copied
I have an Epson 4990 Photo scanner, which has the capability to scan color negatives. I just started using this feature today, even though I have had the scanner for over 6 years. I am finding that you have to set the scan resolution very high to get a crisp result. I am assuming that this is due to the fact that we are scanning a very small target (the film negative), so when you enlarge the resulting photo, it gets pixilated unless you scan at a high resolution. I am currently using 2400 dpi as a scan resolution and am getting reasonable results. The resulting JPEG files are around 4.5 Mb in size.
I am going to experiment with some higher scan resolutions and see how much improvement in image quality I get, and, to see how much the file size increases.
Copy link to clipboard
Copied
I just did a comparison scan at 4800dpi and could not see any image clarity difference from the 2400 dpi scan. However, the file size increased by a factor of 4.

Copy link to clipboard
Copied
In Elements 10 and using a Mac you can invert color negatives to color positives by going to FILTER -> ADJUSTMENTS -> INVERT
..or simpler yet just hit Command I

Copy link to clipboard
Copied
No you can't -- that leaves a positive image with a heavy cyan colour cast. Read this entire discussion.
Ken

Copy link to clipboard
Copied
Not being the professional here and thus not knowing what I "can't" do, but rather just going ahead and playing with Elements 10 on my Mac, can on occasion be somewhat gratifying.
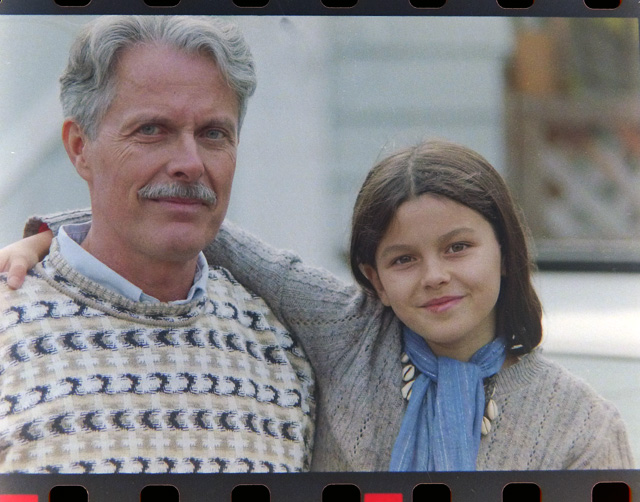
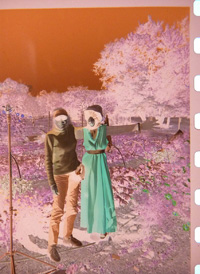
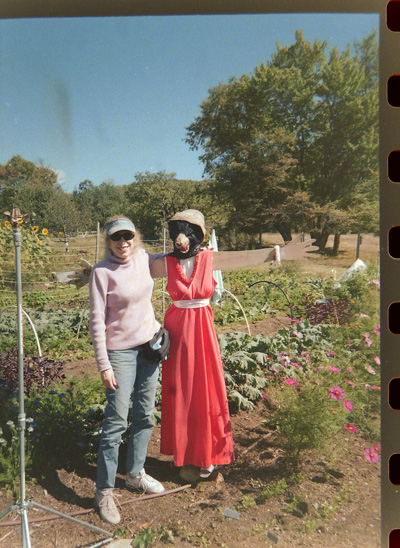
For anyone interested I will follow through on my above comment using the two sets of examples below, same procedure for both:
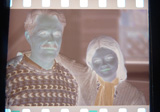
Using a homemade sunlight box and my little Panasonic Lumix Camera (sharp pics from 2 about inches away) I snapped the pictures of the color negatives and then I brought the now digitalized color negatives into Elements 10.
Next I...
cropped the negative image to desired size.
Hit COMMAND I (This inverts the image with a strong cyan color cast)
then go to:
LAYER -> duplicate layer (always a good habit to get into)
ENHANCE -> Auto Color Correction ...or... -> Adjust Color -> Remove Color Cast ...or.... Adjust Color For Skin Tones (or just play with it.. have fun with it.. see what can be done and what can't be done for real.)
and finally ENHANCE -> Adjust Lighting -> Brightness/Contrast to your personal preference.
Then either save for the web to put onto a CD or DVD or print it out. It may not professionally perfect, nor work as good as a $700 scanner, but it certainly works well enough for me.... Good luck to all. bill

Copy link to clipboard
Copied
If you follow the method of setting the white point, you will not have the strong cyan colour cast after inverting the colours that you admitted to.
Ken
Copy link to clipboard
Copied
I have Photoshop Elements 2018, and it doesn't have that White Balance option in the Levels adjustment. Adjusting White Balance, you have to select an area which is white, gray or black - and Elements doesn't let you tell it which the selected area should be, so it makes the negative border gray.
I also copy my negatives on a fluorescent light box, using my Nikon P510 in Close-Up mode (about 3/8" away is as close as it can focus, but that's almost a full frame), and the color of the copy varies depending on how the camera decides to adjust white balance and (perhaps?) how close I am to a bulb.
After serious experimentation, my system is:
1. Straighten and crop the copy so only the image, no border, remains.
2. Invert, which leaves the cyan color cast because of the underlying orange base, and very low contrast.
3. Apply "Enhance / Auto Levels" to produce the proper contrast in the image, which still has the color cast.
4. Apply "Filter / Photo Filter / Warming Filter (85)" to put the orange back. 25% density (default) works well for me.
That leaves me with an image which compares favorably with prints made at the time the photos were taken, ready for final contrast and lighting adjustments like any contemporary digital photo. You may have to adjust settings based on your negative copy process.

Copy link to clipboard
Copied
Actually, I misunderstood the white point adjustment in "Enhance / Adjust Lighting / Levels". But when I tried it on the negative, then inverted, I got a dark, blue image which is resistant to level adjustment and warming - very nasty. My system works much better, at least for me.
BUT, BTW, step 4 should read "Filter / Adjustments / Photo Filter / Warming Filter (85)"; I left out a menu option.
Find more inspiration, events, and resources on the new Adobe Community
Explore Now