 Adobe Community
- Home
- Photoshop Elements
- Discussions
- Re: Need help with I guess "masking"
- Re: Need help with I guess "masking"
Need help with I guess "masking"

Copy link to clipboard
Copied
I am pretty new to this and am struggling with trying to create irregular "cut-out" pieces of photos to create a photo mosaic. I have gotten to the point of creating a surrounding brush-applied fill that extends to the edges of the original photo. The color is something not in the inner piece I want to retain and I guess I need to create some kind of mask or inverse mask to remove the surrounding fill that I created. Can anyone point me in the right direction? Thanks in advance.


 11
Replies
11
11
Replies
11

Copy link to clipboard
Copied
Please explain in more detail what you have done so far, and give us a screenshot of your image with the layers panel open. Since you are new to this, I am guessing that your brush-applied fill has been added to the original photo layer. A mask requires more than one layer. For example, if you had an old photo with a white border and wanted to change the color of the border, you could simply use the paint bucket tool to pour the color into the white border. You would still have only one layer, but you would have changed the color of the border pixels of that layer. Alternatively, you could add a new layer with a single color and mask the layer to hide the color over the photo below, so that the color only showed over the border of that photo. Or you could have the background layer with a single color and place the photo layer over it. You could then mask the border of the photo so only the background color would show through.
If you give us more information about what you are trying to do, perhaps we can be more helpful.
Copy link to clipboard
Copied
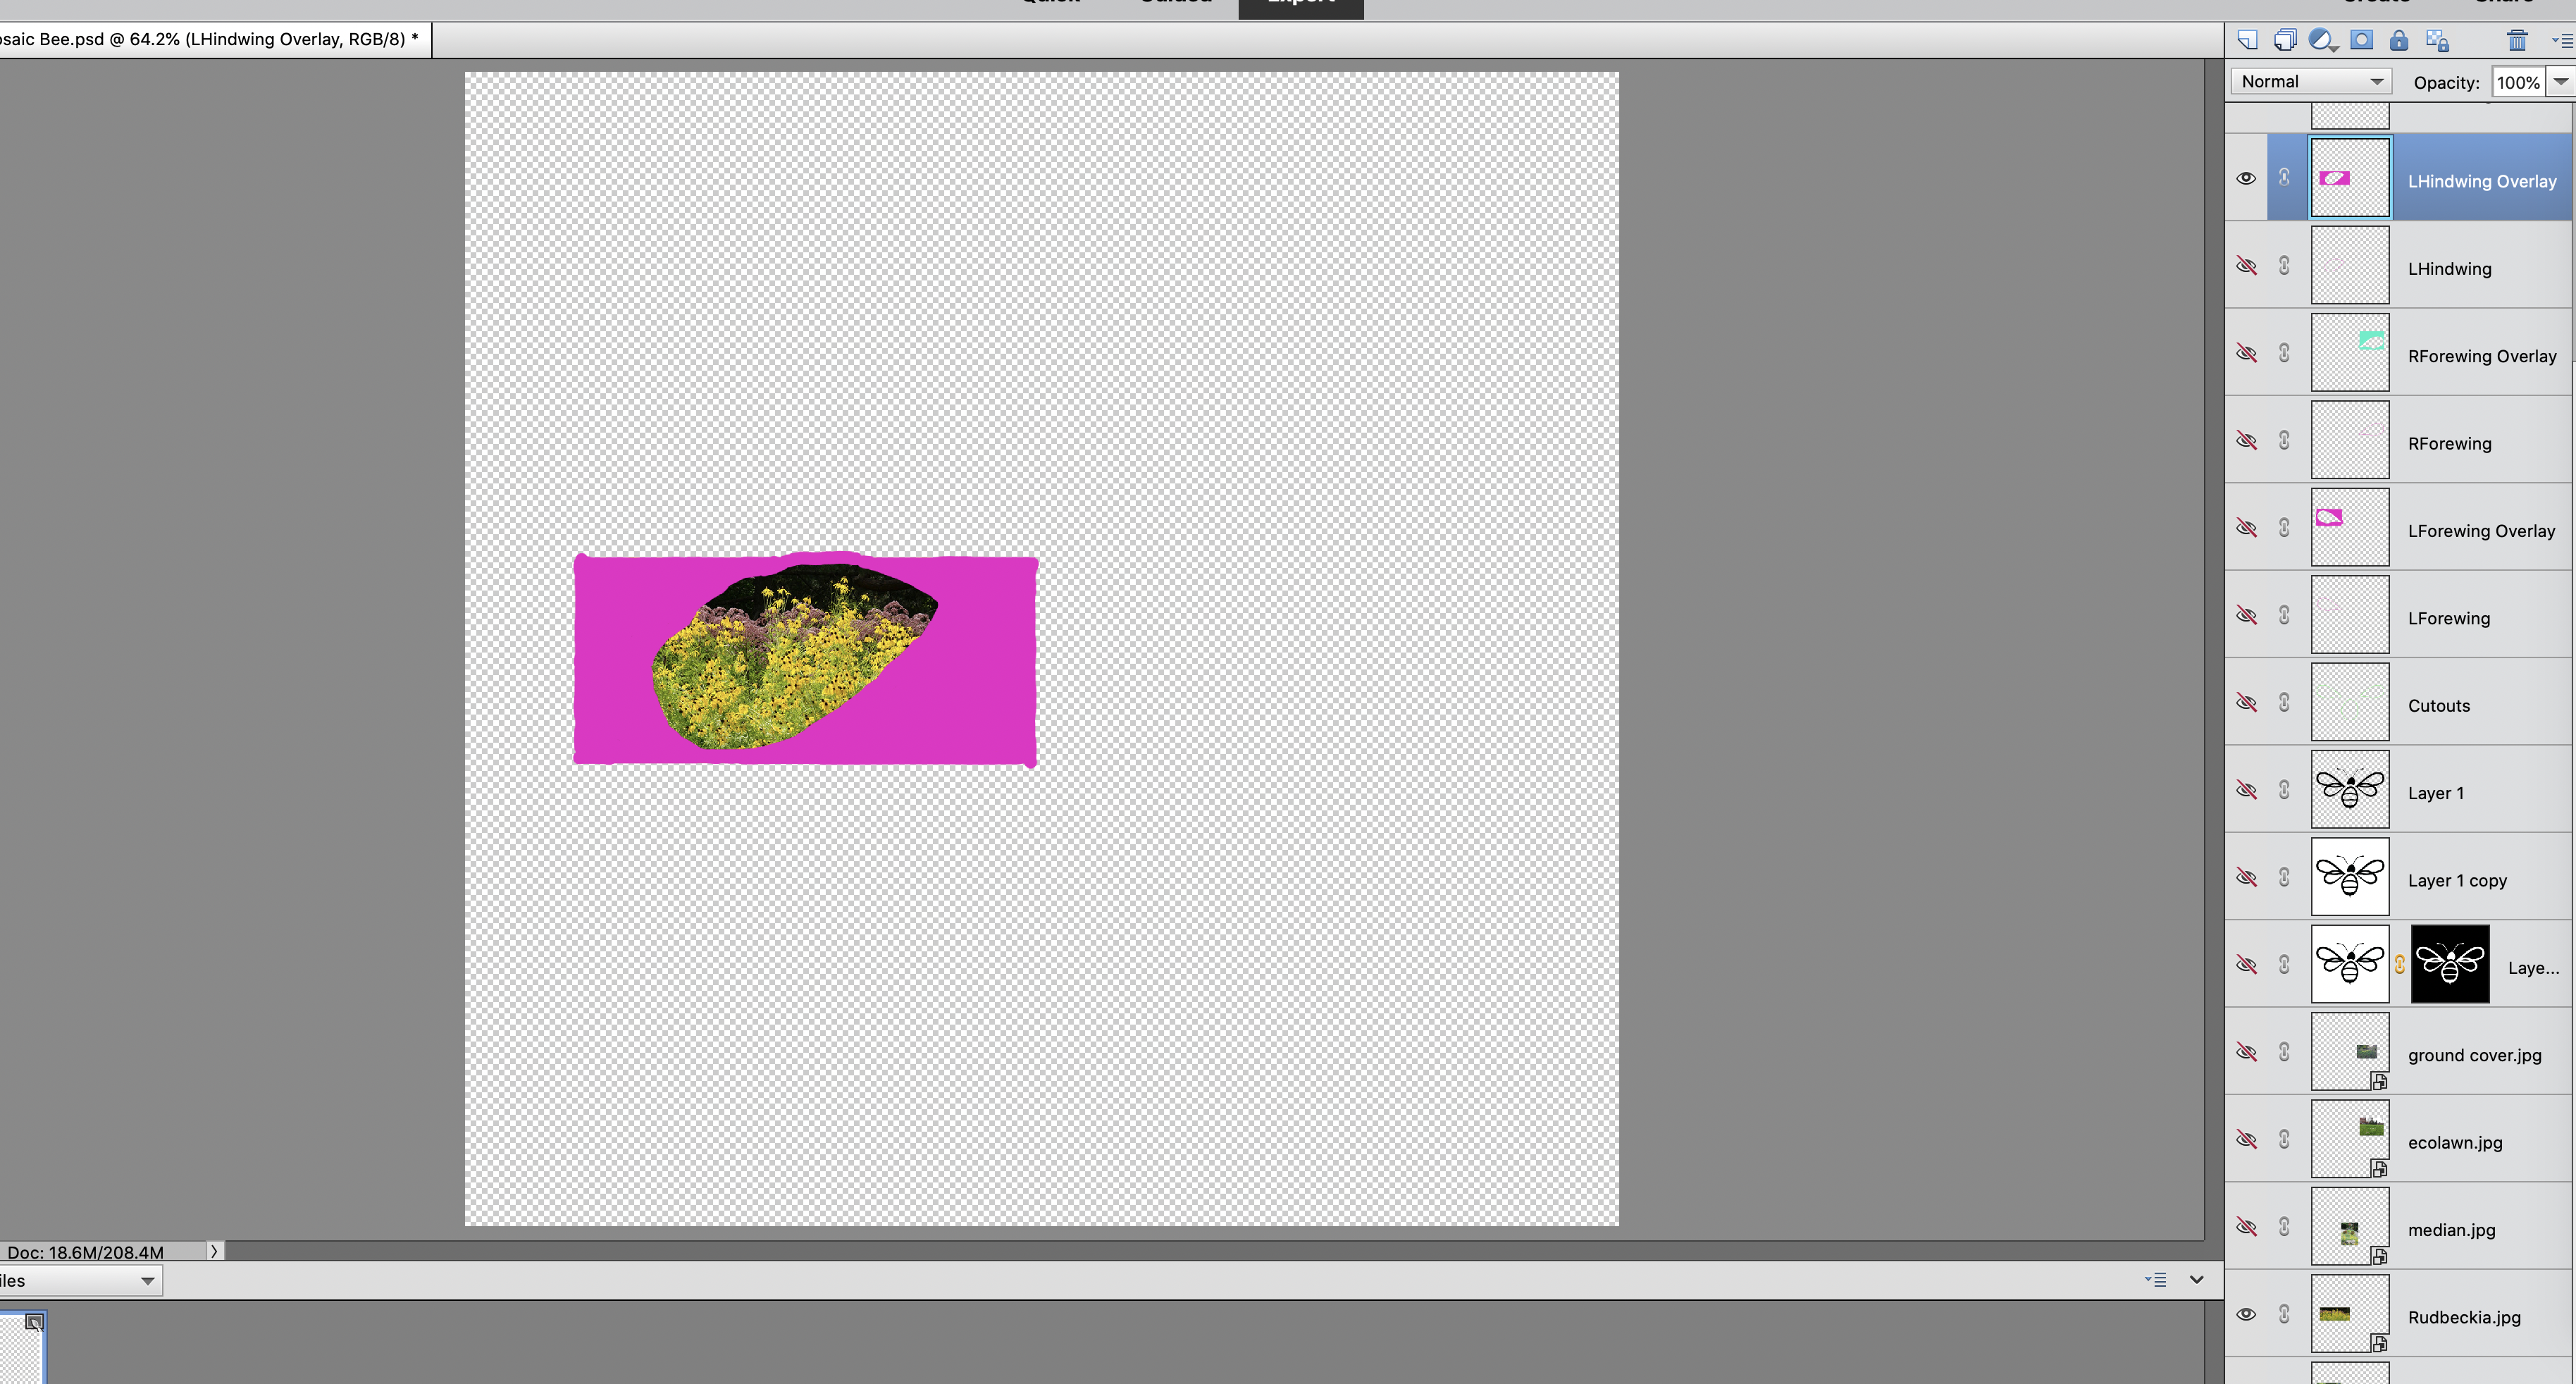
Thanks for the reply. I am attaching two screen shots since I thought it would be helpful to see what I am trying to eventually get at. I don't know what order these will attach. The one with a bee outline is the overall project reference.
If you look at the screenshot with two layers on, one called "LHindwing overlay" and the other "rudbeckia", what I am trying to get is a "removal" of the hot pink area leaving an irregular central area of flowers. The leftover irregular area of flowers will then sit below the bee outline. The final result is intended to be a bee outline with a mosaic of photos filling in different parts of the bee.
Thanks

Copy link to clipboard
Copied
The attachements don't show up.
Click on the "Insert Photos" icon at the top of the reply box here on the forum page.
Copy link to clipboard
Copied
Copy link to clipboard
Copied
To make cut-outs in various shapes, have a look at the Content palette. You can open it via Window menu. Among various things in the drop-down in the palette, there are all sorts of shapes. For drill, let's use the black right facing arrow.
1. Open your picture file
2. Duplicate the Background layer, and shut off its visibility by clicking on the eye icon.
3.Double click on the black arrow in the content palette, and drag the arrow to embrace what you wish to retain in your picture.
4.In the layers palette drag the shape layer between the the Background and Backgroung copy layers. The background layer should be at the bottom, next up the shape layer, Background copy layer at the top.
With the Background copy layer active, press CTRL+G to create a clipping mask

Copy link to clipboard
Copied
Thank you for replying. I looked at shapes, but the problem for me is that my shape is free form. None of the canned shapes suit my needs.
Copy link to clipboard
Copied

Copy link to clipboard
Copied
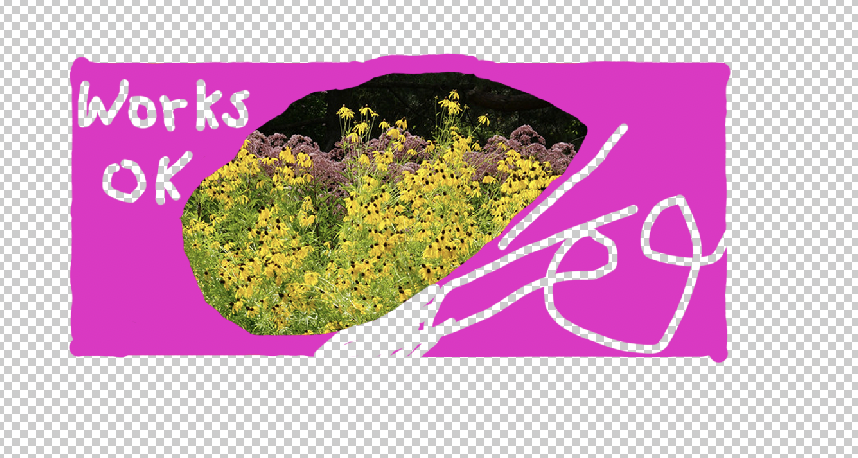
Something like this?
.jpg")
Copy link to clipboard
Copied
That's pretty much it. Thanks for the effort to put the response together.
Copy link to clipboard
Copied
Hopefully, you will find the following a more elegant approach to cutting out an object/shape from a layer.
- Use a selection tool to select the shape. The Quick Selection tool will work fine with your example.
- Press Ctrl+J. This will create a new layer with just the pixels you selected.
- Delete or hide the original layer.

I will leave it for @Jeff Arola to explain his masking method if you need further help with that.
Copy link to clipboard
Copied
Thanks. I will give that a try as a separate exercise. There is a heck of a learning curve here for someone that only uses tools occasionally and must stumble through each time, trying to remember what happened in the past.

 AdChoices