Saved PSE projects save with a white blank mask
Copy link to clipboard
Copied
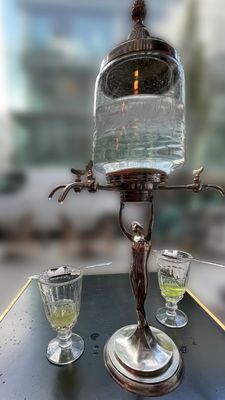
Hello everybody, I'm new to PSE and am fighting a vexing challenge. Any project in which I use a layer mask saves with a white masked forground or background leaving the rest of the picture masked. All images look fine in PSE thus the surprise when I see the saved result. What am I doing that prevents the file from saving 'properly'. Example file attached
Copy link to clipboard
Copied
It is not entirely clear to me what you are doing to produce this. I am assuming that this antique originally was in a picture with a complex background and that you are trying to isolate it. Correct me if this is not so,
So that we are all on the same page, please tell us the steps you have taken in your work-flow. Also, it would help if you post the original picture file for reference.
Copy link to clipboard
Copied
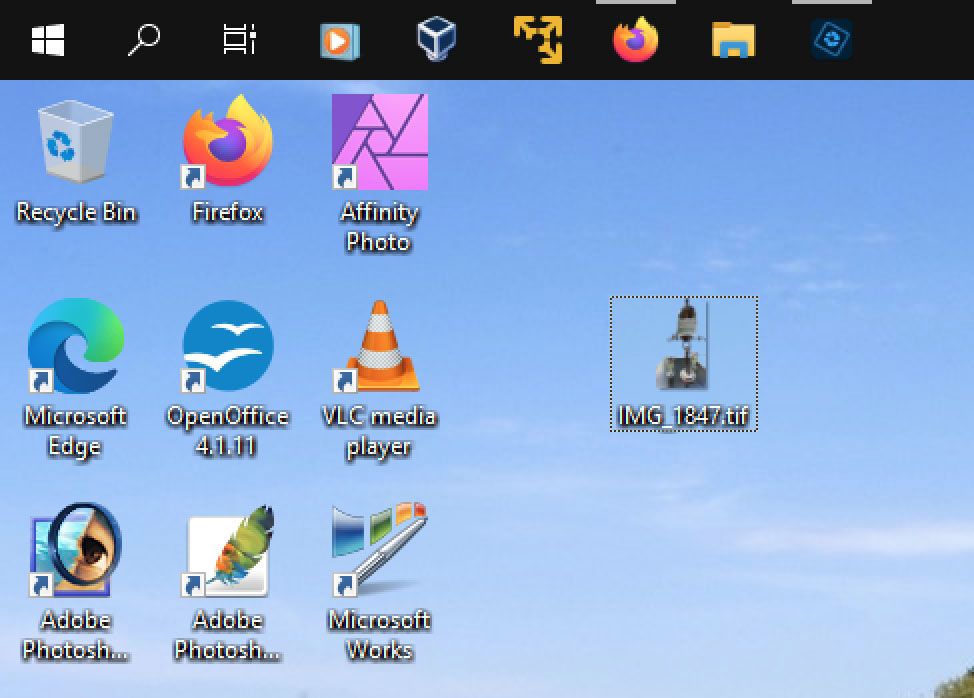
Hello hatstead! Thanks for the fast replly. Yes you are exactly right. Its actually a Absinth vase and I've attached the origional file. My workflow was as follows: (1) duplicate background layer and hide the origional, (2) select the vase, table and glasses with polygon lasso, (3) refined the edges using the refine edge tool, (4) output the refined edge product to a seperate layer with layer mask, (4) continued to refine the image on the layer mask makeing small selections and painting black until the image was fully isolated, (5) applied Gausian blur to the backround layer copy. At this point I saved the file in as a tiff to my desktop and noted that the thumbnail showed my vase and table but the backgrond was pure white. I saved another copy as a tiff with all layers flattened and this made no differene. The file opened fine in Photoshop but the resulting tiff file was not something I could share with anyone. As a further test I've tried this workflow on several images and the result was alwasy the same - the foreground that was in the mask is visible and the background is 'replaced' by a pure white background. Inserting another image layer made no difference.
Copy link to clipboard
Copied
ok.
After step #4, open a blank layer at the top of the stack of layers, and press CTRL+SHIFT+ALT+E to create a stamp visible layer, an amalgam of the layers below. Then shut off the visiblity of the layers below the stamp visible layer.
Your background is entirely white (solid color), so activate the Magic wand tool. On the tool's option bar, uncheck contiguous, and accept the default tolerance 32. Left click the white background, and press delete on the keyboard.
You should be left with the vase surrounded by a checkerboard pattern, which denotes transparency.
You can open a blank layer below and fill it with color, or a gradient, or a texture, etc.
Why did you use Gaussian blur?
If the tolerance 32 did not fetch the entire background, you may have to adjust this value. You can also use the Eraser tool to tidy up.
Copy link to clipboard
Copied
Further to above, in PSE there are frequntly several ways to do things.
Try the following option:
1. Open the file
2. Duplicate the Background layer, work on the Background copy layer, & shut off the visibility of the Background layer
3. Activate the Magnetic lasso tool, and select the vase, then place it on a separate layer ((press CTRL+J)
4.Open a blank layer below the vase layer
and fill with color.
5. Sharpen the layer with the vase.
Copy link to clipboard
Copied
I was able to make the picture work in the way you described, essentially copying the selection and pasting it in to a new version of the image pulled from the hard drive. I then blured the background layer and got the product I was looking for.
Perhaps wrong, but I thought I would be able to acheive the same result within the origional workflow and that I was making a fundamental error at some point.
Copy link to clipboard
Copied
Really appreciate your time.....tracking through creating the stamp visible layer and hiding the layers below. I'm not clear what you mean by "Left click the white background, and press delete on the keyboard. "
Ive attached a screenshot of the layers panel and what I think I have, is the stamp layer (layer 1) but no ability to access the background layer as you indicated.
I used the Gaussian blur because I liked the idea of using the original background but did not want the distractions of all the individual items (buildings, bikes, street etc) in the their original or clear form.
Copy link to clipboard
Copied
The Magic wand tool can be used to select a solid color, as in your white background. With the tool engaged, left click with the cursor pointing to a white area in the picture, then press Delete on the computer's keyboard. At this point you should have transparency in the deleted area{s).
Copy link to clipboard
Copied
Thank you for the clarification! I'll try this
Copy link to clipboard
Copied
I tried this technique and it did not work. Essentialy there is no pure white to select and the wand selectes a number of seemingly randon pixels but not a complete white background.
Copy link to clipboard
Copied
Hi,
Could please share what kind of output you want to generate?
For making the vase standout from subject you need to follow these steps..
You would need to unhide the background copy layer in order to make your background visible. Also follow the below steps while blurring the background:
(1) duplicate background layer and hide the origional, (2) select the vase, table and glasses with polygon lasso, (3) refined the edges using the refine edge tool, (4) output the refined edge product to a seperate layer with layer mask, (4) continued to refine the image on the layer mask makeing small selections and painting black until the image was fully isolated, (5)Select background copy layer and applt Gausian blur. Unhide the background copy layer.
Thanks
Copy link to clipboard
Copied
Yes certainly, I've posted a snapshot of the filal product in the upload section. Very much appreciate your feedback. Your guidance matched my workflow.
I'm not sure what i was doing wrong before, but after your revewing your feedback and that of the others on this post, I started over and watched the result develop at each step along the way to ID where I might run into a problem.
I did two things differently this time; first was to work outside of the Apple photo's app. The last time I initiated my editing from inside the app vs maing an external copy and working on that external copy. Second, I saved a seperate copy of the vase itself as a backup ensuring it was transparent just in case. It turned out that the seperate transparency was not needed but it was a good technique to learn.
Copy link to clipboard
Copied
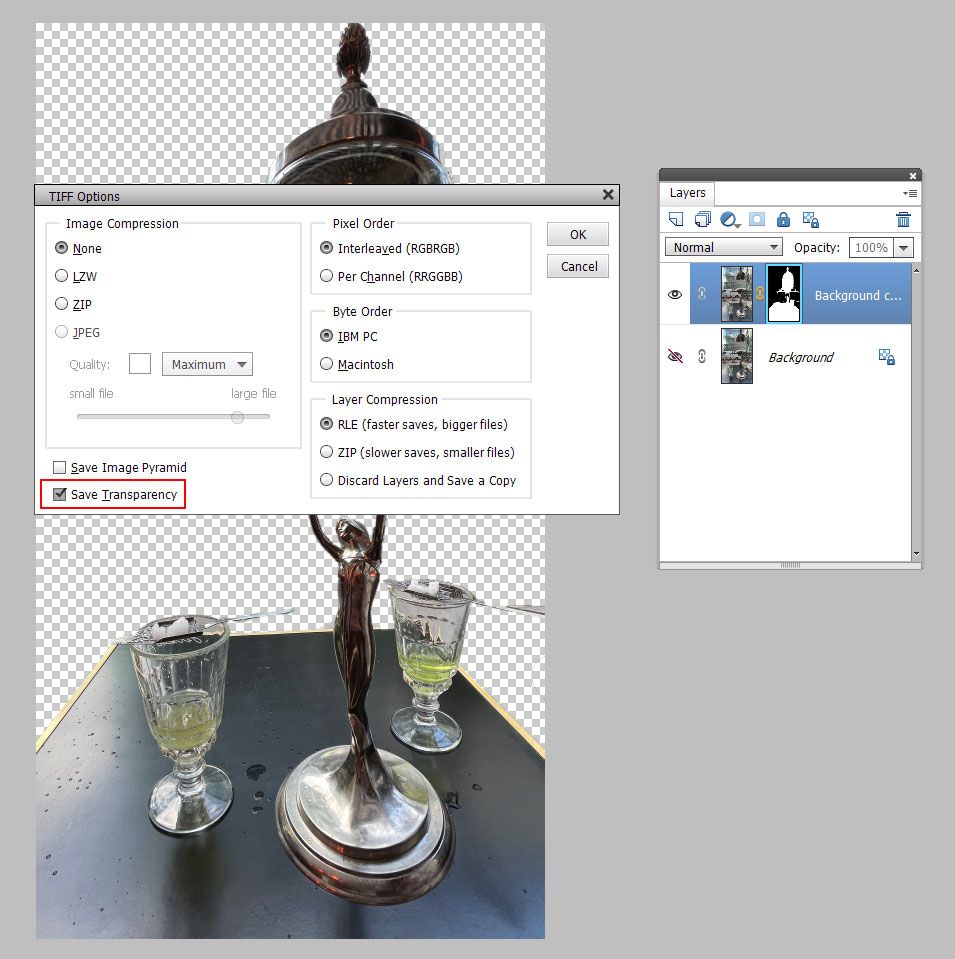
In the TIFF Options dialog did you check Save Transparency?
Copy link to clipboard
Copied
That option was not avaialbe to me. I'm on a Mac if that helps
Copy link to clipboard
Copied
On your screen shot, it is in the lower left, at bottom.
Copy link to clipboard
Copied
Sorry I was not clear, the box is there but it is greyed out and cannot be clicked on
Copy link to clipboard
Copied
When you save you need to turn off the visibility for all layers except the one with the mask, then Save Transparency will be available.
Mac desktops don't show the transparency of images like windows does.
You can tell if your image has transpency by right clicking the image, clicking Get Info and the transparent image background will br grey, while the non transparent image will be white.
You can also use Quick Look by pressing the Spacebar with the image selected although it's harder to see the difference between grey and white than in Get Info.
Copy link to clipboard
Copied
Thanks Jeff, that worked fine. The transparency or ensuring the image was saved as a transparency is the step I was missing. Really appreciate the help of everyone, I learned a lot.


