 Adobe Community
- Home
- Photoshop Elements
- Discussions
- Adjust over-exposed streak in B&W negative
- Adjust over-exposed streak in B&W negative
Copy link to clipboard
Copied
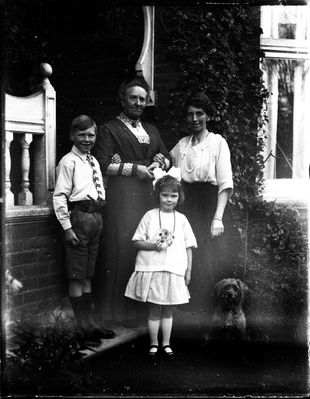
I am digitising a number of B&W glass negatives dating from 1912. Several of them have light leakage resulting in a bleached streak to the edge of the plate, and (as with this one) some gradation of exposure over the lower part. I have Photoshop Elements 2020, and I am using Silverfast 8 with an Epson V800 scanner. How best can I treat these areas to make them blend in better with the rest of the photograph?
 1 Correct answer
Try this:
Open the picture file
Duplicate the Background layer
Set the blending mode of the Background copy payer to Overlay
Prese CTRL+SHIFT+ALT+E to open a stamp visible layer, combining the 2 lower layers.
Activate the Burn tool and swipe over the suboptimal areas.
I did this quickly. Try out the various tools, e.g.Burn, smudge.
Another trick I have used when working on projects like these is to use the Marquee tool to select a "good" area on a picture and place it over a defective area as a
...
Copy link to clipboard
Copied
Moving to the Photoshop Elements forum from Photoshop
Copy link to clipboard
Copied
Try this:
Open the picture file
Duplicate the Background layer
Set the blending mode of the Background copy payer to Overlay
Prese CTRL+SHIFT+ALT+E to open a stamp visible layer, combining the 2 lower layers.
Activate the Burn tool and swipe over the suboptimal areas.
I did this quickly. Try out the various tools, e.g.Burn, smudge.
Another trick I have used when working on projects like these is to use the Marquee tool to select a "good" area on a picture and place it over a defective area as a patch.
Copy link to clipboard
Copied
Thank you so much for your very helpful tip - it is just the tool I have been looking for. I have successfully improved several other negatives that show the same fault.

