 Adobe Community

Copy link to clipboard
Copied
I have a couple of questions, and I may not be in the right forum.
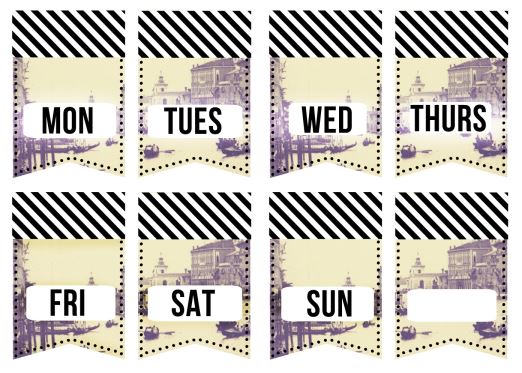
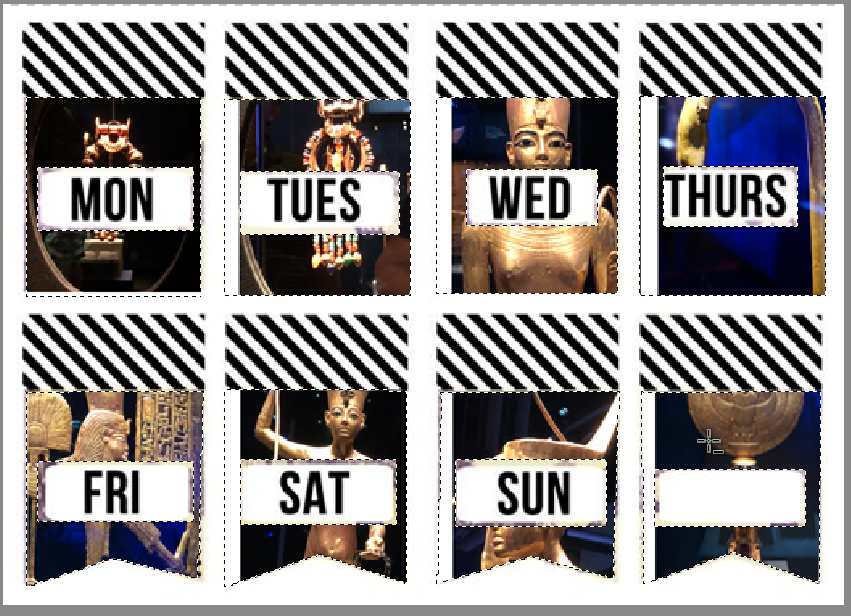
I'd like to make something similar to what's in this picture. Can I do it in PSE? Instead of redesigning from the ground up, I'd like to replace the photos in the background with my own photos.
That said, do I need to do it in InDesign? I'd like to avoid Illustrator if possible. I'd even be willing to make it a rectangle instead of a pointed banner. Thanks!


 1 Correct answer

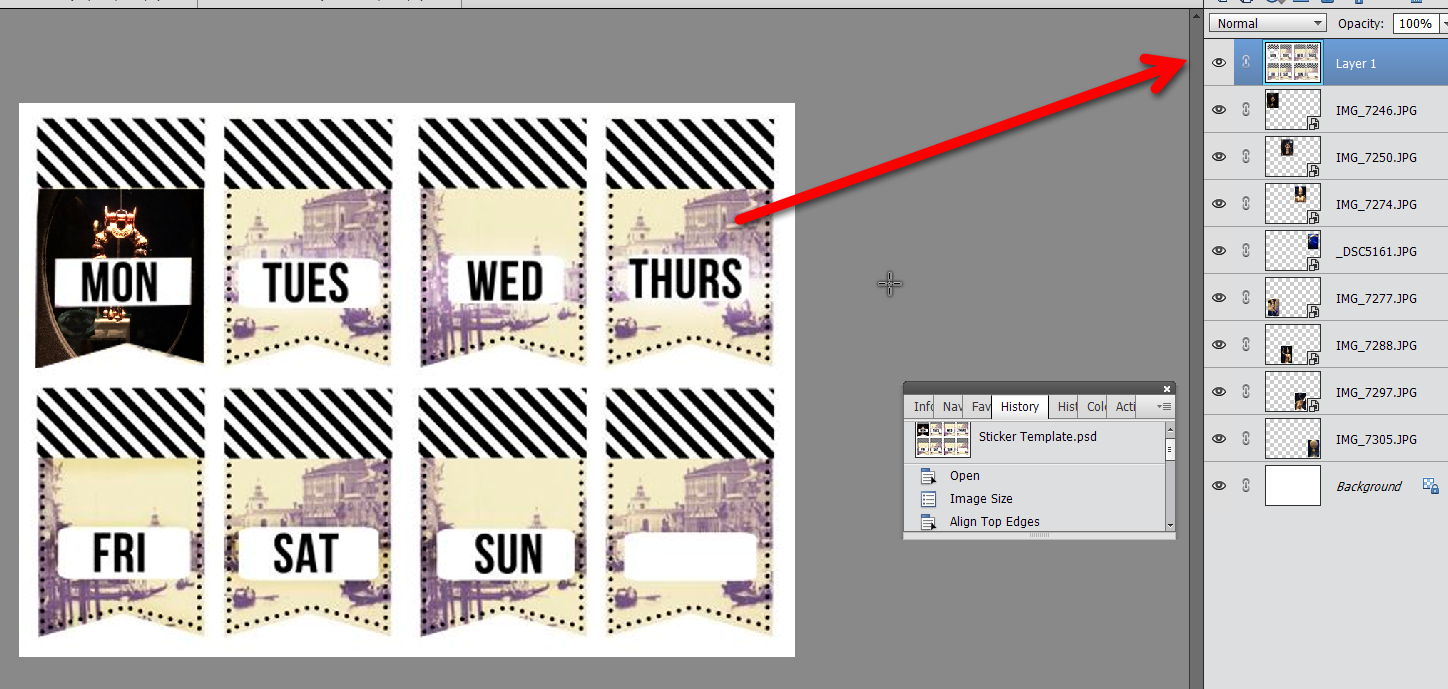
It would be helpful if you could post a screen shot of your layers panel. It should look something like this:
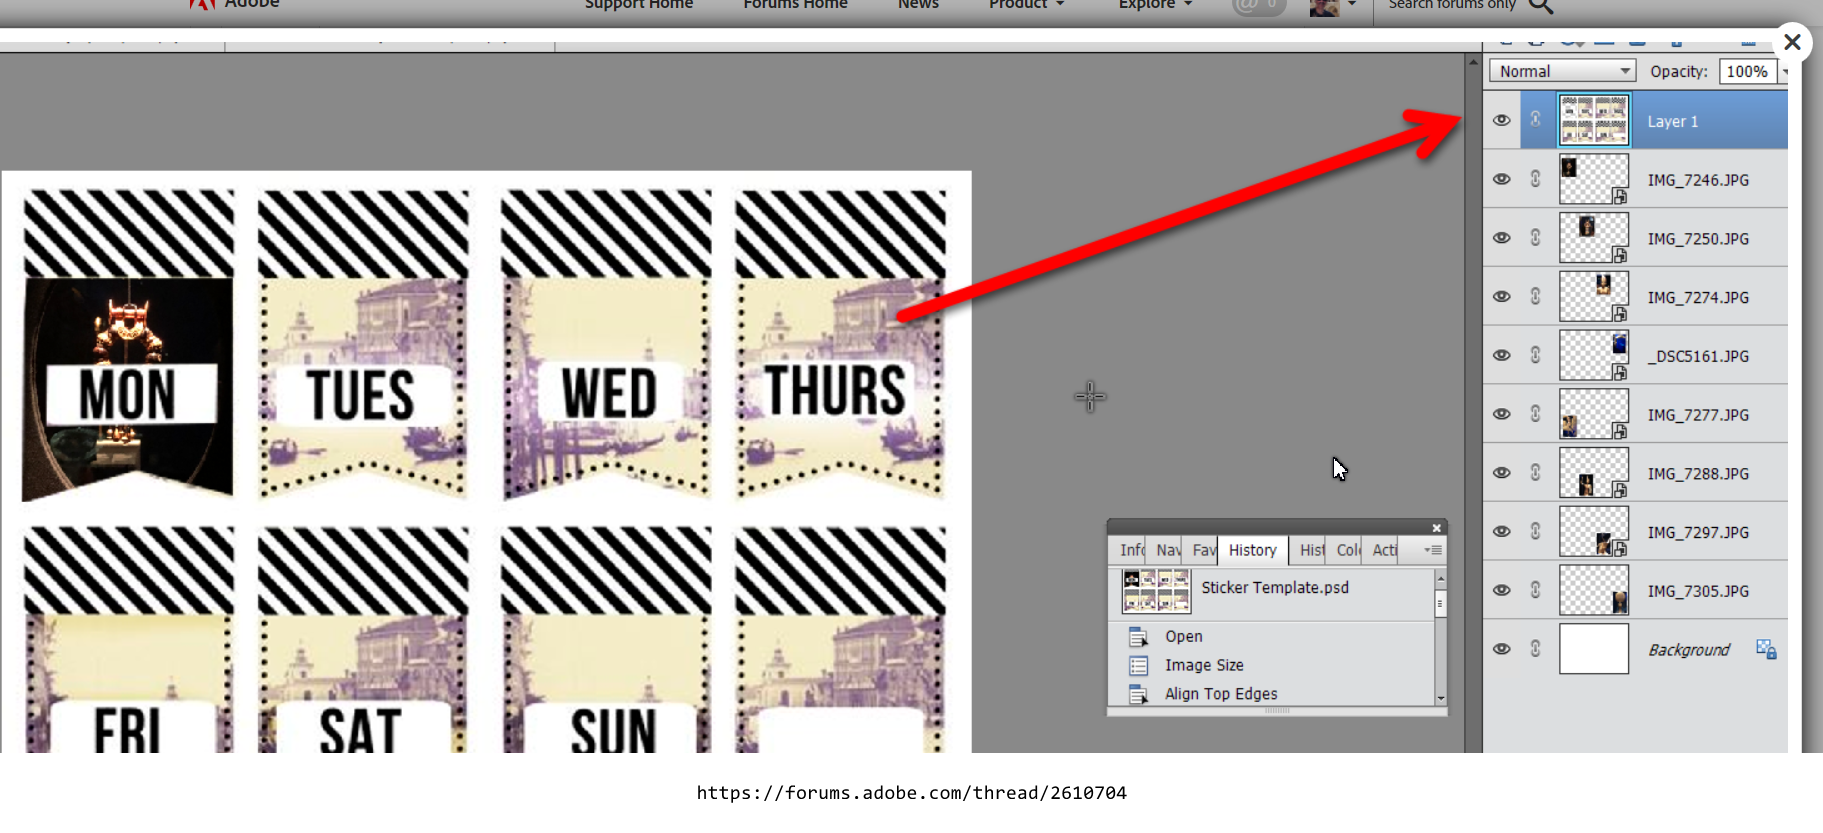
It is not essential that you create a new file. I just did that to create a white layer at the bottom. However, your original image layer has to be at the top of the layers panel. Essentially what we are doing is cutting holes in the photo so that the images underneath can appear through the holes. It is also essential that your selection takes place on the top layer, so make sure it
... 8
Replies
8
8
Replies
8
Copy link to clipboard
Copied
The short answer is yes, you can do this task in PSE. There are several ways to do it, but generally you will be creating layers for the photos you want to replace the existing ones and using some form of masking to replace portions of the original image. Before giving you any step-by-step instructions, perhaps you can give us a little more detail about the ultimate goal, for example, is the ultimate output a single image with a day of the week or a combined image showing all days of the week as in your post. And what is your own level of knowledge about editing images?
Copy link to clipboard
Copied
Hi, Greg: My ultimate goal is to have a combined image with all the days of the week. I'll print it on sticker paper and cut them all out for my travel journal.
I've been working with PS & PSE for over 10 years. For the past several years it's been a a hobby, but once upon a time I worked in marketing/PR and used the programs a lot more. Thanks!
Copy link to clipboard
Copied
I guess what I meant to say is: I am pretty comfortable editing images.
Copy link to clipboard
Copied
Sorry for the delay in responding. I'm not sure if you still need help on this, but here's one way to do it. It's probably not the best way, but it is quick and easy.
- Create a new file using the dimensions of your existing image. Use a resolution of 300 pixels per inch.
- Click and drag the eight images you want to use to replace the existing photos in the following pattern:

(If you open the images in the Editor, you can click and drag them to the new file from the Photo Bin and then resize them using the handles. In PSE 2019, each image will become a smart object and can be resized without losing image quality.)
3. Add your template photo to the new file and, if necessary resize it to fit the page and drag it to the top of the layers panel. Your layers panel and editing window should look something like this:
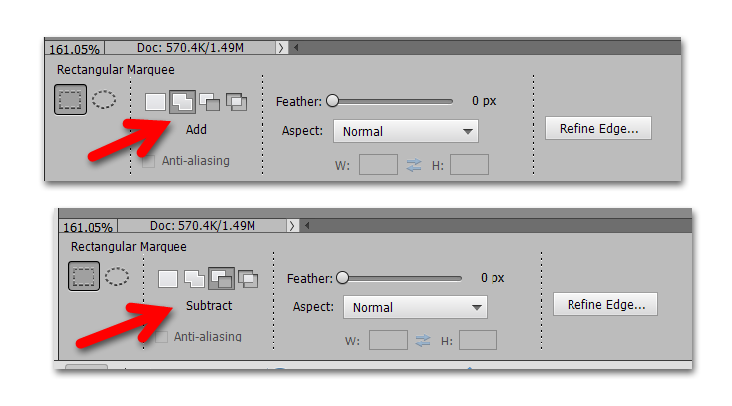
4. Use a selection tool such as the rectangular marquee tool or polygonal lasso to make a selection around each of the pictures you want to replace. (Make sure the Add option is active for the tool.)
5. Now use the Subtract option for the selection tool and make a selection around each day of the week text box.
6. Hit delete - Voila! You should end up with something like this:
(I used the rectangular marquee for the top row and the polygonal lasso for the lower row.) If necessary, you can move each photo's layer around and zoom them in and out using the layer's handles.
There are more sophisticated ways to perform this edit, using masks and other techniques but hopefully, this gives you enough information to achieve your goal. Feel free to ask for more information if anything is unclear. I don't claim to be an expert in compositing such as this, so I expect someone else can come along and fill in some details.
Copy link to clipboard
Copied
I'm not sure what I did incorrectly, but this didn't work for me. When I hit "delete" the original image was still there.
Could you explain what you mean in Step #1, about creating the new file? Maybe that's where I went wrong. I just used the original file I had, as I have more than one copy of it.
Also, I am working PSE 14.
Thank you!
Copy link to clipboard
Copied
It would be helpful if you could post a screen shot of your layers panel. It should look something like this:

It is not essential that you create a new file. I just did that to create a white layer at the bottom. However, your original image layer has to be at the top of the layers panel. Essentially what we are doing is cutting holes in the photo so that the images underneath can appear through the holes. It is also essential that your selection takes place on the top layer, so make sure it is highlighted as in this screenshot before making the selections.
If the original photo is not at the top of the layers stack, you can click and drag the layer to place it at the top.
Hope this helps, but please ask any other questions you may have about this workflow.
Copy link to clipboard
Copied
Got it! I see what I was doing wrong--I had the layers in the wrong order.
Thanks so much for your help!
Copy link to clipboard
Copied
Glad it worked out for you. 

 AdChoices