 Adobe Community
- Home
- Photoshop Elements
- Discussions
- Deleting "silvering" particles from scans of antiq...
- Deleting "silvering" particles from scans of antiq...

Copy link to clipboard
Copied
I have scanned many old photos from the early 20th century. At that time, they used silver oxide or something like that in priting black and white. The sheen from the silver in the print shows up as "silvering"/tarnish in the scan, i.e. bright blue particles all over the image. Is there a way to select only these bright blue particles and either delete them, mask them or replace them with what is around them? This is something that can be done using the full Photoshop or a program called Picture Window Pro, but the last time I checked (PSE 12?) it could not be done with PSE. I'd like to stick with PSE so I'm hoping that by now this kind of selection and restoration can be handled by PSE. Can anyone tell me if it's possible and, if so, how? Many thanks!


 1 Correct answer

Here's something you might try using two Hue/Saturation adjustments layers.
The goal is to desaturate the image to remove the cast caused by the silvering and then bring
back the detail that was covered by the silvering
The before image that i got from here:
http://bigdustup.blogspot.com/2010/02/fixing-silvering-in-old-family.html

1. Go to Layer>New Adjustment Layer>Hue/Saturation ans set the name to filter and Mode to Color

2. Make a second Hue/Saturation adj layer and name it f
... 8
Replies
8
8
Replies
8

Copy link to clipboard
Copied
This 3 minute video demonstrates the ease with which the silver might be eliminated from your scan(s) using full blown Photoshop. I'm not suggesting it can't be done in PSE, just that it may involve different steps and the use of a plugin (as an example). I hope you'll find this info useful.
Copy link to clipboard
Copied
Here's something you might try using two Hue/Saturation adjustments layers.
The goal is to desaturate the image to remove the cast caused by the silvering and then bring
back the detail that was covered by the silvering
The before image that i got from here:
http://bigdustup.blogspot.com/2010/02/fixing-silvering-in-old-family.html
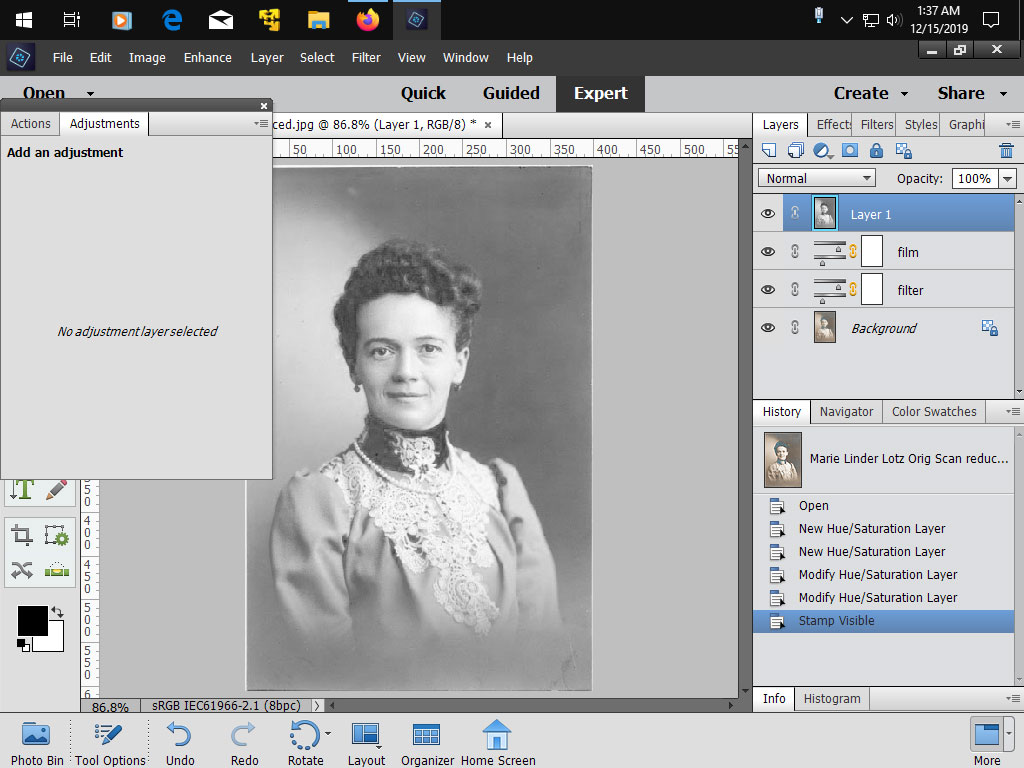
1. Go to Layer>New Adjustment Layer>Hue/Saturation ans set the name to filter and Mode to Color
2. Make a second Hue/Saturation adj layer and name it film and in the Hue/Sat adj dialog move the
Saturation slider all the way to the left to remove all color from the photo


3 .In this step the idea is to bring out the lost detail in the areas where the silvering particles are (bluish area)
Click on the filter hue/sat layer and move the Hue slider to get the best image.
In this example i moved the slider to the left.
Change the Channel to Cyans and move the Hue slider to the right to get the most detail
Change the Channel to Blues and move the Hue slider to the right to get the most detail


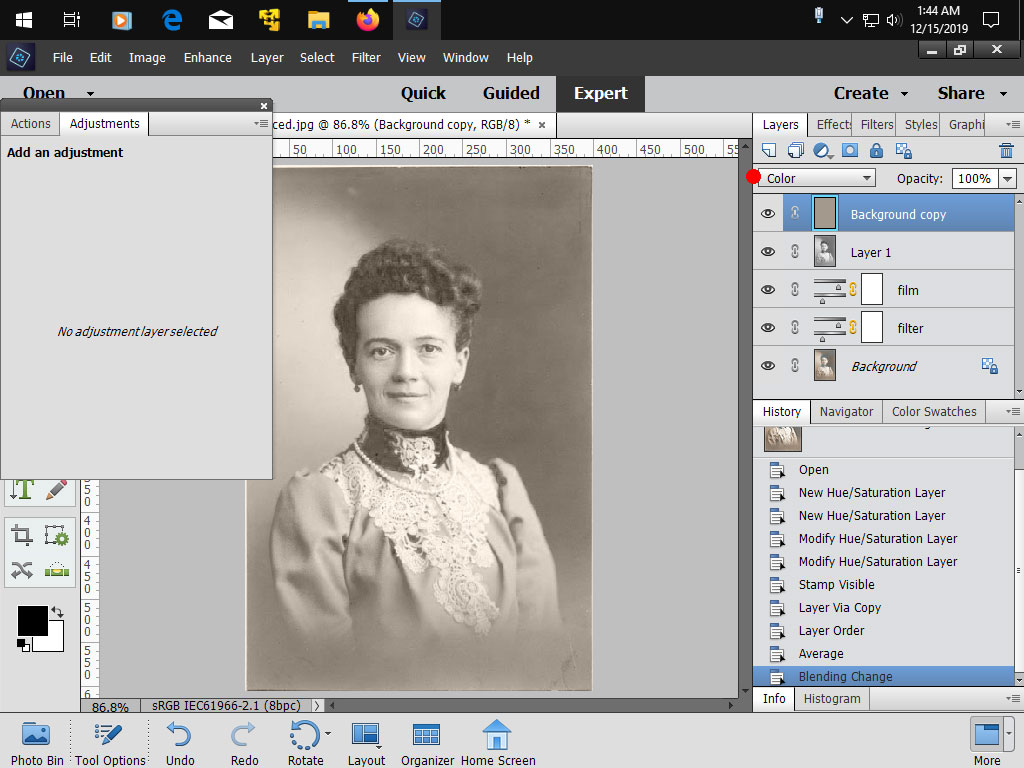
4. Click on the film hue/sat layer then press Shift+Ctrl+Alt+E to make a merged copy of your layers
In this example the result is Layer 1

5. Click on Background layer and press Ctrl+J to make a copy of the Background layer. Then drag that copy to
the top of the layer stack. Background copy in this example.
6. Go to Filter>Blur>Average, then change the Layer Blend mode to Color

After

All the screenshots are attached below if you want bigger views than forum offers.
Copy link to clipboard
Copied
Jeff_Arola, I was just about to say that. Just kidding! Thanks for the very excellent tutorial, how amazing. For any that may not already know, Hue, Saturation (etc) sliders can be feathered individually by highlighting their numeric values and using up/down arrow keys on the keyboard. It came in handy today.
Copy link to clipboard
Copied
Thank you so much Jeff for that very helpful detailed explanation. Now I'll be able to get all that horrible silvering out of my old family photos -- it really ruins the picture. It's so good to know there is a way to do this in PSE. And thank you Phinny for the additional information about feathering Hue and Saturation. I didn't know that.
Copy link to clipboard
Copied
This process worked perfectly! Thanks again, Jeff_Arola!

Copy link to clipboard
Copied
Hi Paulm,
At the end of the steps Jeff described, how do you combine all the layers into one layer to save? Merge down did not work for me.
Thanks in advance,
Judy
Copy link to clipboard
Copied
You can go to Layer>Flatten Image.
Copy link to clipboard
Copied
Thank you, Jeff!

 AdChoices